标签:list 推荐 classes play import 媒体类型 imp add factor
现有一个用spring boot的后台项目,项目开发rest端口与前端交互,使用Jython调用本地python代码。项目基于IDEA开发,部署在windows系统中。
前端使用ajax请求后台接口,后台返回json数据。后台独立测试(curl、restlet)没问题,前端出现报错跨域问题。
首先我们试图在ajax请求中增加dataType并设定为jsonp,结果没有报跨域问题,返回直接进入了error,状态码200,一些博客认为是后台数据不够严谨,不是严格的json格式,然后并不是。
$.ajax({ //请求方式
    type: "GET",
    contentType: "application/json;charset=UTF-8",//请求的媒体类型
    url: "http://127.0.0.1:8088/search?carId=" + carId, // 请求地址
    dataType: "jsonp",

    success: function (result) {
       ...
最终解决问题的办法是通过后台来支持跨域,这里还有一个小坑,在springboot1和springboot2中支持跨域的处理方式不相同。
在springboot2之下,我们可以通过如下两步来增加跨域支持。
1、写一个配置类,实现增加跨域映射
import org.springframework.context.annotation.Configuration;
import org.springframework.web.servlet.config.annotation.CorsRegistry;
import org.springframework.web.servlet.config.annotation.EnableWebMvc;
import org.springframework.web.servlet.config.annotation.WebMvcConfigurer;

@Configuration
@EnableWebMvc
public class CorsConfig implements WebMvcConfigurer {

    public void addCorsMappings(CorsRegistry registry){
        registry.addMapping("/**")
                //设置允许跨域请求的域名
                .allowedOrigins("*")
                //是否允许证书 不再默认开启
                .allowCredentials(true)
                //设置允许的方法
                .allowedMethods("*")
                //跨域允许时间
                .maxAge(3600);
    }
}
2、利用注解配置Controller
@CrossOrigin(maxAge = 3600)
@RestController
@RequestMapping("/")
public class IndexController {
    private AlgorithmModel algorithmModel;
    private FileModel fileModel;

    @CrossOrigin(origins = "http://localhost:63342")
    @GetMapping(value = "/search")
    public Result search(@RequestParam String carId)
    {
        List<Route> routes = null;
        // check if file exists
        if(fileModel.fileExists(carId)){
            routes = fileModel.genRoutes(carId);
        }else{
            if(algorithmModel.call(carId) != null){
                routes = fileModel.genRoutes(carId);
            }else{
                return Result.fail("1");
            }
        }
        return Result.success("0", routes);
    }
}
PS:注解的位置比较灵活
因为要调用外部的python代码,我使用了Jython。将PythonInterpreter设置为bean,并组装进其他的bean中。
@Bean
public PythonInterpreter getPythonInterpreter() {
    PythonInterpreter pyInterpreter = new PythonInterpreter();
    return pyInterpreter;
}
在idea中运行的时候没有任何问题,打包运行时报错如下:
...
Error starting ApplicationContext. To display the conditions report re-run your application with ‘debug‘ enabled.
2019-06-24 16:56:04.915 ERROR 51338 --- [           main] o.s.boot.SpringApplication               : Application run failed

org.springframework.beans.factory.UnsatisfiedDependencyException: Error creating bean with name ‘indexController‘ defined in URL [jar:file:/Users/zhengshuangxi/Desktop/car/vehicle-web-0.0.2-SNAPSHOT.jar!/BOOT-INF/classes!/cn/xidian/sxzheng/vehicleweb/controller/IndexController.class]: Unsatisfied dependency expressed through constructor parameter 0;
nested exception is org.springframework.beans.factory.BeanCreationException: Error creating bean with name ‘getAlgorithmModel‘ defined in class path resource [cn/xidian/sxzheng/vehicleweb/config/MyConfig.class]: Bean instantiation via factory method failed;
nested exception is org.springframework.beans.BeanInstantiationException: Failed to instantiate [cn.xidian.sxzheng.vehicleweb.model.AlgorithmModel]: Factory method ‘getAlgorithmModel‘ threw exception;
nested exception is org.springframework.beans.factory.BeanCreationException: Error creating bean with name ‘getPythonInterpreter‘ defined in class path resource [cn/xidian/sxzheng/vehicleweb/config/MyConfig.class]: Bean instantiation via factory method failed;
nested exception is org.springframework.beans.BeanInstantiationException: Failed to instantiate [org.python.util.PythonInterpreter]: Factory method ‘getPythonInterpreter‘ threw exception;
nested exception is ImportError: Cannot import site module and its dependencies: No module named site
...
根据报错信息可以得知 getPythonInterpreter 方法报错,报错信息为 "Cannot import site module and its dependencies: No module named site" ,这里的原因是没有site模块,解决办法就是修改getPythonInterpreter方法
@Bean
public PythonInterpreter getPythonInterpreter() {
    Properties props = new Properties();
    props.put("python.home", "../jython-2.7.0");
    props.put("python.console.encoding", "UTF-8");
    props.put("python.security.respectJavaAccessibility", "false");
    props.put("python.import.site", "false");
    Properties preprops = System.getProperties();
    PythonInterpreter.initialize(preprops, props, new String[0]);
    PythonInterpreter pyInterpreter = new PythonInterpreter();
    return pyInterpreter;
}
修改代码处理之后,site的问题没有了,但是后来又报错“os模块找不见”。这些问题的原因主要是因为在java中使用Jython运行python程序时候,它的搜索路径需要手动设置。而且Jython有个致命的弱点,就是它支持的库太少了,像一些科学计算库numpy等都比较麻烦,因此我后来改用Runtime执行python文件,同时我也强烈推荐大家使用Runtime执行外部程序,并通过io流收集结果。
    public String call(String carId){
        Process process;
        String command = "python3 " + pythonFilePath + " " + carId;
        System.out.println(command);
        String result = "";
        try{
            process = Runtime.getRuntime().exec(command);
            BufferedReader in = new BufferedReader(new InputStreamReader(process.getInputStream()));
            String line = null;
            while((line = in.readLine()) != null){
                result = result.concat(line);
            }
            in.close();
            process.waitFor();
        }catch(IOException e){
            e.printStackTrace();
        }catch (InterruptedException e){
            e.printStackTrace();
        }
        return result;
    }
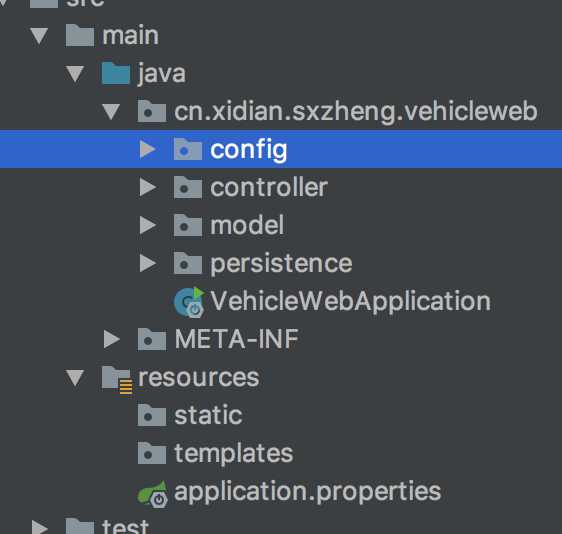
因为后台开发完成之后需要打包运行在别的机器上,因此关于python程序位置的设置,一些外部的参数设置就必须通过外部配置文件来完成,写入工程里面的application.properties不能进行修改,所以必须要实现可以读取外部属性配置文件。每次修改属性文件后重新启动程序就可以生效。
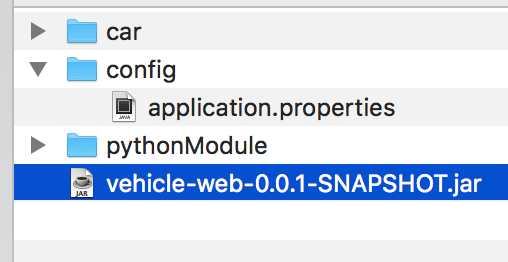
像图中的application.properties文件最终是打包到jar中的,无法进行修改。我们需要类似右边的情况,在config中对配置文件进行随时修改,然后可以通过重新运行jar文件来使得修改生效。
开发阶段,我们可以通过@PropertySource注解来使用外部的配置文件,然后通过@Value注解取配置文件中的参数。
打包部署后,我们可以直接在jar的当前目录下新建config文件夹,并新建application.properties文件,外部文件的优先级大于内部配置文件,因此我们可以手动修改application.properties来实现配置参数在生产环境中的修改。
标签:list 推荐 classes play import 媒体类型 imp add factor
原文地址:https://www.cnblogs.com/zhengshuangxi/p/11079420.html