标签:back ring app mamicode group mave config head pen
springboot工程搭建(入门案例)
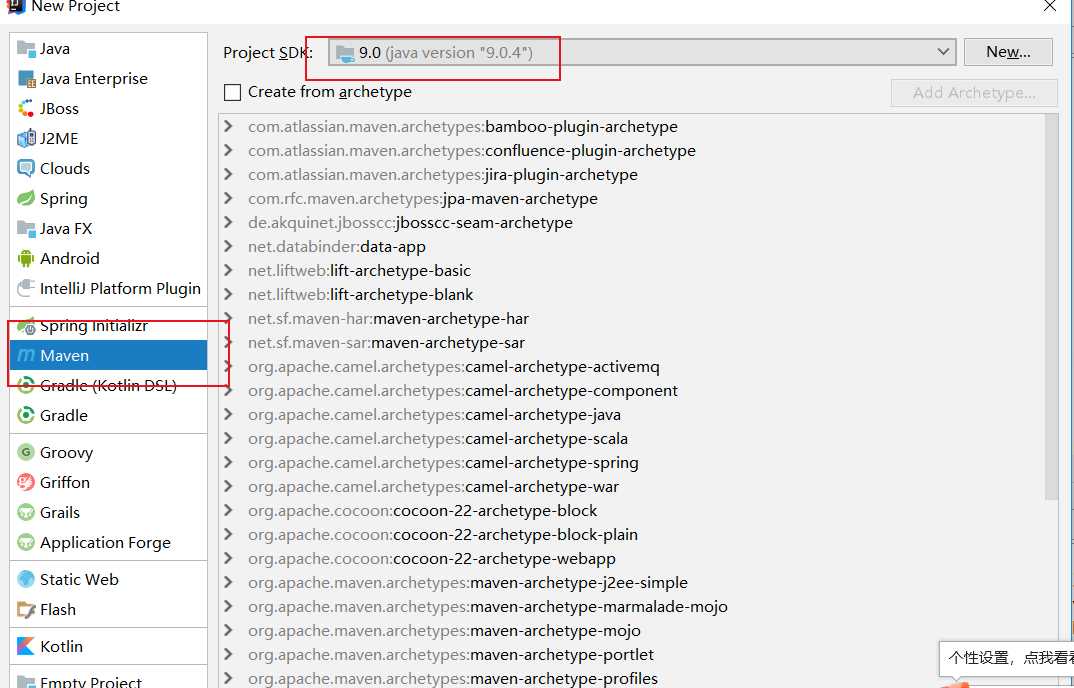
第一步:创建maven工程

第二步:设置项目信息

第三步:默认项目名称,不用改动(第二步已填写)

第三步:在pom.xml中导入依赖
SpringBoot要求,项目要继承SpringBoot的起步依赖spring-boot-starter-parent
<parent>
<groupId>org.springframework.boot</groupId>
<artifactId>spring-boot-starter-parent</artifactId>
<version>2.0.1.RELEASE</version>
</parent>
SpringBoot要集成SpringMVC进行Controller的开发,所以项目要导入web的启动依赖
<dependencies>
    <dependency>
        <groupId>org.springframework.boot</groupId>
        <artifactId>spring-boot-starter-web</artifactId>
    </dependency>
</dependencies>
第四步:编写
 1 import org.springframework.boot.SpringApplication;
 2 importorg.springframework.boot.autoconfigure.SpringBootApplication;
 3
 4 @SpringBootApplication
 5 public class MySpringBootApplication {
 6
 7     public static void main(String[] args) {
 8         SpringApplication.run(MySpringBootApplication.class);
 9     }
10
11 }
 1 import org.springframework.stereotype.Controller;
 2 import org.springframework.web.bind.annotation.RequestMapping;
 3 import org.springframework.web.bind.annotation.ResponseBody;
 4
 5 @Controller
 6 public class StartController {
 7
 8     @RequestMapping("/hello")
 9     @ResponseBody
10     public String init(){
11         return "hi,springboot!";
12     }
13
14 }
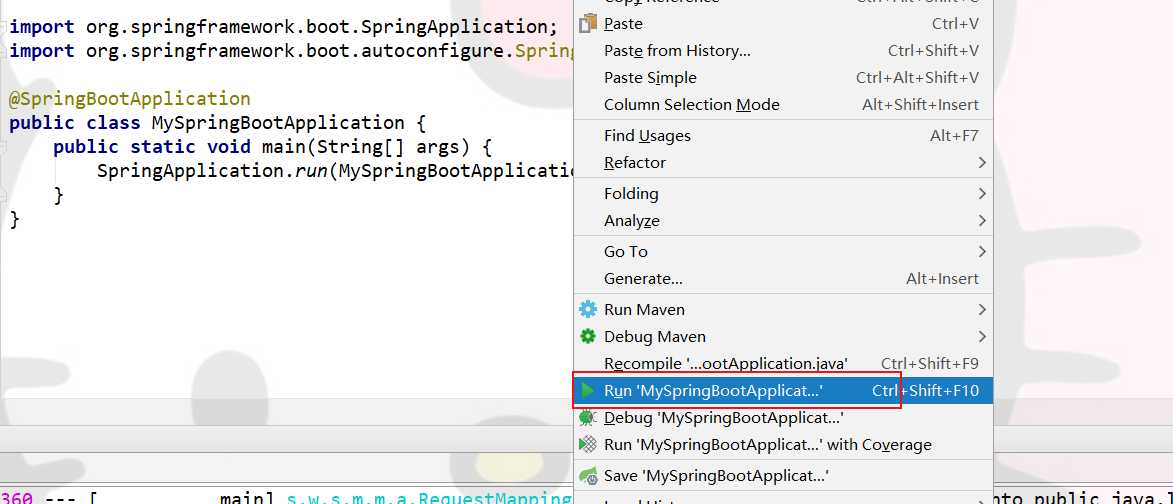
第六步:启动MySpringBootApplication.java的主方法(即启动项目)

项目启动完成........开心

测试结果如下:

完成项目搭建!!!!
标签:back ring app mamicode group mave config head pen
原文地址:https://www.cnblogs.com/Sarah-Strawberry/p/11087324.html