标签:需要 nginx反向代理 lin word 如何 而不是 nta rgs write
前言
问题描述:怎么让springboot部署在服务器上使用https协议方式访问我们的接口或者域名,目的是某些平台请求的是https协议,而不是https
部署环境:阿里云 centos7服务器,springboot项目打包的jar,nginx反向代理
注:部署前需要解决几个问题
1)需要配置springboot项目支持https协议,
2)需要配置阿里云的安全组,放行相关的端口,如本文中开放的8080和8081端口
3)配置nginx的nginx.conf文件做好反向代理
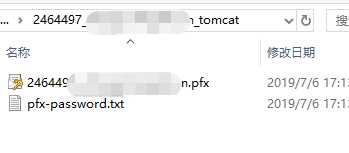
4)申请ssl文件,至于怎么申请ssl文件自行百度(注:因为springboot启动项目的时候使用的是tomcat,我们部署的时候需要nginx做好反向代理,所以这里面我们需要两个类型的ssl文件,即nginx下面的xxx.pem/xxx.key和tomcat下面的xxx.pfx/xxx.txt文件,xxx.txt里面保存的是密码)

(图1)
(图2)
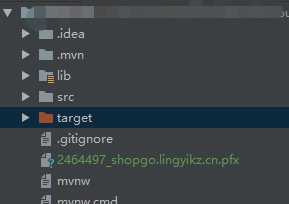
5)把申请的ssl里面的pfx文件方向项目的根目录下,如下图
步骤:
1.配置本地项目xxx.yml文件,如下图
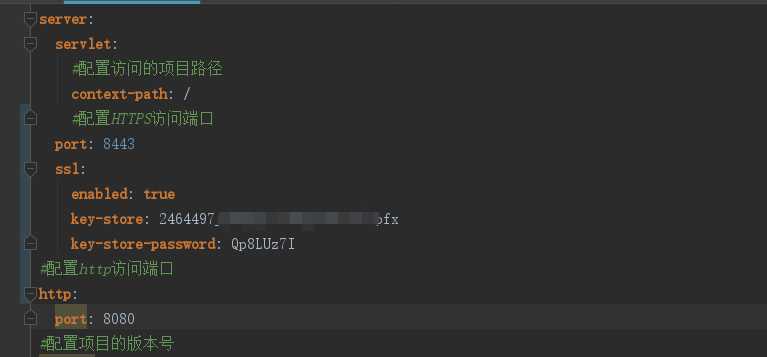
相关的代码如下
server:
  servlet:
    #配置访问的项目路径
    context-path: /
    #配置HTTPS访问端口
  port: 8443
  ssl:
    enabled: true
    key-store: xxx.pfx
    key-store-password: 123456
#配置http访问端口
http:
  port: 8080
2.配置启动项,即在启动项里面增加如下代码,这里可以配置通知支持http和https
import org.apache.catalina.connector.Connector;
import org.mybatis.spring.annotation.MapperScan;
import org.springframework.boot.SpringApplication;
import org.springframework.boot.autoconfigure.SpringBootApplication;
import org.springframework.boot.builder.SpringApplicationBuilder;
import org.springframework.boot.web.embedded.tomcat.TomcatServletWebServerFactory;
import org.springframework.boot.web.servlet.server.ServletWebServerFactory;
import org.springframework.boot.web.servlet.support.SpringBootServletInitializer;
import org.springframework.context.annotation.Bean;


@SpringBootApplication
@MapperScan(value = "xxx.mapper")
public class SitecloudApplication  {
    public static void main(String[] args) {
        SpringApplication.run(SitecloudApplication.class, args);
    }
    // springboot2 写法
    @Bean
    public ServletWebServerFactory servletContainer() {
        TomcatServletWebServerFactory tomcat = new TomcatServletWebServerFactory();
        tomcat.addAdditionalTomcatConnectors(createStandardConnector()); // 添加http
        return tomcat;
    }

    // 配置http
    private Connector createStandardConnector() {
        Connector connector = new Connector("org.apache.coyote.http11.Http11NioProtocol");
        connector.setPort(8080);//nginx需要代理的端口,这里我直接写固定了,这里的端口是yml文件中的8080端口,你可以直接取yml文件的端口
        return connector;
    }

}
3.配置阿里云的安全组,放行相关的端口

4.配置nginx
进入你安装的nginx目录里面xxx/conf/nginx.conf文件中,配置如下
#https支持
server {
listen 443 ssl;
server_name 你的域名不需要在前面加http;
ssl on;
ssl_certificate /ssl/xxx.pem;
ssl_certificate_key /ssl/xxx.key;
ssl_ciphers ECDHE-RSA-AES128-GCM-SHA256:ECDHE:ECDH:AES:HIGH:!NULL:!aNULL:!MD5:!ADH:!RC4;
ssl_protocols TLSv1 TLSv1.1 TLSv1.2;
ssl_prefer_server_ciphers on;
ssl_session_cache shared:SSL:1m;
ssl_session_timeout 5m;
location /images/{
root /usr/;
autoindex on;
}
location /app {
root html;
index index.html index.htm;
proxy_pass http://ip:8080;
}
}
server {
listen 80;
server_name 你的域名不需要在前面加http;
rewrite ^(.*)$ https://$host$1 permanent;
}
}
5.springboot本地打成xxx.jar文件,放入在linux中你新建的任何文件夹中
6.把你申请的ssl的xxx.pfx,xxx.pem,xxx.key文件放在和你的jar一个目录的地方

7.运行java -jar xxx.jar
8.在nginx的sbin文件夹下启动nginx
./nginx -s reload
./nginx -t
10.访问项目,直接用域名访问的方式如https://xxx.com:8443

访问http:xxx.8080

至此,项目运行成功,转载请留下出处
如何让springboot打包的项目部署在阿里云上使用https和http方式访问
标签:需要 nginx反向代理 lin word 如何 而不是 nta rgs write
原文地址:https://www.cnblogs.com/jfaith/p/11144838.html