标签:document 代码 img links mamicode ext rect col tor
1.右击 phpStudy ->【打开配置文件】->【vhosts-conf】;
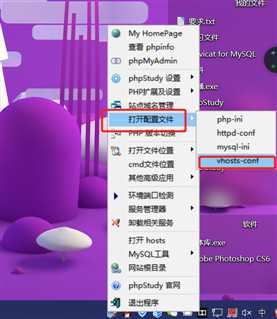
2.在里面加入如下代码,并保存:
NameVirtualHost *:80
<VirtualHost *:80>
 ServerName  www.test.com//你想要显示的域名
 DocumentRoot "d:/test/"//目标文件夹
<Directory "d:/test/"> //目标文件夹
 Options FollowSymLinks IncludesNOEXEC Indexes
 DirectoryIndex index.html index.htm default.htm index.php default.php index.cgi default.cgi index.pl default.pl index.shtml
 AllowOverride Options FileInfo
 Order Deny,Allow
 Allow from all
</Directory>
</VirtualHost>
3.右击 phpStudy ->【打开配置文件】->【httpd-conf】;
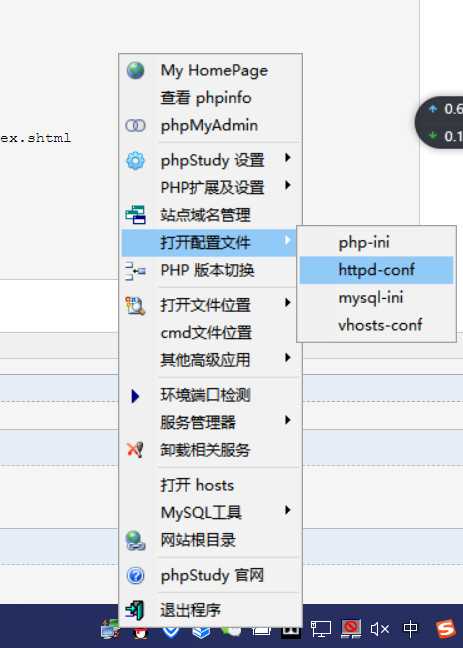
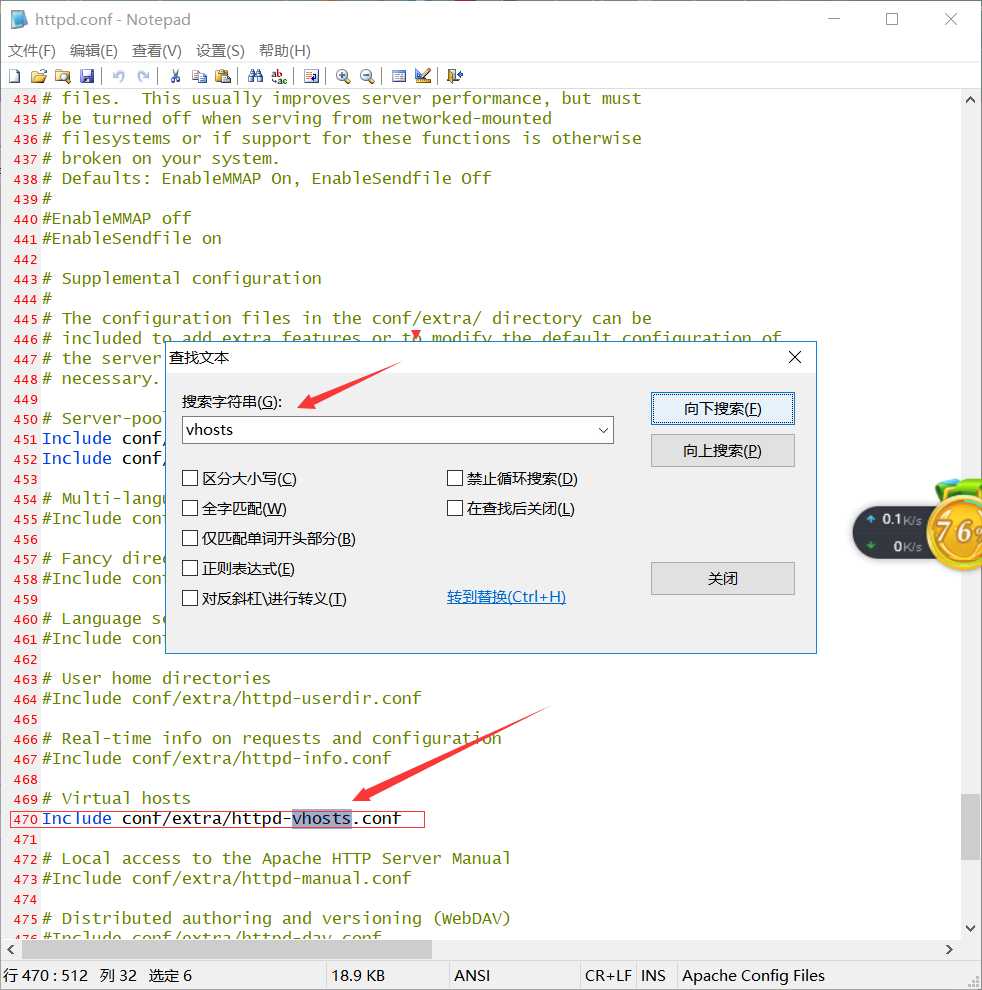
4.打开后 Ctrl+f 搜索vhosts 把该行前面的#号删掉,若已删除,请忽略该步骤。
5.请按照C:\Windows\System32\drivers\etc路径找到hosts文件并打开。
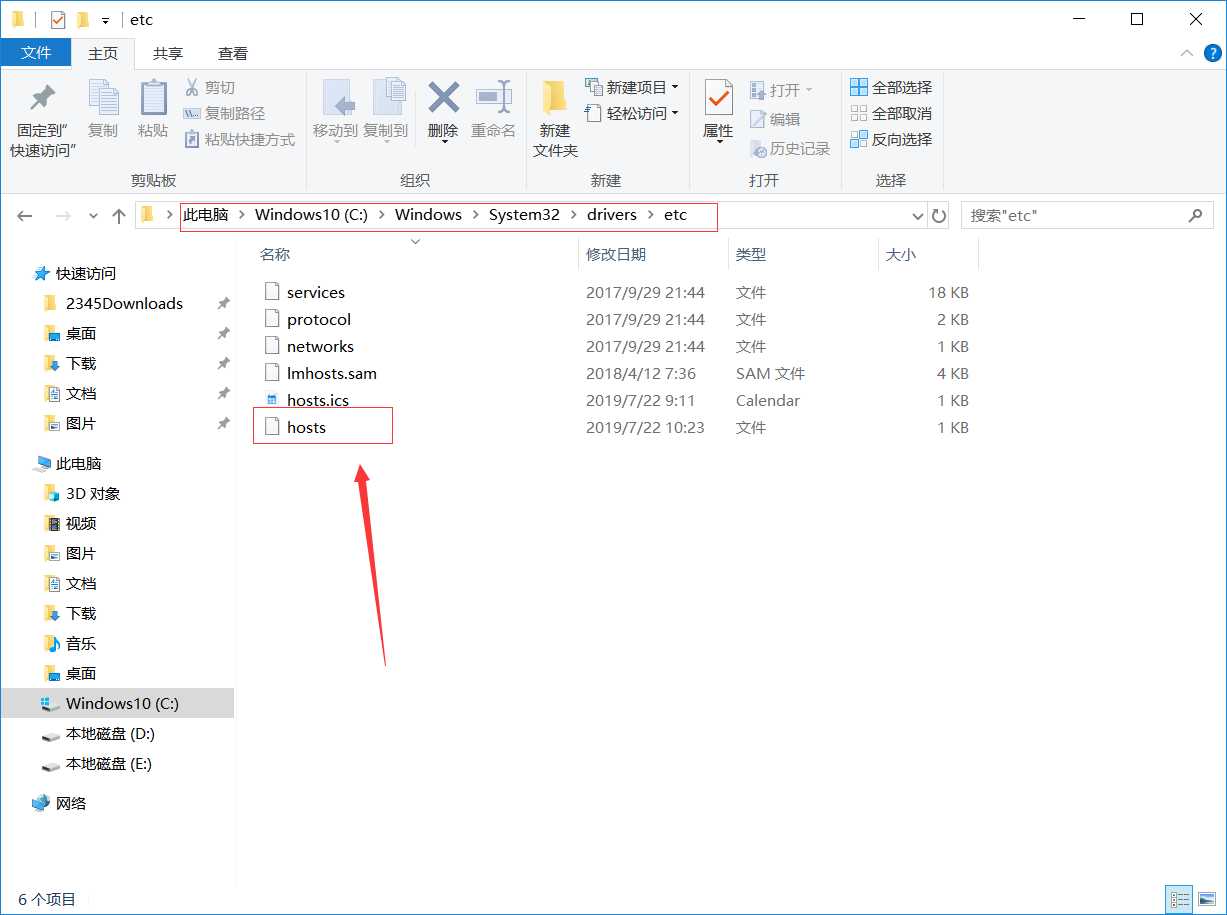
6.在里面加入配置的虚拟域名。

7.重启phpstudy即可。
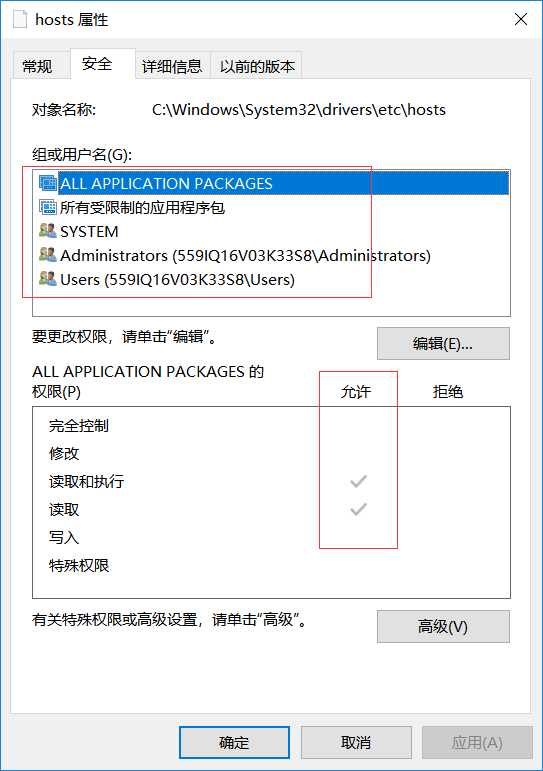
注意:若无法对hosts文件进行修改,请右击hosts,选择属性,安全,把所有用户的权限都勾选即可修改。
phpstudy 下载地址:链接:https://share.weiyun.com/569s2FW 密码:yd5rjp
标签:document 代码 img links mamicode ext rect col tor
原文地址:https://www.cnblogs.com/zhangxu-fasu/p/11227930.html