标签:att 拦截器 其它 interface dem 命令行 add 相关 现在
之前
    复杂的配置
        项目各种配置其实是开发时的损耗
        写配置挤占了写应用程序逻辑的时间
    混乱的依赖管理
        项目当中添加很多库已经很麻烦了
        还要知道这些库的哪个版本和其他库不会有冲突
        一旦选错了依赖的版本
        随之而来的不兼容问题就会造成项目的致命性伤害
现在
    Spring Boot 简化了基于Spring的应用开发
    只需要“run”就能创建一个独立的、生产级别的Spring应用
Spring Boot为Spring平台及第三方库提供开箱即用的设置http://spring.io/projects/spring-boot
为所有 Spring 的开发者提供一个非常快速的、广泛接受的入门体验
开箱即用,通过简单的配置,简化了以前复杂配置操作
提供了一些大型项目中常见的非功能性特性,如内嵌服务器、安全、指标,健康检测、外部化配置等
无需 XML 配置
1.创建Maven工程
2.引入springboot依赖
<parent>
    <groupId>org.springframework.boot</groupId>
    <artifactId>spring-boot-starter-parent</artifactId>
    <version>2.1.3.RELEASE</version>
</parent>

3.添加spring-boot启动器依赖(添加启动器后 web工程常用的依赖会自动帮你引入)
<dependencies>
    <dependency>
        <groupId>org.springframework.boot</groupId>
        <artifactId>spring-boot-starter-web</artifactId>
    </dependency>
</dependencies>

4.编写启动类
@SpringBootApplication
public class Application {
    public static void main(String[] args) {
        SpringApplication.run(Application.class,args);
    }
}

5.编写Controller直接访问
@Controller
public class MyController {
    @RequestMapping("/hello")
    @ResponseBody
    public String hello(){
        return "hello";
    }
}

6.spring boot 热部署
<dependency>
    <groupId>org.springframework.boot</groupId>
    <artifactId>spring-boot-devtools</artifactId>
</dependency>
补充
如遇到spring boot run启动时非常缓慢使用以下方法
1.在命令行中输入hostname  查询当前主机名称
DESKTOP-1234567

2.到C盘Windows\System32\drivers\etc中找到host文件
3.复制一份其它地方进行编辑,编辑时在hostname之后添加.local
# localhost name resolution is handled within DNS itself.
127.0.0.1       localhost DESKTOP-1234567.local
::1             localhost DESKTOP-1234567.local

4.注意事项: 127.0.0.1和local之间是两个tab 不是空格springBoot默认使用servlet3.0 可以没有web.xml
没有任何的xml,我们想要做一些自定义的配置,比如数据库相关的信息,该如何配置?
使用Java配置
Spring1.0时代
Spring配置都是xml格式
Spring2.0时代
引入了注解,并未完全替代xml
Spring3.0及以后
3.0以后Spring的注解已经非常完善了
SpringBoot
使用Java配置
SpringBoot进行Java配置
springBoot当中java配置主要靠java类和一些注解代替xml
@Configuration:声明一个类作为配置类,代替xml文件
@Bean:声明在方法上,将方法的返回值加入Bean容器,代替<bean>标签
@value:属性注入
@PropertySource:指定外部属性文件,
创建配置类,引入jdbc.properties?
1.把properties名称改为application.properties
2.创建一个类,名为JDBCPropertis
3.把所有属性添加到类当中
4.在类上添加注解
    @ConfigurationProperties(prefix="jdbc")
    @Data
    public class JDBCProperties{
        String url;
        String driverClassName;
        String username;
        String password;
    }

5.在config中直接使用

    @Configuration
    @@EnableConfigurationProperties(JDBCProperties.class)
    public class JdbcConfig{
        /*方法的返回值就是一个bean对象
        *就可以使用@autoware进行注入
        **/
        @Bean
        public DataSource dataSource(JDBCProperties jdbc){
            DruidDataSource dataSource=new DruidDataSource();
            dataSource.setUrl(jdbc.url);
            dataSource.setDriverClassName(jdbc.driverClassName):
            dataSource.setUsername(jdbc.username);
            dataSource.setPassword(jdbc.password);
            return dataSource;
        }
    }

6.也可以使用属性注入方式,也可以使用构造方法的形式

    @Configuration
    @@EnableConfigurationProperties(JDBCProperties.class)
    public class JdbcConfig{
        @Autowired
    JDBCProperties jdbc;
    public JdbcConfig(JDBCProperties jdbc){
        this.jdbe=jdbc;
    }
        /*方法的返回值就是一个bean对象
        *就可以使用@autoware进行注入
        **/
        @Bean
        public DataSource dataSource(JDBCProperties jdbc){
            DruidDataSource dataSource=new DruidDataSource();
            dataSource.setUrl(jdbc.url);
            dataSource.setDriverClassName(jdbc.driverClassName):
            dataSource.setUsername(jdbc.username);
            dataSource.setPassword(jdbc.password);
            return dataSource;
        }
    }
?
创建application.properties属性文件
?
jdbc.driverClassName=com.mysql.jdbc.Driver
jdbc.ur1=jdbc:mysq1://localhost:3306/springboot?characterEncoding=utf-8
jdbc.username=root
jdbc.password=123456
直接在方法上配置注解形式
?
@Configuration
public class JdbcConfig{
    /*
    本声明要注入的属性前缀,
    SpringBoot会自动把相关解性通过set方法注入到DataSource中
    */
    @Bean
    @ConfigurationProperties(prefix="jdbc")
    public DataSource dataSource(){
        DruidDataSource dataSource=new DruidDataSource();
        return dataSource;
    }
}使用SpringBoot之后,一个整合了SpringMVC的WEB工程开发非常简单,那些繁杂的配置都消失不见了,这是如何做到的??
@SpringBootApplication
public class Application {
    public static void main(String[] args) {
        SpringApplication.run(Application.class,args);
    }
}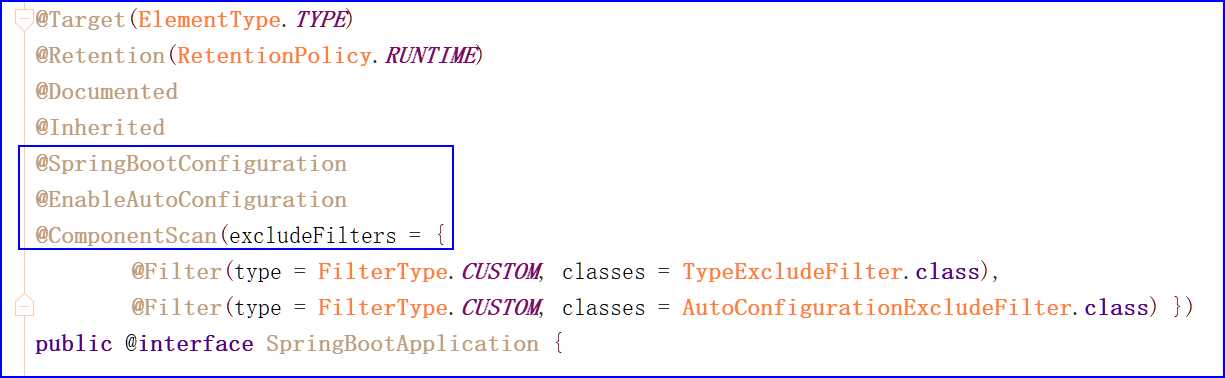
读取其中的配置信息
?
@Target({ElementType.TYPE})
@Retention(RetentionPolicy.RUNTIME)
@Documented
@Configuration
public @interface SpringBootConfiguration {
}1.创建表
CREATE TABLE `tb_hero` (
`id` int(11) NOT NULL AUTO_INCREMENT,
`username` varchar(255) DEFAULT NULL,
`profession` varchar(255) DEFAULT NULL,
`phone` varchar(255) DEFAULT NULL,
`email` varchar(255) DEFAULT NULL,
PRIMARY KEY (`id`)
) ENGINE=InnoDB AUTO_INCREMENT=11 DEFAULT CHARSET=utf8;
INSERT INTO `tb_hero` VALUES ('1', '鲁班', '射手', '13499887733', '12341241@qq.com');
INSERT INTO `tb_hero` VALUES ('2', '李白', '刺客', '18977665521', 'libai@163.com');
INSERT INTO `tb_hero` VALUES ('3', '阿轲', '刺客', '18977665997', 'aike@qq.com');
INSERT INTO `tb_hero` VALUES ('4', '德玛', '肉盾', '13700997665', 'demaxiya.126.com6');
INSERT INTO `tb_hero` VALUES ('5', '亚索', '战士', '13586878987', 'yasuo@qq.com');
INSERT INTO `tb_hero` VALUES ('6', '奶妈', '辅助', '13398909089', 'nama@qq.com');
INSERT INTO `tb_hero` VALUES ('7', '剑圣', '刺客', '13398909088', 'jiansheng@163.com');
INSERT INTO `tb_hero` VALUES ('8', '盖伦', '肉盾', '15923242231', 'gailun@126.com');
INSERT INTO `tb_hero` VALUES ('9', '锤石', '辅助', '13398908900', '8888@163.com');
INSERT INTO `tb_hero` VALUES ('10', '阿木', '辅助', '13398908928', '13398908928@qq.com');
2.表对应的pojo
public class TbHero {
private Integer id;
private String username;
private String profession;
private String phone;
private String email;
}1.端口配置
server:
port: 80
2.静态资源访问
由于没有了web-inf目录,如果直接把静态资源类似图片等信息放到resource是无法访问到的
默认情况下,它是在以下目录当中进行查找静态资源文件
private static final String[] CLASSPATH_RESOURCE_LOCATIONS={
classpath:/META-INF/resources/","classpath:/resources/",
"classpath:/static/","classpath:/public/"
};
所以要自己手动在resource文件当中创建静态资源目录
3.日志级别
@Slf4j等效于private static final Logger log = LoggerFactory.getLogger(MyInterceptor.class);
Slf4j
log.info("信息")
日志级别配置
logging:
level:
com.itlike: debug
# 日志输出路径
path: "D:/test/test.log"
pattern:
dateformat: "''"
3.拦截器
https://docs.spring.io/spring-boot/docs/2.1.3.RELEASE/reference/htmlsingle/#getting-started-cli-example
1.自定义拦截器
@Slf4j
public class MyInterceptor implements HandlerInterceptor {
@Override
public boolean preHandle(HttpServletRequest request, HttpServletResponse response, Object handler) throws Exception {
log.info("拦截器");
return true;
}
}
2.添加配置
@Configuration
public class WebMvcConfig implements WebMvcConfigurer {
@Override
public void addInterceptors(InterceptorRegistry registry) {
registry.addInterceptor(new MyInterceptor()).addPathPatterns("/**");
}
}
注解扫描-自动配置完成
包扫描-内部自带了包扫描
视图解析器-springboot当中不支持jsp,无需配置1.添加jdbc启动器
<dependency>
<groupId>org.springframework.boot</groupId>
<artifactId>spring-boot-starter-jdbc</artifactId>
</dependency>
2.添加Mysql数据库驱动
<dependency>
<groupId>mysql</groupId>
<artifactId>mysql-connector-java</artifactId>
</dependency>
3.配置连接参数(在application.yml文件中配置)
spring:
datasource:
driver-class-name: com.mysql.jdbc.Driver
url: jdbc:mysql://localhost:3306/springboot?useUnicode=true&characterEncoding=utf8&serverTimezone=GMT%2B8
username: root
password: 123456
4.添加Mybatis启动器
spring-boot没有给Mybatis写启动器,Mybaits自己写了启动器
https://github.com/mybatis/spring-boot-starter
添加Mybatis启动器
<dependency>
<groupId>org.mybatis.spring.boot</groupId>
<artifactId>mybatis-spring-boot-starter</artifactId>
<version>1.3.2</version>
</dependency>
别名
type-aliases-package: com.itlike.Pojo
配置mapper文件地址
mapper-locations: mapper/*.xml
mapper接口扫描
在main方法上添加@MapperScan("包名") 注解
map
<?xml version="1.0" encoding="UTF-8" ?>
<!DOCTYPE mapper PUBLIC "-//mybatis.org//DTD Mapper 3.0//EN" "http://mybatis.org/dtd/mybatis-3-mapper.dtd" >
<mapper namespace="">
</mapper>介绍
https://github.com/abel533/Mapper
通用Mapper可以极大的方便开发人员
可以随意的按照自己的需要选择通用方法
还可以很方便的开发自己的通用方法
极其方便的使用MyBatis单表的增删改查
支持单表操作,不支持通用的多表联合查询。
1.引入启动器
<dependency>
<groupId>tk.mybatis</groupId>
<artifactId>mapper-spring-boot-starter</artifactId>
<version>2.1.5</version>
</dependency>
2.使用时, 直接在接口上继续Mapper<实体类>
public interface HeroMapper extends Mapper<Hero> {
public List<Hero> getAllHero();
}
以前需要自己写方法, 现在不用自己写,直接继承
也不需要在Mapper文件当中写sql了
底层会利用Mybatis的可拦截原理,帮你把方法的sql动态生成了
通用mapper已经引入了springboot jdbc Mybatis,就不需要再单独引入了
也可开启驼峰
启动类也可改成通用mapper的启动类,通过mapper在扫描时, 去自动生成sql
3.在Pojo中指定表名与相关主键属性
@Data
@Table(name = "tb_hero")
public class Hero {
@Id
@KeySql(useGeneratedKeys = true)
private Integer id;
private String username;
private String profession;
@Transient
private String phone;
private String email;
private Date onlinetime;
}?
//添加service方法
//在添加Spring-jdbc时, 所有的事务都已经配置完成 , 无需我们再自动配置事务
//只需要在添加事务的方法上, 添加注解@Transactional
@Service
public class HeroServiceImpl implements HeroService {

    @Autowired
    private HeroMapper heroMapper;

    @Override
    public List<Hero> getAllHero() {
        List<Hero> heroes = heroMapper.selectAll();
        System.out.println(heroes);
        return heroMapper.getAllHero();
    }
}@Controller
@Slf4j
public class MyController {
@Autowired
private HeroService heroService;
@RequestMapping("/hello")
public String hello(Model model){
List<Hero> allHero = heroService.getAllHero();
model.addAttribute("allHero",allHero);
return "hello";
}
}标签:att 拦截器 其它 interface dem 命令行 add 相关 现在
原文地址:https://www.cnblogs.com/mumuyinxin/p/11316846.html