标签:get python not 操作 结构 ips ring 循环 阵列
import cv2
import numpy as np
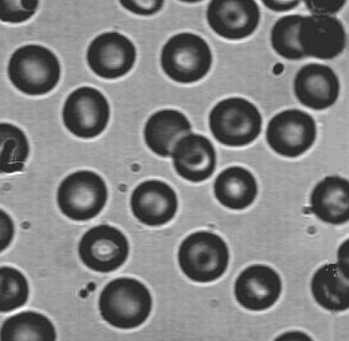
path = "_holefill.jpg"
img = cv2.imread(path)
gray = cv2.cvtColor(img, cv2.COLOR_BGR2GRAY)#转换成灰度图
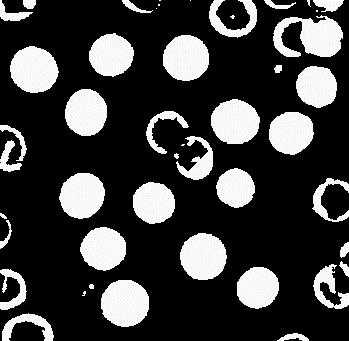
ret, thresh = cv2.threshold(gray, 50, 250, cv2.THRESH_BINARY_INV)#灰度图转换成二值图像
thresh_not = cv2.bitwise_not(thresh)#二值图像的补集
kernel = cv2.getStructuringElement(cv2.MORPH_ELLIPSE, (3,3))#3×3结构元
"""
构建阵列F,并将thresh_not边界值写入F
"""
F = np.zeros(thresh.shape, np.uint8)
F[:, 0] = thresh_not[:, 0]
F[:, -1] = thresh_not[:, -1]
F[0, :] = thresh_not[0, :]
F[-1, :] = thresh_not[-1, :]
"""
循环迭代,对F进行膨胀操作,结果与thresh_not执行and操作
"""
for i in range(200):
F_dilation = cv2.dilate(F, kernel, iterations=1)
F = cv2.bitwise_and(F_dilation, thresh_not)
result = cv2.bitwise_not(F)#对结果执行not
#显示结果
cv2.imshow(‘p‘,result)
cv2.imshow(‘r‘,thresh)
cv2.waitKey(0)

标签:get python not 操作 结构 ips ring 循环 阵列
原文地址:https://www.cnblogs.com/er-gou-zi/p/11831222.html