码迷,mamicode.com
首页 > 数据库 > 详细

nginx 代理 mysql

时间:2019-11-13 23:48:07      阅读:106      评论:0      收藏:0      [点我收藏+]

标签:环境   实验   image   inf   bar   toolbar   ash   png   make   


实验环境

       nginx1.12.1  :   192.168.1.19

       mysql           :   192.168.1.20:3306


1:编译或者升级nginx至版本1.9.0以上,编译过程中需带上--with-stream。

# ./configure  --prefix=/opt/apps/nginx --with-stream
# make && make install


2:配置stream,定义代理192.168.1.20的3306端口映射为端口2333。

# vi /opt/apps/nginx/conf/nginx.conf
……
……
events {
    use epoll;
    worker_connections  65535;
}
#stream配置
stream {
    server {
       listen 2333; 
       proxy_connect_timeout 1s;
       proxy_timeout 3s;
       proxy_pass 192.168.1.20:3306;    
    }
}
http {
……
……
}


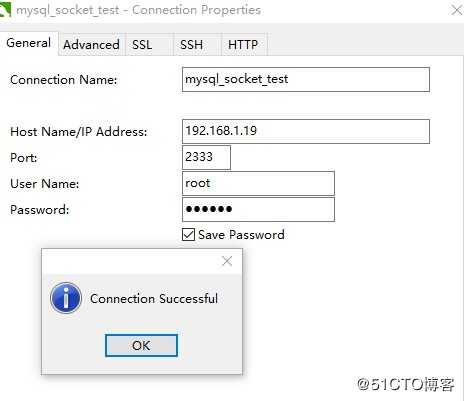
3:开启nginx,验证代理是否生效。

技术图片

     可以看到我们现在可以通过nginx代理的端口访问到内网的mysql服务了。这也直接避免了mysql直接暴露到公网,增加些许的安全。当然,利用stream也可以实现后端服务的负载均衡。

nginx 代理 mysql

标签:环境   实验   image   inf   bar   toolbar   ash   png   make   

原文地址:https://www.cnblogs.com/lshan/p/11854127.html

(0)
(0)
   
举报
评论 一句话评论(0
登录后才能评论!
© 2014 mamicode.com 版权所有  联系我们:gaon5@hotmail.com
迷上了代码!