标签:内容 inter content head parent oat ali 功能 bis
一、左边的菜单栏
<!DOCTYPE html>
<html lang="en">
<head>
    <meta charset="UTF-8">
    <title>left_menu</title>
    <style>
        body{
            margin: 0;
        }
        .hide{
            display: none;
        }
        .top{
            height: 48px;
            background-color: darkturquoise;
        }
        .outer{
            float: left;
            width: 20%;
            height: 600px;
            background-color: darkgray;
        }
        .outer .menu .title{
            border: 1px solid darkcyan;
            background-color: darkcyan;
        }
        .content{
            float: left;
            width: 80%;
            background-color: bisque;
            height: 600px;
        }
    </style>
    <script src="js/jquery-3.4.1.js"></script>
</head>
<body>
    <div class="top"></div>
    <div class="outer">
        <div class="menu">
            <div class="title" onclick="Show(this);">菜单一</div>
            <ul class="con">
                <li>菜单一中的功能一</li>
                <li>菜单一中的功能二</li>
                <li>菜单一中的功能三</li>
            </ul>
        </div>
        <div class="menu">
            <div class="title" onclick="Show(this);">菜单二</div>
            <ul class="con hide">
                <li>菜单二中的功能一</li>
                <li>菜单二中的功能二</li>
                <li>菜单二中的功能三</li>
            </ul>
        </div>
        <div class="menu">
            <div class="title" onclick="Show(this);">菜单三</div>
            <ul class="con  hide">
                <li>菜单三中的功能一</li>
                <li>菜单三中的功能二</li>
                <li>菜单三中的功能三</li>
            </ul>
        </div>
    </div>
    <div class="content"></div>

    <script>
        function Show(self) {
            $(self).next().removeClass("hide");
            $(self).parent().siblings().find(".con").addClass("hide");
        }
    </script>

</body>
</html>
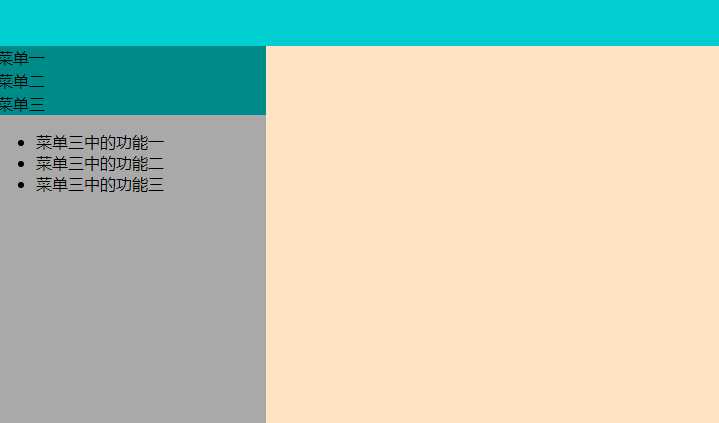
结果图示

二、tab栏切换实例
<!DOCTYPE html>
<html lang="en">
<head>
    <meta charset="UTF-8">
    <title>jquer_tab</title>
    <script src="js/jquery-3.4.1.js"></script>
    <style>
        *{
            margin: 0;
            padding: 0;
        }
        .current{
            background-color: cornflowerblue;
            color: white;
        }
        .tab{
            height: 40px;
            background-color: darkgray;
        }
        li{
            display: inline;
            list-style: none;
            padding: 20px;

        }
        .outer{
            width: 70%;
            margin: 0 auto;
            height: 300px;
            background-color: bisque;
        }
        .content{
            height: auto;
            padding: 50px;
            background-color: darkcyan;

        }
        .hide{
            display: none;
        }
    </style>
</head>
<body>

    <div class="outer">
        <ul class="tab">
            <li sel="c1" class="current" onclick="Tab(this);">菜单一</li>
            <li sel="c2" onclick="Tab(this);">菜单二</li>
            <li sel="c3" onclick="Tab(this);">菜单三</li>
        </ul>
        <div class="content">
            <div id="c1">我是菜单一的内容</div>
            <div id="c2" class="hide">我是菜单二的内容</div>
            <div id="c3" class="hide">我是菜单三的内容</div>
        </div>
    </div>

    <script>
        function Tab(self) {
            $(self).addClass("current").siblings().removeClass("current");
            var index = $(self).attr("sel");
            $("#"+index).removeClass("hide").siblings().addClass("hide");
        }
    </script>

</body>
</html>
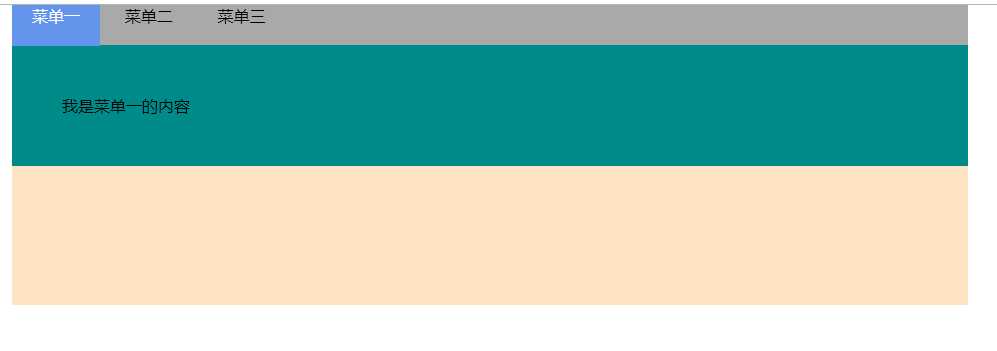
结果图示

三、隐藏/显示、渐变控制
<!DOCTYPE html>
<html lang="en">
<head>
    <meta charset="UTF-8">
    <title>隐藏/显示</title>
    <script src="js/jquery-3.4.1.js"></script>
</head>
<body>

    <p>I‘m yusheng_liang,I studying jquery</p>
    <button id="hide">隐藏</button>
    <button id="show">显示</button>
    <button id="toggle">隐藏/显示</button>

    <script>
        //隐藏
        $("#hide").click(function () {
            $("p").hide(1000);
        })
        //显示
        $("#show").click(function () {
            $("p").show(1000);
        })

        $("#toggle").click(function () {
            $("p").toggle(1000)
        })
    </script>

</body>
</html>
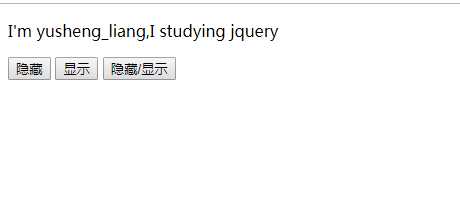
结果图示

四、轮播图实例
<!DOCTYPE html>
<html lang="en">
<head>
    <meta charset="UTF-8">
    <title>轮播图</title>
    <script src="js/jquery-3.4.1.js"></script>
    <style>
        *{
            margin: 0;
            padding: 0;
        }
        ul li{
            list-style: none;
        }
        .outer{
            width: 200px;
            height: 200px;
            border: dashed cadetblue 5px;
            margin: 0 auto;
            position: relative;
        }
        .outer .img li{
            position: absolute;
            left: 0;
            top: 0;
            cursor: pointer;
        }
        .num{
            position: absolute;
            left: 0;
            /*top: 0;*/
            bottom: 5px;
            font-size: 0px;
            text-align: center;
            width: 100%;
        }
        .num li{
            height: 18px;
            width: 18px;
            background-color: aqua;
            border-radius: 50%;
            text-align: center;
            display: inline-block;
            font-size: 14px;
            margin: 5px;
            cursor: pointer;
        }
        .but{
            height: 40px;
            width: 20px;
            background-color: bisque;
            position: absolute;
            /*left: 0px;*/
            top: 50%;
            margin-top: -20px;
            opacity: 0.6;
            font-size: 20px;
            font-weight: bolder;
            display: none;
        }
        .btn_right{
            right: 0;
        }
        .outer:hover .but{
            display: block;
        }
        .outer .num li.current{
            background-color: red;
        }
    </style>
</head>
<body>
    <div class="outer">
        <ul class="img">
            <li><img src="image/1.jpg"></li>
            <li><img src="image/2.jpg"></li>
            <li><img src="image/4.jpg"></li>
            <li><img src="image/5.jpg"></li>
        </ul>
        <ul class="num">
            <li>1</li>
            <li>2</li>
            <li>3</li>
            <li>4</li>
        </ul>
        <button class="btn_left but"> < </button>
        <button class="btn_right but"> > </button>
    </div>

    <script>
        $(".num li").first().addClass("current");
        $(".num li").mouseover(function () {
            $(this).addClass("current").siblings().removeClass("current");
            var index = $(this).index();
            i = index;
            $(".img li").eq(index).fadeIn(1000).siblings().fadeOut(1000);
        });

        i = 0;
        var time = setInterval(autoShow,4000);
        function autoShow() {
            i++;
            if(i == 4){
                i = 0;
            }
            $(".num li").eq(i).addClass("current").siblings().removeClass("current");
            $(".img li").eq(i).fadeIn(1000).siblings().fadeOut(1000);
        }
        $(".outer").hover(function () {
            clearInterval(time);
        },function () {
            time = setInterval(autoShow,4000);
        })

        $(".btn_right").click(function () {
            autoShow();
        })
        $(".btn_left").click(function () {
            if(i == 0){
                i = 4;
            }
            i = i - 2;
            autoShow();
        })

    </script>
</body>
</html>
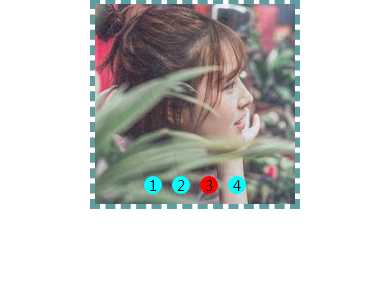
结果图示

标签:内容 inter content head parent oat ali 功能 bis
原文地址:https://www.cnblogs.com/june-L/p/11961066.html