标签:print car 地址 端口 qq邮箱 xls ima src 客户
Python对SMTP支持有smtplib和email两个模块,email负责构造邮件,smtplib负责发送邮件。


最后代码如下:
 1 # -*- coding:utf-8 -*-
 2 import smtplib
 3 from email.mime.text import MIMEText
 4 from email.mime.image import MIMEImage
 5 from email.mime.multipart import MIMEMultipart
 6
 7 class send_email():
 8     def __init__(self):
 9         self.Host = "smtp.qq.com"                # QQ邮箱服务地址
10         self.Subject = input("请输入邮件标题:") # 设置邮件标题
11         self.From = input("请输入发件人地址:")  # 设置发件人邮箱
12         self.To = input("请输入收件人地址:")    # 设置收件人邮箱(多个用逗号隔开)
13
14     # ==========================发送文本====================
15     # 发送邮件主体到对方的邮箱中
16     def email_text(self,message):
17         message_text = MIMEText(_text=‘<h2 style="color:red;font-size:100px"><a href="http://www.baidu.com">这是一个链接</a></h2>‘,_subtype=‘html‘, _charset=‘utf-8‘)
18         message.attach(message_text)
19
20
21     # ==========================发送图片====================
22     def email_image(self,message):
23         image_data = open(file="123456789.jpg", mode="rb")
24         message_image = MIMEImage(_imagedata=image_data.read(), _subtype="base64", _charset="utf-8")
25
26         # 设置文件在附件当中的名字
27         message_image[‘Content-disposition‘] = ‘attachment;filename = "text.jpg"‘
28         image_data.close()
29         message.attach(message_image)
30
31     # ==========================发送附件====================
32     def email_file(self,message):
33         file_data = open(file=r"C:\Users\lenovo\Desktop\income.xlsx", mode="rb")
34         message_file = MIMEText(_text=file_data.read(), _subtype="base64", _charset="utf-8")
35
36         # 设置文件在附件当中的名字
37         message_file[‘Content-Disposition‘] = ‘attachment;filename="textfile.xlsx"‘
38         file_data.close()
39         message.attach(message_file)
40
41
42     # ========================发送邮件======================
43     def init_email(self):
44         message["From"] = self.From              # 设置邮件发件人
45         message["To"] = self.To                   # 设置邮件接收人
46         message["Subject"] = self.Subject         # 设置邮件标题
47
48         # 获取简单邮件传输协议证书
49         email_client = smtplib.SMTP_SSL(host="smtp.qq.com")
50
51         # 设置发件人邮箱的域名和端口
52         email_client.connect(host="smtp.qq.com", port="465")
53
54         # 登陆邮件,权限验证,password为邮箱授权码
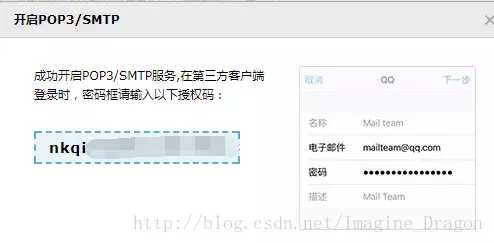
55         result = email_client.login(user=self.From, password="eejjgbvxpzyadhhg")
56         print("登录结果:", result)
57
58         # 发送邮件,from_addr:发送人,to_addrs:收件人,msg:发送的文本
59         email_client.sendmail(from_addr=self.From, to_addrs=self.To, msg=message.as_string())
60
61         # 关闭邮件客户端
62         email_client.close()
63
64
65
66 if __name__ == ‘__main__‘:
67     # 创建一个邮件对象
68     message = MIMEMultipart()
69     email = send_email()            # 调用对象
70
71     # email.email_text(message)       # 调用对象的方法
72     email.email_image(message)
73     # email.email_file(message)
74
75     email.init_email()
标签:print car 地址 端口 qq邮箱 xls ima src 客户
原文地址:https://www.cnblogs.com/zhaco/p/12002901.html