标签:highlight layer 些许 test 维护 front 开始 call ESS
其实用了很长时间思考了一下一些数据运算方面放在哪里合适。当然,数值方面的运算肯定要放在服务端是正确的,本地的数值计算就会有被修改器修改、数据传输中抓包改包等作弊、外挂的问题存在,不过对于我这个小项目目前开发阶段来说,只涉及到对游戏角色移动操控这块。
在我自己所接触过的网游中,确实存在两种方式来处理角色移动数据,一个是发出操作指令,然后服务器根据操作指令计算出移动坐标再返给客户端处理,一个是本地计算移动距离,再将数据交付给服务器。这两种情况在游戏掉线的时候就能有很明显的感觉,前者掉线后,角色就无法移动了,做出的任何操作指令都不会有反馈,后者在掉线后,依然可以操纵角色在游戏中活动。
这两种方式各有利弊,前者可以杜绝各种修改数据的外挂,但是对服务器会有很大的数据计算压力。后者无法避免一些神仙外挂,但是服务器方面计算成本就会降低很多。
因为自身做过很多年的单机游戏,想学习一下网游的开发理论知识,才决定写这一系列的博客记录学习过程,所以决定使用全服务器处理数据的方案,将包括角色移动的数据计算都放到服务器中进行。
在之前的篇章中,已经做好了摇杆,在场景中摆放了个角色。在这个基础上,接下来扩展一下服务器和客户端代码,让我们可以通过摇杆操作角色,让服务器运算角色移动后的坐标并返回客户端,在客户端中表现出人物行走。同时,也能支持多个客户端同时访问,在客户端中可以看到多个角色的移动。
在确定了方案之后,就需要对服务器和客户端做出不小的改动。
首先改造一下服务器,因为大部分的数据处理都放在服务器来做,那么就需要让服务器来主导数据形式。
因为初步设计的模式是以地图为单位来创建服务器,那么每个地图都会有自己的信息,包括地图的名称,地图中npc的数据以及地图中玩家的数据。
在Server中创建MapServerModules文件夹,在里面创建mapObject.js文件,编写地图的类代码。
class MapObject {
    constructor(mapName) {
        this.mapName = mapName;//地图名称
        this.npcs = [];//地图中npc的数组
        this.players = [];//地图中玩家的数组
    }

    //客户端连接完毕,创建玩家的数据信息后将其放入地图的玩家数组中
    addPlayer(player) {
        for(let i in this.players) {
            let playerItem = this.players[i];
            if(player.getPlayerData().playerId === playerItem.getPlayerData().playerId) {
                return;
            }
        }
        this.players.push(player);
    }
    /**
     * 监听到玩家离开地图,要从数组中将玩家信息删除
     * 因为玩家离开后,需要通知其他还在连接中的玩家
     * 所以延迟从数组中删掉,是为了给其他玩家发送地图玩家数据时标记玩家退出
     */
    deletePlayer(player) {
        setTimeout(() => {
            this.players.splice(this.players.indexOf(player), 1);
        }, 1000);
    }

    //地图信息,将npc和玩家数据打包成数据集
    getMapInfo() {
        return {
            npcs: this.npcs.map((item) => {return null}),
            players: this.players.map((item) => {return item.getPlayerData()})
        }
    }
}

module.exports = MapObject;
地图类创建好后,接着创建一个角色类,里面包含了玩家的一些数据,以及相关的数据计算。当然,这些数据计算日后肯定需要抽离出来,但因为现在是一个简单的demo,暂时放在同一个类中进行处理。
在根目录的modules文件夹中,创建playerObject.js,用来编写玩家类的代码。因为自己设想的demo开发流程,还没有到加入数据库的时候,所以在这里,玩家数据初始化都使用了一些随机参数。
class PlayerObject {
  //构造函数中的相关初始化。
  constructor() {
    this.dt = 1 / 60; //因为游戏的设计帧率是60帧,所以服务器在计算数据的时候,也选择60帧(即每秒进行60次计算)
    this.update = null; //循环计时器

    //角色状态参数,站立,向左右方向行走
    this.State = {
      STATE_STAND: 1,
      STATE_WALK_LEFT: 2,
      STATE_WALK_RIGHT: 3
    };

    //玩家角色数据集,初始化随机的id和随机的名字
    this.playerData = {
      playerId: this.makeUUID(),
      playerName: "player" + Math.ceil(Math.random() * 100),
      playerAttribute: {
        //角色数据
        logout: false, //是否退出地图的标示符
        currentState: this.State.STATE_STAND, //角色当前状态
        moveSpeed: 150.0, //角色移动速度
        position: {
          //角色在地图中的坐标
          x: -500,
          y: -460
        },
        scale: {
          //角色动画的缩放参数,角色的面向是通过缩放参数来控制的
          x: 3,
          y: 3
        }
      }
    };
    this.connection = null; //角色的websocket连接对象
  }

  //获取到角色的相关数据,用在map中生成数据合集
  getPlayerData() {
    return this.playerData;
  }

  addConnection(connection) {
    this.connection = connection;
  }

  makeUUID() {
    return "xxxxxxxx-xxxx-4xxx-yxxx-xxxxxxxxxxxx".replace(/[xy]/g, function(c) {
      var r = (Math.random() * 16) | 0,
        v = c == "x" ? r : (r & 0x3) | 0x8;
      return v.toString(16);
    });
  }

  //接收玩家的操作,目前只有操控移动,所以这里是根据操作改变角色状态
  operation(data) {
    this.playerData.playerAttribute.currentState = data.state;
  }

  /**
   * 角色在服务器生成后,需要发送消息到客户端
   * 客户端进行角色人物动画加载,加载完成后,再通知服务器可以开始角色数据运算
   * 这里使用定时器循环计算
   */

  start() {
    this.update = setInterval(() => {
      if (!this.playerData.playerAttribute) {
        return;
      }
      switch (this.playerData.playerAttribute.currentState) {
        case this.State.STATE_STAND:
          break;
        case this.State.STATE_WALK_LEFT:
          this.walkLeft();
          break;
        case this.State.STATE_WALK_RIGHT:
          this.walkRight();
          break;
      }
      //计算完成后,通过websocket的连接对象,连同地图中全部的npc和角色信息,一并返回给客户端
      if (this.connection) {
        let map = this.connection.map;
        let mapData = map.getMapInfo();
        let data = {
            /**
             * 数据格式暂定
             * dataType 数据操作指令
             * data 数据
             */
          dataType: "GAME_PLAYER_DATA",
          data: mapData
        };
        this.connection.sendText(JSON.stringify(data));
      }
    }, this.dt * 1000);
  }

  //标记角色离开地图,停止数据计算
  end() {
    this.playerData.playerAttribute.logout = true;
    clearInterval(this.update);
  }

  //计算角色移动后的坐标,和处理面向
  walkLeft() {
    let dis = this.playerData.playerAttribute.moveSpeed * this.dt;
    this.playerData.playerAttribute.position.x =
      this.playerData.playerAttribute.position.x - dis;
    this.playerData.playerAttribute.scale.x =
      Math.abs(this.playerData.playerAttribute.scale.x) * -1;
  }

  walkRight() {
    let dis = this.playerData.playerAttribute.moveSpeed * this.dt;
    this.playerData.playerAttribute.position.x =
      this.playerData.playerAttribute.position.x + dis;
    this.playerData.playerAttribute.scale.x = Math.abs(
      this.playerData.playerAttribute.scale.x
    );
  }
}

module.exports = PlayerObject;
如此就创建好了一个简单的地图类和一个简单的角色类处理地图和角色信息。
接下来创建一下地图的服务器。在Server目录下,添加mapServer.js。
const wsServer = require("../modules/websocketServer");//引入websocketServer
const mapObject = require("./MapServerModules/mapObject");//引入地图类
const playerObject = require("../modules/playerObject");//引入角色类

const map_1 = new mapObject("map_1");//初始化地图信息

//同聊天服务器一样,几个回调函数来处理连接的监听
const textCallback = (server, result, connection) => {
  let dataType = result.dataType;
  let player = null;

  //通过dataType的操作指令,执行不同的任务
  /**
   * PLAYER_SERVER_INIT 服务器角色初始化,用于客户端连接成功后,向服务器发送的命令
   * PLAYER_SERVER_INIT_OVER 服务器完成角色初始化,向客户端发送命令,要求客户端创建角色相关数据
   * PLAYER_CLIENT_INIT_OVER 客户端角色创建完成,通知服务器开始角色数据计算
   * PLAYER_OPERATION 客户端发起操作,控制角色,改变角色状态
   */
  switch (dataType) {
    case "PLAYER_SERVER_INIT"://服务器角色初始化,并添加连接对象
      player = new playerObject();
      player.addConnection(connection);
      connection["player"] = player;
      connection["map"] = map_1;
      connection.sendText(
        makeResponseData("PLAYER_SERVER_INIT_OVER", player.getPlayerData())
      );
      break;
    case "PLAYER_CLIENT_INIT_OVER"://客户端角色创建完成,开启角色数据计算,并将角色信息添加到地图信息中心
      player = connection.player;
      player.start();
      map_1.addPlayer(player);
      break;
    case "PLAYER_OPERATION"://客户端发来的操作,改变角色状态
      player = connection.player;
      player.operation(result.data);
      break;
  }
};

//通知客户端连接成功
const connectCallback = (server, result, connection) => {
  connection.sendText(makeResponseData("CONNECT_SUCCESS", null));
};

//客户端取消连接,将该客户端角色移出地图数据
const closeConnectCallback = (server, result, connection) => {
  connection.player.end();
  map_1.deletePlayer(connection.player);
};

//打包数据的公共函数
const makeResponseData = (dataType, data) => {
  return JSON.stringify({
    dataType,
    data
  });
};

module.exports = MapServer = port => {
  let callbacks = {
    textCallback: (server, result, connection) => {
      textCallback(server, result, connection);
    },
    connectCallback: (server, result, connection) => {
      connectCallback(server, result, connection);
    },
    closeConnectCallback: (server, result, connection) => {
      closeConnectCallback(server, result, connection);
    }
  };

  const mapServer = wsServer(port, callbacks);
};
因为在地图服务器的监听回调中,添加了connection的参数,所以也要修改对应的modules/websocketServer.js中相关代码,这里就不列出了。
修改index.js文件,添加服务器端口,可以随着服务器启动后启动地图服务器。
const http = require(‘http‘);
const url = require(‘url‘);
const chatServer = require(‘./Server/chatServer‘);
const mapServer = require(‘./Server/mapServer‘);
// const wsServer = require(‘./websocketServer‘);

http.createServer(function(req, res){
    var request = url.parse(req.url, true).query
    var response = {
        info: request.input ? request.input + ‘, hello world‘ : ‘hello world‘
    };
    res.setHeader("Access-Control-Allow-Origin", "*");//跨域
    res.write(JSON.stringify(response));
    res.end();
}).listen(8181);

const chat = chatServer(8183);
const map = mapServer(8184);
以上,服务器相关代码就完成了。记录的内容中可能有些许疏漏,具体可以到文章末尾列出的github地址下载代码。
接下来修改一下客户端相关代码,以便能够和服务器通信并完成操作响应。
因为服务器端口越来越多,可能在后续的地方会有相当多的地方要填写连接地址,这里将地址相关的代码提到公共类中,方便调用和统一维护。
修改Script/Common/Tools.js中的代码,添加连接地址获取。
    constructor() {
        this.webSocketServerUrl = "ws://127.0.0.1";
        this.chatPort = "8183";//端口需要和服务器保持一致
        this.testMapPort = "8184";
    }

    getChatServerUrl() {
        return this.webSocketServerUrl + ":" + this.chatPort;
    }

    getTestMapServerUrl() {
        return this.webSocketServerUrl + ":" + this.testMapPort;
    }
作为联网游戏,肯定是有多端连接进来的,那么就需要每个连接到游戏中的玩家,在地图中都要有对应的角色。所以,现在需要把之前添加的女仆长,转换成预制体,并为其编写一个Script/Player/Character.js,并拖拽到预制体上。
cc.Class({
  extends: cc.Component,

  properties: {},

  onLoad() {
    //和服务器一样,角色的三个状态
    this.State = cc.Enum({
      STATE_STAND: 1,
      STATE_WALK_LEFT: -1,
      STATE_WALK_RIGHT: -1
    });
    this.playerData = null;
    this.currentState = this.State.STATE_STAND;
    this.animDisplay = null;
  },

  //获取角色信息
  getPlayerData() {
    return this.playerData;
  },

  //创建时,初始化角色信息
  initCharacter(data) {
    this.playerData = data;
    let playerAttribute = data.playerAttribute;
    this.animDisplay = this.getComponent(dragonBones.ArmatureDisplay);
    this.node.setPosition(
      cc.v2(playerAttribute.position.x, playerAttribute.position.y)
    );
  },

  //服务器发送过来角色数据,在这里更新
  refreshPlayerData(playerData) {
    let playerAttribute = playerData.playerAttribute;
    this.resetState(playerAttribute.currentState);
    this.node.setPosition(
      cc.v2(playerAttribute.position.x, playerAttribute.position.y)
    );
    this.node.setScale(playerAttribute.scale.x, playerAttribute.scale.y);
  },

  //根据状态切换角色动画,注意,这里切换动画的的骨骼名称、动画名称都是在龙骨编辑器里定义好的
  resetState(state) {
    if (this.currentState === state) {
      return;
    }
    switch (state) {
      case this.State.STATE_STAND:
        this.changeAnimation("SakuyaStand", "SakuyaStand", 0);
        break;
      case this.State.STATE_WALK_LEFT:
        this.changeAnimation("SakuyaWalkFront", "SakuyaWalkFront", 0);

        break;
      case this.State.STATE_WALK_RIGHT:
        this.changeAnimation("SakuyaWalkFront", "SakuyaWalkFront", 0);
        break;
    }
    this.currentState = state;
  },

  //切换动画
  changeAnimation(armatureName, animationName, playTimes, callbacks) {
    if (
      this.animDisplay.armatureName === armatureName &&
      this.animDisplay.animationName === animationName
    ) {
      return;
    }

    if (this.animDisplay.armatureName !== armatureName) {
      this.animDisplay.armatureName = armatureName;
    }

    this.animDisplay.playAnimation(animationName, playTimes);
  },

  //将角色从界面中移除
  deleteCharacter() {
    this.node.removeFromParent(true);
  }
});
然后在编辑器里配置好相关的脚本,并拖拽生成预制体。
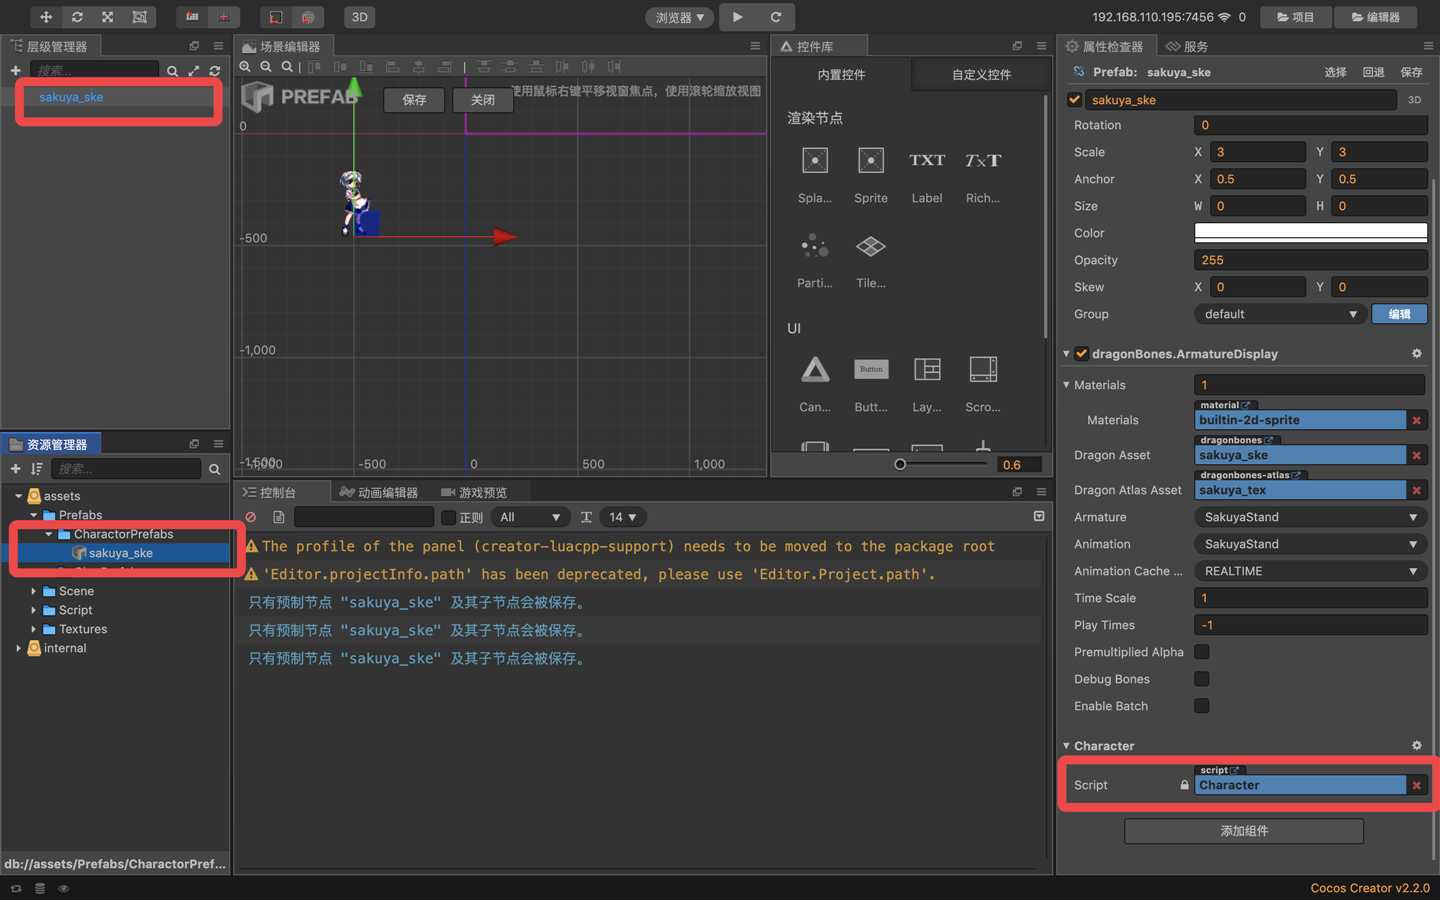
同时,需要创建一个玩家类Script/Player/Player.js,用来处理玩家的操控数据。 并绑定到编辑器的RolePlayer层上。
cc.Class({
  extends: cc.Component,

  properties: {
    //将摇杆绑定到Player,记得在编辑器中将对应模块拖入哦
    joyStick: {
      default: null,
      type: cc.Node
    },
    //角色动画的预制体,记得在编辑器中将对应模块拖入哦
    playerCharacterPrefab: {
      default: null,
      type: cc.Prefab
    }
  },

  // LIFE-CYCLE CALLBACKS:

  onLoad() {
    //获得摇杆
    this.joyStickController = this.joyStick.getComponent("JoyStick");

    //同样在Player里面添加一下状态管理,避免在状态未改变时频繁像服务器发送操作指令
    this.State = cc.Enum({
      STATE_STAND: 1,
      STATE_WALK_LEFT: -1,
      STATE_WALK_RIGHT: -1
    });
    this.currentState = this.State.STATE_STAND;
    this.character = null;
    this.playerData = null;
    this.wsServer = null;
  },

  start() {},

  //服务器通知客户端初始化玩家角色时,通过服务器返回的角色数据,用预制体创建Character角色并放入到场景中,同时发送创建完成消息给服务器
  initCharacter(data, wsServer) {
    this.wsServer = wsServer;
    this.playerData = data;
    this.character = cc.instantiate(this.playerCharacterPrefab);
    this.node.addChild(this.character);
    this.character.getComponent("Character").initCharacter(data);
    this.sendDataToServer("PLAYER_CLIENT_INIT_OVER", null);
  },

  //获取玩家控制的角色信息
  getPlayerData() {
      return this.playerData;
  },

  //这个循环是用来监听摇杆状态的,当摇杆达到操作要求后,改变角色状态并发送到服务器
  update(dt) {
    if (!this.playerData) {
      return;
    }
    let radian = this.joyStickController._radian;
    if (radian != -100) {
      if (-0.5 <= radian && radian <= 0.5) {
        this.changeState(this.State.STATE_WALK_RIGHT);
      } else if (
        (2.5 <= radian && radian <= Math.PI) ||
        (-1 * Math.PI <= radian && radian <= -2.5)
      ) {
        this.changeState(this.State.STATE_WALK_LEFT);
      } else {
        this.changeState(this.State.STATE_STAND);
      }
    } else {
      this.changeState(this.State.STATE_STAND);
    }
  },

  changeState(state) {
    //这里就是状态未改变时不要发消息给服务器
    if(this.currentState === state) {
        return ;
    }
    this.sendDataToServer("PLAYER_OPERATION", {state: state});
  },

  //接收到服务器返回的数据,更新角色状态。玩家操纵的角色在这里单独处理,其他客户端玩家控制的角色,可以直接操作Character来处理。
  refreshPlayerData(playerData) {
    this.character.getComponent("Character").refreshPlayerData(playerData);
    this.currentState = playerData.playerAttribute.state;
  },

  //封装一下向服务器发送消息的函数
  sendDataToServer(dataType, data) {
    if (this.wsServer.readyState === WebSocket.OPEN) {
      let wsServerData = {
        dataType,
        data
      };
      this.wsServer.send(JSON.stringify(wsServerData));
    }
  }
});
接下来创建一个地图相关的脚本,绑定到Canvas上,相当于客户端处理地图数据的脚本。
Script/SceneComponent/MapScript.js
import Tools from ‘../Common/Tools‘;

cc.Class({
  extends: cc.Component,

  properties: {
      //绑定角色控制,记得在编辑器中拖入相关模块
      player: {
          default: null,
          type: cc.Node
      },
      //绑定预制体,用来创建其他客户端玩家角色数据,记得在编辑器中拖入相关模块
      playerCharacterPrefab: {
        default: null,
        type: cc.Prefab
      },
      //绑定角色们该在的图层,记得在编辑器中拖入相关模块
      playerLayer: {
          default: null,
          type: cc.Node
      }
  },

  // LIFE-CYCLE CALLBACKS:

  onLoad() {
    //非玩家控制角色和npc角色数据合集
    this.otherPlayers = [];
    this.npcs = [];
    //地图的websocket
    this.mapWS = new WebSocket(Tools.getTestMapServerUrl());
    this.mapWS.onmessage = event => {
        let dataObject = JSON.parse(event.data);
        let dataType = dataObject.dataType;
        let data = dataObject.data;

        //连接成功
        if(dataType === "CONNECT_SUCCESS") {
            this.openMap();
        }
        //服务器完成创建后,将角色数据发送给客户端,客户端根据数据创建角色
        if(dataType === "PLAYER_SERVER_INIT_OVER") {
            if(this.player) {
                this.player.getComponent("Player").initCharacter(data, this.mapWS);
            }
        }
        //服务器发送回来的游戏过程中的全部角色数据
        if(dataType === "GAME_PLAYER_DATA") {
            let npcs = data.npcs;
            let players = data.players;

            //npc数据处理,以后拓展
            for(let i in npcs) {
                let npc = npcs[i];
            }

            //玩家角色处理
            for(let i in players) {
                let player = players[i];
                //返回的数据中,如果是玩家操控的角色,单独处理
                if(player.playerId === this.player.getComponent("Player").getPlayerData().playerId) {
                    this.player.getComponent("Player").refreshPlayerData(player);
                    continue;
                }
                //遍历其他角色数据,判断是否是新加入的角色,不是的话,刷新角色数据
                let isNew = true;
                for(let k in this.otherPlayers) {
                    let otherPlayer = this.otherPlayers[k];
                    if(player.playerId === otherPlayer.getComponent("Character").getPlayerData().playerId) {
                        //判断已加入角色是否为退出地图状态,是的话删数据色,不是的话更新角色
                        if(!player.playerAttribute.logout) {
                            otherPlayer.getComponent("Character").refreshPlayerData(player);
                        }else {
                            otherPlayer.getComponent("Character").deleteCharacter();
                            this.otherPlayers.splice(k, 1);
                            k--;
                        }
                        isNew = false;
                        break;
                    }
                }
                //如果是新加入角色,是的话,创建角色并添加到地图中
                if(isNew && !player.playerAttribute.logout) {
                    let otherPlayer = cc.instantiate(this.playerCharacterPrefab);
                    this.playerLayer.addChild(otherPlayer);
                    otherPlayer.getComponent("Character").initCharacter(player);
                    this.otherPlayers.push(otherPlayer);
                }
            }
        }
    };
  },

  start() {

  },

  openMap() {
    if (this.mapWS.readyState === WebSocket.OPEN) {
        let mapWSData =  {
            dataType: "PLAYER_SERVER_INIT",
            data: null
        }
        this.mapWS.send(JSON.stringify(mapWSData));
    }
  },

  // update (dt) {},
});
最后,因为更改了一些角色信息,将玩家uuid和角色名放在了服务器生成,那么在本地删除相关代码,暂时屏蔽掉聊天界面的服务。后续,会在多场景切换中,如何保持聊天内容不被清除的开发期,再次启用!
Script/UIComponent/ChatComponent/ChatScript.js
  onLoad() {
    this.chatItems = [];
    this.chatItemNodePool = new cc.NodePool();
  },

  start() {},
启动服务器和客户端,可以看到角色加载完成,尝试在屏幕左边拖动,试试角色是否可以移动。
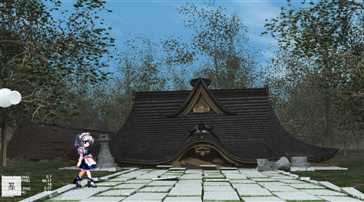
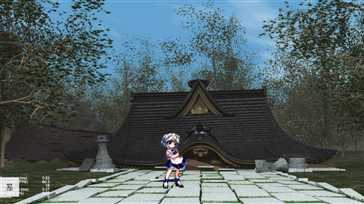
可以看到,向右拖拽摇杆,可以发现女仆长切换成行走姿态并向右移动。松开摇杆,恢复到站立状态。
接下来,保持这个页面,再打开一个新的页面,发现不仅在旧的页面中,出现了新加入的角色,在新的界面中,也可以看到之前已加入的角色。
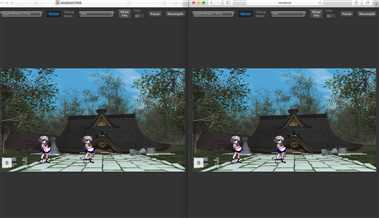
尝试在右边的页面中操作角色,可以发现,左边界面中的角色也跟着同步移动了。
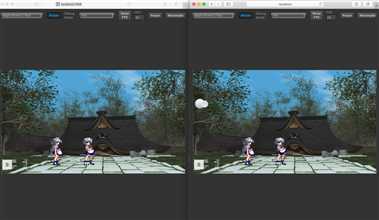
接下来关掉左边的界面,可以在右边界面中看到,左边页面中先打开控制的角色消失了。
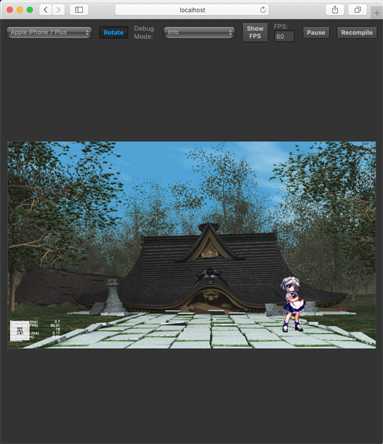
如果成功看见了上面的过程,那么证明服务器和客户端之间的socket连接成功的运行了起来。那么,一个最简单的网游demo便成功完成了开发。
在后续的demo开发计划中,将会创建两个场景,并提供场景切换点,实现多地图的交互。
文章中的代码:
客户端: https://github.com/MythosMa/CocosCreator_ClientTest.git
服务端: https://github.com/MythosMa/NodeJS_GameServerTest.git
一起来学习用nodejs和CocosCreator开发网络游戏吧(六)--- 可操纵的游戏角色(下)
标签:highlight layer 些许 test 维护 front 开始 call ESS
原文地址:https://www.cnblogs.com/mythosma/p/12101556.html