标签:localhost inux 自定义key insert ref for 取数据 rip dex
首先采集官方的模板
#template_db_mysql.conf created by Zabbix for "Template DB MySQL" and Zabbix 4.2
#For OS Linux: You need create .my.cnf in zabbix-agent home directory (/var/lib/zabbix by default)
#For OS Windows: You need add PATH to mysql and mysqladmin and create my.cnf in %WINDIR%\my.cnf,C:\my.cnf,BASEDIR\my.cnf https://dev.mysql.com/doc/refman/5.7/en/option-files.html
#The file must have three strings:
#[client]
#user=zbx_monitor
#password=<password>
#
UserParameter=mysql.ping[*], mysqladmin -h"$1" -P"$2" ping
UserParameter=mysql.get_status_variables[*], mysql -h"$1" -P"$2" -sNX -e "show global status"
UserParameter=mysql.version[*], mysqladmin -s -h"$1" -P"$2" version
UserParameter=mysql.db.discovery[*], mysql -h"$1" -P"$2" -sN -e "show databases"
#UserParameter=mysql.dbsize[*], mysql -h"$1" -P"$2" -sN -e "SELECT SUM(DATA_LENGTH + INDEX_LENGTH) FROM INFORMATION_SCHEMA.TABLES WHERE TABLE_SCHEMA=‘$3‘"
UserParameter=mysql.replication.discovery[*], mysql -h"$1" -P"$2" -sNX -e "show slave status"
UserParameter=mysql.slave_status[*], mysql -h"$1" -P"$2" -sNX -e "show slave status"
UserParameter=mysql.status[*],/server/scripts/mysql.sh $1
这是官方给的文件 放上去感觉没太大用处 除了让默认mysql.status启用 也没有数据流量。
[root@1 zabbix_agentd.conf.d]# cat /server/scripts/mysql.sh
#!/bin/bash
# 用户名
MYSQL_USER=‘root‘
# 密码
MYSQL_PASSWORD=‘Csq143814.‘
# 主机地址/IP
MYSQL_HOST=‘localhost‘
# 端口
MYSQL_PORT=‘3306‘
# 数据连接
MYSQL_CONN="/usr/bin/mysqladmin"
# 参数是否正确
if [ $# -ne "1" ];then
echo "arg error!"
fi
# 获取数据
case $1 in
Uptime)
result=`${MYSQL_CONN} status|cut -f2 -d":"|cut -f1 -d"T"`
echo $result
;;
Com_update)
result=`${MYSQL_CONN} extended-status |grep -w "Com_update"|cut -d"|" -f3`
echo $result
;;
Slow_queries)
result=`${MYSQL_CONN} status |cut -f5 -d":"|cut -f1 -d"O"`
echo $result
;;
Com_select)
result=`${MYSQL_CONN} extended-status |grep -w "Com_select"|cut -d"|" -f3`
echo $result
;;
Com_rollback)
result=`${MYSQL_CONN} extended-status |grep -w "Com_rollback"|cut -d"|" -f3`
echo $result
;;
Questions)
result=`${MYSQL_CONN} status|cut -f4 -d":"|cut -f1 -d"S"`
echo $result
;;
Com_insert)
result=`${MYSQL_CONN} extended-status |grep -w "Com_insert"|cut -d"|" -f3`
echo $result
;;
Com_delete)
result=`${MYSQL_CONN} extended-status |grep -w "Com_delete"|cut -d"|" -f3`
echo $result
;;
Com_commit)
result=`${MYSQL_CONN} extended-status |grep -w "Com_commit"|cut -d"|" -f3`
echo $result
;;
Bytes_sent)
result=`${MYSQL_CONN} extended-status |grep -w "Bytes_sent" |cut -d"|" -f3`
echo $result
;;
Bytes_received)
result=`${MYSQL_CONN} extended-status |grep -w "Bytes_received" |cut -d"|" -f3`
echo $result
;;
Com_begin)
result=`${MYSQL_CONN} extended-status |grep -w "Com_begin"|cut -d"|" -f3`
echo $result
;;
*)
echo "Usage:$0(Uptime|Com_update|Slow_queries|Com_select|Com_rollback|Questions|Com_insert|Com_delete|Com_commit|Bytes_sent|Bytes_received|Com_begin)"
;;
esac
上面是脚本chmod +x mysql.sh
[root@1 zabbix_agentd.conf.d]# vim mysql_status.conf
UserParameter=mysql.status[*],/server/scripts/mysql.sh $1
UserParameter=mysql.ping,/usr/bin/mysqladmin -uroot -pCsq143814. ping|grep alive|wc -l
UserParameter=mysql.version,mysql -V | cut -f6 -d" " | sed ‘s/,//‘
开启/usr/lcoal/zabbix/etc/zabbix_agentd.conf
自定义key的权限 和调用agentd.conf.d的权限
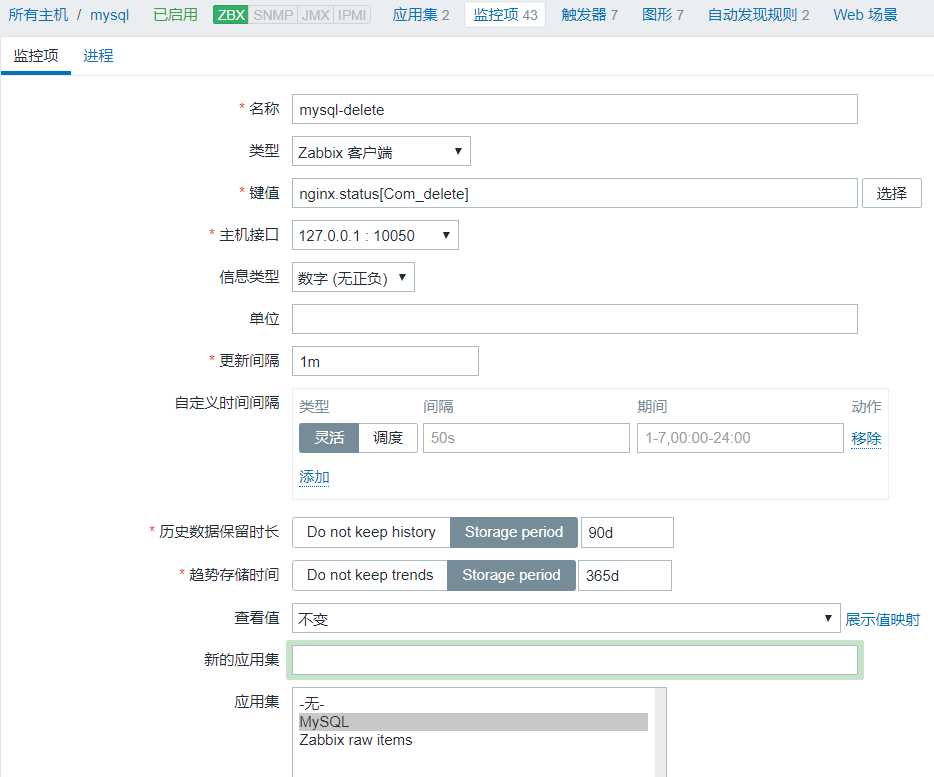
然后刷新的你的items模板

上面delete 本地获取是有数据的 这回又没了


查看图形

具体官方给出的文档 4.4的我暂时用不出来效果 翻了好几天的博客。都没查到
标签:localhost inux 自定义key insert ref for 取数据 rip dex
原文地址:https://www.cnblogs.com/AnyChen/p/12113252.html