标签:android style blog http io color ar 使用 for


CardView也是5.0的新控件,这控件其实就是一个卡片啦,当然我们自己也完全可以定义这样一个卡片,从现在的微博等社App中可以看到各式各样的自定义卡片,所以这个控件意义不是很大。比较是support中的view所以使用在布局里面的时候一下子看不到效果的,比较不好。CardView继承的是FrameLayout,所以摆放内部控件的时候需要注意一下啦。
建议:个人不是很建议用这个控件,因为我们完全可以自定义这样一个控件,这样既能在布局时直接看到效果又比较方便,关键问题是CardView中的很多熟悉不支持5.0之下的版本,虽然有support-v7,但也就是支持个背景和高度啥的,意义不是很大。总之呢,我们还是要看看这个CardView是个什么东西。
参数说明:
<resources>
    <declare-styleable name="CardView">
        <!-- Background color for CardView. -->
        <!-- 背景色 -->
        <attr name="cardBackgroundColor" format="color" />
        <!-- Corner radius for CardView. -->
        <!-- 边缘弧度数 -->
        <attr name="cardCornerRadius" format="dimension" />
        <!-- Elevation for CardView. -->
        <!-- 高度 -->
        <attr name="cardElevation" format="dimension" />
        <!-- Maximum Elevation for CardView. -->
        <!-- 最大高度 -->
        <attr name="cardMaxElevation" format="dimension" />
        <!-- Add padding in API v21+ as well to have the same measurements with previous versions. -->
        <!-- 设置内边距,v21+的版本和之前的版本仍旧具有一样的计算方式 -->
        <attr name="cardUseCompatPadding" format="boolean" />
        <!-- Add padding to CardView on v20 and before to prevent intersections between the Card content and rounded corners. -->
        <!-- 在v20和之前的版本中添加内边距,这个属性是为了防止卡片内容和边角的重叠 -->
        <attr name="cardPreventCornerOverlap" format="boolean" />
        <!-- 下面是卡片边界距离内部的距离-->
        <!-- Inner padding between the edges of the Card and children of the CardView. -->
        <attr name="contentPadding" format="dimension" />
        <!-- Inner padding between the left edge of the Card and children of the CardView. -->
        <attr name="contentPaddingLeft" format="dimension" />
        <!-- Inner padding between the right edge of the Card and children of the CardView. -->
        <attr name="contentPaddingRight" format="dimension" />
        <!-- Inner padding between the top edge of the Card and children of the CardView. -->
        <attr name="contentPaddingTop" format="dimension" />
        <!-- Inner padding between the bottom edge of the Card and children of the CardView. -->
        <attr name="contentPaddingBottom" format="dimension" />
    </declare-styleable>
</resources>
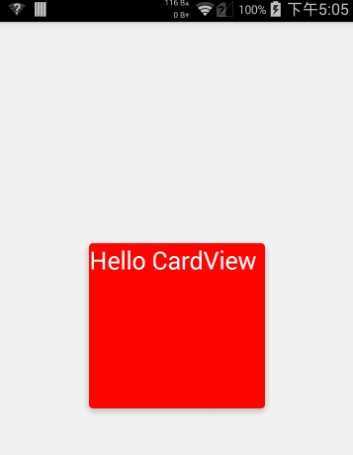
看完了参数,那么我们来看看布局文件中的用法。
<!-- A CardView that contains a TextView -->

<android.support.v7.widget.CardView xmlns:android="http://schemas.android.com/apk/res/android"
    xmlns:tools="http://schemas.android.com/tools"
    xmlns:app="http://schemas.android.com/apk/res-auto"
    android:id="@+id/card_view"
    android:layout_width="200dp"
    android:layout_height="200dp"
    android:layout_gravity="center"
    app:cardCornerRadius="4dp"
    app:cardBackgroundColor="#ff0000"
    app:cardElevation="5dp"
    app:cardMaxElevation="10dp"
    app:cardUseCompatPadding="true"
    app:cardPreventCornerOverlap="true">

    <TextView
        android:id="@+id/info_text"
        android:layout_width="match_parent"
        android:layout_height="match_parent"
        android:layout_gravity="center"
        android:textSize="25sp"
        android:textColor="#ffffff"
        android:text="Hello CardView"/>

</android.support.v7.widget.CardView>
这样我们就定义好了一个CardView了。本来这篇文章不需要给源码的,但因为有人的support-v7包中这个jar有点问题(比如我),所以还是放一个代码吧。
源码下载:http://download.csdn.net/detail/shark0017/8108835
参考自:
http://blog.csdn.net/a396901990/article/details/40187769
标签:android style blog http io color ar 使用 for
原文地址:http://www.cnblogs.com/tianzhijiexian/p/4067308.html