标签:configure users option print 上海 png type java size

pom.xml中引入dubbo-starter依赖,在application.properties配置属性,使用@Service【暴露服务】使用@Reference【引用服务】,选取的是application.properties+部分注解的方式来完成。
此模块目录结构如下:
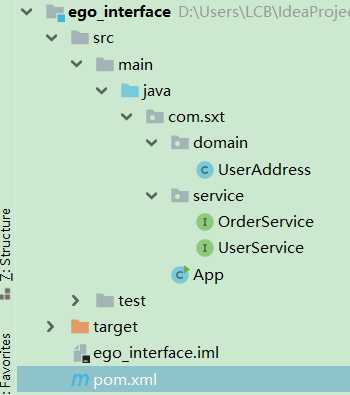
1、实体类UserAddress
package com.sxt.domain;
import java.io.Serializable;

//实体类 必须实现序列化
public class UserAddress implements Serializable {

    private Integer id;
    private String address;
    private String userId;

    public UserAddress() {
    }
    public UserAddress(Integer id, String address, String userId) {
        this.id = id;
        this.address = address;
        this.userId = userId;
    }

    public Integer getId() {
        return id;
    }
    public void setId(Integer id) {
        this.id = id;
    }
    public String getAddress() {
        return address;
    }
    public void setAddress(String address) {
        this.address = address;
    }
    public String getUserId() {
        return userId;
    }
    public void setUserId(String userId) {
        this.userId = userId;
    }
}
2、提供者接口UserService
package com.sxt.service;
import com.sxt.domain.UserAddress;
import java.util.List;
//提供者接口
public interface UserService {

    //根据用户id查询用户地址
    public List<UserAddress> getUserAddressByUserId(String userId);
}
3、消费者接口OrderService
package com.sxt.service;
import com.sxt.domain.UserAddress;
import java.util.List;
//消费者接口
public interface OrderService{

    //初始化订单
    public List<UserAddress> initOrder(String userId);
}
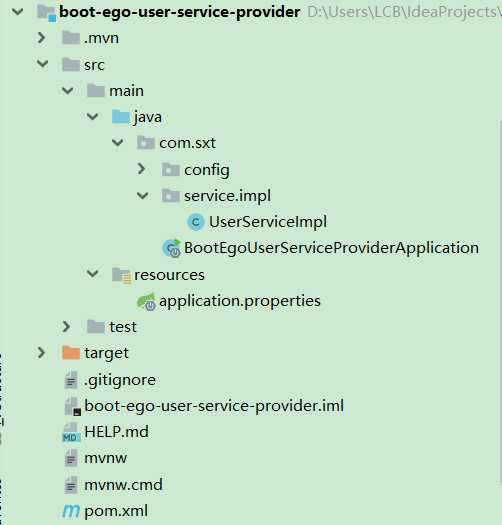
此模块目录结构如下(config是第二种方式用的,此处请先忽略):
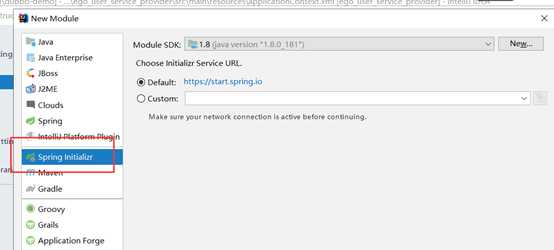
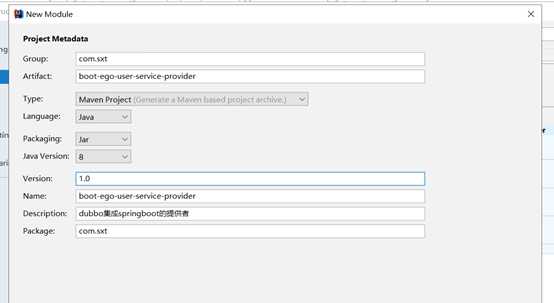

添部分关键依赖(其余自动生成):

    <!--加入对ego_interface依赖-->
  <!--这个是上面第二步创建的你所要使用的接口类的依赖-->

<dependency>
    <groupId>com.sxt</groupId>
    <artifactId>ego_interface</artifactId>
    <version>1.0-SNAPSHOT</version>
</dependency>

        <!-- Dubbo Spring Boot Starter -->
<dependency>
     <groupId>org.apache.dubbo</groupId>
     <artifactId>dubbo-spring-boot-starter</artifactId>
     <version>${dubbo.version}</version>
</dependency>
        <!-- 使用zk 做注册中心,Dubbo 需要的依赖 -->
<dependency>
      <groupId>org.apache.dubbo</groupId>
      <artifactId>dubbo-dependencies-zookeeper</artifactId>
      <version>${dubbo.version}</version>
      <type>pom</type>
            <exclusions>
                <exclusion>
                    <groupId>org.slf4j</groupId>
                    <artifactId>slf4j-log4j12</artifactId>
                </exclusion>
            </exclusions>
</dependency>
1、编写UserServiceImpl
package com.sxt.service.impl;

import com.sxt.domain.UserAddress;
import com.sxt.service.UserService;
import org.apache.dubbo.config.annotation.Service;
import java.util.ArrayList;
import java.util.List;

//此处service是apache.dubbo的 代替了创建和暴露对象
@Service
public class UserServiceImpl implements UserService {

    public static List<UserAddress> address=new ArrayList<>();

    static {
        address.add(new UserAddress(1, "天安门广场", "bj"));
        address.add(new UserAddress(2, "上海迪士尼", "sh"));
    }


    @Override
    public List<UserAddress> getUserAddressByUserId(String userId) {
        return address;
    }
}
2、修改application.properties
#application-name 本模块名字
dubbo.application.name=boot-ego-user-service-provider
#registry 指定注册中心地址(www.lcbxiuxiu.tech是我阿里云地址 请换成你自己的服务器地址)
dubbo.registry.address=zookeeper://www.lcbxiuxiu.tech:2181
#dubbo protocol 指定dubbo协议 将服务暴露在20880端口
dubbo.protocol.name=dubbo
dubbo.protocol.port=20880
3、修改启动类并启动
@SpringBootApplication
//此注解为了自动开启dubbo
@EnableDubbo
public class BootEgoUserServiceProviderApplication {
  public static void main(String[] args) {
        SpringApplication.run(BootEgoUserServiceProviderApplication.class, args);
    }
}
4、启动成功后画面在远程dubbo访问

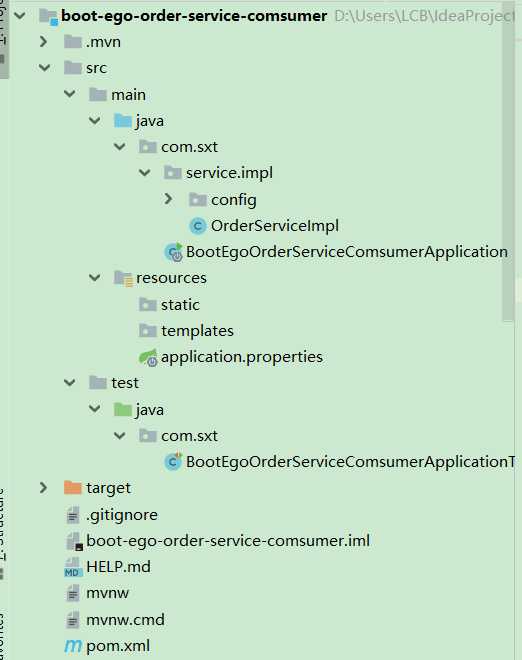
此模块目录结构如下(config是第二种方式用的,此处请先忽略):
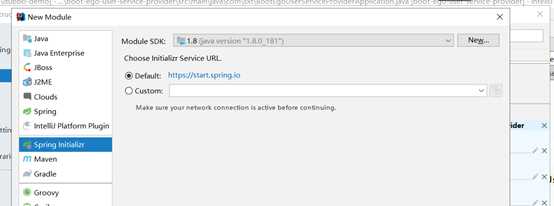
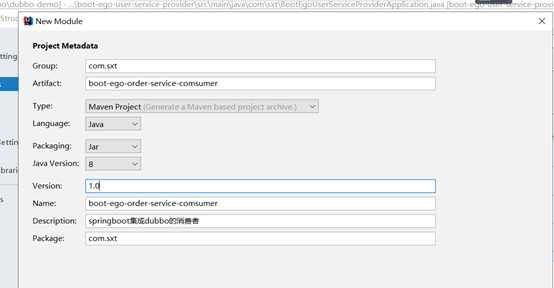
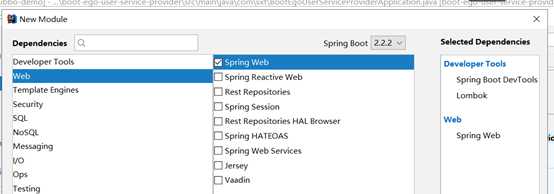

1、修改pom.xml
<?xml version="1.0" encoding="UTF-8"?>
<project xmlns="http://maven.apache.org/POM/4.0.0" xmlns:xsi="http://www.w3.org/2001/XMLSchema-instance"
         xsi:schemaLocation="http://maven.apache.org/POM/4.0.0 https://maven.apache.org/xsd/maven-4.0.0.xsd">
    <modelVersion>4.0.0</modelVersion>
    <parent>
        <groupId>org.springframework.boot</groupId>
        <artifactId>spring-boot-starter-parent</artifactId>
        <version>2.2.2.RELEASE</version>
        <relativePath/> <!-- lookup parent from repository -->
    </parent>
    <groupId>com.sxt</groupId>
    <artifactId>boot-ego-order-service-comsumer</artifactId>
    <version>1.0</version>
    <name>boot-ego-order-service-comsumer</name>
    <description>springboot集成dubbo的消费者</description>

    <properties>
        <java.version>1.8</java.version>
        <dubbo.version>2.7.3</dubbo.version>
    </properties>

    <dependencies>
        <dependency>
            <groupId>org.springframework.boot</groupId>
            <artifactId>spring-boot-starter-web</artifactId>
        </dependency>

        <dependency>
            <groupId>org.springframework.boot</groupId>
            <artifactId>spring-boot-devtools</artifactId>
            <scope>runtime</scope>
            <optional>true</optional>
        </dependency>
        <dependency>
            <groupId>org.projectlombok</groupId>
            <artifactId>lombok</artifactId>
            <optional>true</optional>
        </dependency>
        <dependency>
            <groupId>org.springframework.boot</groupId>
            <artifactId>spring-boot-starter-test</artifactId>
            <scope>test</scope>
            <exclusions>
                <exclusion>
                    <groupId>org.junit.vintage</groupId>
                    <artifactId>junit-vintage-engine</artifactId>
                </exclusion>
            </exclusions>
        </dependency>
        <!--加入对ego_interface依赖-->
        <dependency>
            <groupId>com.sxt</groupId>
            <artifactId>ego_interface</artifactId>
            <version>1.0-SNAPSHOT</version>
            <scope>compile</scope>
        </dependency>

        <!-- Dubbo Spring Boot Starter -->
        <dependency>
            <groupId>org.apache.dubbo</groupId>
            <artifactId>dubbo-spring-boot-starter</artifactId>
            <version>${dubbo.version}</version>
        </dependency>
        <!-- 使用zk 做注册中心,Dubbo 需要的依赖 -->
        <dependency>
            <groupId>org.apache.dubbo</groupId>
            <artifactId>dubbo-dependencies-zookeeper</artifactId>
            <version>${dubbo.version}</version>
            <type>pom</type>
            <exclusions>
                <exclusion>
                    <groupId>org.slf4j</groupId>
                    <artifactId>slf4j-log4j12</artifactId>
                </exclusion>
            </exclusions>
        </dependency>

    </dependencies>

    <build>
        <plugins>
            <plugin>
                <groupId>org.springframework.boot</groupId>
                <artifactId>spring-boot-maven-plugin</artifactId>
            </plugin>
        </plugins>
    </build>

</project>
2、创建OrderServiceImpl
package com.sxt.service.impl;

import com.sxt.domain.UserAddress;
import com.sxt.service.OrderService;
import com.sxt.service.UserService;
import org.springframework.stereotype.Service;
import org.apache.dubbo.config.annotation.Reference;

import java.util.List;

@Service  //此处是spring的 帮你自动创建对象与注入
public class OrderServiceImpl implements OrderService {

    @Reference //此处是apache.dubbo 代替引入远程对象
    private UserService userService;

    public void setUserService(UserService userService) {
        this.userService = userService;
    }

    @Override
    public List<UserAddress> initOrder(String userId) {
        return this.userService.getUserAddressByUserId(userId);
    }

}
3、修改启动类并启动
package com.sxt;

import org.apache.dubbo.config.spring.context.annotation.EnableDubbo;
import org.springframework.boot.SpringApplication;
import org.springframework.boot.autoconfigure.SpringBootApplication;

@SpringBootApplication
@EnableDubbo
public class BootEgoOrderServiceComsumerApplication {

    public static void main(String[] args) {
        SpringApplication.run(BootEgoOrderServiceComsumerApplication.class, args);
    }
}
4、在测试类中测试
package com.sxt;

import com.sxt.domain.UserAddress;
import com.sxt.service.OrderService;
import org.junit.jupiter.api.Test;
import org.springframework.beans.factory.annotation.Autowired;
import org.springframework.boot.test.context.SpringBootTest;

import java.io.IOException;
import java.util.List;

@SpringBootTest
class BootEgoOrderServiceComsumerApplicationTests {

    @Autowired
    OrderService orderService;

    @Test
        void contextLoads() throws IOException {
        List<UserAddress> userAddresses = orderService.initOrder("sxt");
        for (UserAddress userAddress : userAddresses) {
            System.out.println(userAddress.getId()+" "+userAddress.getAddress());
        }
        //想在dubbo首页显示消费者 阻止程序停止
        System.in.read();
    }

}
5、修改application.properties后启动上面的测试类即可
#application.name
dubbo.application.name=boot-ego-order-service-comsumer
#address
dubbo.registry.address=zookeeper://自己的服务器地址:2181
小结第一种方式:
1.提供者只需要在application.properties中声明:模块名字,注册中心地址,连接规则(使用什么协议,暴露什么端口)。其余的由service实现类中的@service(apache.dubbo)注解帮忙创建和暴露了对象
2.消费者只需要在application.properties中声明:模块名字,注册中心地址。其余由service实现类中的@service(spring的)注解帮忙创建和注入对象,@Reference(apache.dubbo)帮忙引入远程服务,在测试类中就可以使用@Autowired装配对象使用其方法
标签:configure users option print 上海 png type java size
原文地址:https://www.cnblogs.com/lcbxiuxiu/p/12202627.html