标签:mes width expr nta started http get art nal splay
来自官方文档:https://spring.io/guides/gs/serving-web-content/
This guide walks you through the process of creating a “Hello, World” web site with Spring.


You will build an application that has a static home page and that will also accept HTTP GET requests at: http://localhost:8080/greeting.
It will respond with a web page that displays HTML. The body of the HTML will contain a greeting: “Hello, World!”
You can customize the greeting with an optional name parameter in the query string. The URL might then be http://localhost:8080/greeting?name=User.
The name parameter value overrides the default value of World and is reflected in the response by the content changing to “Hello, User!”
For all Spring applications, you should start with the Spring Initializr. The Initializr offers a fast way to pull in all the dependencies you need for an application and does a lot of the setup for you. This example needs the Spring Web, Thymeleaf, and Spring Boot DevTools dependencies. The following image shows the Initializr set up for this sample project:

In Spring’s approach to building web sites, HTTP requests are handled by a controller. You can easily identify the controller by the @Controller annotation. In the following example, GreetingController handles GET requests for /greeting by returning the name of a View(in this case, greeting). A View is responsible for rendering the HTML content. The following listing (from src/main/java/com/example/servingwebcontent/GreetingController.java) shows the controller:
package com.example.servingwebcontent;
import org.springframework.stereotype.Controller;
import org.springframework.ui.Model;
import org.springframework.web.bind.annotation.GetMapping;
import org.springframework.web.bind.annotation.RequestParam;
@Controller
public class GreetingController {
    @GetMapping("/greeting")
    public  String greeting(@RequestParam(name = "name",required=false,defaulValue="World") String name, Model model){
        model.addAttribute("name",name);
        return "greeting";
    }
}
This controller is concise and simple, but there is plenty going on. We break it down step by step.
The @GetMapping annotation ensures that HTTP GET requests to /greeting are mapped to the greeting() method.
@RequestParam binds the value of the query string parameter name into the name parameter of the greeting() method. This query string parameter is not required. If it is absent in the request, the defaultValue of World is used. The value of the name parameter is added to a Model object, ultimately making it accessible to the view template.
The implementation of the method body relies on a view technology (in this case, Thymeleaf) to perform server-side rendering of the HTML. Thymeleaf parses the greeting.html template and evaluates the th:text expression to render the value of the ${name} parameter that was set in the controller.The following listing (from src/main/resources/templates/greeting.html) shows the greeting.html template:
<!DOCTYPE HTML>
<html xmlns:th="http://www.thymeleaf.org">
<head>
    <title>Getting Started: Serving Web Content</title>
    <meta http-equiv="Content-Type" content="text/html; charset=UTF-8" />
</head>
<body>
<p th:text="‘Hello, ‘ + ${name} + ‘!‘" />
</body>
</html>
A common feature of developing web applications is coding a change, restarting your application, and refreshing the browser to view the change. This entire process can eat up a lot of time. To speed up this refresh cycle, Spring Boot offers with a handy module known as spring-boot-devtools. Spring Boot Devtools:
Enables hot swapping.
Switches template engines to disable caching.
Enables LiveReload to automatically refresh the browser.
Other reasonable defaults based on development instead of production.
The Spring Initializr creates an application class for you. In this case, you need not further modify the class provided by the Spring Initializr. The following listing (from src/main/java/com/example/servingwebcontent/ServingWebContentApplication.java) shows the application class:
package com.example.servingwebcontent;

import org.springframework.boot.SpringApplication;
import org.springframework.boot.autoconfigure.SpringBootApplication;

@SpringBootApplication
public class ServingWebContentApplication {

    public static void main(String[] args) {
        SpringApplication.run(ServingWebContentApplication.class, args);
    }

}
@SpringBootApplication is a convenience annotation that adds all of the following:
@Configuration: Tags the class as a source of bean definitions for the application context.
@EnableAutoConfiguration: Tells Spring Boot to start adding beans based on classpath settings, other beans, and various property settings. For example, if spring-webmvc is on the classpath, this annotation flags the application as a web application and activates key behaviors, such as setting up a DispatcherServlet.
@ComponentScan: Tells Spring to look for other components, configurations, and services in the com/example package, letting it find the controllers.
The main() method uses Spring Boot’s SpringApplication.run() method to launch an application. Did you notice that there was not a single line of XML? There is no web.xml file, either. This web application is 100% pure Java and you did not have to deal with configuring any plumbing or infrastructure.
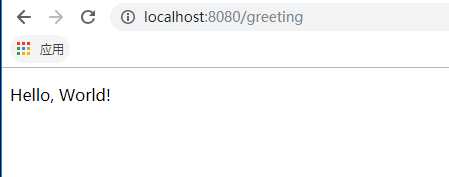
Now that the web site is running, visit http://localhost:8080/greeting, where you should see “Hello, World!”
Provide a name query string parameter by visiting http://localhost:8080/greeting?name=User. Notice how the message changes from “Hello, World!” to “Hello, User!”:
This change demonstrates that the @RequestParam arrangement in GreetingController is working as expected. The name parameter has been given a default value of World, but it can be explicitly overridden through the query string.
Spring Boot——Serving Web Content with Spring MVC
标签:mes width expr nta started http get art nal splay
原文地址:https://www.cnblogs.com/JasonPeng1/p/12234226.html