标签:href ogg png sch view col logger http cti
1. 第一步
导入pom.xml依赖
<!--PageHelper模版-->
 <!--PageHelper模版-->
        <dependency>
            <groupId>com.github.pagehelper</groupId>
            <artifactId>pagehelper-spring-boot-starter</artifactId>
            <version>1.2.5</version>
        </dependency>
2.第二步
对application.properties进行配置(为了不让缓存,在开发时可以关闭缓存:spring.thymeleaf.cache=false)
#设置分页
#分页插件
pagehelper.helper-dialect=mysql
pagehelper.params=count=countSql
pagehelper.reasonable=true
pagehelper.support-methods-arguments=true
3.第三步
在controller层使用分页插件,见代码!
@Controller
public class ProviderController {

    Logger logger = LoggerFactory.getLogger(getClass());

    @Autowired
    ProviderDao dao;

    @Autowired
    ProviderMapper providerMapper;


    @GetMapping("/providers")
    public String list(Map<String ,Object> map, Provider provider, @RequestParam(defaultValue = "1",value = "pageNum")Integer pageNum){
        //分页为八条一页
        PageHelper.startPage(pageNum,8);

        //查询数据库获取所有供应商
        List<Provider> providers = providerMapper.getProviders(provider);

        PageInfo<Provider> pageInfo = new PageInfo<Provider>(providers);

        map.put("pageInfo",pageInfo);

        return "provider/list";
    }
  }
4.前端使用thymeleaf模板进行数据解析(*.html文件)
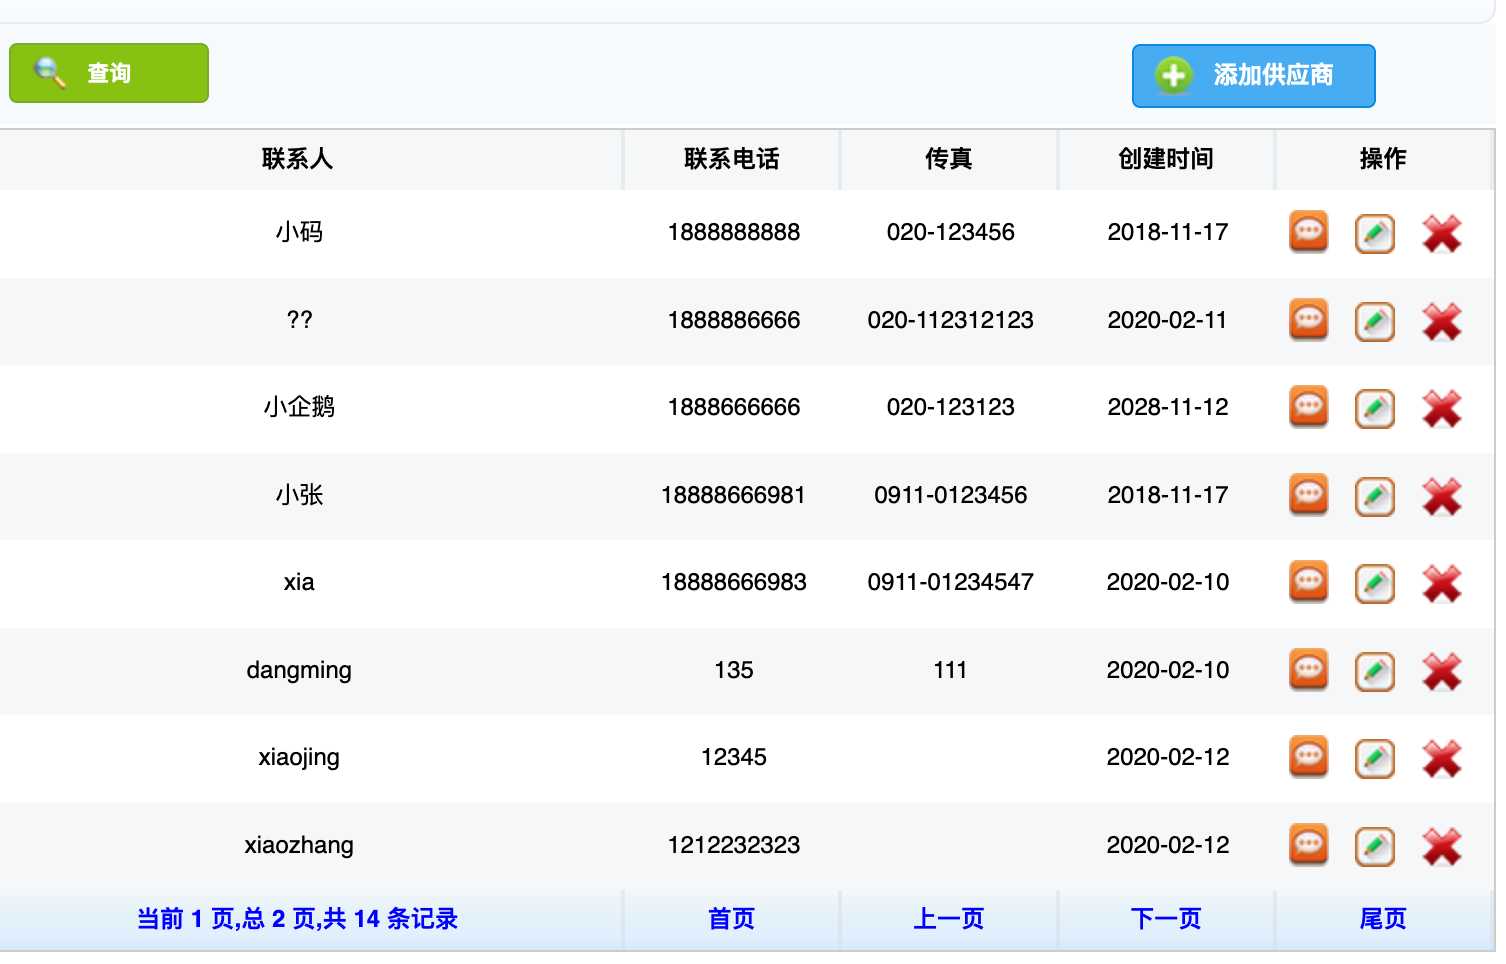
<table class="providerTable" cellpadding="0" cellspacing="0" > <tr class="firstTr"> <th width="10%">供应商编码</th> <th width="20%">供应商名称</th> <th width="10%">联系人</th> <th width="10%">联系电话</th> <th width="10%">传真</th> <th width="10%">创建时间</th> <th width="30%">操作</th> </tr> <tr th:each="p: ${pageInfo.list}"> <td th:text="${p.pid}">PR</td> <td th:text="${p.providerName}">001</td> <td th:text="${p.people}"></td> <td th:text="${p.phone}">15918230478</td> <td th:text="${p.fax}">15918230478</td> <td th:text="${#dates.format(p.createDate,‘yyyy-MM-dd‘)}">2015-11-12</td> <td> <a th:href="@{/provider/}+${p.pid}" href="view.html"><img th:src="@{/img/read.png}" alt="查看" title="查看"/></a> <a th:href="@{/provider/}+${p.pid}+‘?type=update‘" href="update.html"><img th:src="@{/img/xiugai.png}" alt="修改" title="修改"/></a> <!-- 绑定属性 --> <a th:attr="del_uri=@{/provider/}+${p.pid}" href="#" class="delete"><img th:src="@{/img/schu.png}" alt="删除" title="删除"/></a> </td> </tr> <tr class="firstTr" style="color: blue"> <th width="10%"> ------=--</th> <th width="20%"> ----=-----</th> <th width="30%"><p style="color: blue">当前 <span th:text="${pageInfo.pageNum}"></span> 页,总 <span th:text="${pageInfo.pages}"></span> 页,共 <span th:text="${pageInfo.total}"></span> 条记录</p></th> <th width="10%"><a style="color: blue" th:href="@{/providers}">首页</a></th> <th width="10%"><a style="color: blue" th:href="@{/providers(pageNum=${pageInfo.hasPreviousPage}?${pageInfo.prePage}:1)}">上一页</a></th> <th width="10%"><a style="color: blue" th:href="@{/providers(pageNum=${pageInfo.hasNextPage}?${pageInfo.nextPage}:${pageInfo.pages})}">下一页</a></th> <th width="30%"><a style="color: blue" th:href="@{/providers(pageNum=${pageInfo.pages})}">尾页</a></th> </tr> </table>
5.配置好以上文件就能进行测试了

测试结束,OK
标签:href ogg png sch view col logger http cti
原文地址:https://www.cnblogs.com/pengtaotao/p/12301061.html