2.sudo vim ./conf/example.conf
在 example.conf 里写入以下内容:
1.#example.conf: A single-node Flume configuration
2.# Name the components on this agent
3.a1.sources = r1
4.a1.sinks = k1
5.a1.channels = c1
6.# Describe/configure the source
7.a1.sources.r1.type = netcat
8.a1.sources.r1.bind = localhost
9.a1.sources.r1.port = 44444
10.#同上,记住该端口名
11.# Describe the sink
12.a1.sinks.k1.type = logger
13.# Use a channel which buffers events in memory
14.a1.channels.c1.type = memory
15.a1.channels.c1.capacity = 1000
16.a1.channels.c1.transactionCapacity = 100
17.# Bind the source and sink to the channel
18.a1.sources.r1.channels = c1
19.a1.sinks.k1.channel = c1
⑵启动 flume agent (即打开日志控制台):
1./usr/local/flume/bin/flume-ng agent --conf ./conf
--conf-file ./conf/example.conf --name a1
-Dflume.root.logger=INFO,console
再打开一个终端,输入命令:telnet localhost 44444
1.telnet localhost 44444
2.#前面编辑 conf 文件的端口名
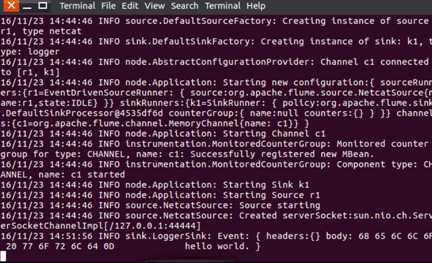
第一个终端的日志控制台显示:

netcatsource 运行成功!
