标签:clipboard ber lease www vim ODB 下载安装 bpa seve
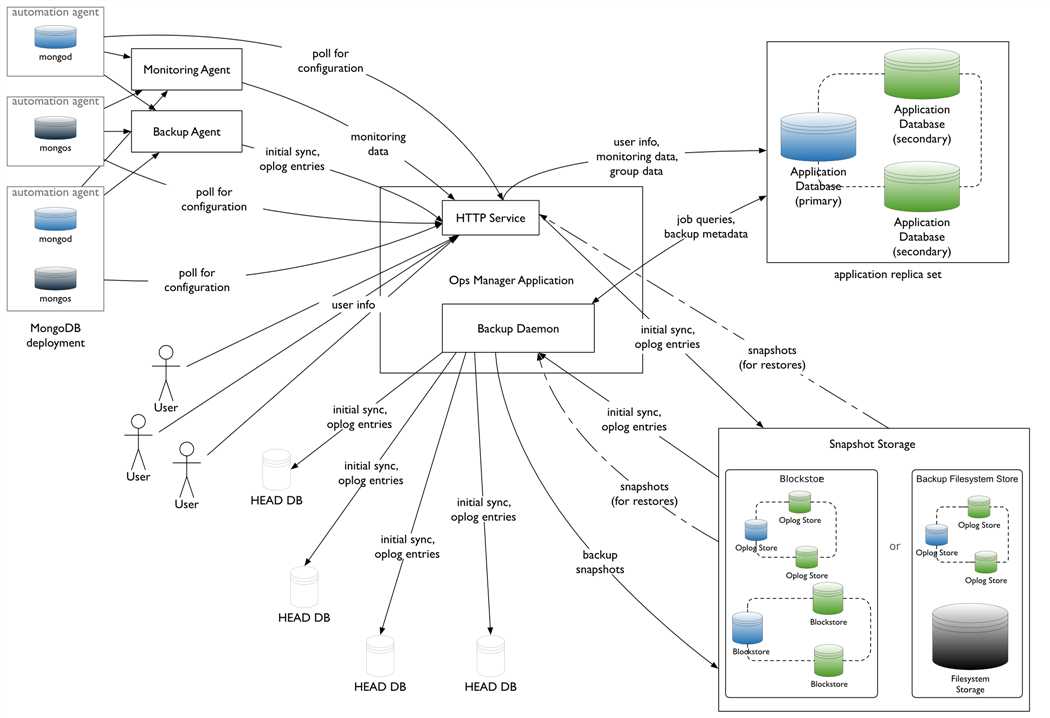
| node1 |
Ops Manager,mongodb,agent |
| node2 | mongodb,agent |
| node3 | mongodb,agent |
参考文档
sysctl -w vm.zone_reclaim_mode=0
yum install -y ntp
/etc/init.d/ntpd start
vim /etc/fstab
/dev/mapper/VolGroup-lv_data /data                       ext4    defaults,noatime,nodiratime        1 1
ulimit -a

修改/etc/security/limits.conf
    mongod soft nproc 65535
    mongod hard nproc 65535
通过启动脚本可以在每次启动时关闭THP
vim /etc/init.d/disable-transparent-hugepages
#以下为脚本内容

#!/bin/bash
### BEGIN INIT INFO
# Provides:          disable-transparent-hugepages
# Required-Start:    $local_fs
# Required-Stop:
# X-Start-Before:    mongod mongodb-mms-automation-agent
# Default-Start:     2 3 4 5
# Default-Stop:      0 1 6
# Short-Description: Disable Linux transparent huge pages
# Description:       Disable Linux transparent huge pages, to improve
#                    database performance.
### END INIT INFO

case $1 in
  start)
    if [ -d /sys/kernel/mm/transparent_hugepage ]; then
      thp_path=/sys/kernel/mm/transparent_hugepage
    elif [ -d /sys/kernel/mm/redhat_transparent_hugepage ]; then
      thp_path=/sys/kernel/mm/redhat_transparent_hugepage
    else
      return 0
    fi

    echo ‘never‘ > ${thp_path}/enabled
    echo ‘never‘ > ${thp_path}/defrag

    re=‘^[0-1]+$‘
    if [[ $(cat ${thp_path}/khugepaged/defrag) =~ $re ]]
    then
      # RHEL 7
      echo 0  > ${thp_path}/khugepaged/defrag
    else
      # RHEL 6
      echo ‘no‘ > ${thp_path}/khugepaged/defrag
    fi

    unset re
    unset thp_path
    ;;
esac
执行脚本
chmod +x /etc/init.d/disable-transparent-hugepages
chkconfig --add disable-transparent-hugepages
/etc/init.d/disable-transparent-hugepages start
检查是否生效
cat /sys/kernel/mm/transparent_hugepage/enabled
cat /sys/kernel/mm/transparent_hugepage/defrag

#有以下输出表示正确
always madvise [never]
Ops Manager需要先安装mongodb,创建其数据库副本集后才能部署安装。
在每台节点上执行以下命令创建官方3.4版本的repo文件
官方的yum源比较慢,推荐使用阿里云yum源
#官方repo
cat > /etc/yum.repos.d/mongodb-org-3.4.repo << EOF
[mongodb-org-3.4]
name=MongoDB Repository
baseurl=https://repo.mongodb.org/yum/redhat/\$releasever/mongodb-org/3.4/x86_64/
gpgcheck=1
enabled=1
gpgkey=https://www.mongodb.org/static/pgp/server-3.4.asc
EOF


# 阿里云repo
cat > /etc/yum.repos.d/mongodb-org-3.4.repo << EOF
[mongodb-org-3.4]
name=MongoDB Repository
#baseurl=https://repo.mongodb.org/yum/redhat/$releasever/mongodb-org/3.4/x86_64/
baseurl=https://mirrors.aliyun.com/mongodb/yum/redhat/\$releasever/mongodb-org/3.4/x86_64/
gpgcheck=0
enabled=1
gpgkey=https://www.mongodb.org/static/pgp/server-3.4.asc
EOF
在每台节点上执行以下步骤
yum install -y mongodb-org
chkconfig mongod on
修改配置
vim /etc/mongod.conf
#修改为数据分区,需创建该目录,并确保mongod用户可读写
# Where and how to store data.
storage:
  dbPath: /data/mongo
  journal:
    enabled: true

#默认监听本地lo,注释掉
# network interfaces
net:
  port: 27017
#  bindIp: 127.0.0.1  # Listen to local interface only, comment to listen on all interfaces.
启动服务
service mongod start
参考 https://docs.mongodb.com/manual/tutorial/deploy-replica-set/
通过修改配置文件的方式创建Ops Manager所需副本集。
注:也可以通过命令行方式指定副本集启动。修改配置文件的方式便于通过init script管理。
在所有节点上修改配置
vim mongod.conf
#添加以下内容
replication:
  replSetName: rs_ops_manager

#重启生效
service mongod restart
在任一节点上执行mongo shell,添加副本集节点,此处使用node1节点
mongo --host localhost --port 27017

#Initiate the replica set
rs.initiate()
#display the replica set configuration object
rs.conf()
#Add the remaining members to the replica set
rs.add("node2_fqdn")
rs.add("node3_fqdn")
#Check the status of the replica set
rs.status()
#下载安装
wget -c https://downloads.mongodb.com/on-prem-mms/rpm/mongodb-mms-3.4.2.389-1.x86_64.rpm
rpm -ivh mongodb-mms-<version>.x86_64.rpm
Configure the Ops Manager connection to the Ops Manager Application Database
vim /opt/mongodb/mms/conf/conf-mms.properties
#设置mongo.mongoUri
mongo.mongoUri=mongodb://node1:27017,node2:27017,node3:27017/?replicaSet=rs_ops_manager
/etc/init.d/mongodb-mms start 启动

Open the Ops Manager home page and register the first user.
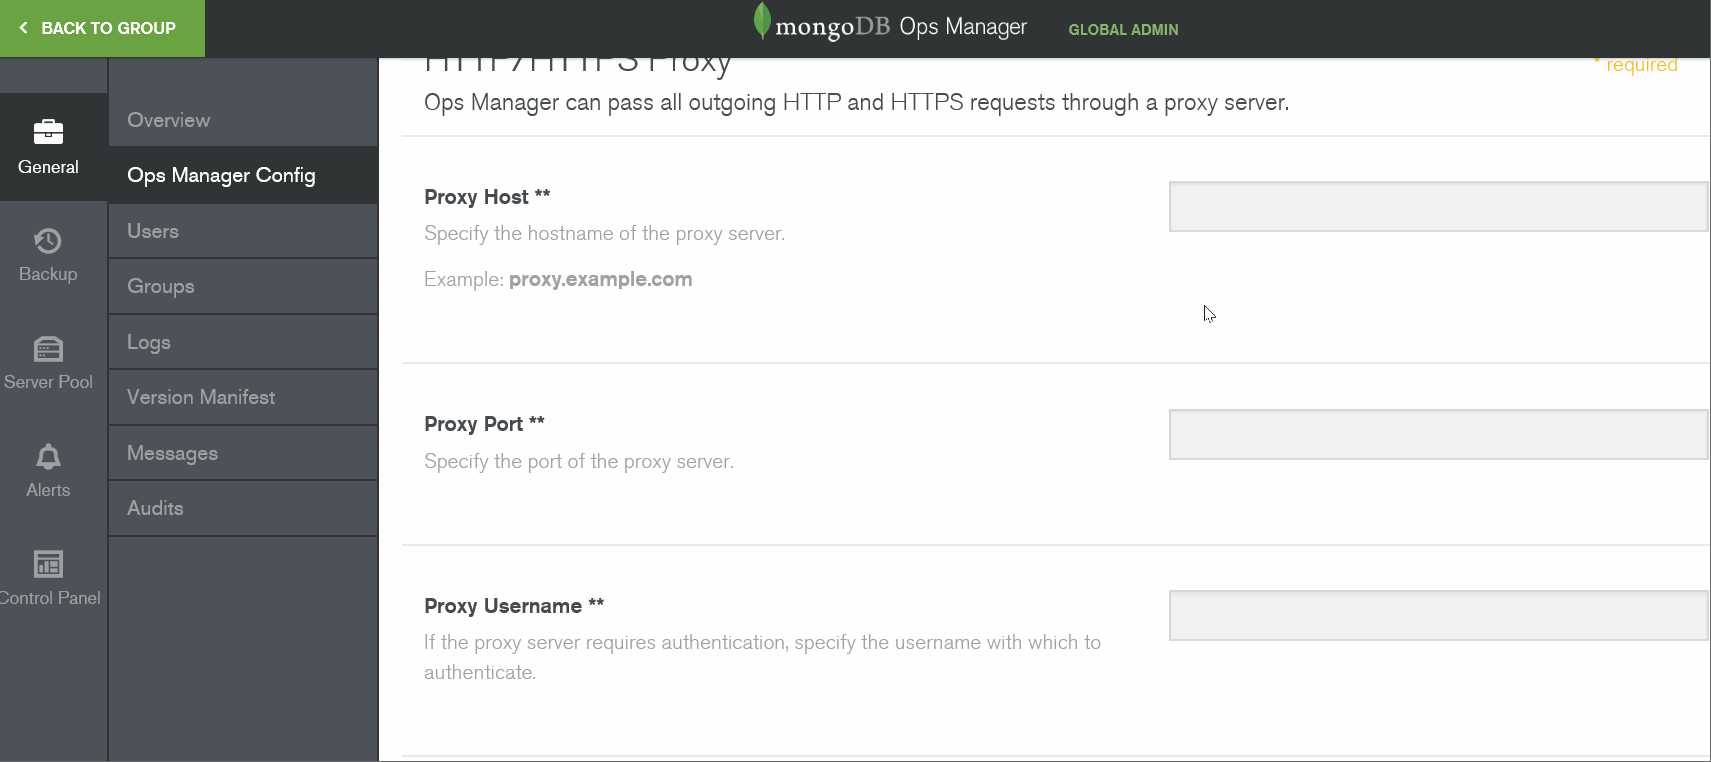
wget -c http://fastdl.mongodb.org/linux/mongodb-linux-x86_64-rhel62-3.4.2.tgz
tar xzf mongodb-linux-x86_64-rhel62-3.4.2.tgz -C /opt/mongodb/mms/mongodb-releases/
chown -R mongodb-mms.mongodb-mms /opt/mongodb/mms/mongodb-releases/mongodb-linux-x86_64-rhel62-3.4.2/
chown -R mongodb-mms:mongodb-mms /opt/mongodb/mms/mongodb-releases chmod -R 640 /opt/mongodb/mms/mongodb-releasesDownload the version manifest for Ops Manager.
Paste the contents the version manifest into the Ops Manager application on each Ops Manager server.
For each group, specify which versions are available for download by Automation Agents.
Review and approve your changes.
Ops Manager displays your proposed changes.
If you are satisfied, click Confirm & Deploy.
Otherwise, click Cancel and you can make additional changes.
参考https://docs.opsmanager.mongodb.com/current/tutorial/install-automation-agent-with-rpm-package/
在node1,node2,node3上安装mongodb-mms-automation-agent-manager
curl -OL http://172.17.20.127:8080/download/agent/automation/mongodb-mms-automation-agent-manager-latest.x86_64.rpm
rpm -U mongodb-mms-automation-agent-manager-latest.x86_64.rpm

按上图ID修改
vim /etc/mongodb-mms/automation-agent.config
#get id and key from Group Settings mmsGroupId=<Group ID> mmsApiKey=<agent API key> mmsBaseUrl=<application URL>
#启动agent/etc/init.d/mongodb-mms-automation-agentstart
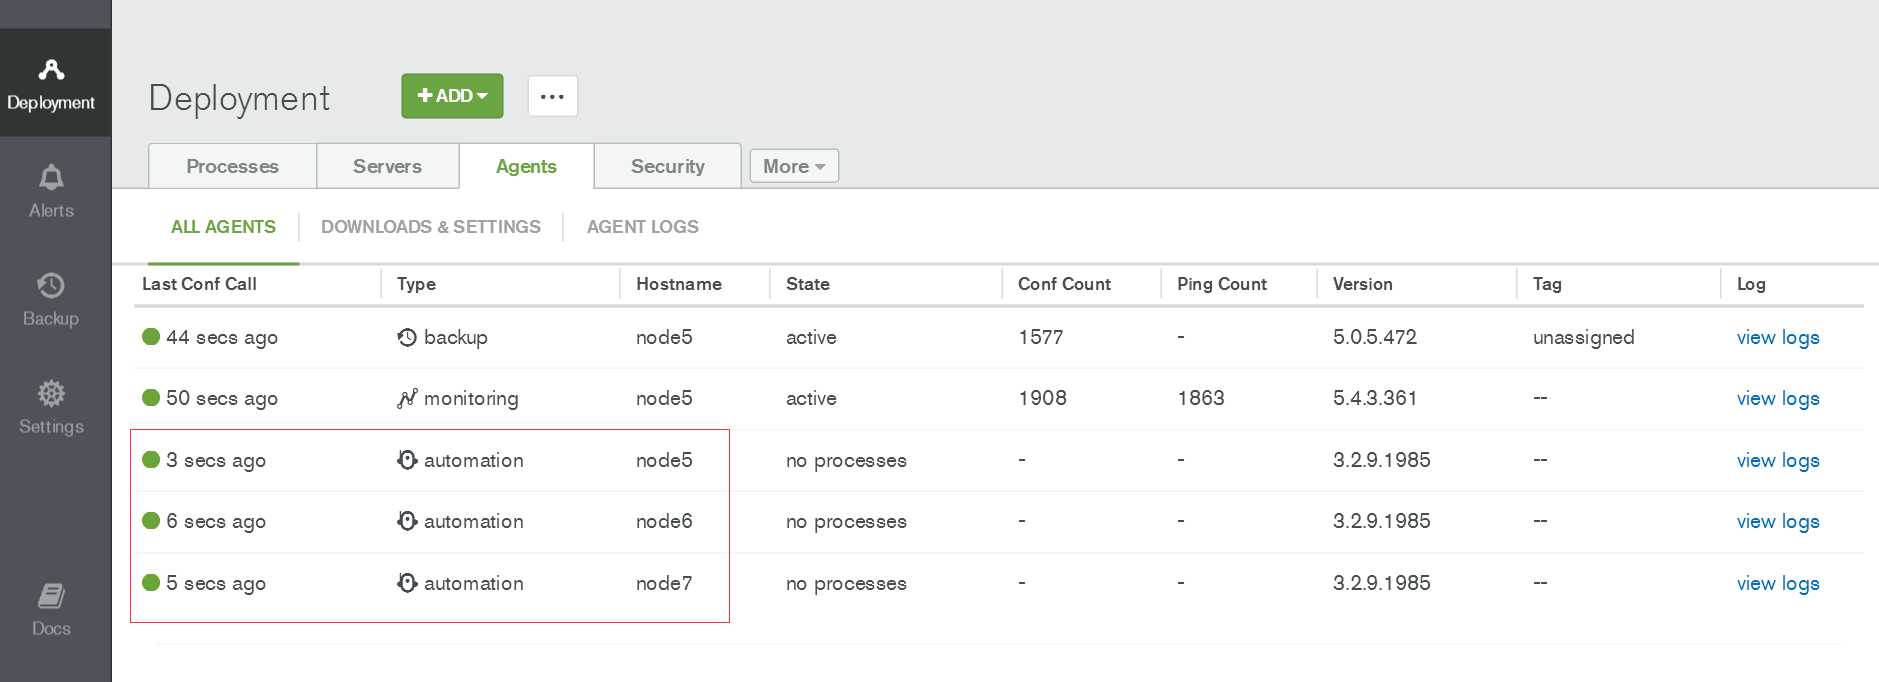
查看各个节点的agent是否连接上
准备工作
解压mongodb压缩包,避免部署的时候在线下载这个包
tar xvf mongodb-linux-x86_64-rhel62-3.4.2.tgz -C /var/lib/mongodb-mms-automation/mongodb-linux-x86_64-3.4.2
chown -R mongod.mongod /var/lib/mongodb-mms-automation/mongodb-linux-x86_64-3.4.2/
检查各个节点的mongodb-mms-automation-agent是否连接上了
点击ADD添加已经存在的集群
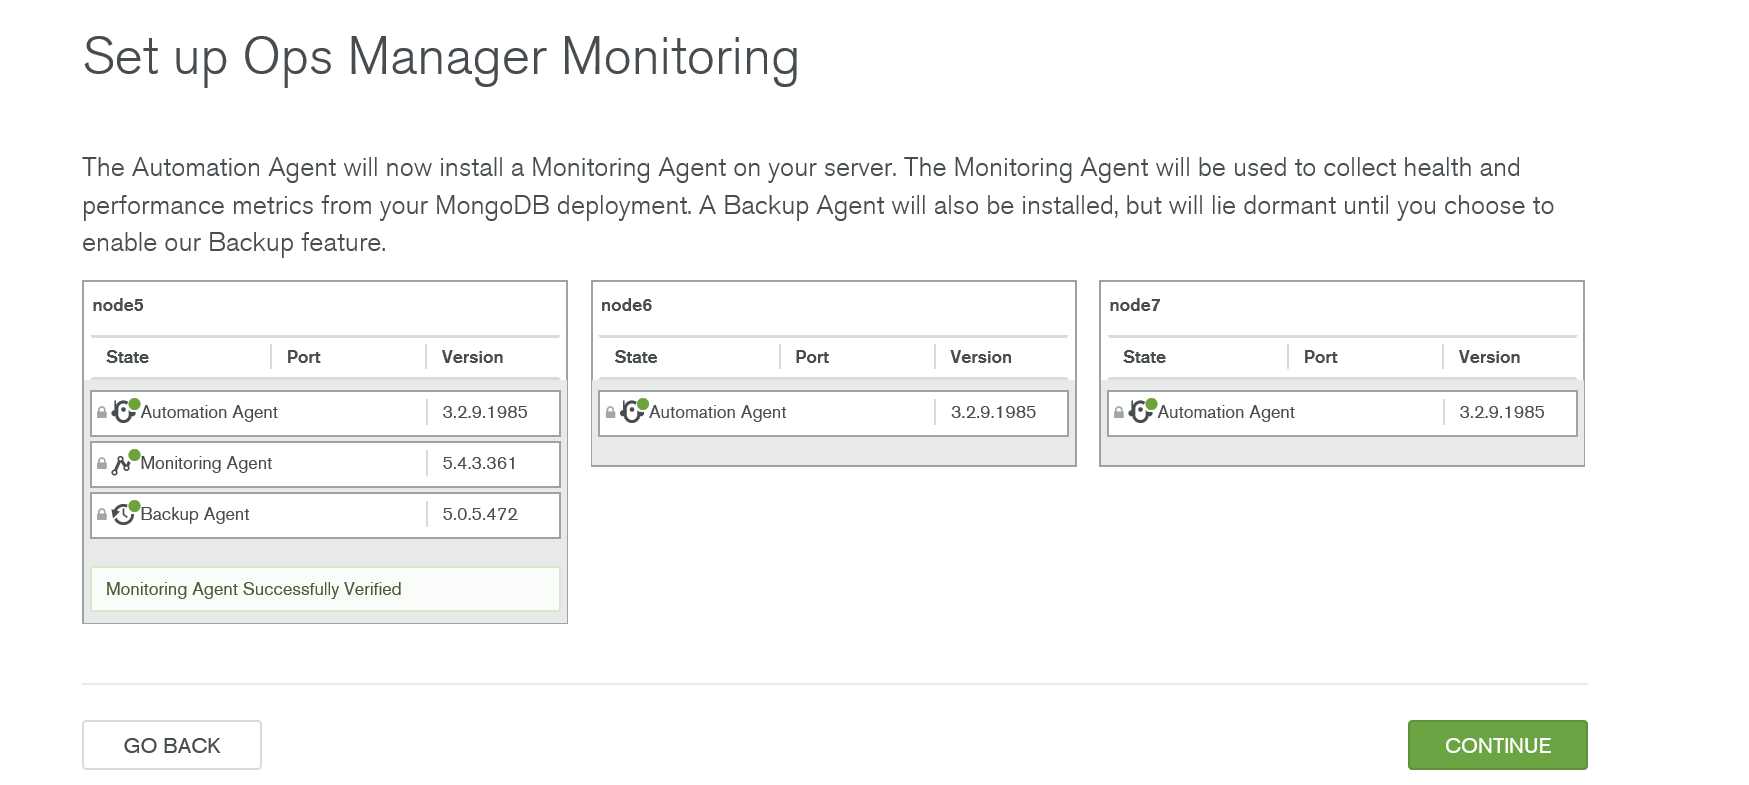
查看集群状态(mongodb启动程序有警告,所以status有警告)
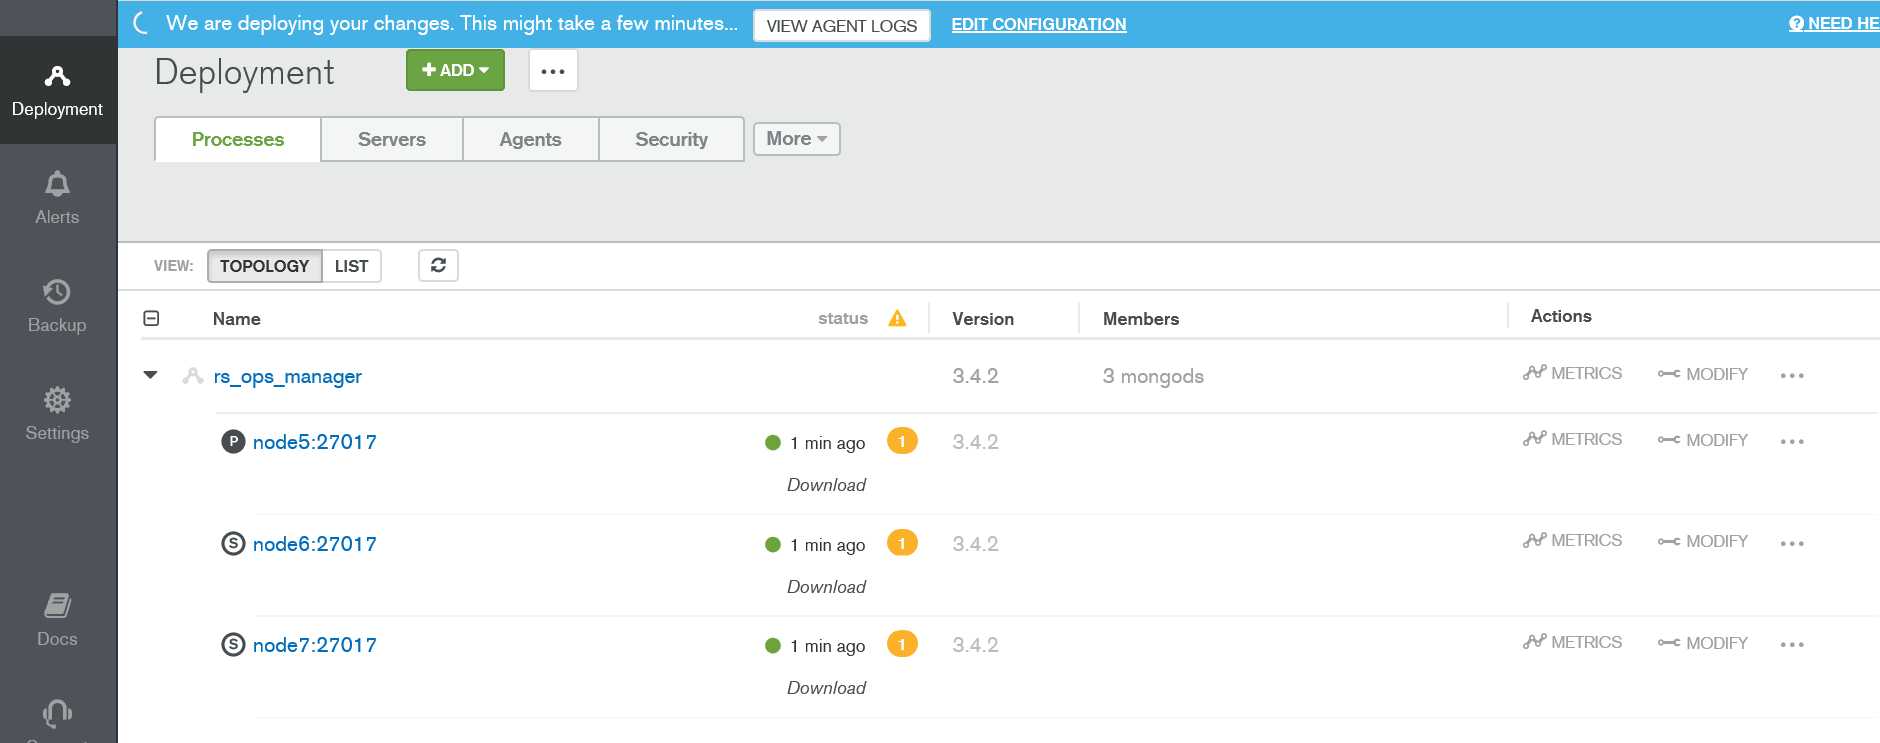
#创建mongodb数据存放目录,后面部署时要填写
mkdir /mongodata
chown mongod:mongod /mongodata
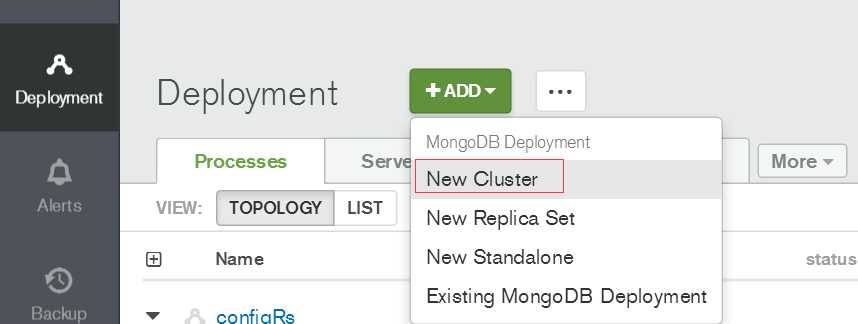
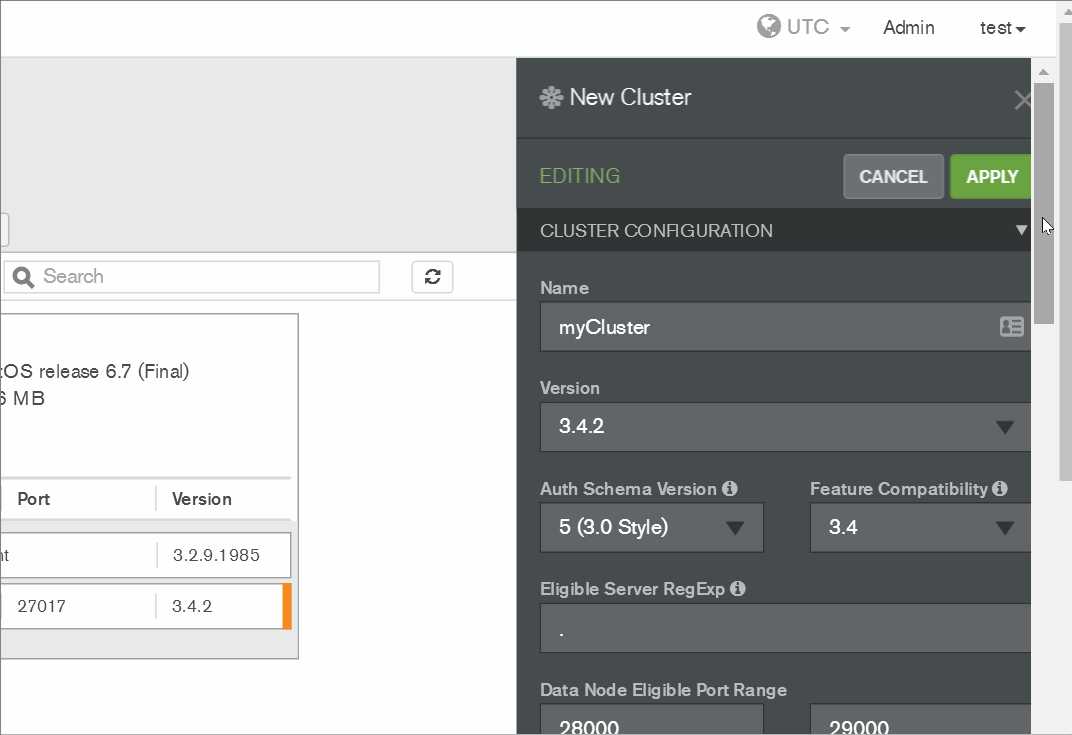
确认后点击REVIEW&DEPLOY
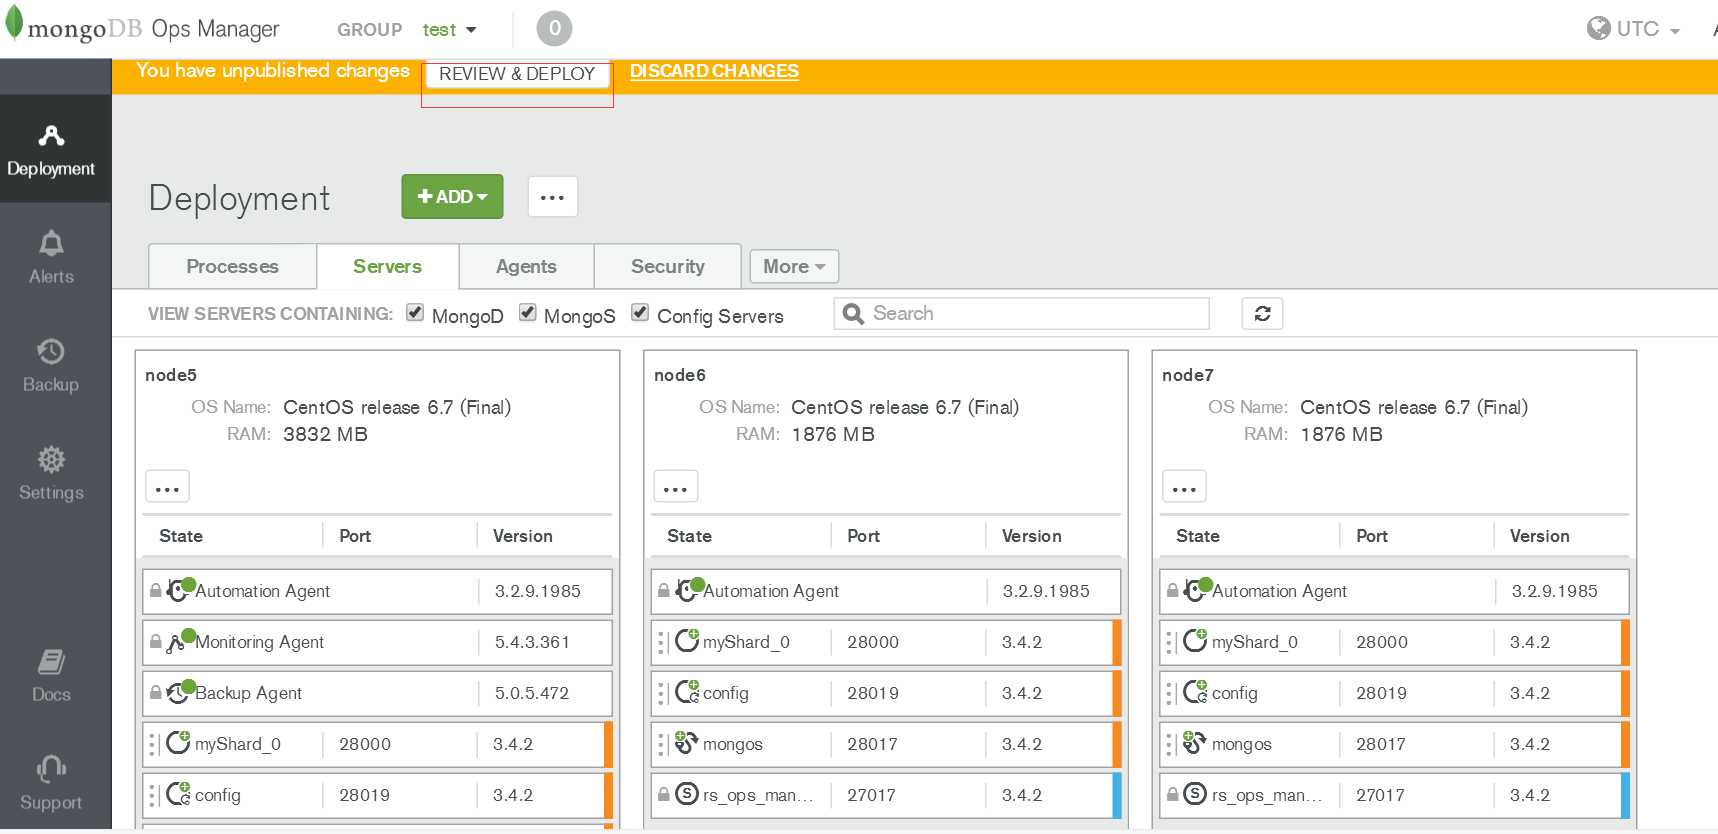
部署中可查看日志/var/log/mongodb-mms-automation/automation-agent.log排查错误,错误解决后点击REVIEW&DEPLOY继续部署。
其他配置可参考官网
通过Ops Manager安装管理mongodb-3.4集群
标签:clipboard ber lease www vim ODB 下载安装 bpa seve
原文地址:https://www.cnblogs.com/vilenx/p/12373639.html