标签:代码 返回 main 应用 unit tor mapping 成功 依赖
今天写了第一个SpringBoot程序,真的感慨到SpringBoot的强大和便捷(可能是由于之前学了SpringMVC),真的超级方便
下面就是我的第一个Spring Boot程序
(1)创建一个maven工程
(2)导入SpringBoot相关的依赖
在pom.xml中添加如下代码
<?xml version="1.0" encoding="UTF-8"?>
<project xmlns="http://maven.apache.org/POM/4.0.0" xmlns:xsi="http://www.w3.org/2001/XMLSchema-instance"
    xsi:schemaLocation="http://maven.apache.org/POM/4.0.0 https://maven.apache.org/xsd/maven-4.0.0.xsd">
    <modelVersion>4.0.0</modelVersion>
    <parent>
        <groupId>org.springframework.boot</groupId>
        <artifactId>spring-boot-starter-parent</artifactId>
        <version>2.2.2.RELEASE</version>
        <relativePath/> <!-- lookup parent from repository -->
    </parent>
    <groupId>com.example</groupId>
    <artifactId>rest-service</artifactId>
    <version>0.0.1-SNAPSHOT</version>
    <name>rest-service</name>
    <description>Demo project for Spring Boot</description>

    <properties>
        <java.version>1.8</java.version>
    </properties>

    <dependencies>
        <dependency>
            <groupId>org.springframework.boot</groupId>
            <artifactId>spring-boot-starter-web</artifactId>
        </dependency>

        <dependency>
            <groupId>org.springframework.boot</groupId>
            <artifactId>spring-boot-starter-test</artifactId>
            <scope>test</scope>
            <exclusions>
                <exclusion>
                    <groupId>org.junit.vintage</groupId>
                    <artifactId>junit-vintage-engine</artifactId>
                </exclusion>
            </exclusions>
        </dependency>
    </dependencies>

    <build>
        <plugins>
            <plugin>
                <groupId>org.springframework.boot</groupId>
                <artifactId>spring-boot-maven-plugin</artifactId>
            </plugin>
        </plugins>
    </build>

</project>
第一次导入这些依赖可能花的时间有点长
(3)编写一个主程序 来启动Spring应用
在src-->main-->java下new一个类取名为HelloWord,在这个类中写一个main方法将应用启动起来
/**
 * @SpringBootApplication来标注一个程序类,说明这是一个Spring Boot类
 */
@SpringBootApplication
public class HelloWord {
    public static void main(String[] args) {
        //Spring 应用启动起来
        SpringApplication.run(HelloWord.class,args);
    }
}
(4)编写相关的Controller、Service
写一个Controller类HelloController
@Controller
public class HelloController {
    @ResponseBody
    @RequestMapping("/hello")
    public String hello(){
        return "HelloWord";
    }
}
@Controller标注为是一个控制器,在方法上添加@RequestMapping来设置访问路径,加上@ResponseBody表明显示返回的字符串
这里和SpringMVC差不多,不过省去了好多配置文件
(5)运行主程序测试
点击main方法左边的绿色按钮选择Run“HelloWord”即可
(6)部署
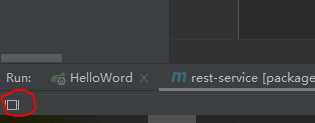
点击左下角的小框

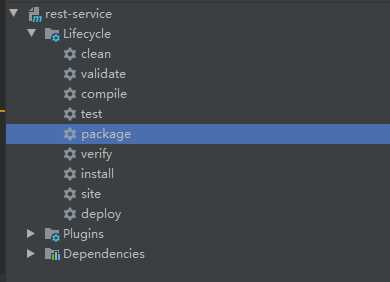
右侧出现

之后点击package再运行

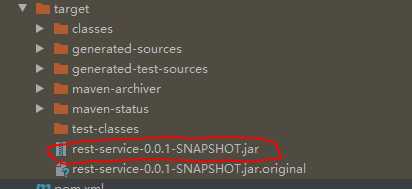
成功之后会在项目的目录上出现

这个jar文件就是我们想要的
先把它复制到桌面上,查看一下它的存放路径
再windows+R--->cmd--->cd +你的路径
再java -jar rest-service-0.0.1-SNAPSHOT.jar(这个是jar文件的名称)
这样就相当于部署好了
是不是很简单,免去了生成war文件再部署的步骤,在浏览器访问
http://localhost:8080/hello
打印

成功了。
我是一个小白,如果有叙述错误的地方还请大神指点
第一个Spring Boot程序——Hello World!
标签:代码 返回 main 应用 unit tor mapping 成功 依赖
原文地址:https://www.cnblogs.com/fightinglmq/p/12577348.html