标签:version alter 命名 odi exe ase === 继承 配置文件
首先是 applicationContext.xml(核心配置文件):
首先,我们需要在配置文件的头部,beans标签的属性中 加上aop命名空间:
xmlns:aop="http://www.springframework.org/schema/aop"
xsi:schemaLocation="http://www.springframework.org/schema/aop
         https://www.springframework.org/schema/aop/spring-aop.xsd"
仅加入aop命名空间后,配置文件内容如下:
<?xml version="1.0" encoding="UTF-8"?>
<beans xmlns="http://www.springframework.org/schema/beans"
       xmlns:xsi="http://www.w3.org/2001/XMLSchema-instance"
       xmlns:context="http://www.springframework.org/schema/context"
       xmlns:aop="http://www.springframework.org/schema/aop"
       xsi:schemaLocation="http://www.springframework.org/schema/beans
        http://www.springframework.org/schema/beans/spring-beans.xsd
         http://www.springframework.org/schema/context
         https://www.springframework.org/schema/context/spring-context.xsd
         http://www.springframework.org/schema/aop
         https://www.springframework.org/schema/aop/spring-aop.xsd">
</beans>
那么,配置文件式 也存在着两种使用方式,本人在这里一一来讲解下:
在beans标签内,增加如下子级标签,导入aop约束:
<aop:config>
	<!--aop配置内容-->
</aop:config>
在config标签内部,配置aop的内容:
config配置内容,总共分为三类:
在第二种使用方式中会进行讲解:
<aop:aspect/>
<aop:pointcut id="切入点id" expression="execution(表达式)"/>
现在,本人来讲解下 上述表达式的语法
表达式语法:
权限名 返回值类型 类的全路径名.目标方法名(参数全路径类型1, 参数全路径类型2 ...)
那么,我们在使用的时候也可以对其进行简化:
简化:
- 权限名可以省略
- 返回值可以设置为 ‘*‘,表示任意返回值都能匹配上
- 包名可以用‘.‘代替,表示其父包下的所有子包都能匹配上
- 类名/方法名 可以设置为‘*‘,表示 其父包下的所有类/其所属类中的所有方法 都能匹配上
- 参数可以用‘. .‘代替,表示任意个数、任意种类的参数都能被匹配上
<aop:advisor advice-ref="横切关注点的bean id" pointcut="切入点 id" />
那么,我们该如何去定义一个拦截器呢?
首先,我们需要写一个类,继承如下四个几口中的一个:
参数:
- method:
被拦截的方法(即:切入点)- objects:
执行该方法的参数- Object o:
执行该方法的代理对象
参数:
- returnValue:
目标方法(即:切入点)的返回值- method:
目标方法(即:切入点)- args:
目标方法(即:切入点)的参数- target:
执行该方法的代理对象
提供 public Object invoke(MethodInvocation invocation) throws Throwable 方法
参数类型MethodInvocation,主要是用于 获取 目标对象 以及 方法信息 的
无需要重写的方法
那么,现在本人就来展示下方式一的使用:
首先,本人给出一个dao层实现类:
package edu.youzg.about_aop.test.dao;

import org.springframework.stereotype.Repository;

/**
 * @Author: Youzg
 * @CreateTime: 2020-05-01 20:31
 * @Description:带你深究Java的本质!
 */
@Repository
public class UserDaoImpl implements IUserDao {

    @Override
    public void add() {
        System.out.println("dao层add方法被调用!");
    }

    @Override
    public void delete() {
        System.out.println("dao层delete方法被调用!");
    }

    @Override
    public void alter() {
        System.out.println("dao层alter方法被调用!");
    }

    @Override
    public void select() {
        System.out.println("dao层select方法被调用!");
    }

}
接下来,本人来给出一个service层的实现类:
package edu.youzg.about_aop.test.service;

/**
 * @Author: Youzg
 * @CreateTime: 2020-05-01 20:33
 * @Description:带你深究Java的本质!
 */
public interface IUserService {
    public void login();

    public void register();

    public void rename();

    public void cancellat();
}
现在,本人来给出一个通知器类:
package edu.youzg.about_aop.test.aspect;

import org.springframework.aop.MethodBeforeAdvice;
import org.springframework.stereotype.Component;

import java.lang.reflect.Method;

@Component	//将其注入IoC容器中
public class MyAspect implements MethodBeforeAdvice {	//继承Adice接口,实现其自带方法,成为一个拦截器(通知器)

    @Override
    public void before(Method method, Object[] objects, Object o) throws Throwable {
        System.out.println("===== Youzg代理执行 之 前置增强 =====");
    }

}
最后,现在本人 来给出配置文件:
<?xml version="1.0" encoding="UTF-8"?>
<beans xmlns="http://www.springframework.org/schema/beans"
       xmlns:xsi="http://www.w3.org/2001/XMLSchema-instance"
       xmlns:context="http://www.springframework.org/schema/context"
       xmlns:aop="http://www.springframework.org/schema/aop"
       xsi:schemaLocation="http://www.springframework.org/schema/beans
        http://www.springframework.org/schema/beans/spring-beans.xsd
         http://www.springframework.org/schema/context
         https://www.springframework.org/schema/context/spring-context.xsd
         http://www.springframework.org/schema/aop
         https://www.springframework.org/schema/aop/spring-aop.xsd">

    <context:component-scan base-package="edu.youzg.about_aop" />

    <aop:config>
        <!-- 定义拦截器 -->
        <aop:advisor advice-ref="myAspect" pointcut="execution(* edu.youzg.about_aop..*.*(..))" />
    </aop:config>

</beans>
最后,本人再来给出一个测试类
package edu.youzg.about_aop.test;

import edu.youzg.about_aop.test.service.IUserService;
import org.springframework.context.ApplicationContext;
import org.springframework.context.support.ClassPathXmlApplicationContext;

/**
 * @Author: Youzg
 * @CreateTime: 2020-05-01 23:11
 * @Description:带你深究Java的本质!
 */
public class Test {

    public static void main(String[] args) {
        ApplicationContext context = new ClassPathXmlApplicationContext("applicationContext.xml");
        IUserService userService = context.getBean("userServiceImpl", IUserService.class);
        userService.login();
    }

}
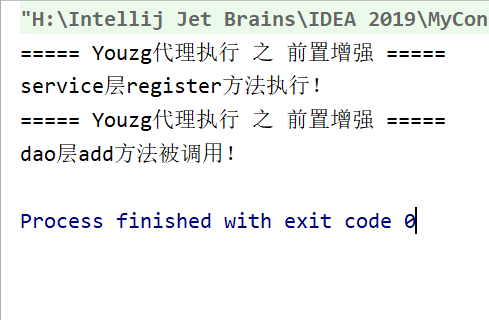
那么,现在本人来展示下运行结果:
方式二的通知有五个类型:
- 前置通知
- 后置通知
- 最终通知
- 环绕通知
- 异常通知
首先得配置一个自定义拦截器类:
接下来是配置文件:
<aop:config>
    <aop:aspect  id="切面bean id" ref="切面">
        <!--切入点-->
        <aop:pointcut id="自定义拦截器 bean id" expression="execution(表达式)"/>
        <!--五种通知类型-->
        <!--前置通知-->
        <aop:before method="前置拦截方法名"  pointcut-ref="切入点id"  />
        <!--最终通知-->
        <aop:after-returning method="最终拦截方法名" pointcut-ref="切入点id" />
        <!--后置通知-->
        <aop:after method="后置拦截方法名" pointcut-ref="切入点id" />
        <!--环绕通知-->
        <aop:around method="环绕拦截方法名" pointcut-ref="切入点id" />
        <!--异常通知-->
        <aop:after-throwing method="异常拦截方法名" pointcut-ref="切入点id" />
    </aop:aspect>
</aop:config>
为了方便,在上文中,本人将所有通知方式都在一起展示了
那么,我们在使用的时候,只需要针对需求选取其中几种就行
那么,现在本人来展示下方式二的使用:
首先,本人来给出一个自定义拦截器类:
package edu.youzg.about_aop.test.aspect;

import org.aspectj.lang.ProceedingJoinPoint;
import org.springframework.stereotype.Component;

/**
 * @Author: Youzg
 * @CreateTime: 2020-05-01 21:56
 * @Description:带你深究Java的本质!
 */
@Component
public class YouzgAspect {

    public void myBefore() {
        System.out.println("==before拦截执行==");
    }

    public void myAfter() {
        System.out.println("==after拦截执行==");
    }

    public void myAfterReturning() {
        System.out.println("==afterReturning拦截执行==");
    }

    public void myThrowing() {
        System.out.println("==throwing拦截执行==");
    }

    public Object myAround(ProceedingJoinPoint pjp) {
        Object result = null;
        try {
            System.out.println("== around拦截执行 ==");
            result = pjp.proceed();
            // 方法执行完毕之后编写
            System.out.println("== around拦截完毕 ==");
            System.out.println("==方法执行的结果[" + result + "]==");
        }catch(Throwable t){
        // 可以处理,异常通知
            System.out.println("异常处理");
        }
        return result;
    }

}
现在,本人来给出配置文件的信息:
<?xml version="1.0" encoding="UTF-8"?>
<beans xmlns="http://www.springframework.org/schema/beans"
       xmlns:xsi="http://www.w3.org/2001/XMLSchema-instance"
       xmlns:context="http://www.springframework.org/schema/context"
       xmlns:aop="http://www.springframework.org/schema/aop"
       xsi:schemaLocation="http://www.springframework.org/schema/beans
        http://www.springframework.org/schema/beans/spring-beans.xsd
         http://www.springframework.org/schema/context
         https://www.springframework.org/schema/context/spring-context.xsd
         http://www.springframework.org/schema/aop
         https://www.springframework.org/schema/aop/spring-aop.xsd">

    <context:component-scan base-package="edu.youzg.about_aop" />

    <aop:config>
        <aop:aspect id="youzgAsp" ref="youzgAspect">
            <!--切入点-->
            <aop:pointcut id="youzgPoingcut" expression="execution(* edu.youzg.about_aop..*.*(..))"/>
            <!--五种通知类型-->
            <!--前置通知-->
            <aop:before method="myBefore" pointcut-ref="youzgPoingcut" />
            <!--后置通知-->
            <aop:after-returning method="myAfterReturning" pointcut-ref="youzgPoingcut" />
            <!--最终通知-->
            <aop:after method="myAfter" pointcut-ref="youzgPoingcut" />
            <!--环绕通知-->
            <aop:around method="myAround" pointcut-ref="youzgPoingcut" />
            <!--异常通知-->
            <aop:after-throwing method="myThrowing" pointcut-ref="youzgPoingcut" />
        </aop:aspect>
    </aop:config>

</beans>
最后,本人再来给出一个测试类
package edu.youzg.about_aop.test;

import edu.youzg.about_aop.test.service.IUserService;
import org.springframework.context.ApplicationContext;
import org.springframework.context.support.ClassPathXmlApplicationContext;

/**
 * @Author: Youzg
 * @CreateTime: 2020-05-01 23:11
 * @Description:带你深究Java的本质!
 */
public class Test {

    public static void main(String[] args) {
        ApplicationContext context = new ClassPathXmlApplicationContext("applicationContext.xml");
        IUserService userService = context.getBean("userServiceImpl", IUserService.class);
        userService.login();
    }

}
那么,现在本人来展示下运行结果:
标签:version alter 命名 odi exe ase === 继承 配置文件
原文地址:https://www.cnblogs.com/codderYouzg/p/12815324.html