标签:spring element seq express stat follow auto website mapping
工作流在项目中非常常用,这里先来看两张图:第一张: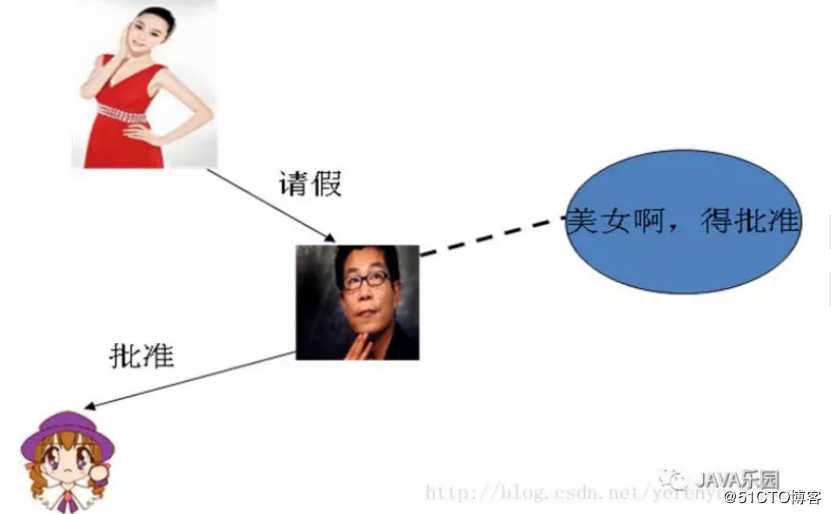
第二张: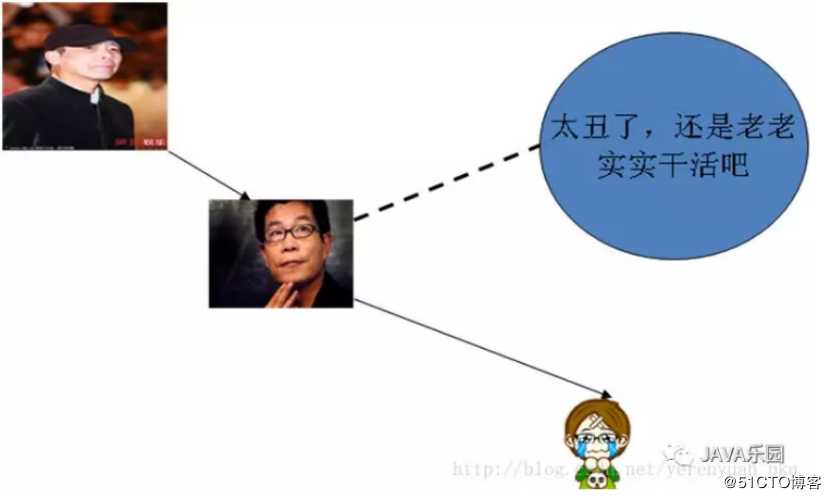
对以上两张图进行说明:
假设这两张图就是华谊兄弟的请假流程图
图的组成部分:
人物:范冰冰、冯小刚、王中军
事件(动作):请假、批准、不批准
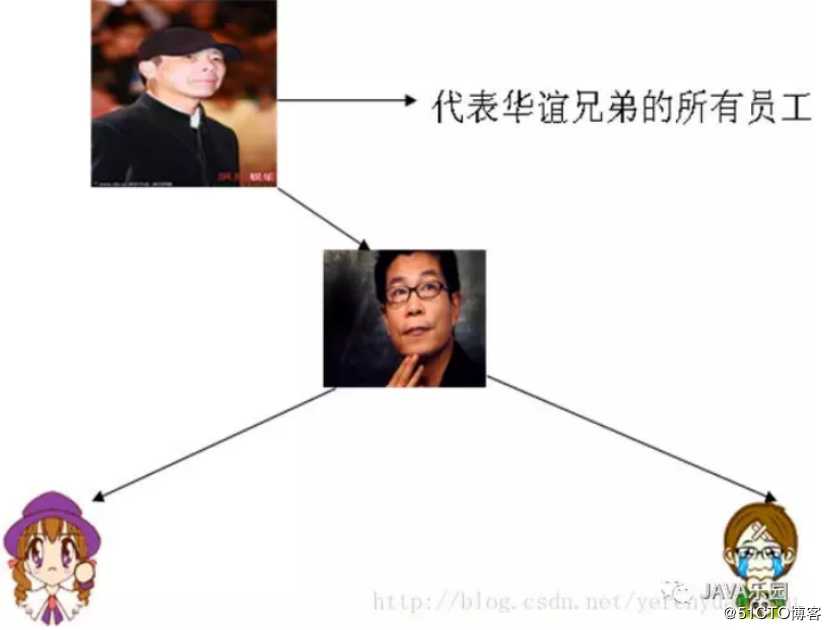
工作流(Workflow):就是“业务过程的部分或整体在计算机应用环境下的自动化”,它主要解决的是“使在多个参与者之间按照某种预定义的规则传递文档、信息或任务的过程自动进行,从而实现某个预期的业务目标,或者促使此目标的实现”。目前市面上常用的工作流引擎包括jbpm、activiti和OSWorkflowOSWorkflow。
1、新建项目sc-activiti,对应的pom.xml文件如下
<?xml version="1.0" encoding="UTF-8"?>

<project xmlns="http://maven.apache.org/POM/4.0.0" xmlns:xsi="http://www.w3.org/2001/XMLSchema-instance"
        xsi:schemaLocation="http://maven.apache.org/POM/4.0.0 http://maven.apache.org/xsd/maven-4.0.0.xsd">
        <modelVersion>4.0.0</modelVersion>

        <groupId>com.sc</groupId>
        <artifactId>sc-activiti</artifactId>
        <version>0.0.1-SNAPSHOT</version>

        <name>sc-activiti-drools</name>
        <!-- FIXME change it to the project‘s website -->
        <url>http://www.example.com</url>

        <properties>
                <project.build.sourceEncoding>UTF-8</project.build.sourceEncoding>
                <maven.compiler.source>1.8</maven.compiler.source>
                <maven.compiler.target>1.8</maven.compiler.target>
        </properties>

        <parent>
                <groupId>org.springframework.boot</groupId>
                <artifactId>spring-boot-starter-parent</artifactId>
                <version>2.0.4.RELEASE</version>
        </parent>

        <dependencyManagement>
                <dependencies>
                        <dependency>
                                <groupId>org.springframework.cloud</groupId>
                                <artifactId>spring-cloud-dependencies</artifactId>
                                <version>Finchley.RELEASE</version>
                                <type>pom</type>
                                <scope>import</scope>
                        </dependency>

                </dependencies>
        </dependencyManagement>

        <dependencies>
                <dependency>
                        <groupId>org.springframework.boot</groupId>
                        <artifactId>spring-boot-starter-web</artifactId>
                </dependency>

                <dependency>
                        <groupId>org.activiti</groupId>
                        <artifactId>activiti-spring-boot-starter-basic</artifactId>
                        <version>5.22.0</version>
                </dependency>

                <dependency>
                        <groupId>org.springframework.boot</groupId>
                        <artifactId>spring-boot-starter-data-jpa</artifactId>
                </dependency>

                <dependency>
                        <groupId>org.springframework.boot</groupId>
                        <artifactId>spring-boot-starter-thymeleaf</artifactId>
                </dependency>

                <dependency>
                        <groupId>mysql</groupId>
                        <artifactId>mysql-connector-java</artifactId>
                        <scope>runtime</scope>
                </dependency>

                <dependency>
                        <groupId>org.springframework.boot</groupId>
                        <artifactId>spring-boot-starter-jdbc</artifactId>
                </dependency>

                <dependency>
                        <groupId>org.springframework.boot</groupId>
                        <artifactId>spring-boot-starter-test</artifactId>
                        <scope>test</scope>
                </dependency>

        </dependencies>

        <build>
                <pluginManagement><!-- lock down plugins versions to avoid using Maven
                                defaults (may be moved to parent pom) -->
                        <plugins>
                                <plugin>
                                        <artifactId>maven-clean-plugin</artifactId>
                                        <version>3.0.0</version>
                                </plugin>
                                <!-- see http://maven.apache.org/ref/current/maven-core/default-bindings.html#Plugin_bindings_for_jar_packaging -->
                                <plugin>
                                        <artifactId>maven-resources-plugin</artifactId>
                                        <version>3.0.2</version>
                                </plugin>
                                <plugin>
                                        <artifactId>maven-compiler-plugin</artifactId>
                                        <version>3.7.0</version>
                                </plugin>
                                <plugin>
                                        <artifactId>maven-surefire-plugin</artifactId>
                                        <version>2.20.1</version>
                                </plugin>
                                <plugin>
                                        <artifactId>maven-jar-plugin</artifactId>
                                        <version>3.0.2</version>
                                </plugin>
                                <plugin>
                                        <artifactId>maven-install-plugin</artifactId>
                                        <version>2.5.2</version>
                                </plugin>
                                <plugin>
                                        <artifactId>maven-deploy-plugin</artifactId>
                                        <version>2.8.2</version>
                                </plugin>
                        </plugins>
                </pluginManagement>
        </build>
</project>
2、新建配置文件application.yml
spring:
    datasource:
        driver-class-name: com.mysql.jdbc.Driver
        url: jdbc:mysql://127.0.0.1:3306/sc?characterEncoding=utf8&useSSL=true
        username: root
        password: root
    activiti:
        check-process-definitions: false
    jpa:
        properties:
            hibernate:
                hbm2ddl:
                    auto: update
    show-sql: true

server:
    port: 8081
    context-path: /
    session:
        timeout: 10
    tomcat:
        uri-encoding: UTF-8
3、新建请假流程文件holiday.bpmn
<?xml version="1.0" encoding="UTF-8"?>
<definitions xmlns="http://www.omg.org/spec/BPMN/20100524/MODEL" xmlns:xsi="http://www.w3.org/2001/XMLSchema-instance" xmlns:activiti="http://activiti.org/bpmn" xmlns:bpmndi="http://www.omg.org/spec/BPMN/20100524/DI" xmlns:omgdc="http://www.omg.org/spec/DD/20100524/DC" xmlns:omgdi="http://www.omg.org/spec/DD/20100524/DI" typeLanguage="http://www.w3.org/2001/XMLSchema" expressionLanguage="http://www.w3.org/1999/XPath" targetNamespace="http://www.activiti.org/test">
    <process id="demo2" name="My process" isExecutable="true">
        <startEvent id="startevent1" name="Start"></startEvent>
        <userTask id="usertask1" name="请假"></userTask>
        <userTask id="usertask2" name="审批"></userTask>
        <endEvent id="endevent1" name="End"></endEvent>
        <sequenceFlow id="flow1" sourceRef="usertask2" targetRef="endevent1"></sequenceFlow>
        <sequenceFlow id="flow2" sourceRef="usertask1" targetRef="usertask2"></sequenceFlow>
        <sequenceFlow id="flow3" sourceRef="startevent1" targetRef="usertask1"></sequenceFlow>
    </process>
    <bpmndi:BPMNDiagram id="BPMNDiagram_myProcess">
        <bpmndi:BPMNPlane bpmnElement="myProcess" id="BPMNPlane_myProcess">
            <bpmndi:BPMNShape bpmnElement="startevent1" id="BPMNShape_startevent1">
                <omgdc:Bounds height="35.0" width="35.0" x="130.0" y="180.0"></omgdc:Bounds>
            </bpmndi:BPMNShape>
            <bpmndi:BPMNShape bpmnElement="usertask1" id="BPMNShape_usertask1">
                <omgdc:Bounds height="55.0" width="105.0" x="271.0" y="170.0"></omgdc:Bounds>
            </bpmndi:BPMNShape>
            <bpmndi:BPMNShape bpmnElement="usertask2" id="BPMNShape_usertask2">
                <omgdc:Bounds height="55.0" width="105.0" x="471.0" y="170.0"></omgdc:Bounds>
            </bpmndi:BPMNShape>
            <bpmndi:BPMNShape bpmnElement="endevent1" id="BPMNShape_endevent1">
                <omgdc:Bounds height="35.0" width="35.0" x="690.0" y="180.0"></omgdc:Bounds>
            </bpmndi:BPMNShape>
            <bpmndi:BPMNEdge bpmnElement="flow1" id="BPMNEdge_flow1">
                <omgdi:waypoint x="576.0" y="197.0"></omgdi:waypoint>
                <omgdi:waypoint x="690.0" y="197.0"></omgdi:waypoint>
            </bpmndi:BPMNEdge>
            <bpmndi:BPMNEdge bpmnElement="flow2" id="BPMNEdge_flow2">
                <omgdi:waypoint x="376.0" y="197.0"></omgdi:waypoint>
                <omgdi:waypoint x="471.0" y="197.0"></omgdi:waypoint>
            </bpmndi:BPMNEdge>
            <bpmndi:BPMNEdge bpmnElement="flow3" id="BPMNEdge_flow3">
                <omgdi:waypoint x="165.0" y="197.0"></omgdi:waypoint>
                <omgdi:waypoint x="271.0" y="197.0"></omgdi:waypoint>
            </bpmndi:BPMNEdge>
        </bpmndi:BPMNPlane>
    </bpmndi:BPMNDiagram>
</definitions>
对应的bpmn文件的图形如下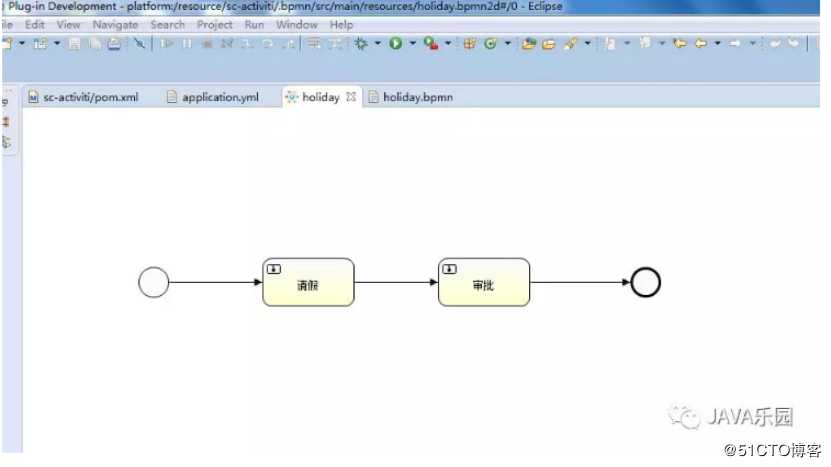
4、新建springboot启动类
package sc.ad;

import org.activiti.spring.boot.SecurityAutoConfiguration;
import org.springframework.boot.SpringApplication;
import org.springframework.boot.autoconfigure.SpringBootApplication;

@SpringBootApplication(exclude = SecurityAutoConfiguration.class)
public class ActivitiApp {
        public static void main(String[] args)
        {
                SpringApplication.run(ActivitiApp.class, args);
        }

}
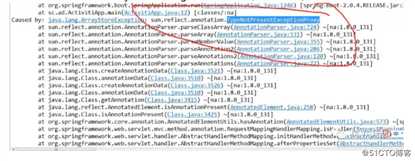
备注:一定要忽略SecurityAutoConfiguration.class,否则会出现如下异常。
5、新建一个controller,用来启动请假流程
package sc.ad.controller;

import org.activiti.engine.RepositoryService;
import org.activiti.engine.RuntimeService;
import org.activiti.engine.TaskService;
import org.activiti.engine.repository.Deployment;
import org.activiti.engine.repository.ProcessDefinition;
import org.activiti.engine.runtime.ProcessInstance;
import org.activiti.engine.task.Task;
import org.springframework.beans.factory.annotation.Autowired;
import org.springframework.web.bind.annotation.RequestMapping;
import org.springframework.web.bind.annotation.RestController;

@RestController
public class ADController {

        @Autowired
        private RepositoryService repositoryService;

        @Autowired
        private RuntimeService runtimeService;

        @Autowired
        private TaskService taskService;

        @RequestMapping("/ad")
        public void firstDemo() {

                // 根据bpmn文件部署流程
                Deployment deployment = repositoryService.createDeployment()
                                .addClasspathResource("holiday.bpmn").deploy();
                // 获取流程定义
                ProcessDefinition processDefinition = repositoryService
                                .createProcessDefinitionQuery()
                                .deploymentId(deployment.getId()).singleResult();
                // 启动流程定义,返回流程实例
                ProcessInstance pi = runtimeService
                                .startProcessInstanceById(processDefinition.getId());
                String processId = pi.getId();
                System.out.println("流程创建成功,当前流程实例ID:" + processId);

                Task task = taskService.createTaskQuery().processInstanceId(processId)
                                .singleResult();
                System.out.println("第一次执行前,任务名称:" + task.getName());
                taskService.complete(task.getId());

                task = taskService.createTaskQuery().processInstanceId(processId)
                                .singleResult();
                System.out.println("第二次执行前,任务名称:" + task.getName());
                taskService.complete(task.getId());

                task = taskService.createTaskQuery().processInstanceId(processId)
                                .singleResult();
                System.out.println("task为null,任务执行完毕:" + task);
        }
}
6、启动项目并进行验证
查看日志,项目启动成功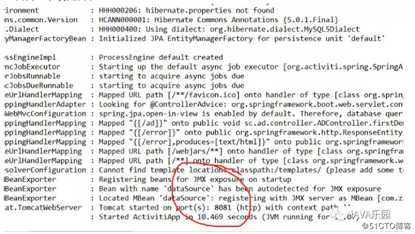
访问:http://127.0.0.1:8081/ad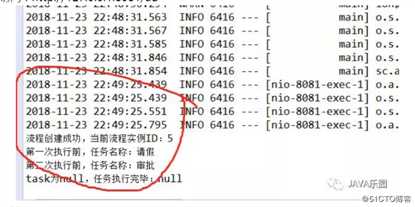
从控制台看到打印出请假流程审批的对应日志。
再从数据库的数据变化看,自带创建了如下表结构
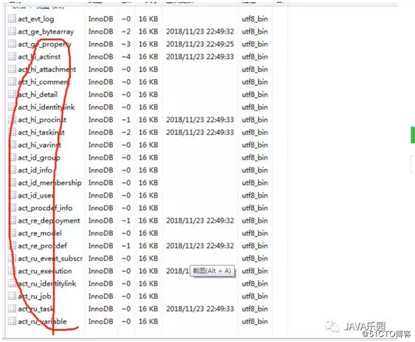
如果使用sql语句查看相应的表可以看到对应的库表里留下了相应的请假及审批记录信息。
34、Spring Cloud 2.x之整合工作流Activiti
标签:spring element seq express stat follow auto website mapping
原文地址:https://blog.51cto.com/13538361/2492025