标签:info state implicit put following uid 存储 iat tps
yum安装mysql方法一:下载二进制格式的mysql安装
[root@localhost ~]# cd /usr/src/
[root@localhost src]# wget https://downloads.mysql.com/archives/get/file/mys
ql-5.7.22-linux-glibc2.12-x86_64.tar.gz
效果
--2018-08-13 23:56:27-- https://downloads.mysql.com/archives/get/file/mysql
-5.7.22-linux-glibc2.12-x86_64.tar.gz
Resolving downloads.mysql.com (downloads.mysql.com)... 137.254.60.14
Connecting to downloads.mysql.com (downloads.mysql.com)|137.254.60.14|:443..
. connected.
HTTP request sent, awaiting response... 302 Found
Location: https://cdn.mysql.com/archives/mysql-5.7/mysql-5.7.22-linux-glibc2
.12-x86_64.tar.gz [following]
......
Saving to: ‘mysql-5.7.22-linux-glibc2.12-x86_64.tar.gz’
100%[=====================================>] 643,790,848 2.46MB/s in 4m 20
s
2018-08-14 00:00:50 (2.36 MB/s) - ‘mysql-5.7.22-linux-glibc2.12-x86_64.tar.g
z’saved [643790848/643790848]方式二 下载mysql-5.7.22-linux-glibc2.12-x86_64.tar.g
z包 用xftp上传至 用户的 /usr/src下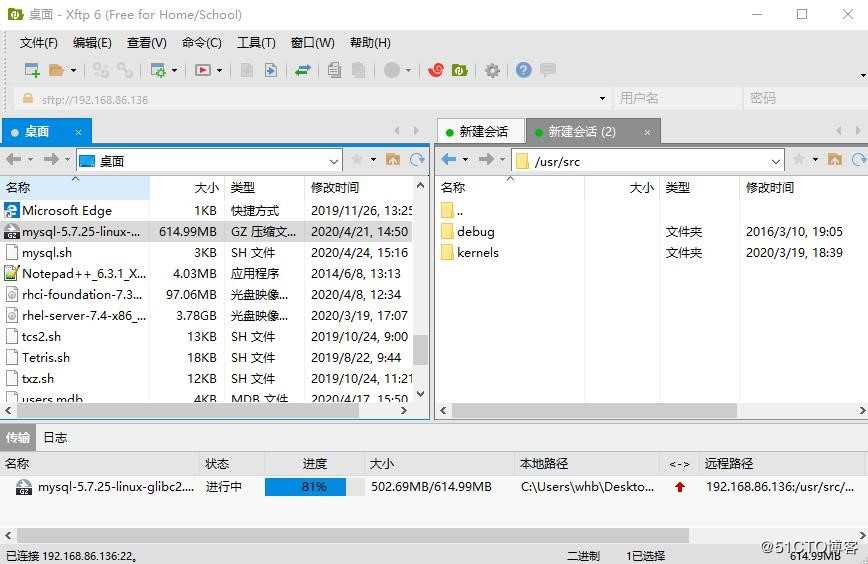
第二步 创建用户和组 解压软件至/usr/local
[root@localhost src]# ls
debug kernels mysql-5.7.22-linux-glibc2.12-x86_64.tar.gz
[root@localhost src]# tar xf mysql-5.7.22-linux-glibc2.12-x86_64.tar.gz -C /usr/local/

第三步 创建用户和组
[root@localhost src]# groupadd -r mysql
[root@localhost src]# useradd -M -s /sbin/nologin -g mysql mysql
[root@localhost src]# cd /usr/local/
[root@localhost local]# ln -sv mysql-5.7.22-linux-glibc2.12-x86_64/ mysql
//软链接
‘mysql’ -> ‘mysql-5.7.22-linux-glibc2.12-x86_64/’
[root@localhost local]# ll
total 0
drwxr-xr-x. 2 root root 6 Mar 10 2016 bin
drwxr-xr-x. 2 root root 6 Mar 10 2016 etc
drwxr-xr-x. 2 root root 6 Mar 10 2016 games
drwxr-xr-x. 2 root root 6 Mar 10 2016 include
drwxr-xr-x. 2 root root 6 Mar 10 2016 lib
drwxr-xr-x. 2 root root 6 Mar 10 2016 lib64
drwxr-xr-x. 2 root root 6 Mar 10 2016 libexec
lrwxrwxrwx 1 root root 36 Aug 14 16:00 mysql -> mysql-5.7.22-linux-glibc2.
12-x86_64/
drwxr-xr-x 9 root root 129 Aug 14 00:16 mysql-5.7.22-linux-glibc2.12-x86_64
drwxr-xr-x. 2 root root 6 Mar 10 2016 sbin
drwxr-xr-x. 5 root root 49 Jun 13 19:03 share
drwxr-xr-x. 2 root root 6 Mar 10 2016 src

第四步 修改目录/usr/local/mysql的属主属组
[root@localhost local]# chown -R mysql.mysql mysql

第五步 添加环境变量
[root@localhost local]# ls /usr/local/mysql
bin COPYING docs include lib man README share support-files
[root@localhost local]# echo ‘export PATH=/usr/local/mysql/bin:$PATH‘ > /etc/pro
file.d/mysql.sh

[root@localhostlocal]# source /etc/profile.d/mysql.sh
[root@localhost local]# echo $PATH //测试一下mysql环境变量
/usr/local/mysql/bin:/usr/local/sbin:/usr/local/bin:/usr/sbin:/usr/bin:/root
/bin
//默认的所有命令都只会从这里识别

第六步 建立数据存放目录
[root@localhost local]# mkdir /opt/data
[root@localhost local]# chown -R mysql.mysql /opt/data/
[root@localhost local]#cd

第七步 初始化数据库
[root@localhost local】#cd
[root@localhost ~]# mysqld --initialize --user=mysql --datadir=/opt/data/
2018-08-15T07:57:46.168380Z 0 [Warning] TIMESTAMP with implicit DEFAULT valu
e is deprecated. Please use --explicit_defaults_for_timestamp server option
(see documentation for more details).
2018-08-15T07:57:50.542516Z 0 [Warning] InnoDB: New log files created, LSN=4
5790
2018-08-15T07:57:50.927286Z 0 [Warning] InnoDB: Creating foreign key constra
int system tables.
2018-08-15T07:57:51.071260Z 0 [Warning] No existing UUID has been found, so
we assume that this is the first time that this server has been started. Gen
erating a new UUID: e8600890-a060-11e8-b1a2-000c294c50b4.
2018-08-15T07:57:51.074566Z 0 [Warning] Gtid table is not ready to be used.
Table ‘mysql.gtid_executed‘ cannot be opened.
2018-08-15T07:57:51.078089Z 1 [Note] A temporary password is generatedfor ro
ot@localhost: jtBzkkb=r5ik
//最后一个才是生成的临时密码

第八步 生成配置文件
[root@localhost ~]# cat > /etc/my.cnf <<EOF
> [mysqld]
> basedir = /usr/local/mysql
> datadir = /opt/data
> socket = /tmp/mysql.sock
> port = 3306
> pid-file = /opt/data/mysql.pid
> user = mysql
> skip-name-resolve
> EOF
//检查一下
[root@localhost ~]# cat /etc/my.cnf
[mysqld]
basedir = /usr/local/mysql
datadir = /opt/data
socket = /tmp/mysql.sock
port = 3306
pid-file = /opt/data/mysql.pid
user = mysql
skip-name-resolve

第九步 配置服务启动脚本
[root@localhost ~]# cp -a /usr/local/mysql/support-files/mysql.server /etc/i
nit.d/mysqld
[root@localhost ~]#vim /etc/init.d/mysqld
找到basedir 
第一个是 解压包的路径
第二个是 数据存储的路径
最后启动mysql
[root@localhost ~]#service  mysqld  start
Starting MySQL.Logging to ‘/opt/data/localhost.localdomain.err‘.
SUCCESS! //正常现象 第一次登录会报出
[root@localhost ~]# ss -antl
State Recv-Q Send-Q Local Address:Port Peer Address:Port
LISTEN 0 128 *:22 *:*
LISTEN 0 100 127.0.0.1:25 *:*
LISTEN 0 128 :::22 :::*
LISTEN 0 100 ::1:25 :::*
LISTEN 0 80 :::3306 :::*

进入mysql
[root@localhost ~]#/mysql -uroot -p ‘jtBzkkb=r5ik’
Enter password:
Welcome to the MySQL monitor. Commands end with ; or \g.Your MySQL connection id is 2
Server version: 5.7.22
Copyright (c) 2000, 2018, Oracle and/or its affiliates. All rights reserved.
Oracle is a registered trademark of Oracle Corporation and/or its
affiliates. Other names may be trademarks of their respective
owners.
Type ‘help;‘ or ‘\h‘ for help. Type ‘\c‘ to clear the current input statemen
t.
mysql>
//设置新密码
mysql> set password = password(‘wangqing123!‘);
Query OK, 0 rows affected, 1 warning (0.00 sec)标签:info state implicit put following uid 存储 iat tps
原文地址:https://blog.51cto.com/14763231/2493263