标签:oid 安全组 from 开始 pack view for art text
步骤:
使用 Idea 创建 SpringBoot 项目:
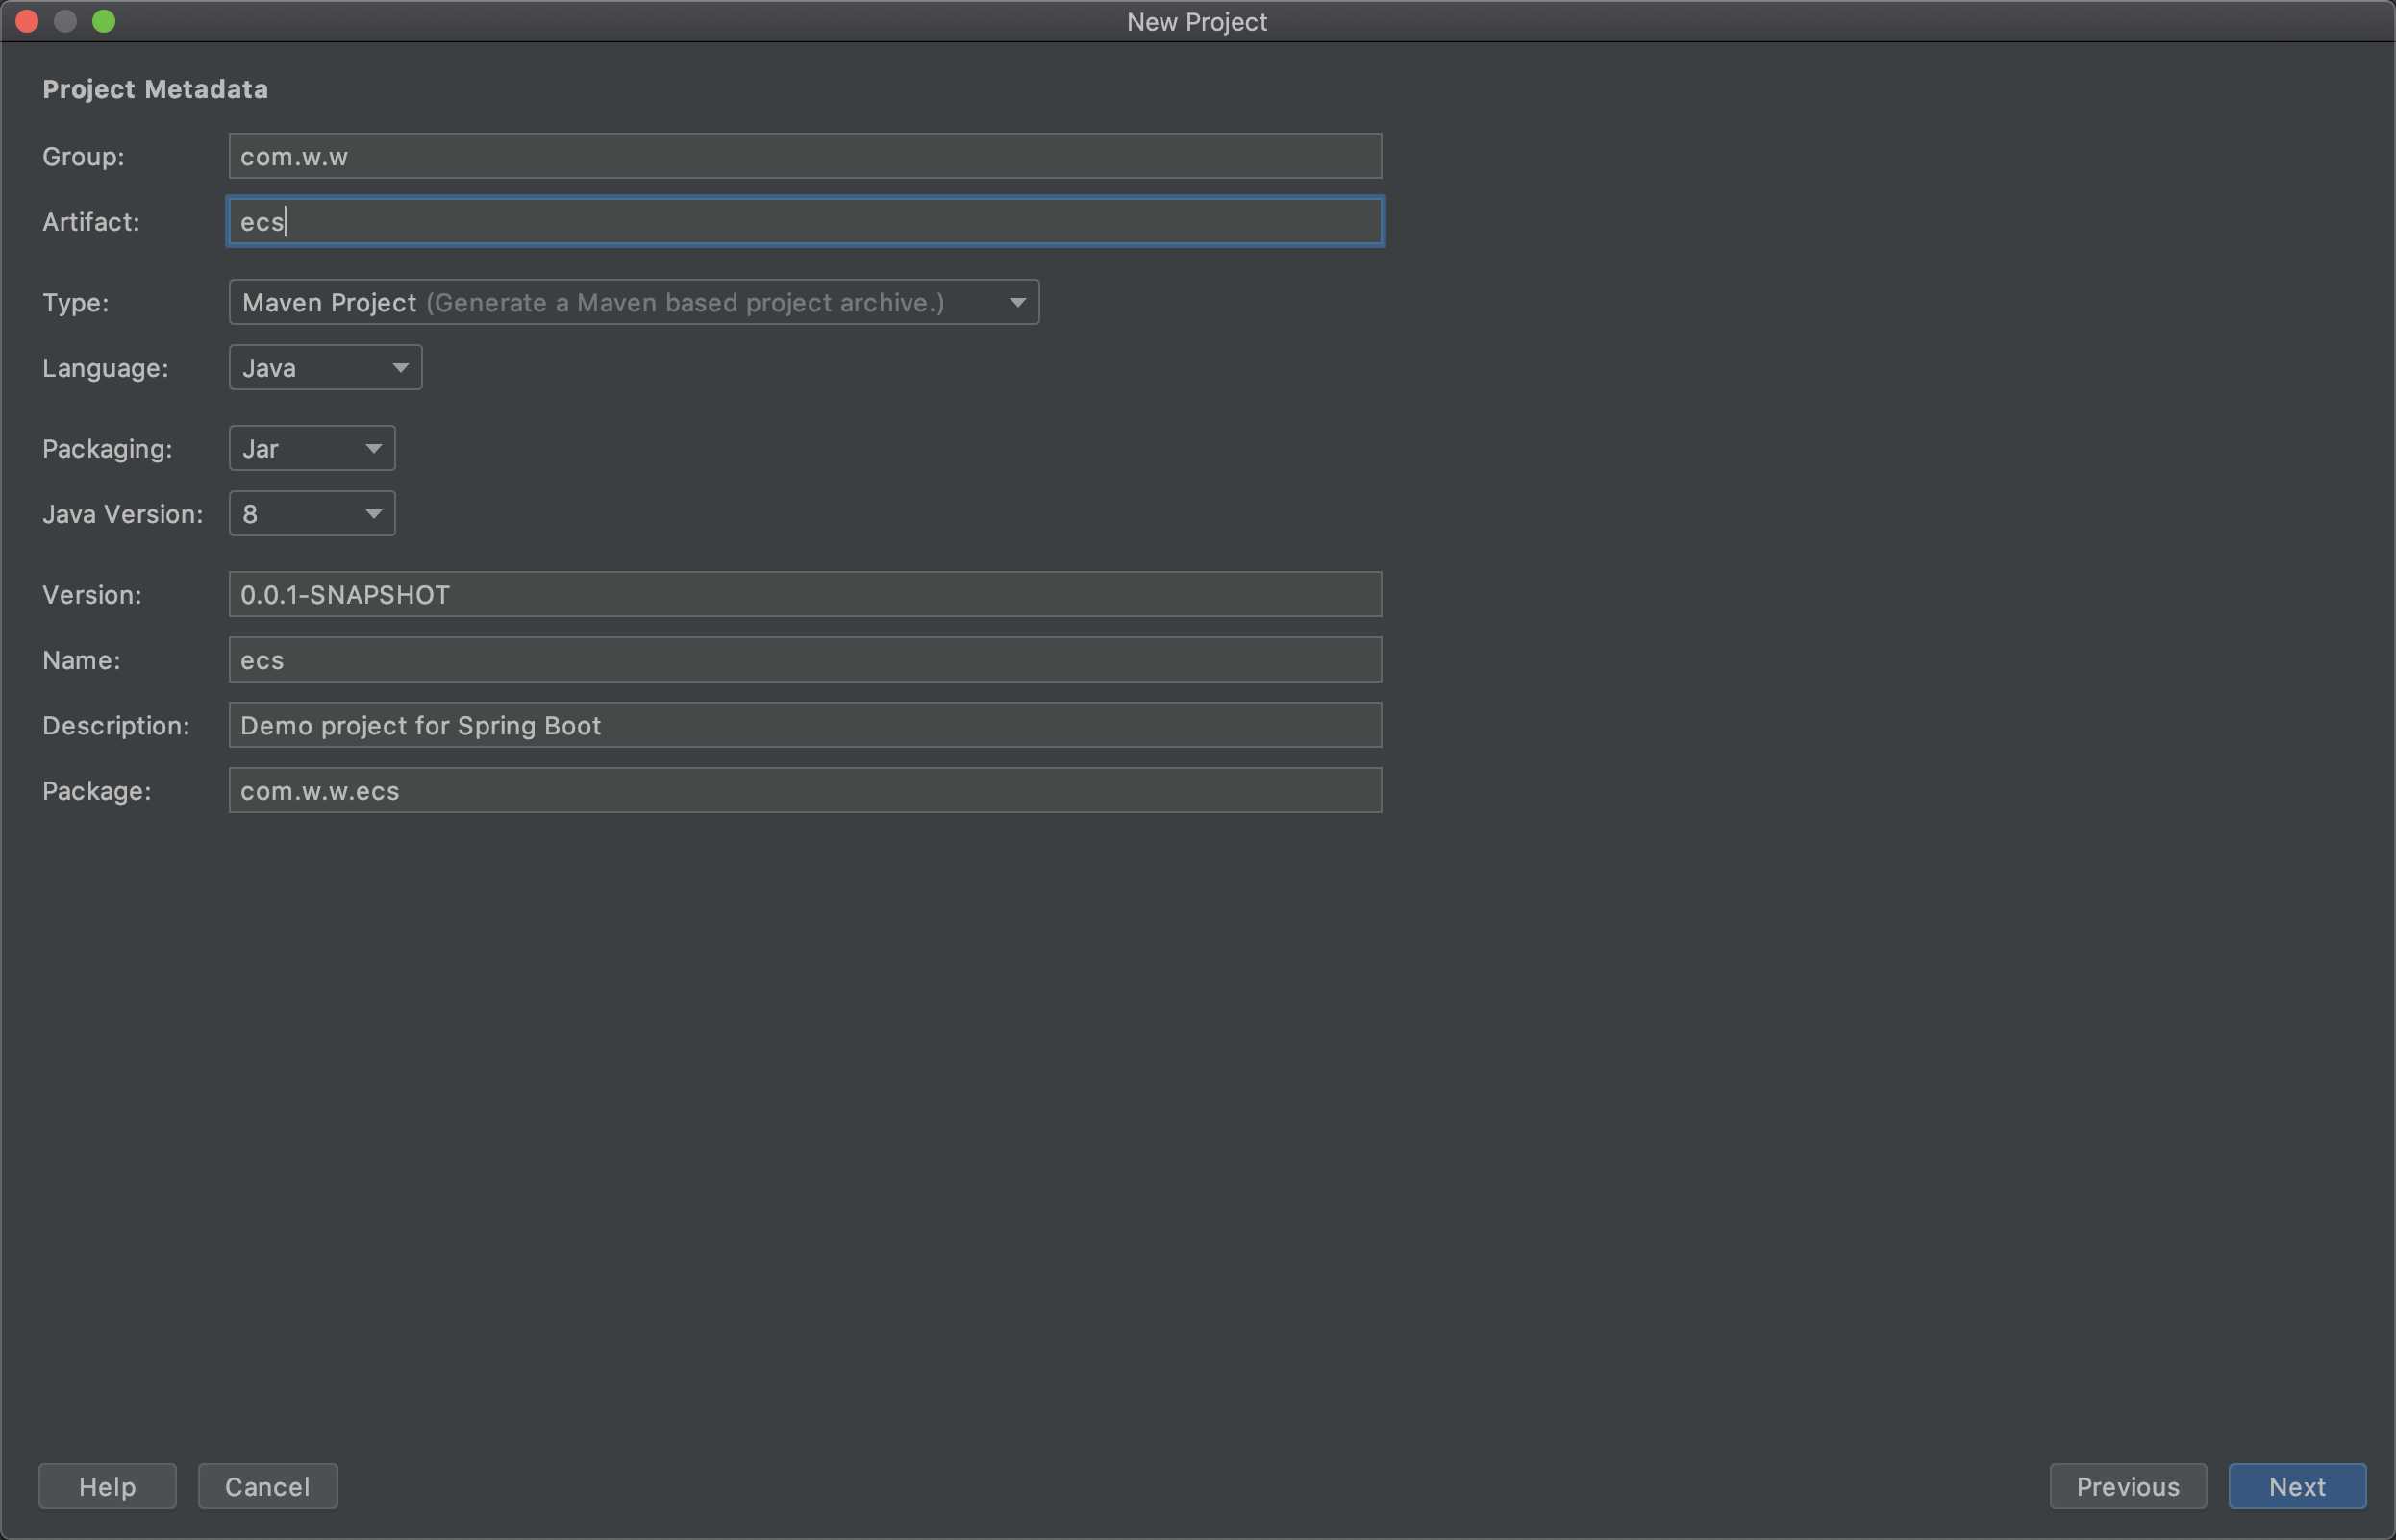
生成项目的 pom.xml 文件如下,进行个别修改:
<?xml version="1.0" encoding="UTF-8"?>
<project xmlns="http://maven.apache.org/POM/4.0.0" xmlns:xsi="http://www.w3.org/2001/XMLSchema-instance"
         xsi:schemaLocation="http://maven.apache.org/POM/4.0.0 https://maven.apache.org/xsd/maven-4.0.0.xsd">
    <modelVersion>4.0.0</modelVersion>
    <parent>
        <groupId>org.springframework.boot</groupId>
        <artifactId>spring-boot-starter-parent</artifactId>
        <version>2.2.7.RELEASE</version>
        <relativePath/> <!-- lookup parent from repository -->
    </parent>
    <groupId>com.w.w</groupId>
    <artifactId>ecs</artifactId>
    <version>0.0.1-SNAPSHOT</version>
    <name>ecs</name>
    <description>Demo project for Spring Boot</description>

    <properties>
        <java.version>1.8</java.version>

        <!-- 跳过执行测试 -->
        <skipTests>true</skipTests>
    </properties>

    <dependencies>
        <dependency>
            <groupId>org.springframework.boot</groupId>
            <artifactId>spring-boot-starter-web</artifactId>
        </dependency>

        <dependency>
            <groupId>org.springframework.boot</groupId>
            <artifactId>spring-boot-starter-test</artifactId>
            <scope>test</scope>
            <exclusions>
                <exclusion>
                    <groupId>org.junit.vintage</groupId>
                    <artifactId>junit-vintage-engine</artifactId>
                </exclusion>
            </exclusions>
        </dependency>
    </dependencies>

    <build>
        <!-- 指定生成jar包名称 -->
        <finalName>ecs</finalName>
        <plugins>
            <plugin>
                <groupId>org.springframework.boot</groupId>
                <artifactId>spring-boot-maven-plugin</artifactId>
            </plugin>
        </plugins>
    </build>

</project>
在 application.properties 中指定服务启动的端口号:
server.port=80
> 这个是因为我的 ECS 的服务器安全组目前就设置了80端口对外暴露,便于测试。
为项目弄个首页,方便部署上后查看
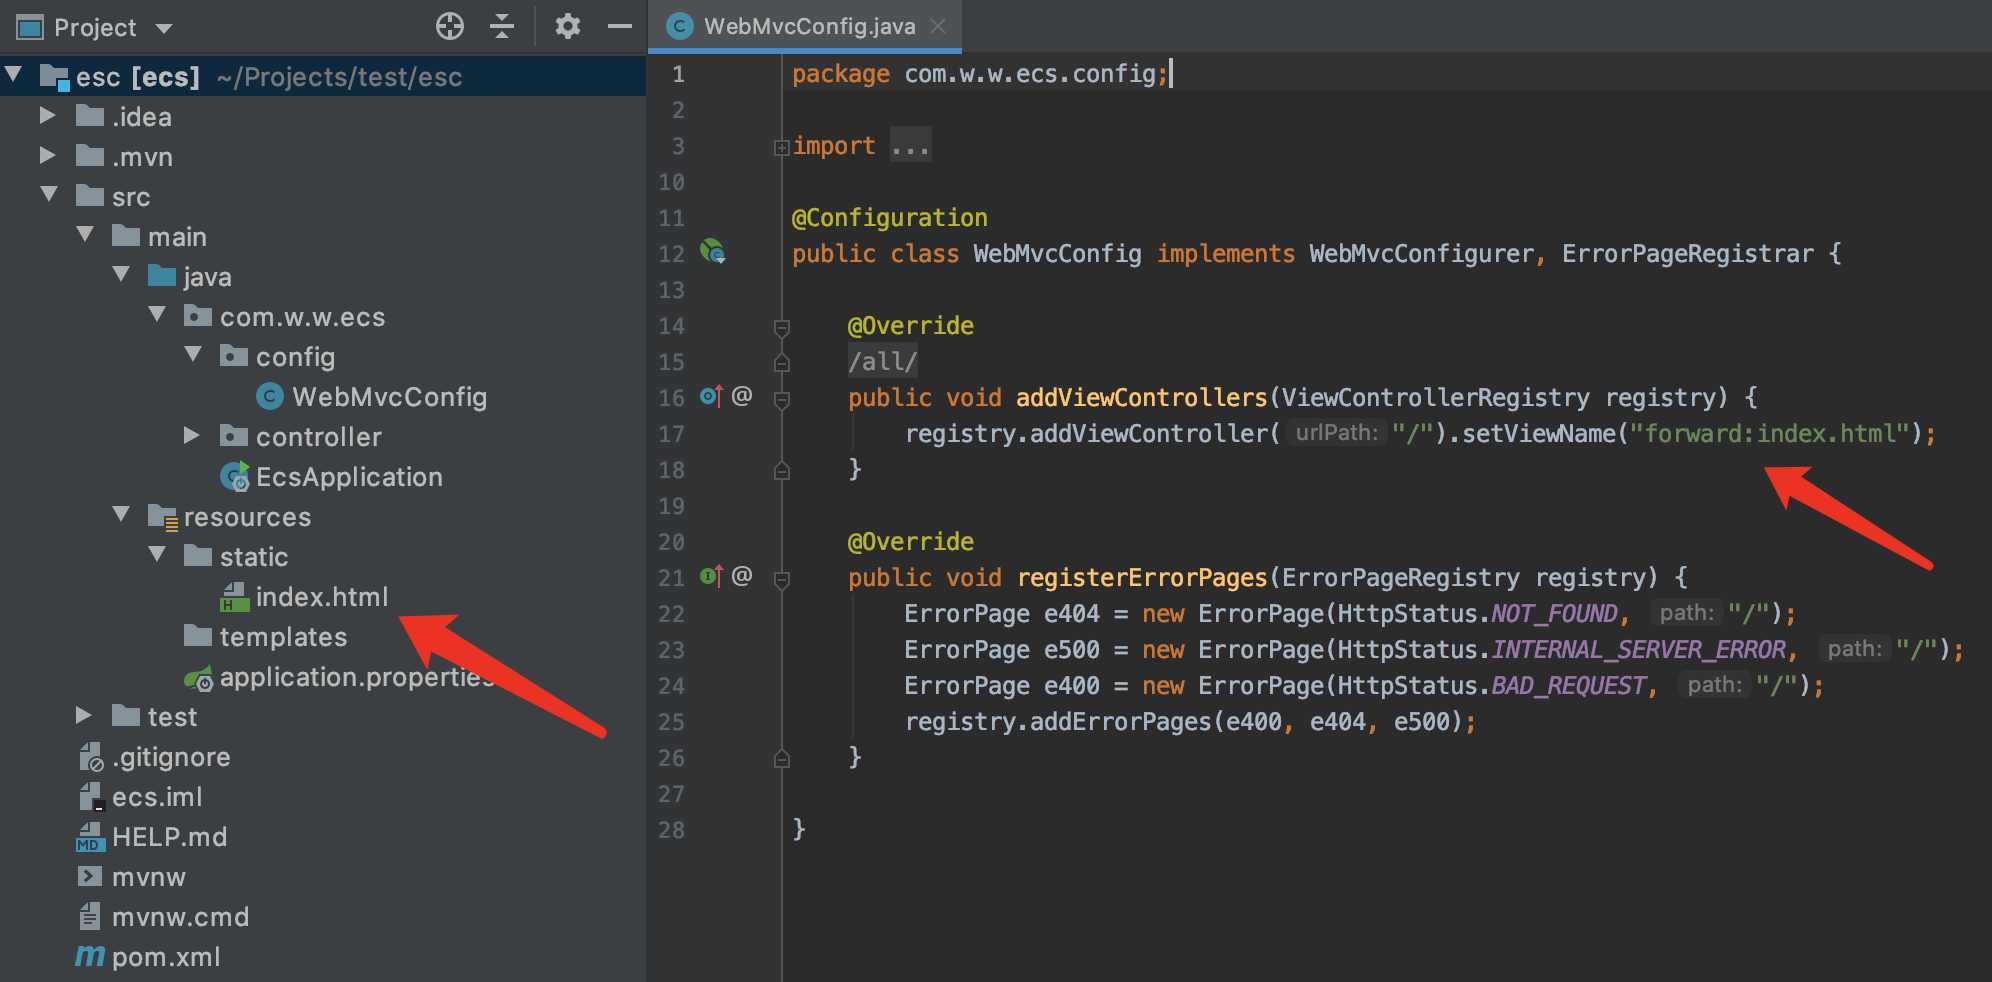
说明:
代码如下:
 1 package com.w.w.ecs.config;
 2
 3 import org.springframework.boot.web.server.ErrorPage;
 4 import org.springframework.boot.web.server.ErrorPageRegistrar;
 5 import org.springframework.boot.web.server.ErrorPageRegistry;
 6 import org.springframework.context.annotation.Configuration;
 7 import org.springframework.http.HttpStatus;
 8 import org.springframework.web.servlet.config.annotation.ViewControllerRegistry;
 9 import org.springframework.web.servlet.config.annotation.WebMvcConfigurer;
10
11 @Configuration
12 public class WebMvcConfig implements WebMvcConfigurer, ErrorPageRegistrar {
13
14     @Override
15     @SuppressWarnings("all")
16     public void addViewControllers(ViewControllerRegistry registry) {
17         registry.addViewController("/").setViewName("forward:index.html");
18     }
19
20     @Override
21     public void registerErrorPages(ErrorPageRegistry registry) {
22         ErrorPage e404 = new ErrorPage(HttpStatus.NOT_FOUND, "/");
23         ErrorPage e500 = new ErrorPage(HttpStatus.INTERNAL_SERVER_ERROR, "/");
24         ErrorPage e400 = new ErrorPage(HttpStatus.BAD_REQUEST, "/");
25         registry.addErrorPages(e400, e404, e500);
26     }
27
28 }
设置 Aliyun 账号:
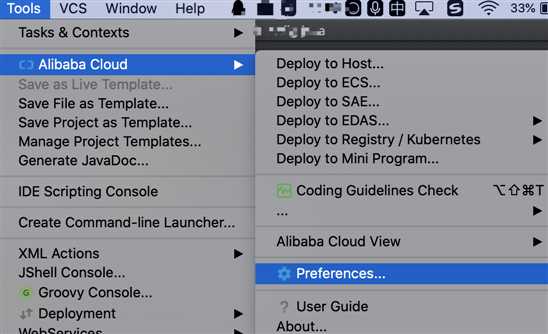
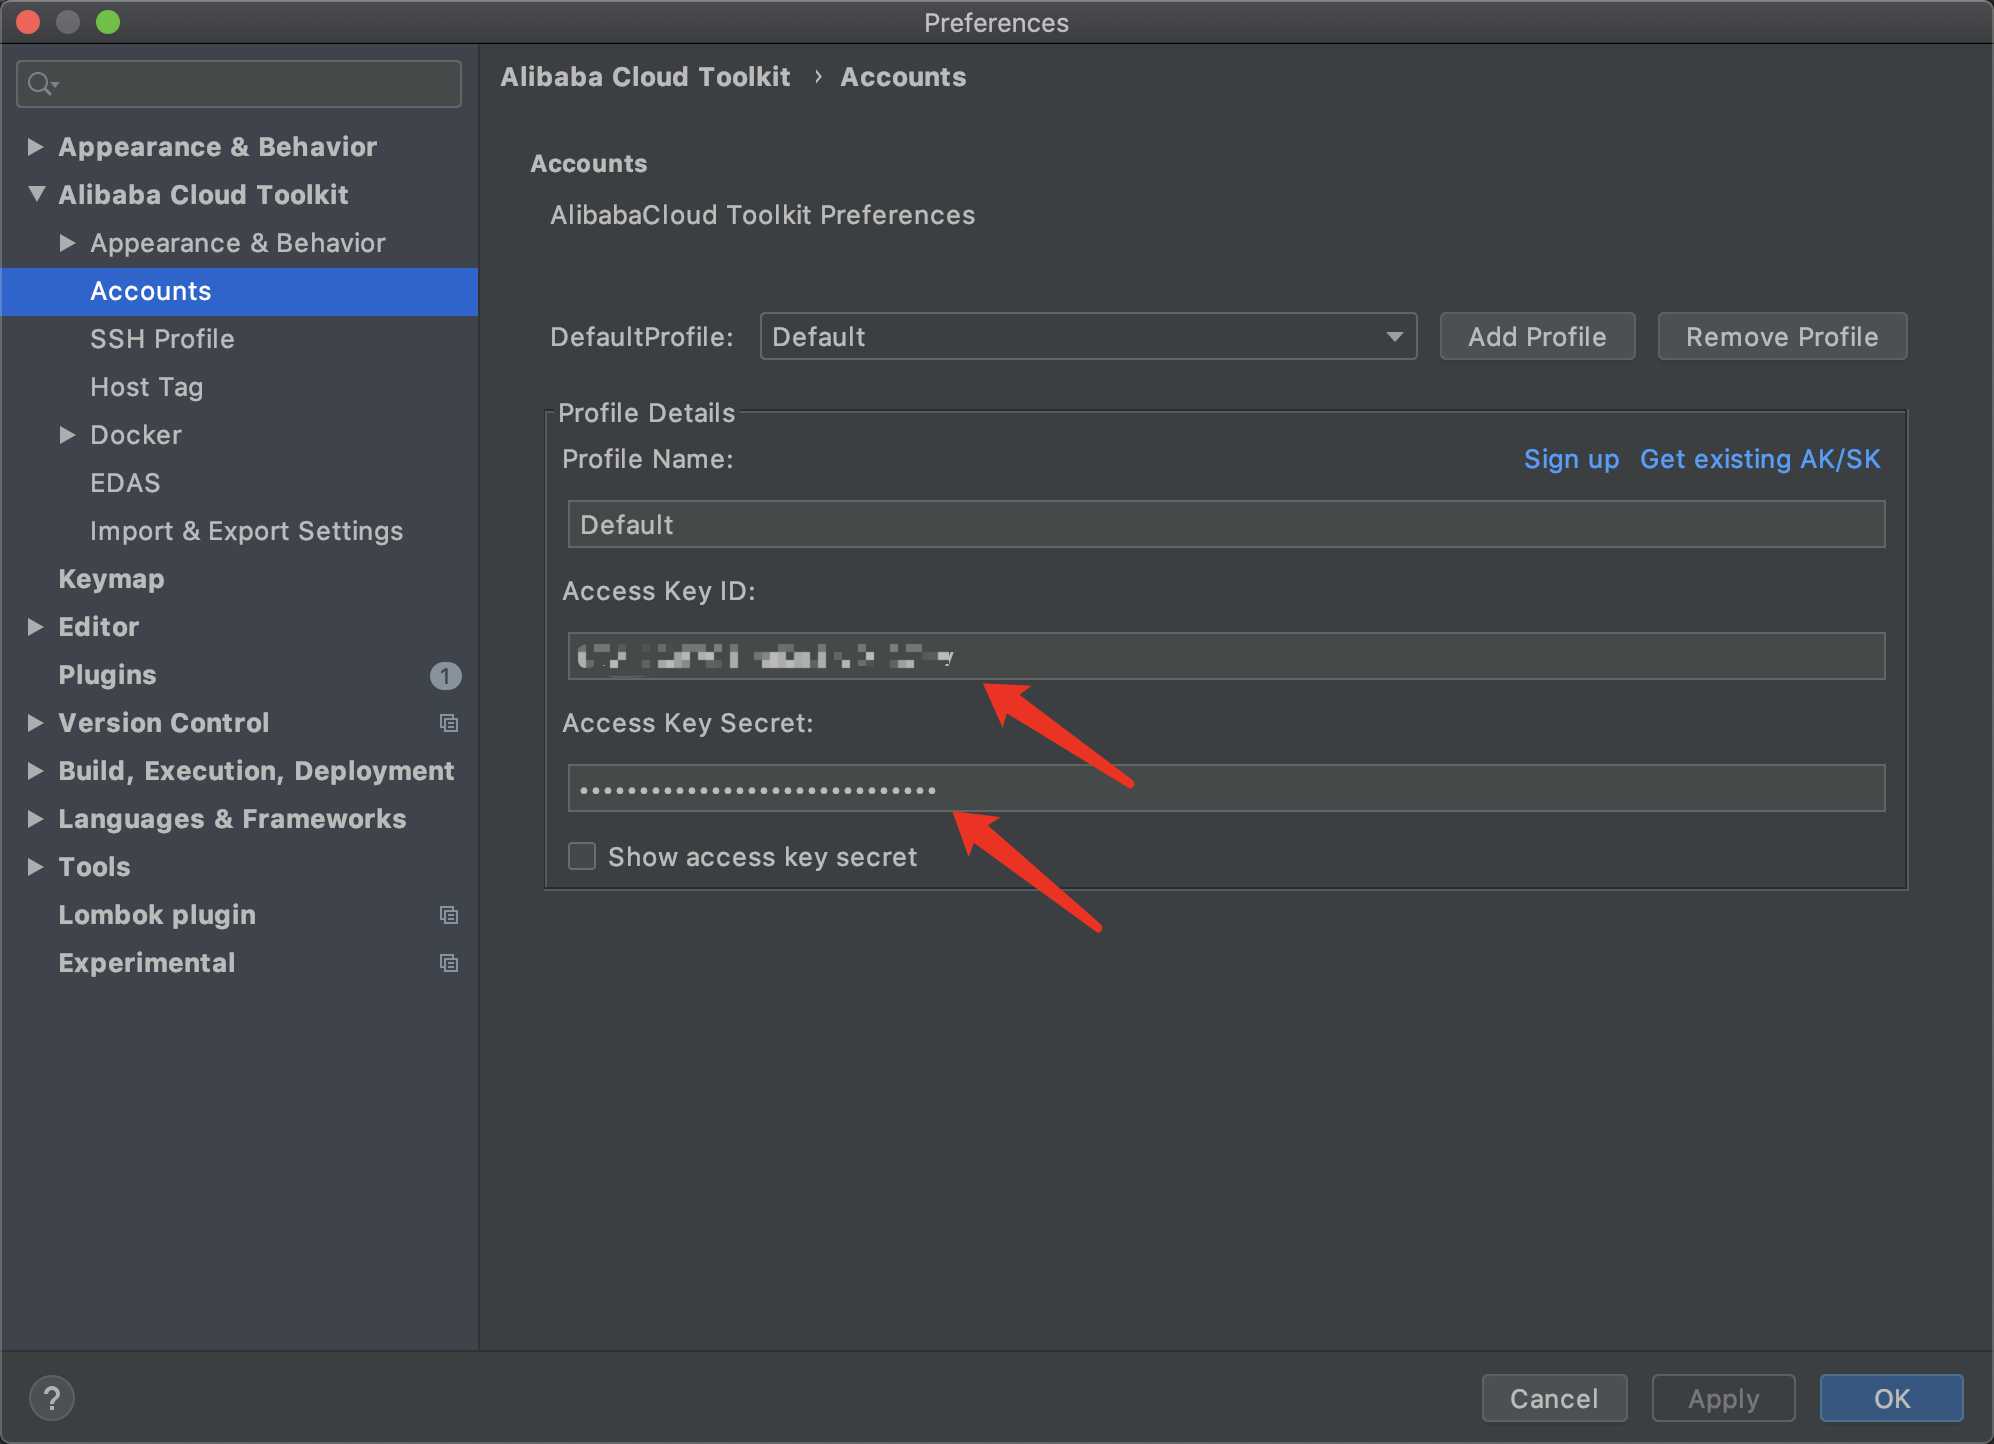
PS:Access Key 在阿里云控制台的右上角,鼠标放到个人头像上,下拉里有 "AccessKey 管理",点击进入添加使用。
配置之后,就可以开始部署到阿里云的 ECS 服务器了。

选择要部署的 ECS 服务器,填写必要的信息:
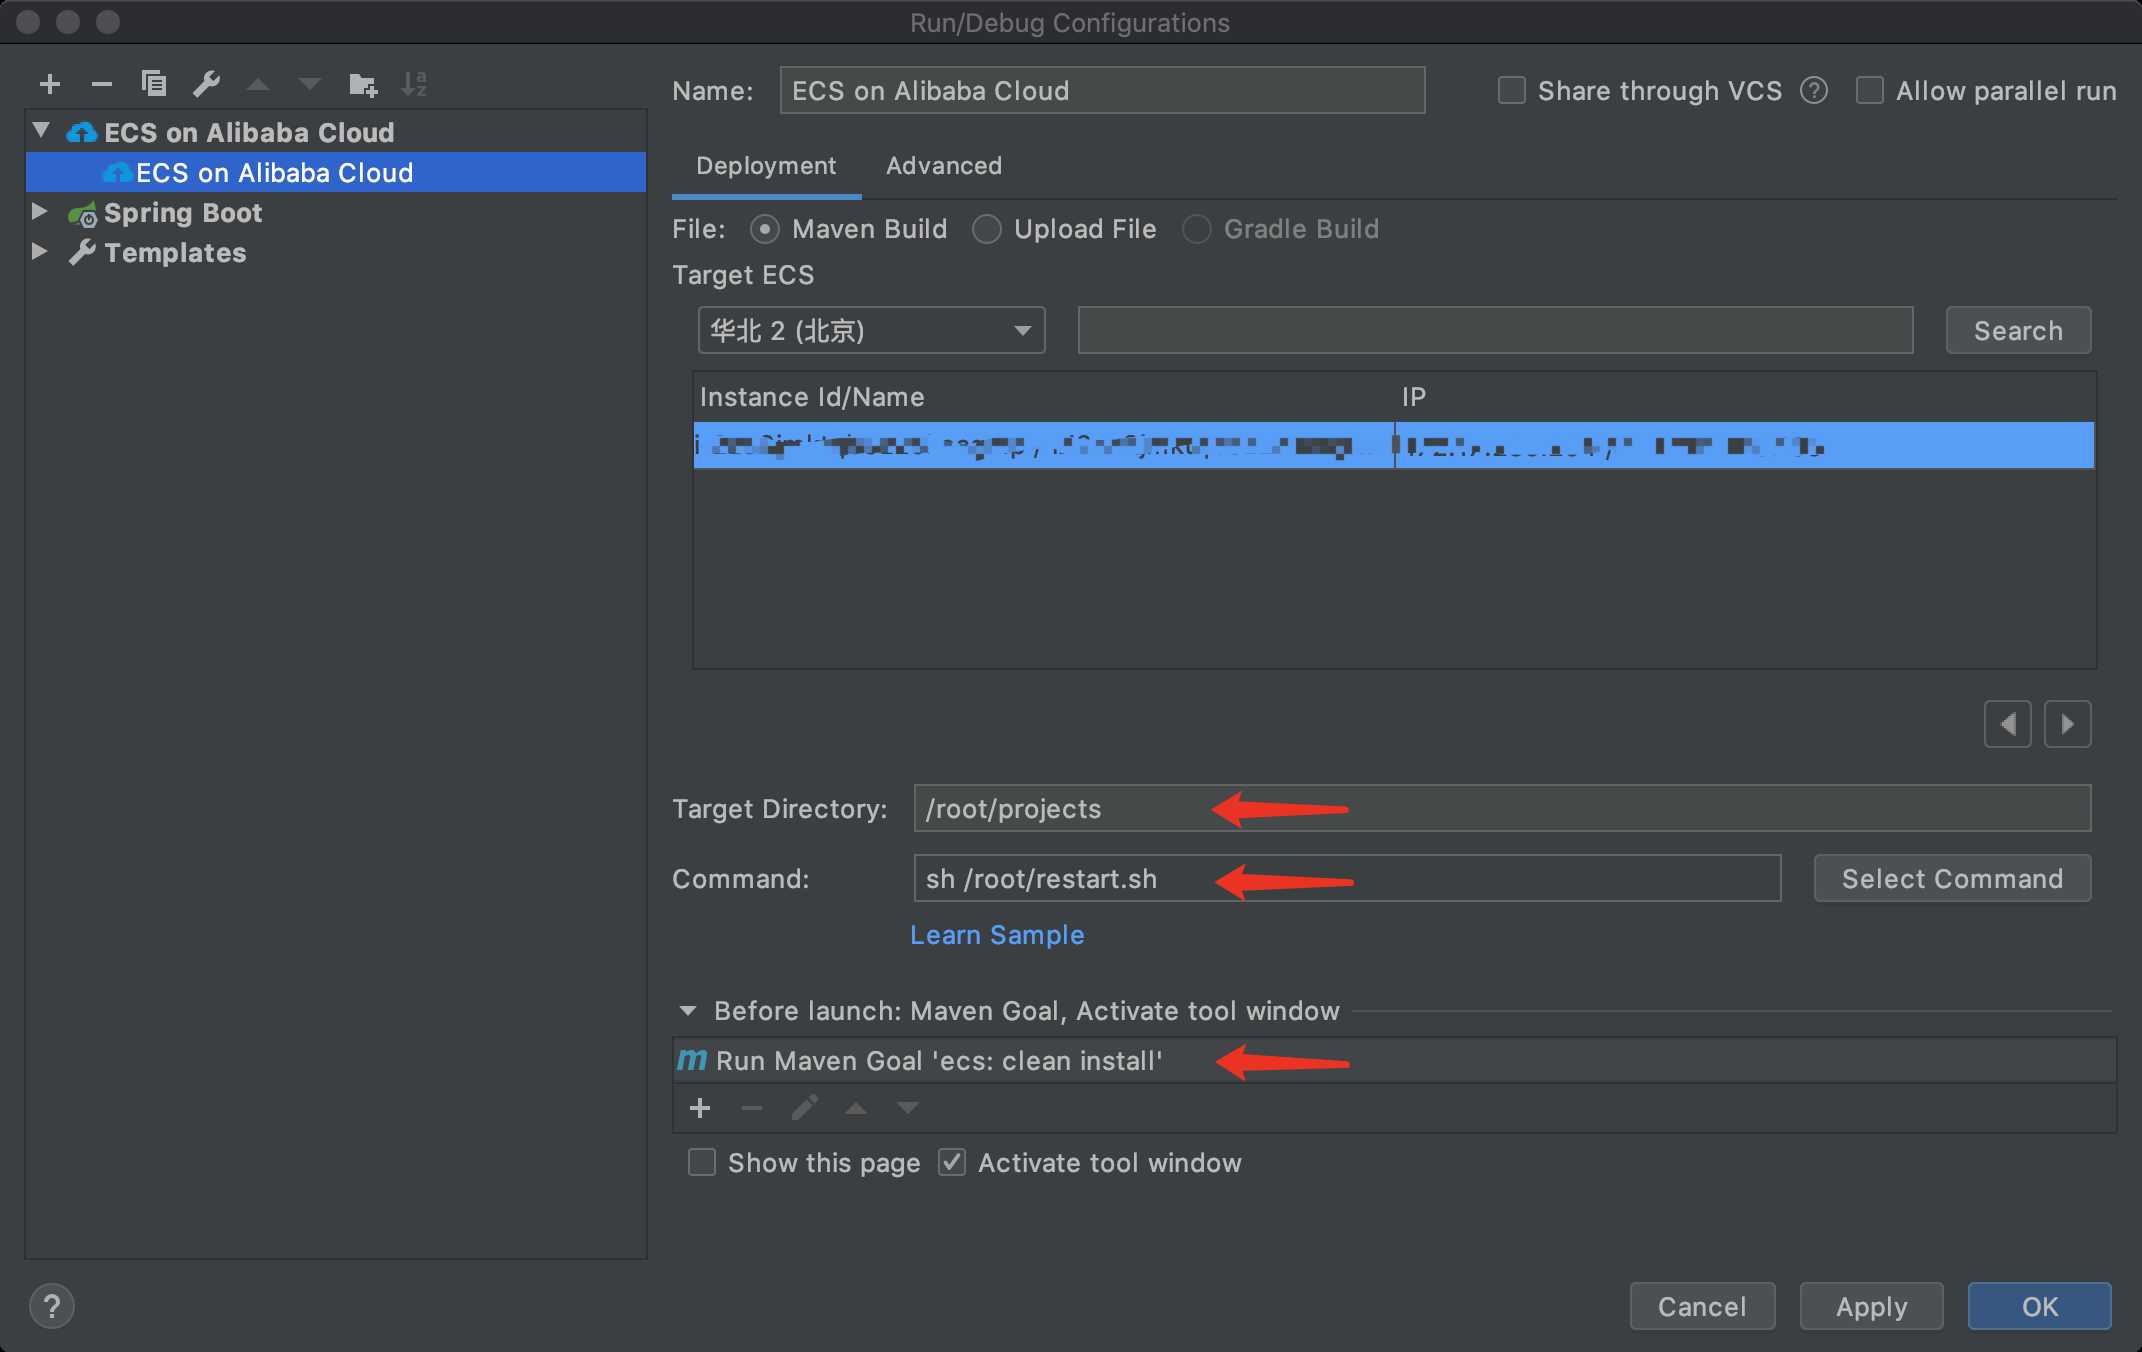
其中,restart.sh 脚本的代码就是简单的执行 SpringBoot 的jar包:
1 #!/bin/bash -e
2 PID=`ps -ef|grep ecs.jar |grep -v grep|awk ‘{print $2}‘ `
3 if [ -n "$PID" ]; then
4     kill -9 $PID
5     echo "结束$PID进程"
6 fi
7 nohup java -jar /root/projects/ecs.jar > ecs.log 2>&1 &
8 echo "部署完毕!"
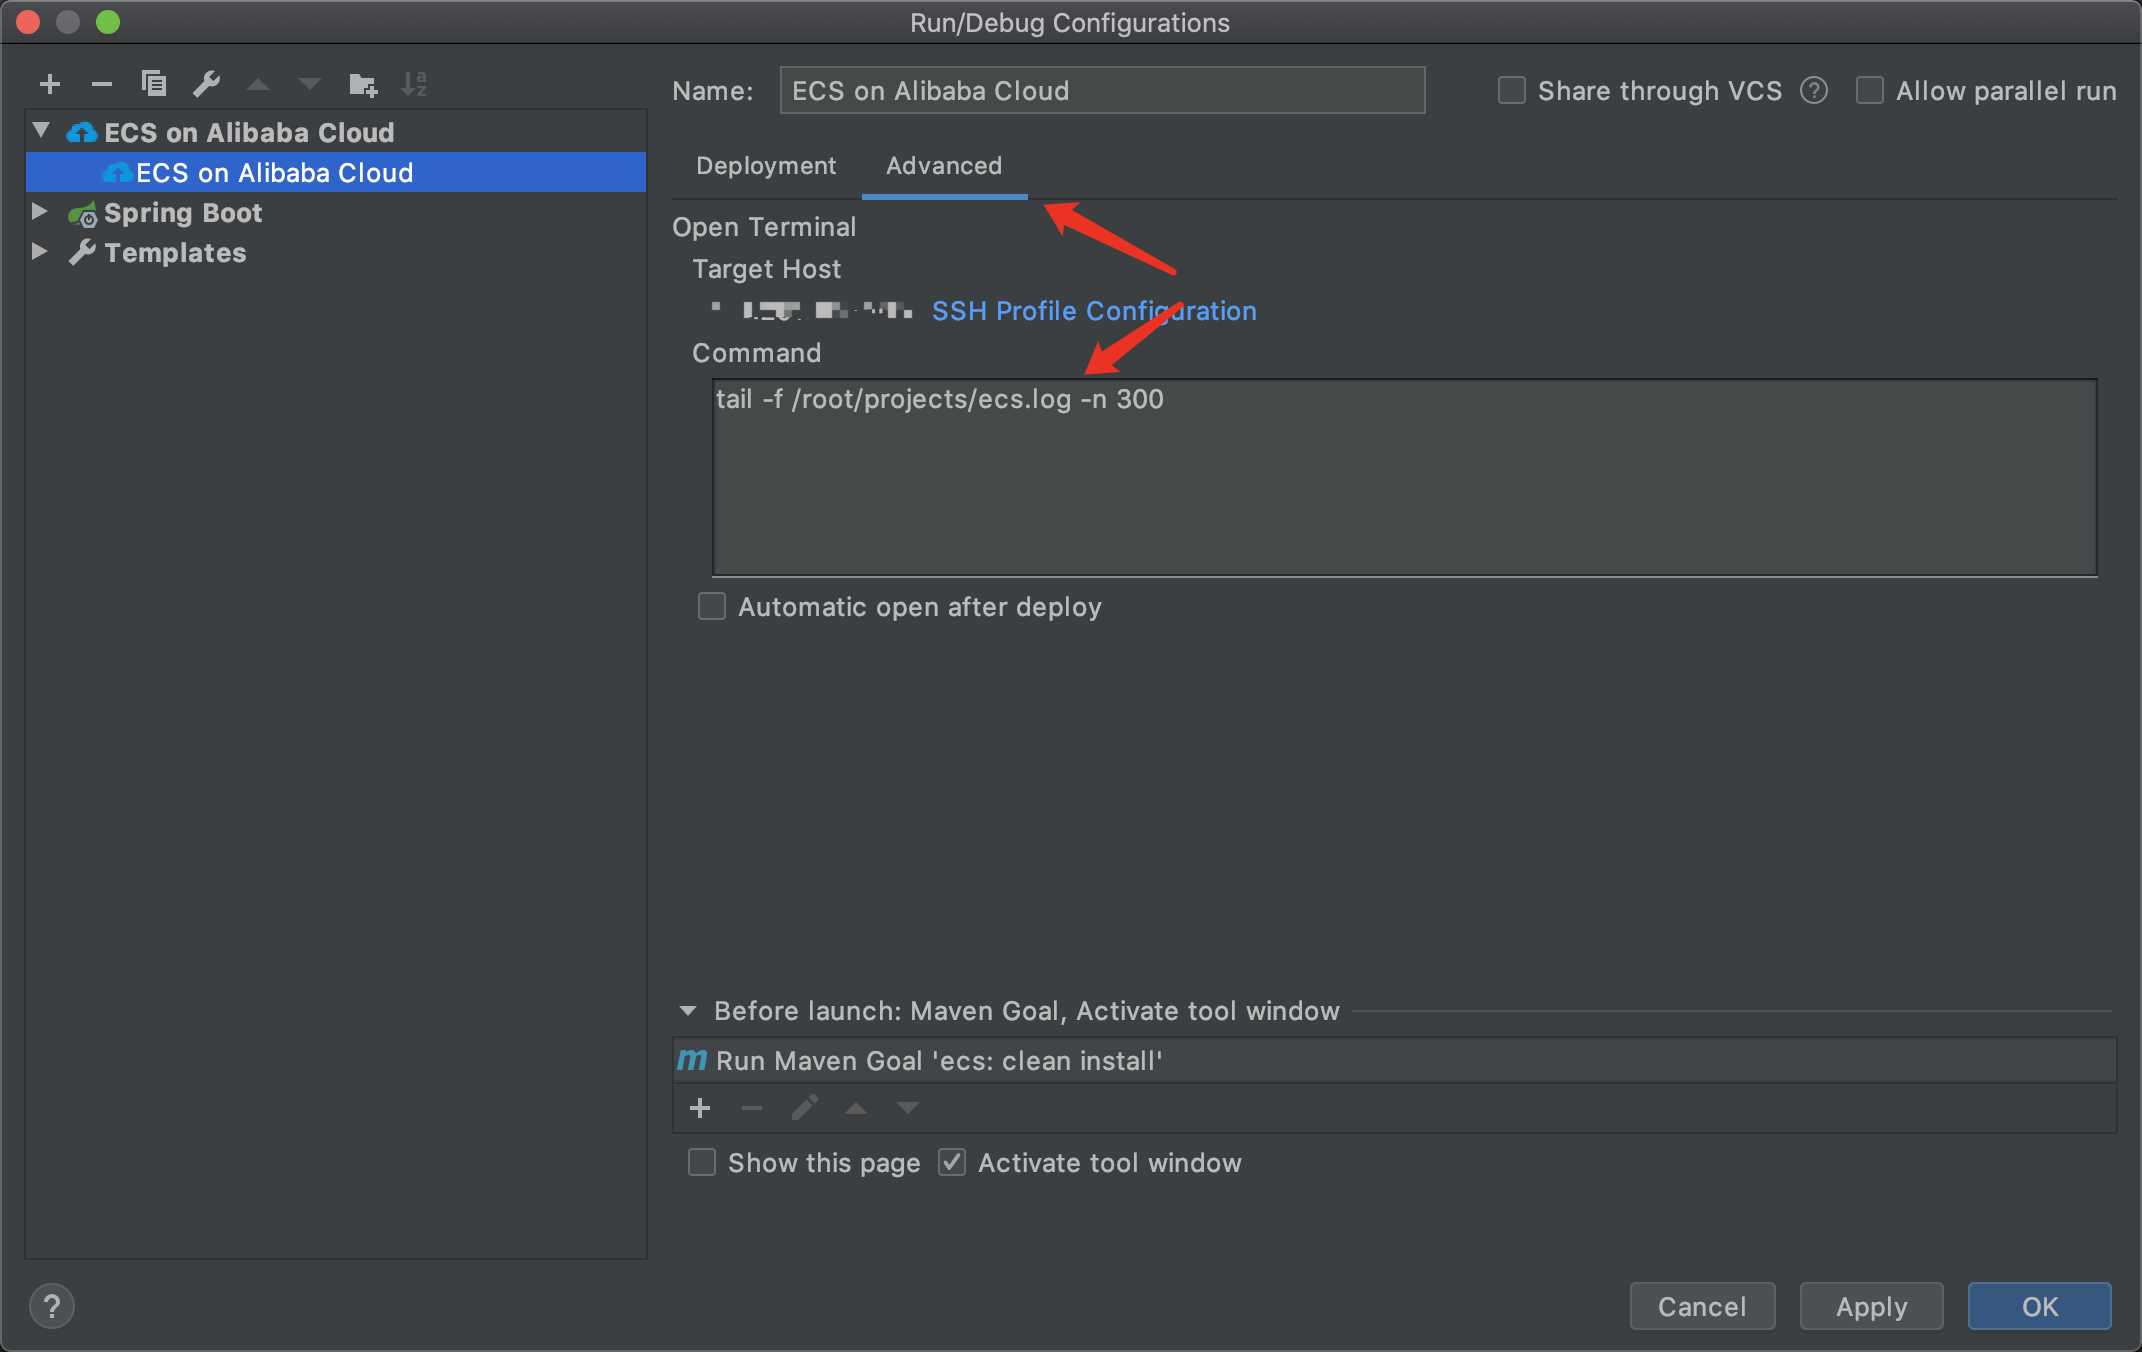
设置 Advanced 可以查看服务日志:
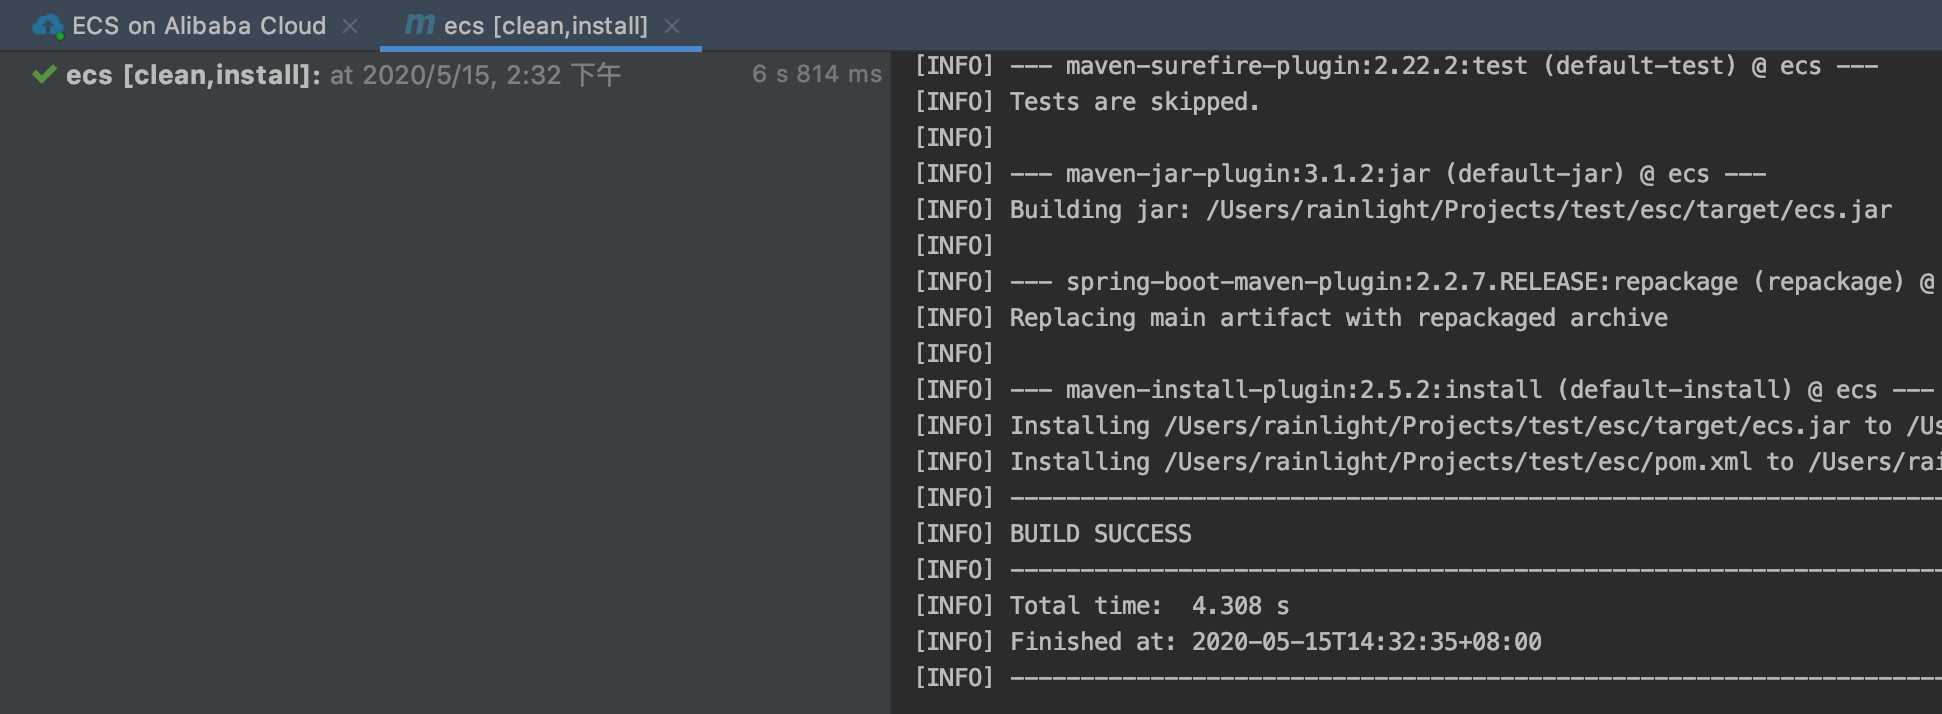
然后,执行部署即可,自动进行的操作有:
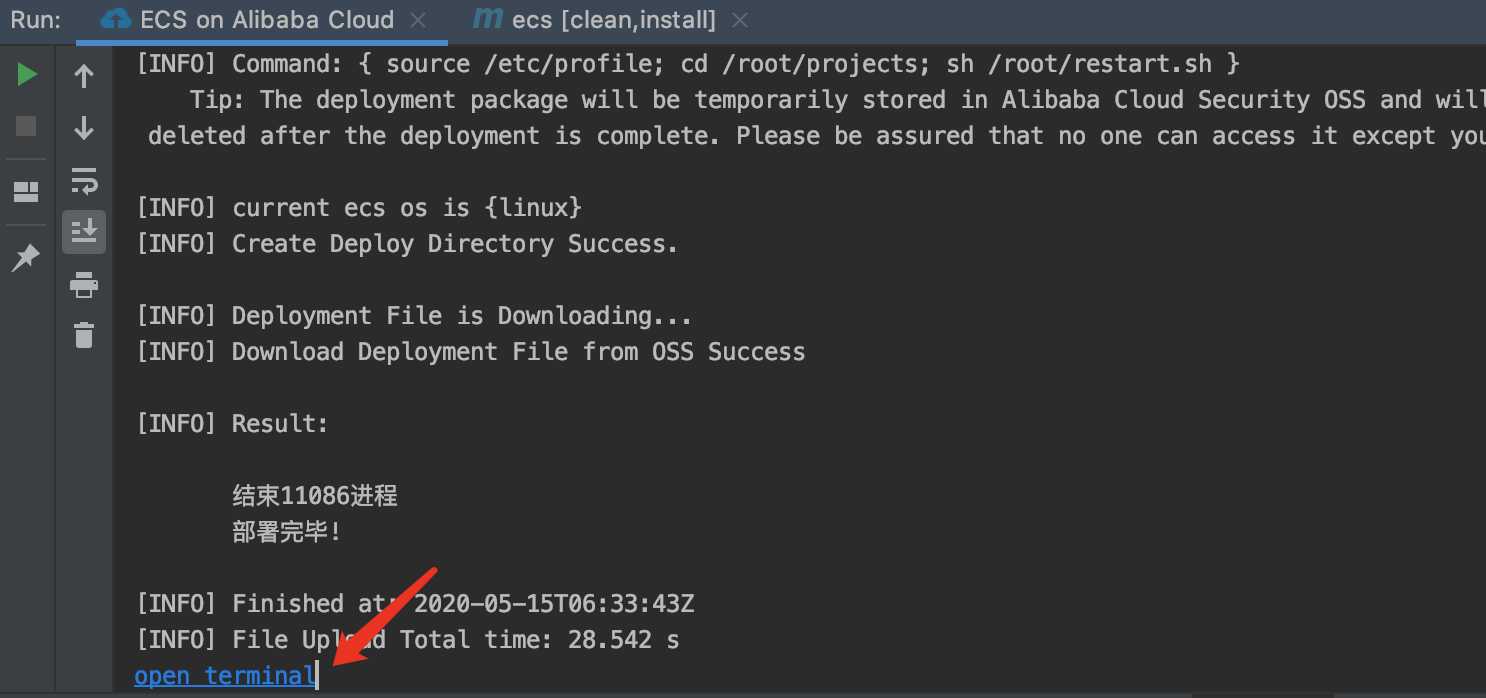
点击 “open terminal” 可以执行上面配置的 Advanced 中的命令查看日志:
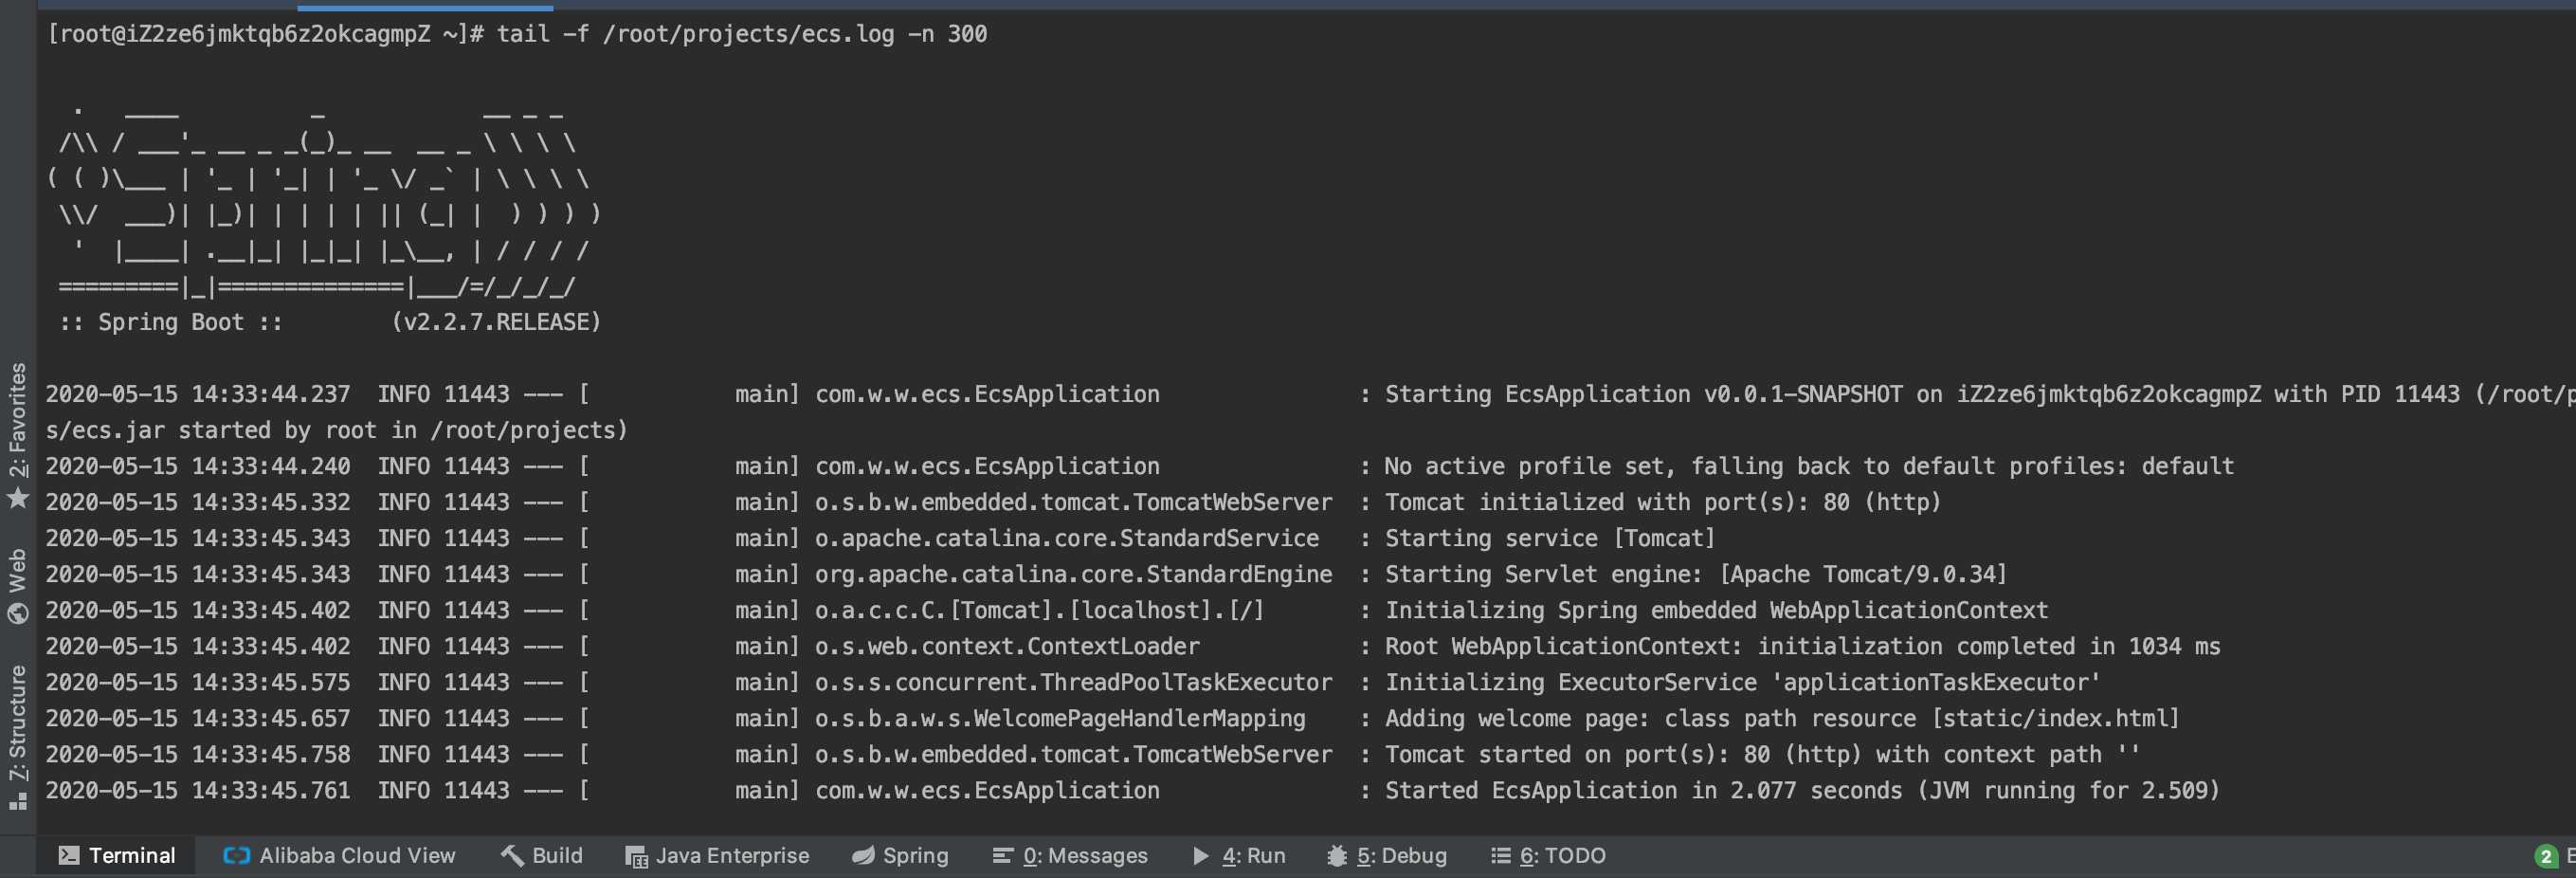
服务启动完成,接下来访问 ECS 服务域名即可查看部署服务的首页:

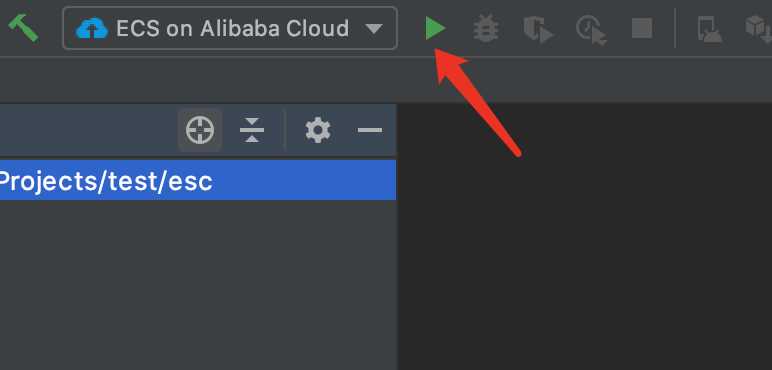
这个完事之后,以后修改了内容,直接本地运行上面配置的“ECS on Alibaba Cloud”,就会将服务打包部署到ECS服务器上。
今天就写在这儿了。Ths~
[原创]-在Idea中使用Alibaba Cloud Toolkit将SpringBoot项目部署到ECS服务器
标签:oid 安全组 from 开始 pack view for art text
原文地址:https://www.cnblogs.com/rainlight/p/12894893.html