标签:nlog 链接 成功 post mysql双主 主从 ima star img
l 主mysql上:
# cp /etc/my.cnf /etc/my.cnf.bak
# vi /etc/my.cnf
log_bin=mysql-bin //开启二进制日志
server_id=1 //server_id 的值主从必须不同
登录mysql后进行授权:
mysql> grant all on *.* to ‘replication‘@‘%‘ identified by ‘replication‘;
mysql> flush privileges;
解释:在master的数据库服务器中建立一个复制的账户,每个slave使用该账户链接master来进行复制,设置所有权限(根据具体情况自定)。上面创建了一个replication用户,密码是replication。只允许在所有段的ip地址的登录。
查看master的状态:
# mysql -uroot -p
mysql> show master status;

记住file和position的值,配置slave的时候需要用。
l从mysql上配置:
修改配置文件
# vi /etc/my.cnf
server_id = 2 //修改server_id,其值必须和master的不同。
relay_log=relay-logs //开启中继日志,可以自定义目录,mysql用户有权限即可
# service mysqld restart
# mysql -uroot –p
连接master服务器:
mysql> change master to master_host=‘172.18.49.10‘,master_user=‘replication‘,master_password=‘replication‘,master_log_file=‘master-bin.000003‘,master_log_pos=284;
选项解释:
master_host:Master 服务器IP
master_user:Master 服务器授权用户,也就是 Master 前面创建的那个用户
master_password:Master 服务器授权用户对应的密码
master_log_file:Master binlog 文件名
master_log_pos:Master binlog 文件中的 Postion 值
手动启动复制线程:
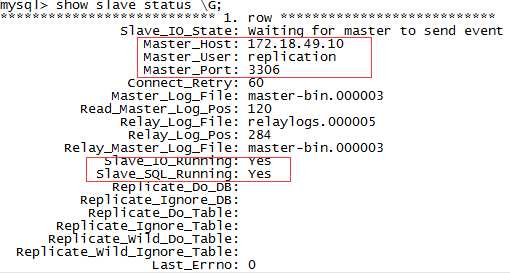
mysql> start slave;

出现yes表明成功
分别在两台虚拟机上执行。
标签:nlog 链接 成功 post mysql双主 主从 ima star img
原文地址:https://www.cnblogs.com/wanglinyan/p/12919044.html