标签:lin ever mysqldump nta ignore nod amp syn col
# Example MySQL config file for small systems.
#
# This is for a system with little memory (<= 64M) where MySQL is only used
# from time to time and it‘s important that the mysqld daemon
# doesn‘t use much resources.
#
# You can copy this file to
# C:/xampp/mysql/bin/my.cnf to set global options,
# mysql-data-dir/my.cnf to set server-specific options (in this
# installation this directory is C:/xampp/mysql/data) or
# ~/.my.cnf to set user-specific options.
#
# In this file, you can use all long options that a program supports.
# If you want to know which options a program supports, run the program
# with the "--help" option.

# The following options will be passed to all MySQL clients
[client]
password       = 123456
port            = 3306
socket          = "C:/xampp/mysql/mysql.sock"


# Here follows entries for some specific programs

# The MySQL server
[mysqld]
port= 3306
socket = "C:/xampp/mysql/mysql.sock"
basedir = "C:/xampp/mysql"
tmpdir = "C:/xampp/tmp"
datadir = "C:/xampp/mysql/data"
pid_file = "mysql.pid"
# enable-named-pipe
key_buffer = 16M
max_allowed_packet = 1M
sort_buffer_size = 512K
net_buffer_length = 8K
read_buffer_size = 256K
read_rnd_buffer_size = 512K
myisam_sort_buffer_size = 8M
log_error = "mysql_error.log"

# Change here for bind listening
bind-address="0.0.0.0"
# bind-address = ::1          # for ipv6

# Where do all the plugins live
plugin_dir = "C:/xampp/mysql/lib/plugin/"

# Don‘t listen on a TCP/IP port at all. This can be a security enhancement,
# if all processes that need to connect to mysqld run on the same host.
# All interaction with mysqld must be made via Unix sockets or named pipes.
# Note that using this option without enabling named pipes on Windows
# (via the "enable-named-pipe" option) will render mysqld useless!
#
# commented in by lampp security
#skip-networking
#skip-federated

# Replication Master Server (default)
# binary logging is required for replication
# log-bin deactivated by default since XAMPP 1.4.11
#log-bin=mysql-bin

# required unique id between 1 and 2^32 - 1
# defaults to 1 if master-host is not set
# but will not function as a master if omitted
server-id	= 1

# Replication Slave (comment out master section to use this)
#
# To configure this host as a replication slave, you can choose between
# two methods :
#
# 1) Use the CHANGE MASTER TO command (fully described in our manual) -
#    the syntax is:
#
#    CHANGE MASTER TO MASTER_HOST=<host>, MASTER_PORT=<port>,
#    MASTER_USER=<user>, MASTER_PASSWORD=<password> ;
#
#    where you replace <host>, <user>, <password> by quoted strings and
#    <port> by the master‘s port number (3306 by default).
#
#    Example:
#
#    CHANGE MASTER TO MASTER_HOST=‘125.564.12.1‘, MASTER_PORT=3306,
#    MASTER_USER=‘joe‘, MASTER_PASSWORD=‘secret‘;
#
# OR
#
# 2) Set the variables below. However, in case you choose this method, then
#    start replication for the first time (even unsuccessfully, for example
#    if you mistyped the password in master-password and the slave fails to
#    connect), the slave will create a master.info file, and any later
#    change in this file to the variables‘ values below will be ignored and
#    overridden by the content of the master.info file, unless you shutdown
#    the slave server, delete master.info and restart the slaver server.
#    For that reason, you may want to leave the lines below untouched
#    (commented) and instead use CHANGE MASTER TO (see above)
#
# required unique id between 2 and 2^32 - 1
# (and different from the master)
# defaults to 2 if master-host is set
# but will not function as a slave if omitted
#server-id       = 2
#
# The replication master for this slave - required
#master-host     =   <hostname>
#
# The username the slave will use for authentication when connecting
# to the master - required
#master-user     =   <username>
#
# The password the slave will authenticate with when connecting to
# the master - required
#master-password =   <password>
#
# The port the master is listening on.
# optional - defaults to 3306
#master-port     =  <port>
#
# binary logging - not required for slaves, but recommended
#log-bin=mysql-bin


# Point the following paths to different dedicated disks
#tmpdir = "C:/xampp/tmp"
#log-update = /path-to-dedicated-directory/hostname

# Uncomment the following if you are using BDB tables
#bdb_cache_size = 4M
#bdb_max_lock = 10000

# Comment the following if you are using InnoDB tables
#skip-innodb
innodb_data_home_dir = "C:/xampp/mysql/data"
innodb_data_file_path = ibdata1:10M:autoextend
innodb_log_group_home_dir = "C:/xampp/mysql/data"
#innodb_log_arch_dir = "C:/xampp/mysql/data"
## You can set .._buffer_pool_size up to 50 - 80 %
## of RAM but beware of setting memory usage too high
innodb_buffer_pool_size = 16M
innodb_additional_mem_pool_size = 2M
## Set .._log_file_size to 25 % of buffer pool size
innodb_log_file_size = 5M
innodb_log_buffer_size = 8M
innodb_flush_log_at_trx_commit = 1
innodb_lock_wait_timeout = 50

## UTF 8 Settings
#init-connect=\‘SET NAMES utf8\‘
#collation_server=utf8_unicode_ci
#character_set_server=utf8
#skip-character-set-client-handshake
#character_sets-dir="C:/xampp/mysql/share/charsets"

[mysqldump]
quick
max_allowed_packet = 16M

[mysql]
no-auto-rehash
# Remove the next comment character if you are not familiar with SQL
#safe-updates

[isamchk]
key_buffer = 20M
sort_buffer_size = 20M
read_buffer = 2M
write_buffer = 2M

[myisamchk]
key_buffer = 20M
sort_buffer_size = 20M
read_buffer = 2M
write_buffer = 2M

[mysqlhotcopy]
interactive-timeout
可直接复制使用:
注意注意!!!!!!一定要将
:# Change here for bind listening
bind-address="0.0.0.0" 配置成0.0.0.0 表示可远程:

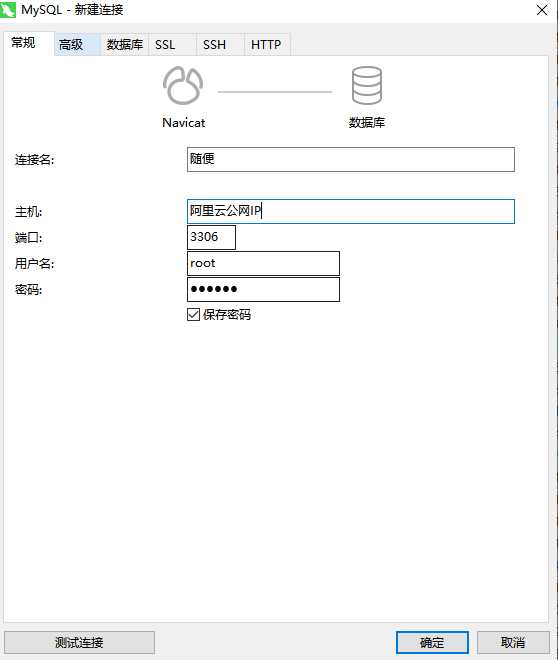
链接名字随便填:主机名字为阿里云公网IP

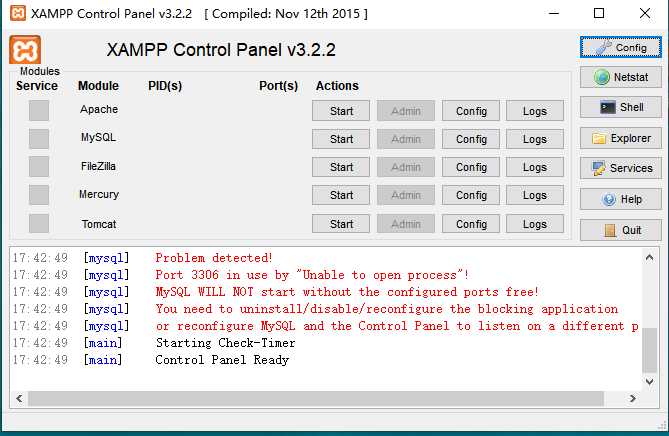
点击:Mysql那栏start连接后 点击config就会跳出配置文件:
按我上面的配置就ok了:
使用XAMPP创建Mysql数据库 要想在本地连接需要配置一下my.ini文件 配置如下:
标签:lin ever mysqldump nta ignore nod amp syn col
原文地址:https://www.cnblogs.com/snail-Up-work-hard/p/12925030.html