标签:xcode ast prepare subclass blob config import led sign
最近在学习app的逆向,准备自己搞一个app,然后用逆向工具对其进行恶搞一下。
纠结在于用Mac app还是 IOS app,纠结了一下,选择了Mac app。
原因:
#import <Cocoa/Cocoa.h>
@interface ViewController : NSViewController
@end
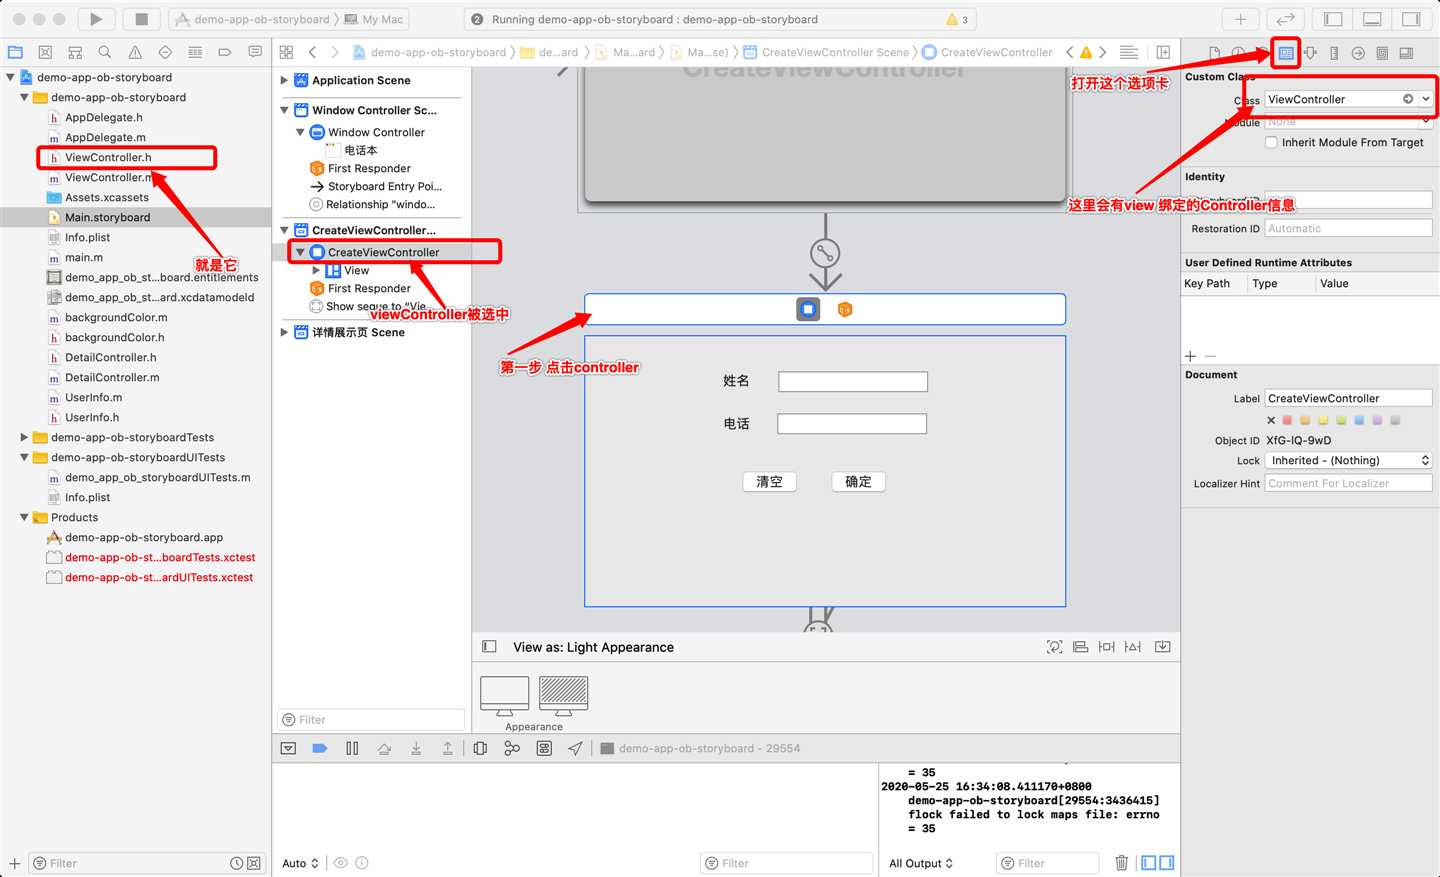
在xcode中打开storyboard文件,找到你要添加点击事件的按钮。
在左侧文件列表中找到关联的那个controller,按住option键然后点击,出现双屏,一屏是storyboard,一屏是代码
按住control键,点着那个按钮拖向代码文件。
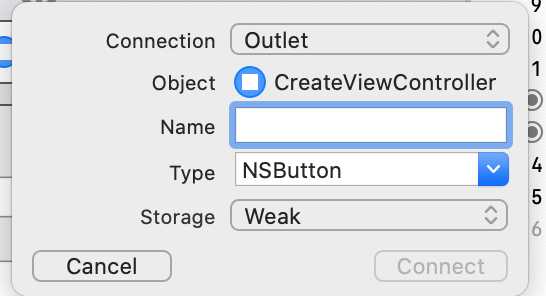
出现dialog,填上你的内容
结束
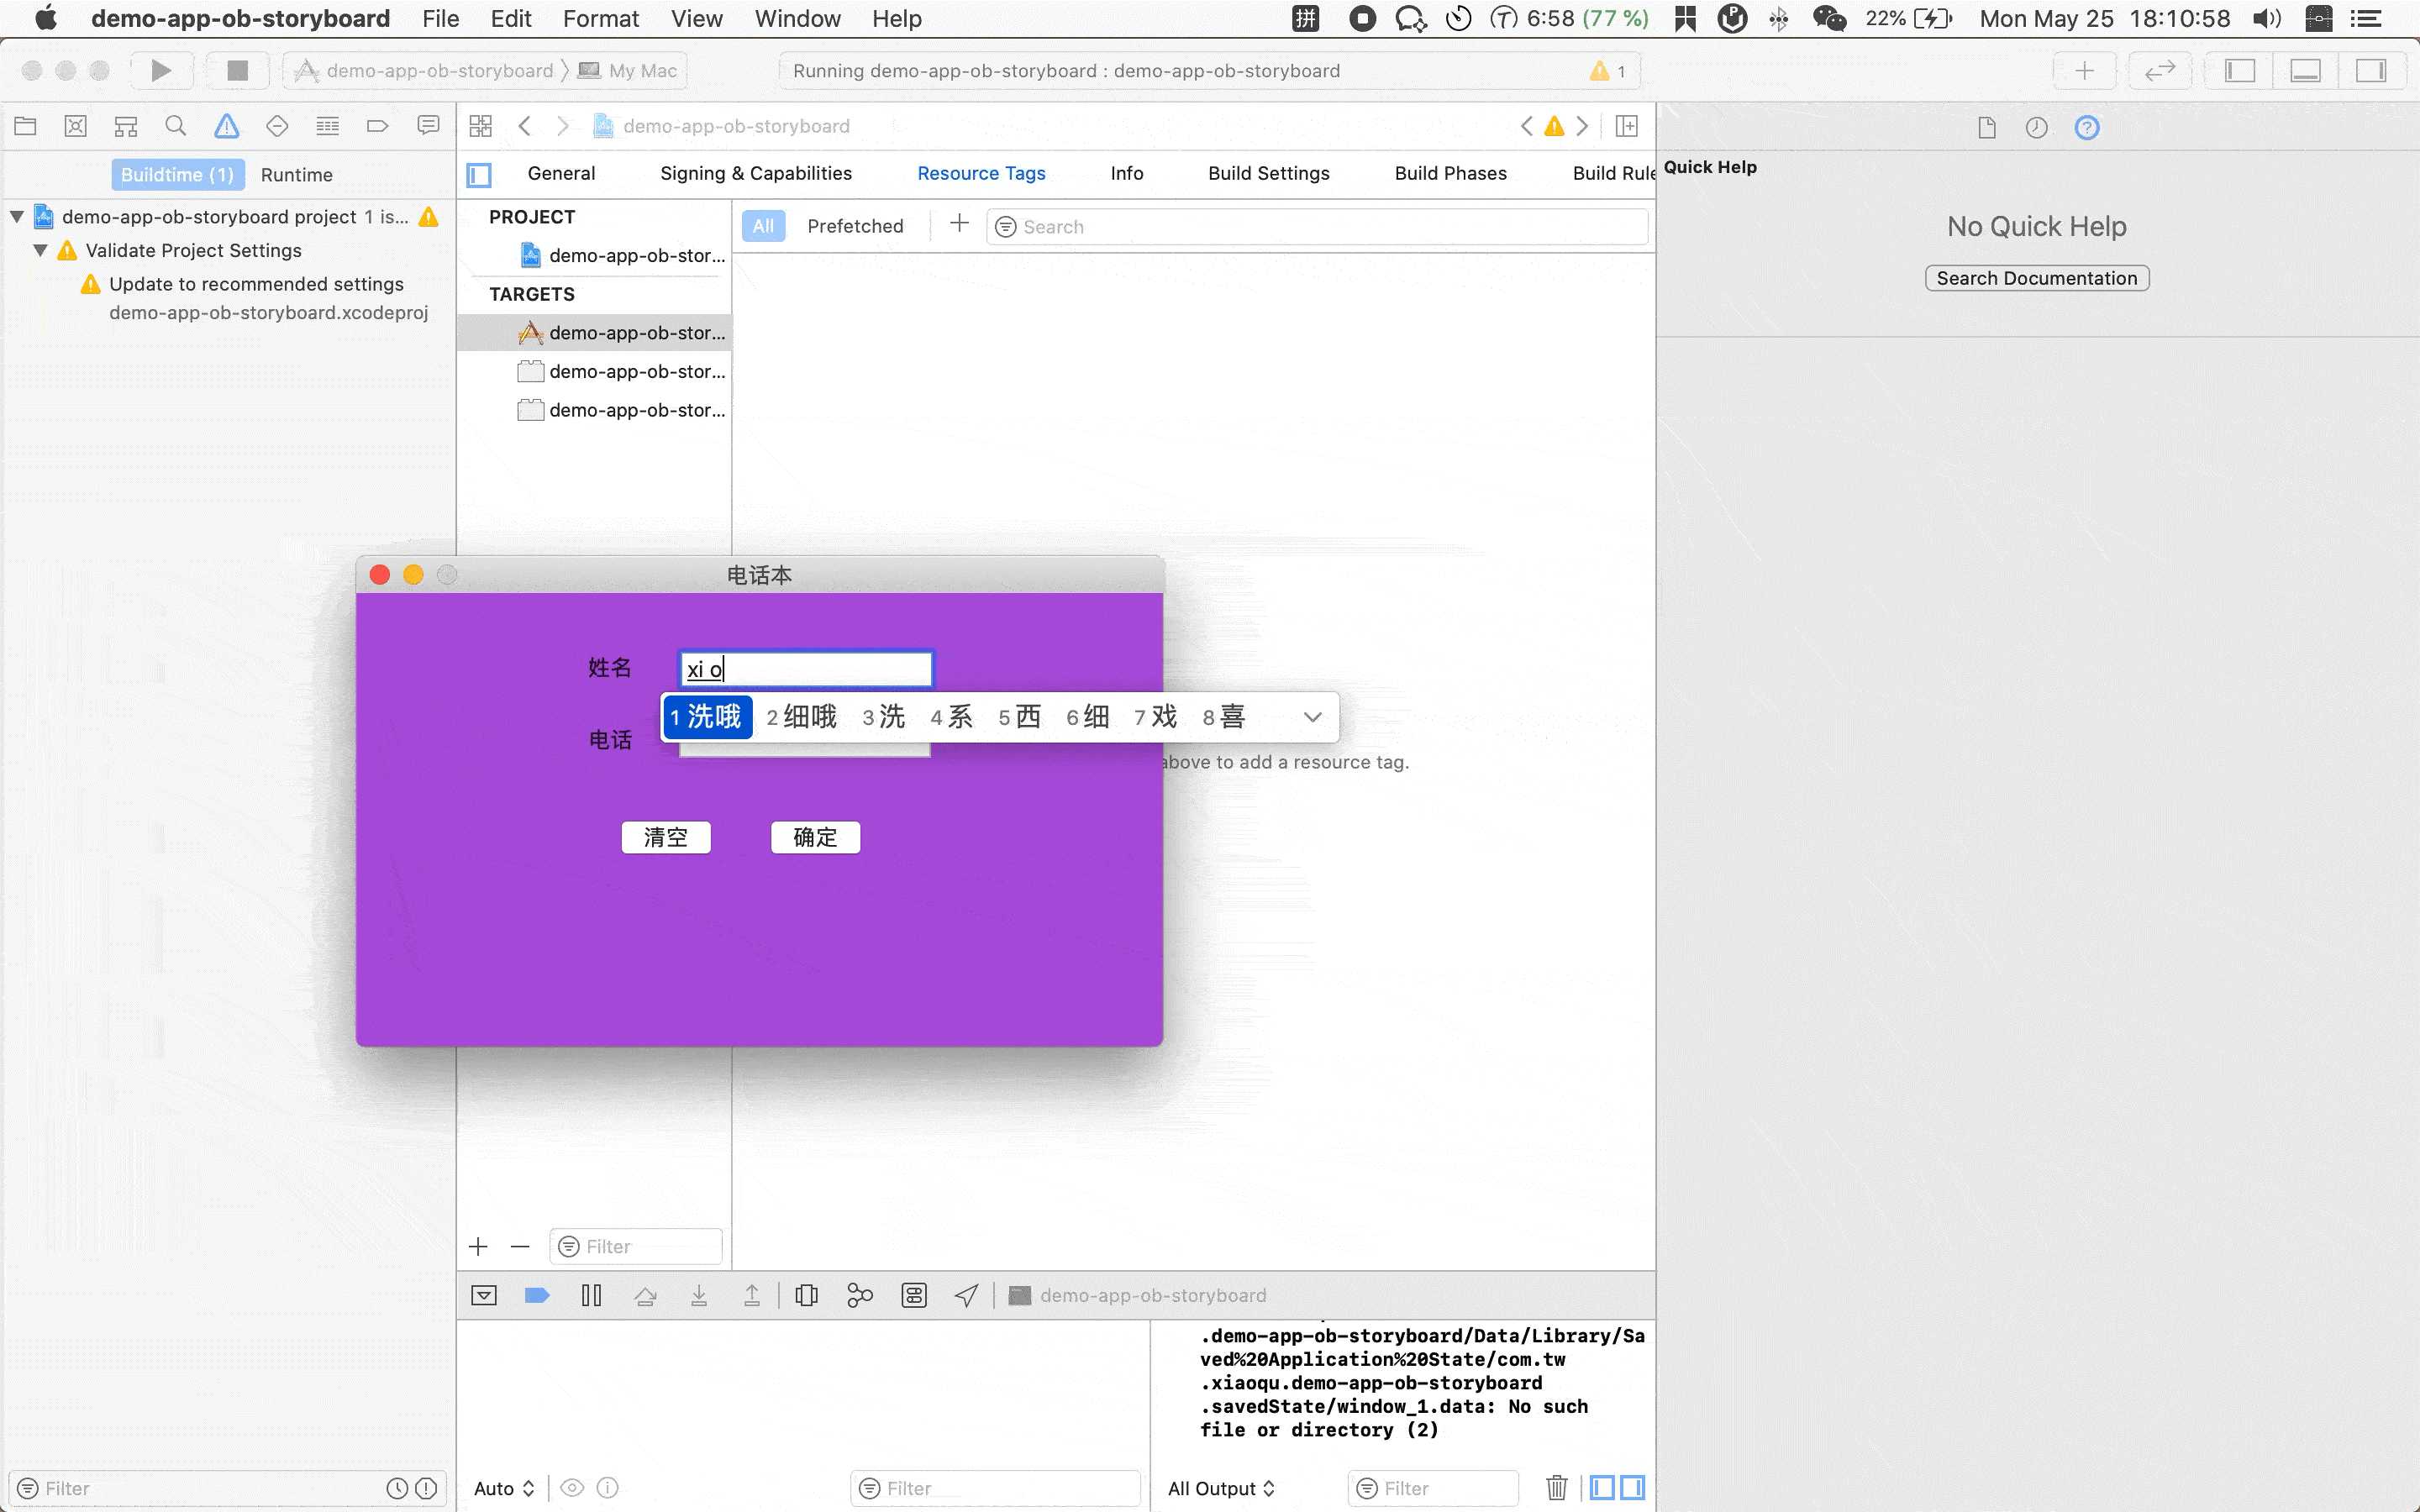
简单的gif
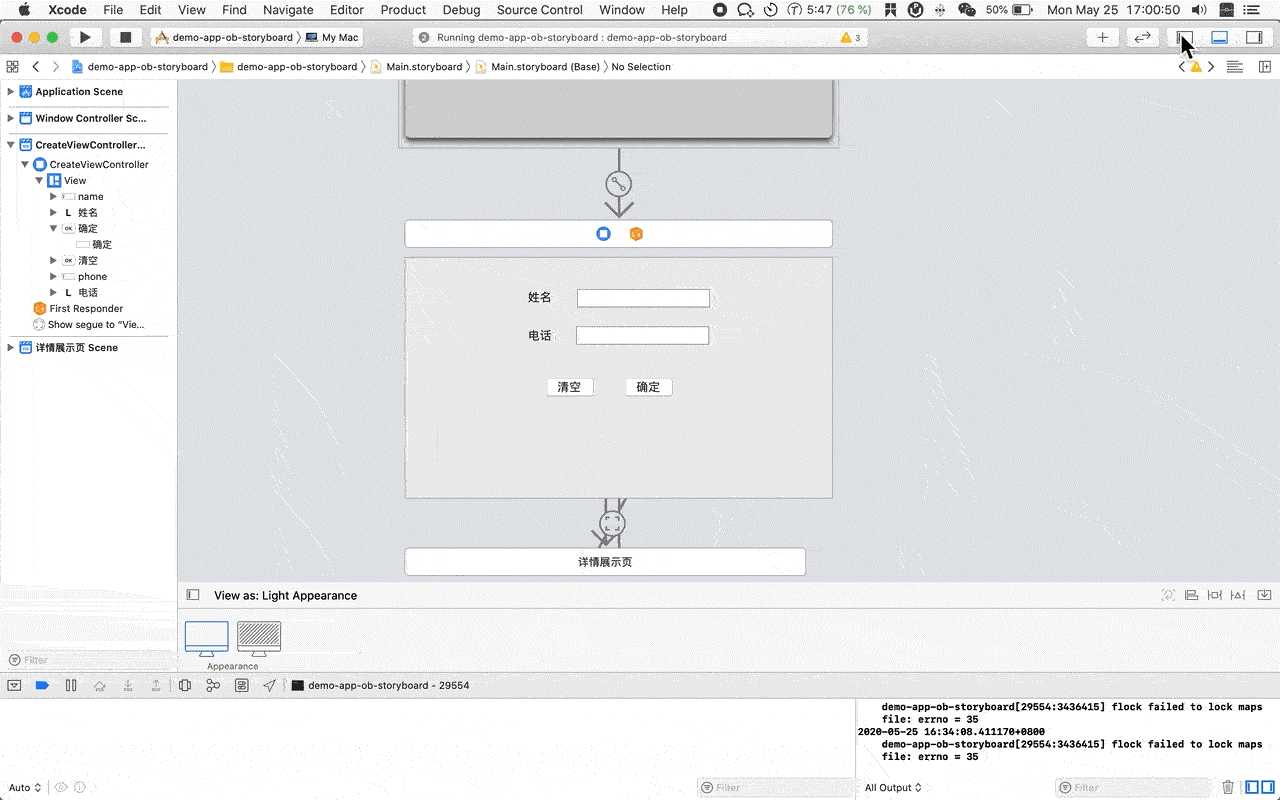
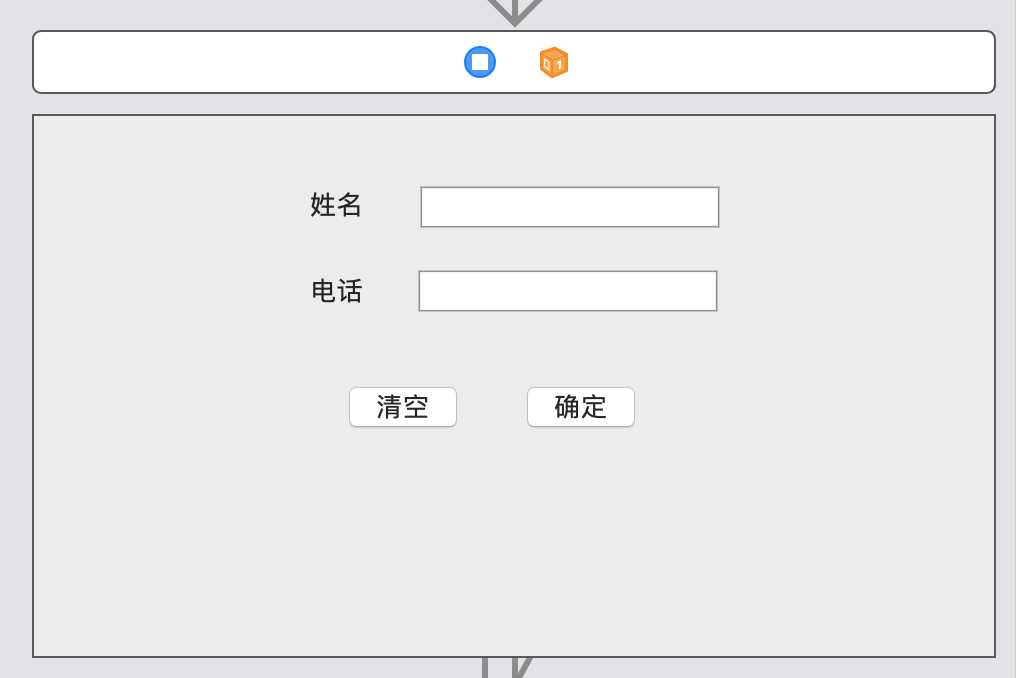
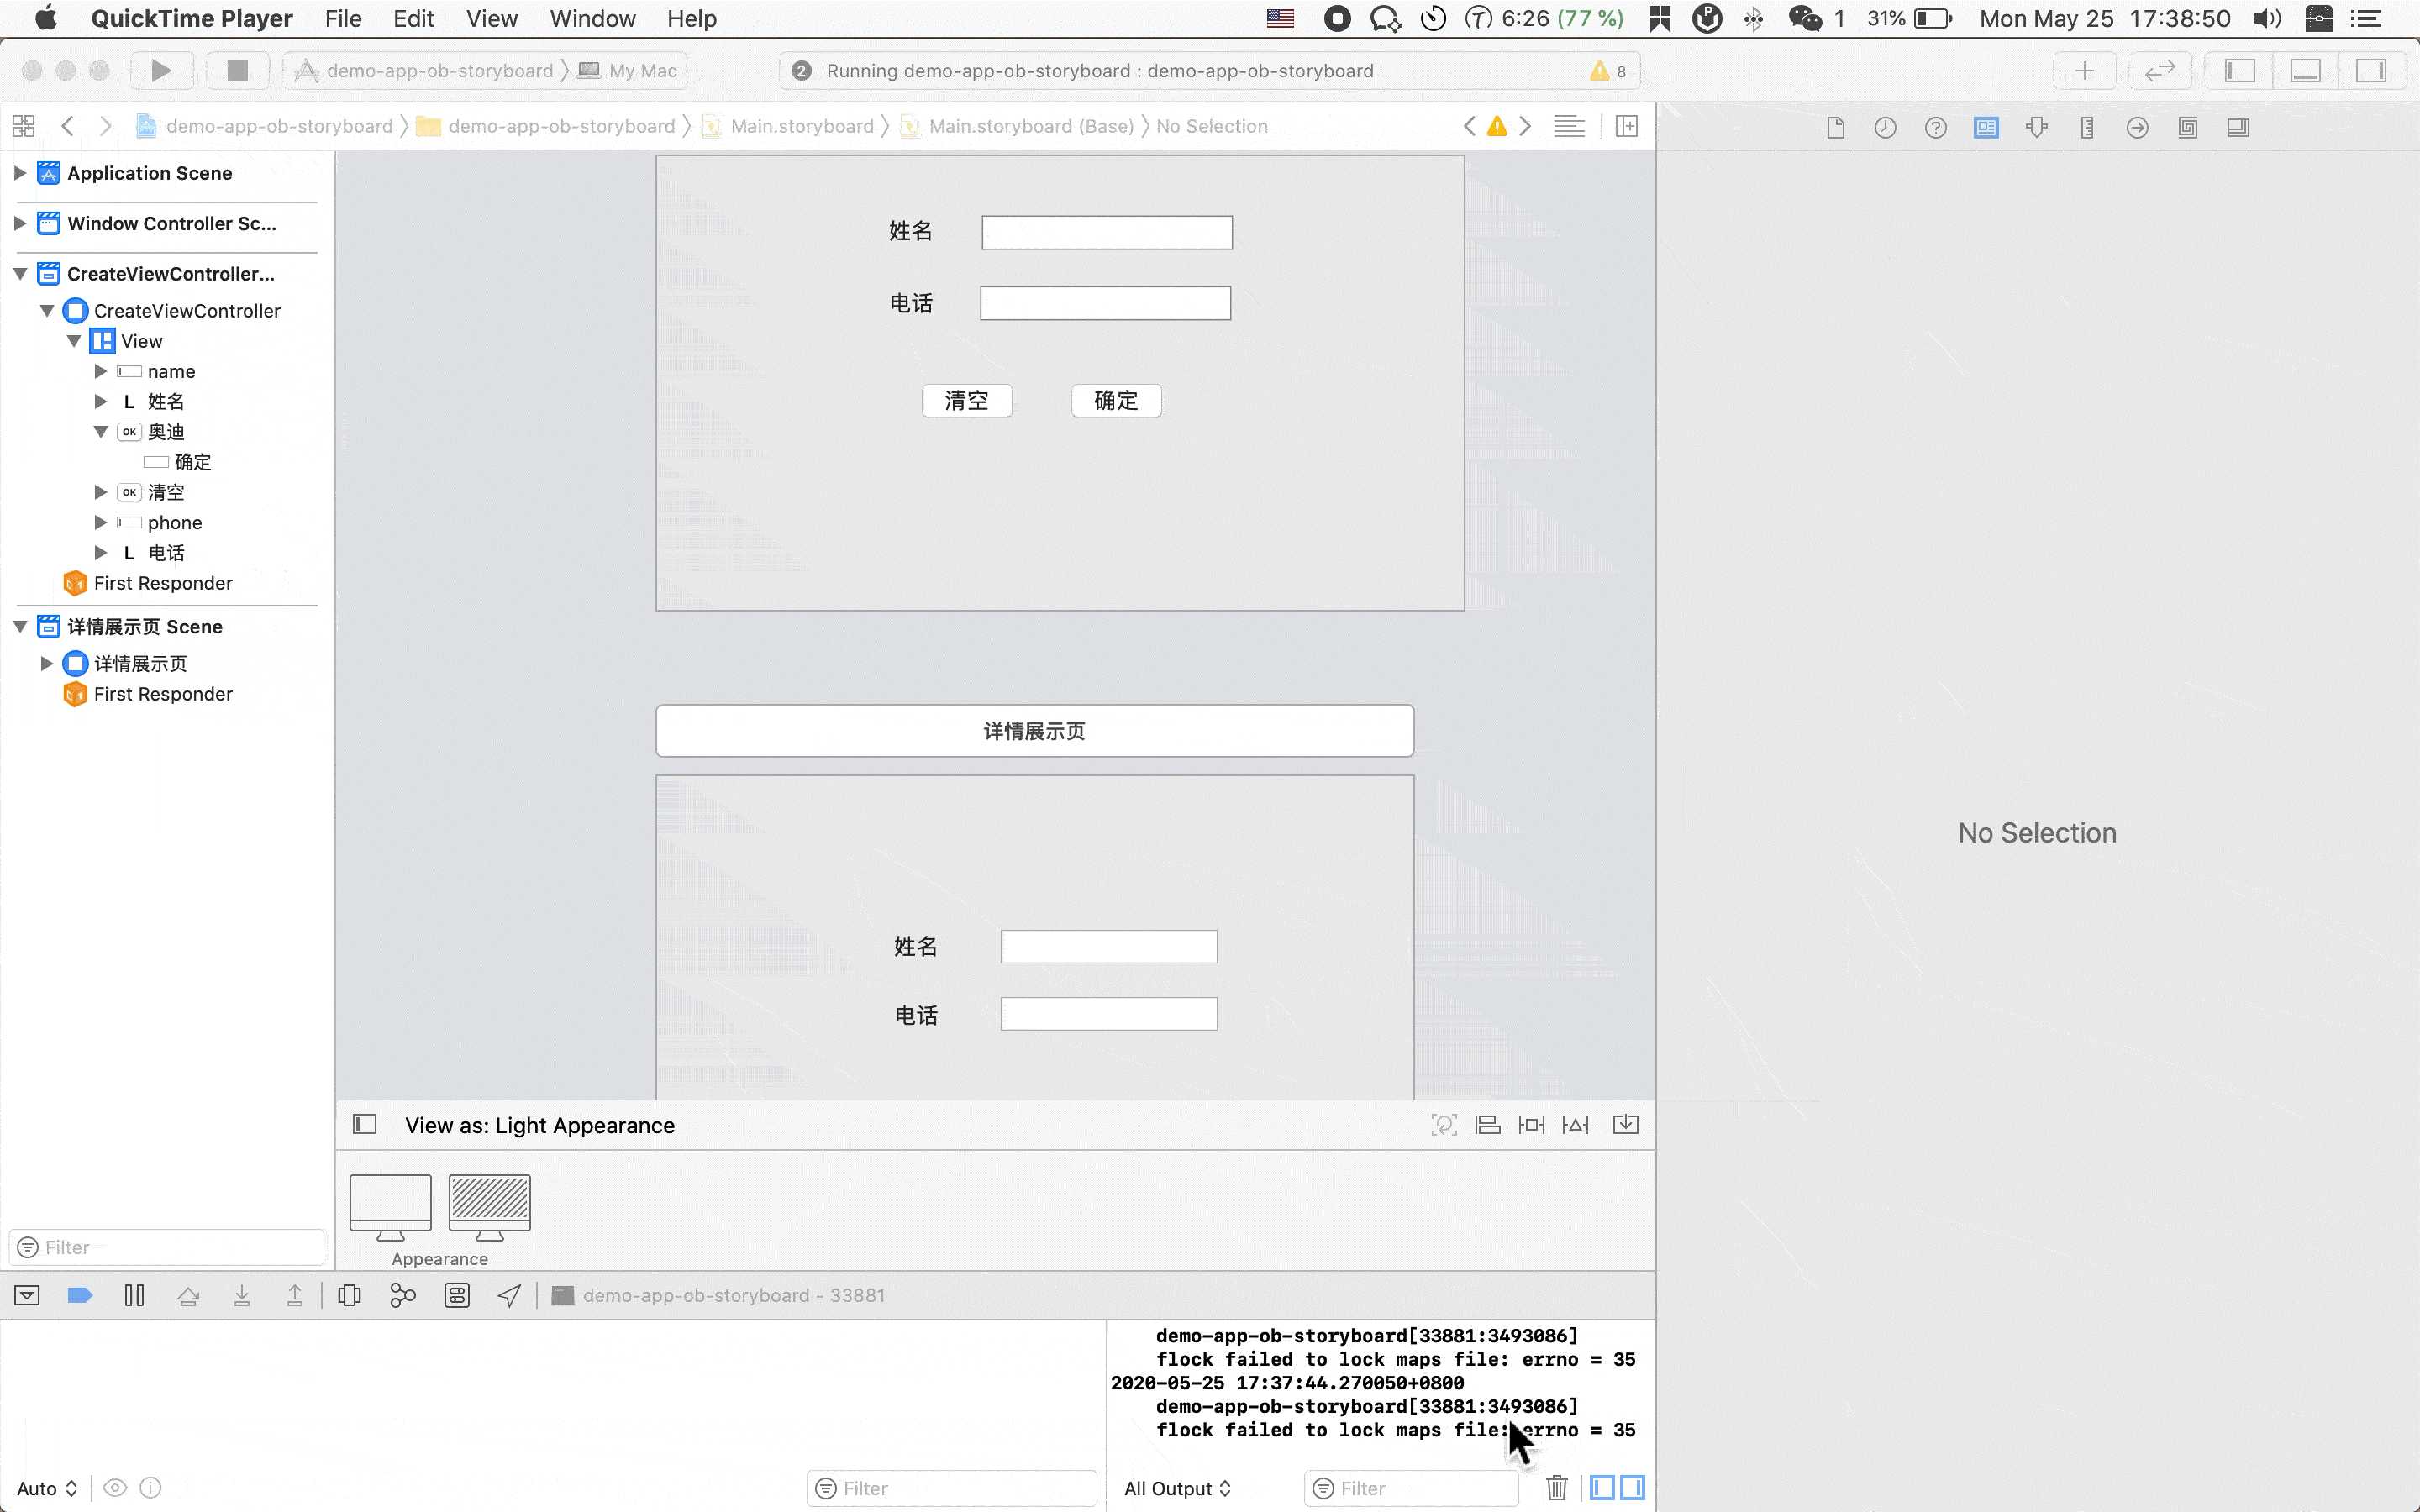
一个添加页面
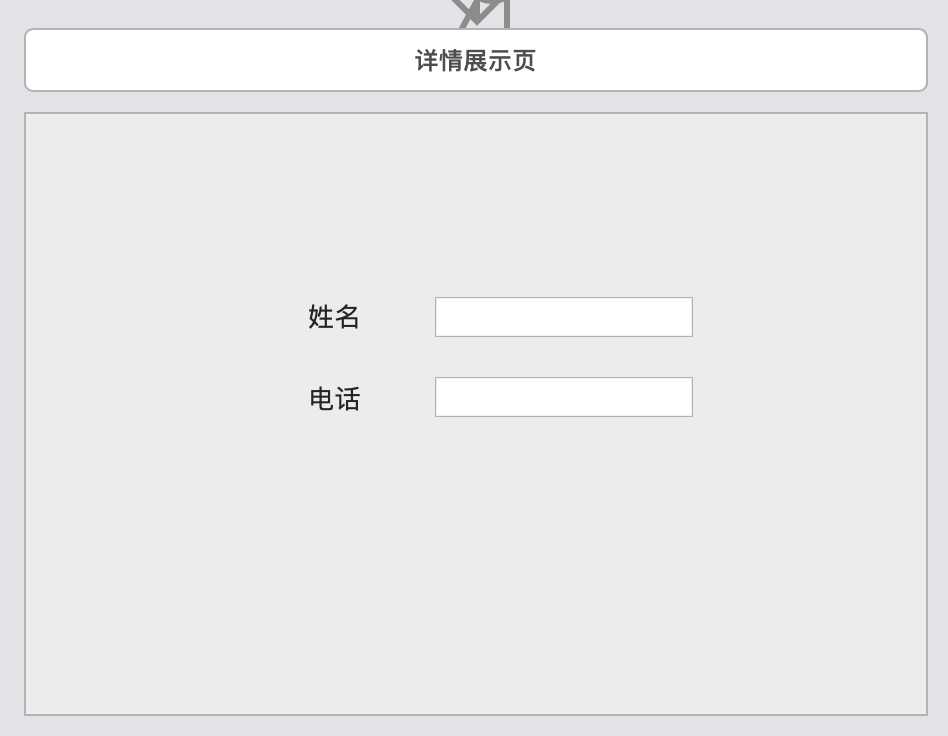
一个详情展示页面
// interface
#import <Cocoa/Cocoa.h>

@interface ViewController : NSViewController
@property (weak) IBOutlet NSTextField *nameTextField;
@property (weak) IBOutlet NSTextField *phoneTextField;
@end

//impl
#import "ViewController.h"

@implementation ViewController

@synthesize nameTextField;
@synthesize phoneTextField;

// 获取姓名输入框的内容
- (NSString *)getName {
    return [nameTextField stringValue];
}
// 获取手机号输入框的内容
- (NSString *)getPhone {
    return [phoneTextField stringValue];
}
//清除输入框内容
- (IBAction)CancelClicked:(id)sender {
    [nameTextField setStringValue:@""];
    [phoneTextField setStringValue:@""];
}
// other code
@end
// interface
#import <Foundation/Foundation.h>
#import <AppKit/AppKit.h>

@interface NSView (backGroundColor)
-(void) setBackGroundColor: (NSColor *) color;
@end

//impl
#import "backgroundColor.h"

@implementation NSView (backgroundColor)
- (void)setBackGroundColor:(NSColor *)color {
    [self setWantsLayer:YES];
    self.layer = [CALayer layer];
    [self.layer setBackgroundColor:[color CGColor]];
}
@end
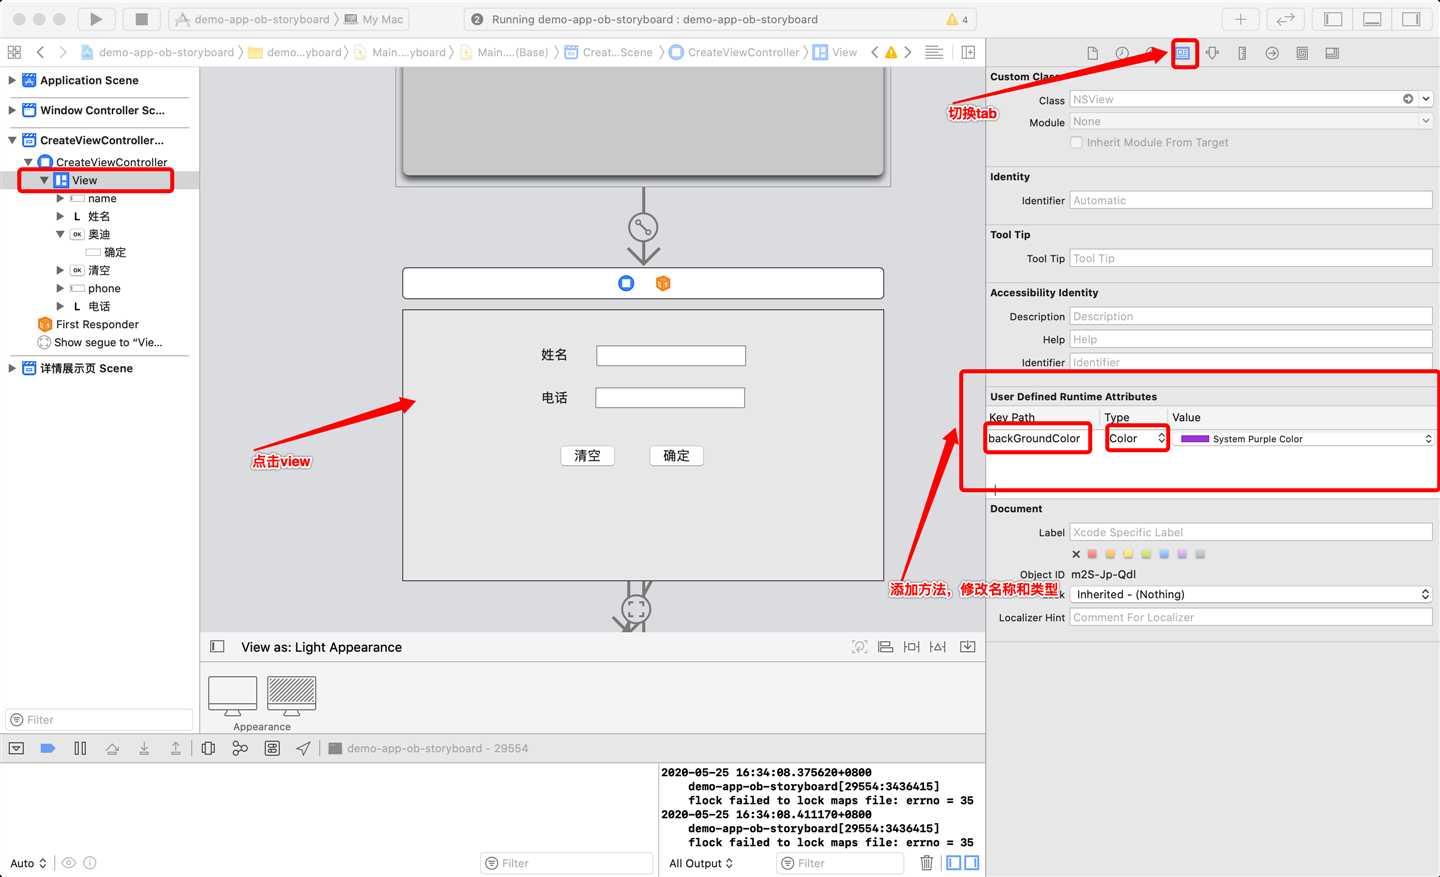
之后出现这个dialog
这样就完成了。
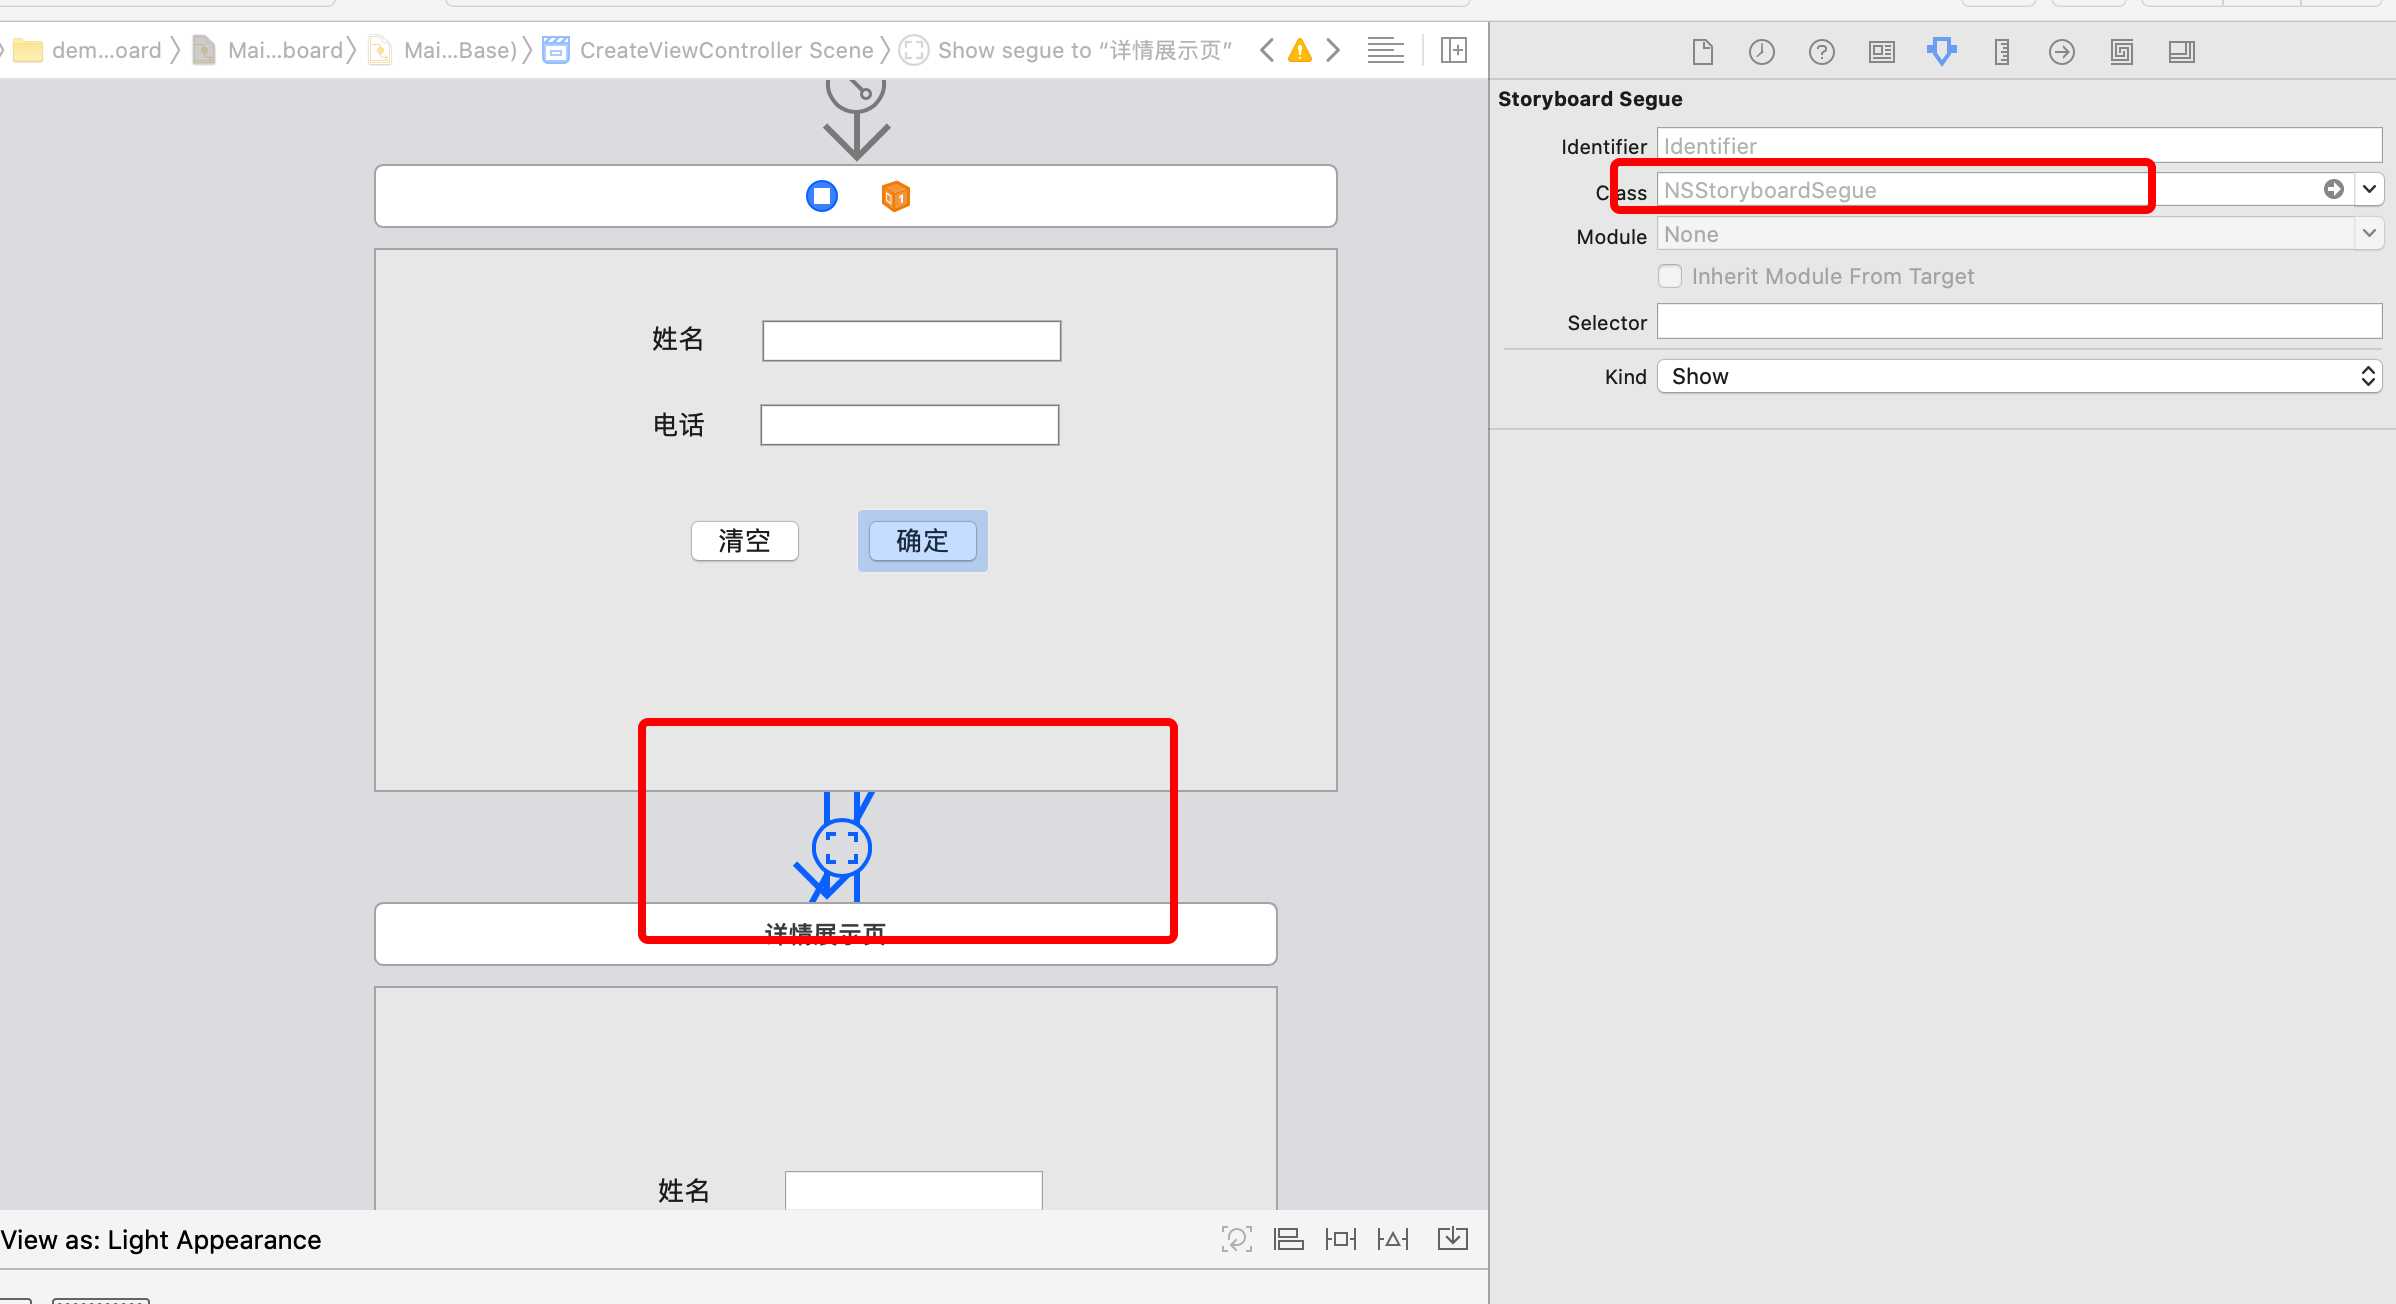
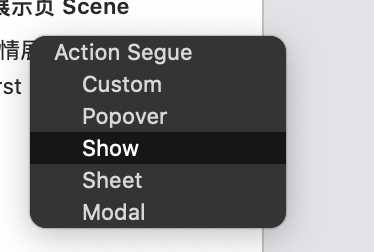
是个NSStoryboardSegue类型的东西
@interface NSStoryboardSegue : NSObject

/* NSStoryboardSegue instances have optional identifiers that can be assigned in Interface Builder. These identifiers can be used in overrides of -[NSViewController prepareForSegue:sender:] to differentiate segues. */
@property (nullable, readonly, copy) NSStoryboardSegueIdentifier identifier;

/* Subclasses of NSStoryboardSegue can use this property to access the source view or window controller that is being segued away from. */
@property (readonly, strong) id sourceController;

/* Subclasses of NSStoryboardSegue can use this property to access the destination view or window controller that‘s being segued to. This property is also essential for overrides of -[NSViewController prepareForSegue:sender:], which is passed to the source view controller. This property allows the receiver of -[NSViewController prepareForSegue:sender:] to access and pass configuration data to the destination controller. */
@property (readonly, strong) id destinationController;

@end
有sourceController和destinationController,是不是很明确了
NSViewController)的- (void)prepareForSegue:(NSStoryboardSegue *)segue sender:(nullable id)sender方法```objective-c
- (void)prepareForSegue:(NSStoryboardSegue *)segue sender:(nullable id)sender {
DetailController *detailController = [[DetailController alloc] init]; // destinationController
detailController = segue.destinationController;
UserInfo *userInfo = [[UserInfo alloc] init];
[userInfo setName:[self getName] andPhone:[self getPhone]];
detailController.userInfo= userInfo;//设置要传递的值
}
```
2. destinationController
添加一个属性接收传递的值,在`viewDidLoad`方法里将传递的值给赋值到view上
```objective-c
// interface
@interface DetailController : NSViewController
@property UserInfo *userInfo;
@property (weak) IBOutlet NSTextField *nameTextField;
@property (weak) IBOutlet NSTextField *phoneTextField;
@end
// impl
@implementation DetailController
@synthesize userInfo;
@synthesize nameTextField;
@synthesize phoneTextField;
- (void)viewDidLoad {
[super viewDidLoad];
[nameTextField setStringValue:[userInfo name]];
[phoneTextField setStringValue:[userInfo phone]];
}
@end
```
resource fork, Finder information, or similar detritus not allowed
Command CodeSign failed with a nonzero exit code
解决方法:进入项目的根目录执行 xattr -cr .
https://github.com/1483523635/simple-MacOS-app
https://github.com/1483523635/blogs/blob/master/MacOSApp/StoryBoard.md
Mac OS app 用 StoryBoard开发的一点感想
标签:xcode ast prepare subclass blob config import led sign
原文地址:https://www.cnblogs.com/qulianqing/p/12960226.html