标签:https config ima apr 执行 top 输入 目录 mamicode
https://mirrors.tuna.tsinghua.edu.cn/apache//httpd/httpd-2.4.43.tar.gz
https://mirrors.tuna.tsinghua.edu.cn/apache//apr/apr-1.7.0.tar.gz
https://mirrors.tuna.tsinghua.edu.cn/apache//apr/apr-util-1.6.1.tar.gz
https://ftp.pcre.org/pub/pcre/pcre-8.40.tar.gz
1.安装C语言编译器:
yum -y install gcc
2.安装wget
yum -y install wget
3.下载源码包:
一般是在/usr/local/src下存放用户安装的源码包
安装在/usr/local/apache 下
执行以下命令 下载源码包到/tmp/
cd /tmp
wget -c https://mirrors.tuna.tsinghua.edu.cn/apache//httpd/httpd-2.4.43.tar.gz
wget -c https://mirrors.tuna.tsinghua.edu.cn/apache//apr/apr-1.7.0.tar.gz
weget -c https://mirrors.tuna.tsinghua.edu.cn/apache//apr/apr-util-1.6.1.tar.gz
weget -c https://ftp.pcre.org/pub/pcre/pcre-8.40.tar.gz
解压
使用tar -zxvf 解压下载的源码包
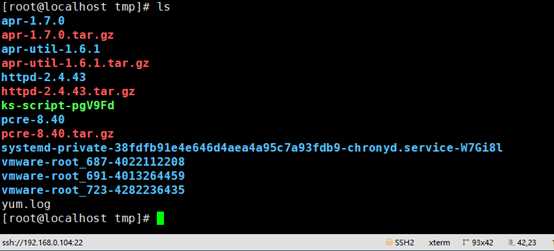
使用cp 命令把解压后的文件copy到/usr/local/src/路径下 并重命名
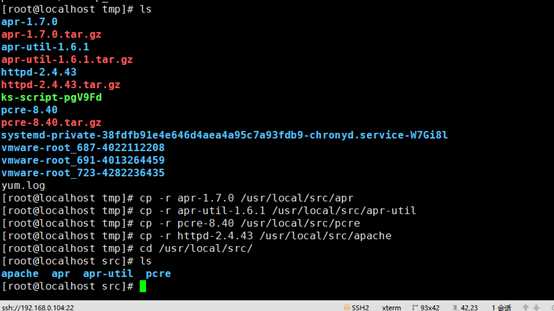
进入到apr目录
运行命令./configure --prefix= + 安装位置
显示报错信息
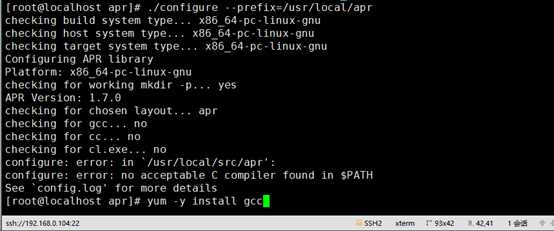
提示我们缺少gcc
使用yum -y install gcc 进行安装
之后make && make install 进行编译安装
进入apr-util目录下
运行命令./configure --prefix= + 位置 --with-apr=+位置
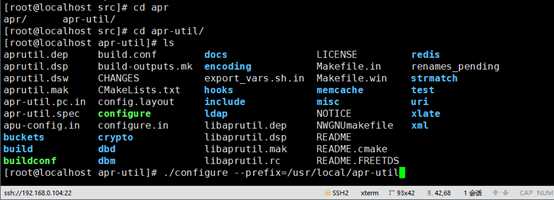
之后make && make install 进行编译安装
出现报错

这里使用yum -y install expat-devel 安装完成后再次进行编译
进入目录下pcre目录下
运行命令./configure --prefix= + 安装位置
出现报错信息 没有c++编译器

我们使用 yum install -y gcc gcc-c++ 进行安装
安装完成后 再次执行./configure --prefix= + 安装位置
之后make && make install 进行编译安装

运行命令
yum -y install gcc gcc-c++ autoconf automake make libtool openssl openssl-devel
后运行
autoreconf -ivf
再次进行make && make install 编译安装
出现错误 提示 bison命令未找到

使用yum search bison查找到
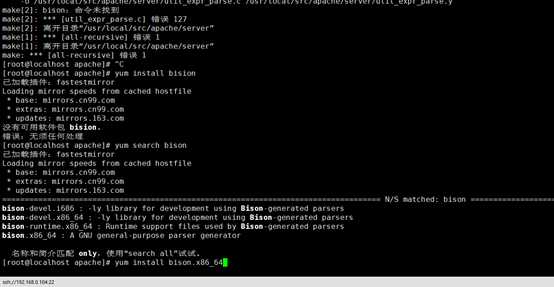
使用yum -y install bison.x86_64 进行安装
安装完成后再次进行make && make install 编译安装
出现报错信息 提示 flex命令未找到

使用上面的方法 用yum搜索并安装flex
安装完成后再次进行make && make install 编译安装
出现报错信息

cd /usr/local/src/
cp -r apr /usr/local/src/apache/srclib/apr
cd apr
./configure --prefix=/usr/local/apr

make && make install
cp -r apr-util /usr/local/src/apache/srclib/apr-util
cd /usr/local/src/apr-util
./configure --prefix=/usr/local/apr-util --with-apr=/usr/local/apr

make && make install
cp -r pcre /usr/local/src/apache/srclib/pcre
./configure --prefix=/usr/local/pcre
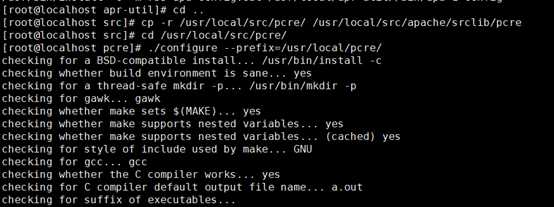
make && make install
上述步骤完成后 进入到/usr/local/src/apache目录
输入执行命令
./configure --prefix=/usr/local/apache --with-apr=/usr/local/apr --with-apr-util=/usr/local/apr-util/ --with-pcre=/usr/local/pcre/

执行完成后进行make && make install 编译安装
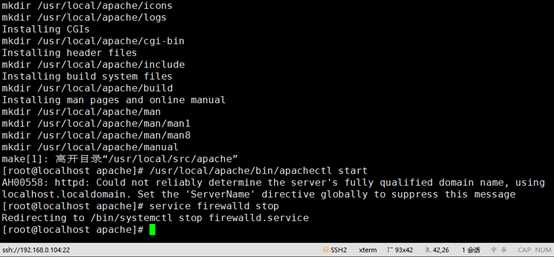
输入/usr/local/apache/bin/apachectl start 开启apache服务
使用service firewalld stop 关闭防火墙
打开本机浏览器 输入linux主机的IP地址
可以看到apache服务已成功开启

ps: 本文出现的/usr/local/apr-util/ 类似这种地址均为自定义的安装目录 并不是指定的 可根据个人实际情况进行改变
如有错误 请指正
标签:https config ima apr 执行 top 输入 目录 mamicode
原文地址:https://www.cnblogs.com/euLb/p/12979859.html