标签:密码 数据源 etc 注册 user target environ rom led
Spring Boot Admin是一个开源社区项目,用于管理和监控SpringBoot应用程序。 应用程序作为Spring Boot Admin Client向为Spring Boot Admin Server注册(通过HTTP)或使用SpringCloud注册中心(例如Eureka,Consul)发现。 UI是的Vue.js应用程序,展示Spring Boot Admin Client的Actuator端点上的一些监控。服务端采用Spring WebFlux + Netty的方式。
这里我们创建一个admin-server模块来作为监控中心演示其功能。
1.1、新建一个SpringBoot项目,
1.2、引入spring-boot-admin-server依赖
 1 <!-- spring-boot-admin -->
 2 <dependency>
 3     <groupId>de.codecentric</groupId>
 4     <artifactId>spring-boot-admin-starter-server</artifactId>
 5     <version>2.2.3</version>
 6 </dependency>
 7
 8 <dependency>
 9     <groupId>org.springframework.boot</groupId>
10     <artifactId>spring-boot-starter-web</artifactId>
11 </dependency>
完整pom如下:

 1 <?xml version="1.0" encoding="UTF-8"?>
 2 <project xmlns="http://maven.apache.org/POM/4.0.0"
 3          xmlns:xsi="http://www.w3.org/2001/XMLSchema-instance"
 4          xsi:schemaLocation="http://maven.apache.org/POM/4.0.0 http://maven.apache.org/xsd/maven-4.0.0.xsd">
 5     <modelVersion>4.0.0</modelVersion>
 6
 7     <groupId>org.example</groupId>
 8     <artifactId>test-springboot-admin-server</artifactId>
 9     <version>1.0-SNAPSHOT</version>
10
11     <parent>
12         <groupId>org.springframework.boot</groupId>
13         <artifactId>spring-boot-starter-parent</artifactId>
14         <version>2.2.5.RELEASE</version>
15     </parent>
16
17     <properties>
18         <project.build.sourceEncoding>UTF-8</project.build.sourceEncoding>
19         <project.reporting.outputEncoding>UTF-8</project.reporting.outputEncoding>
20         <java.version>1.8</java.version>
21     </properties>
22
23     <dependencies>
24
25         <!-- spring-boot-admin -->
26         <dependency>
27             <groupId>de.codecentric</groupId>
28             <artifactId>spring-boot-admin-starter-server</artifactId>
29             <version>2.2.3</version>
30         </dependency>
31
32         <dependency>
33             <groupId>org.springframework.boot</groupId>
34             <artifactId>spring-boot-starter-web</artifactId>
35         </dependency>
36
37         <dependency>
38             <groupId>org.springframework.boot</groupId>
39             <artifactId>spring-boot-starter-test</artifactId>
40             <scope>test</scope>
41         </dependency>
42
43     </dependencies>
44
45
46     <!-- SpringBoot打包插件,可以将代码打包成一个可执行的jar包 -->
47     <build>
48         <plugins>
49             <plugin>
50                 <groupId>org.springframework.boot</groupId>
51                 <artifactId>spring-boot-maven-plugin</artifactId>
52             </plugin>
53         </plugins>
54     </build>
55 </project>
1.3、编辑配置文件application.yml
1 spring:
2   application:
3     name: admin-server
4 server:
5   port: 9301
1.4、编辑启动类
1 @EnableAdminServer
2 @SpringBootApplication
3 public class Application {
4     public static void main(String[] args) {
5         SpringApplication.run(Application.class, args);
6     }
7 }
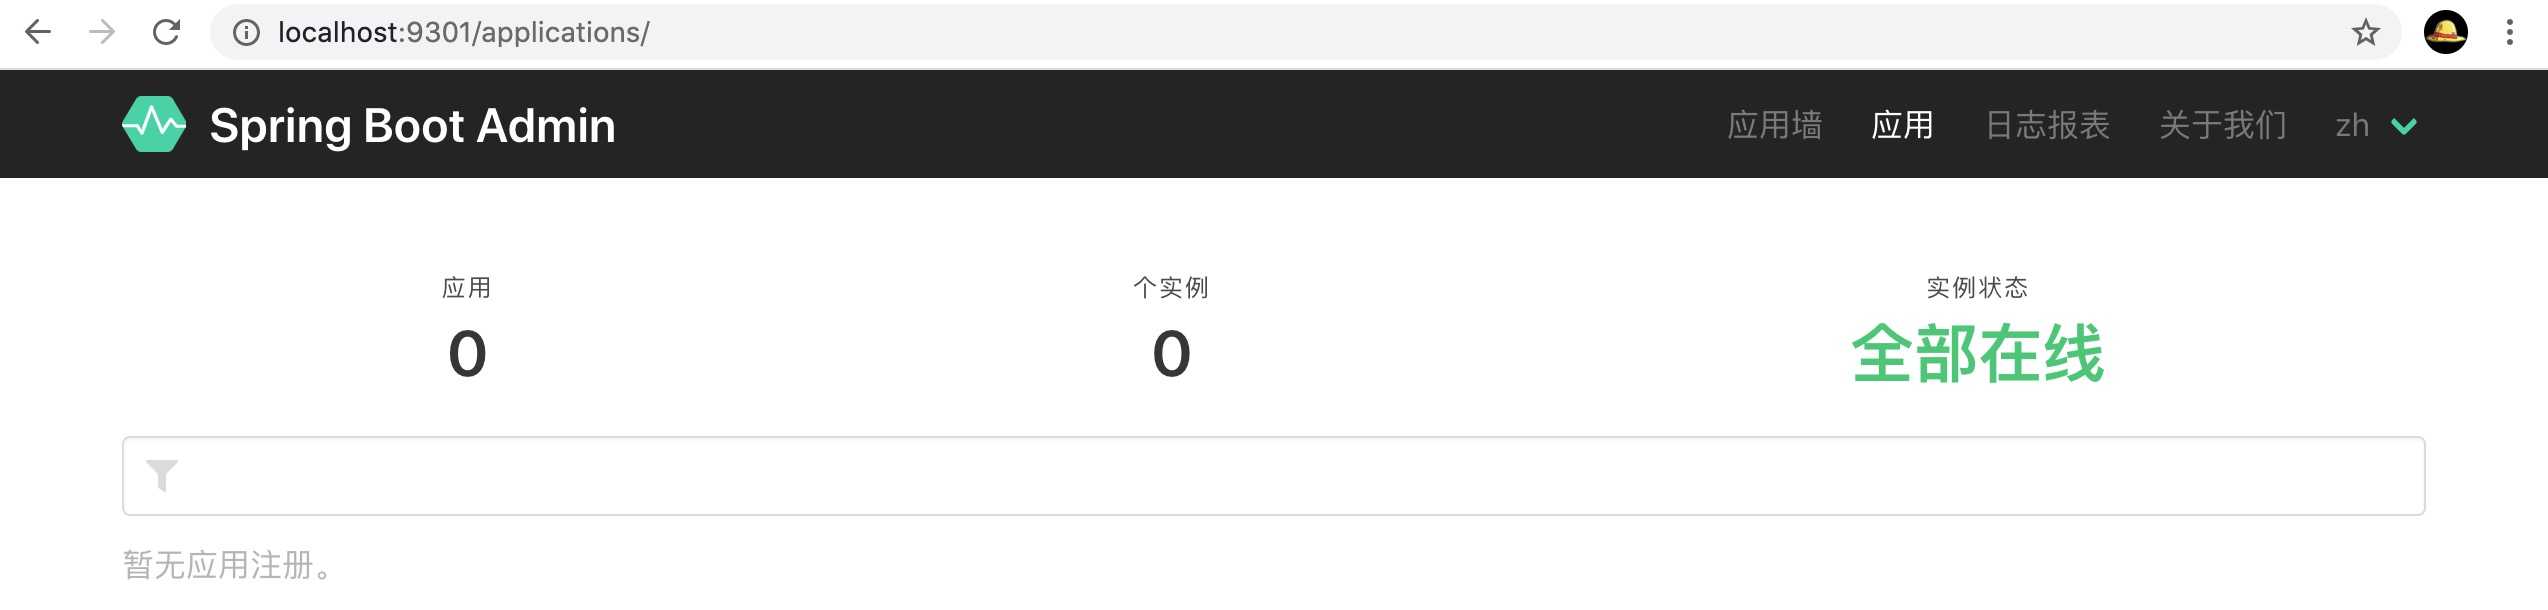
1.5、启动项目,访问地址:http://localhost:9301/
2.1、新建一个SpringBoot项目,
2.2、引入spring-boot-admin-client依赖
 1 <!-- spring-boot-admin -->
 2 <dependency>
 3     <groupId>de.codecentric</groupId>
 4     <artifactId>spring-boot-admin-starter-client</artifactId>
 5     <version>2.2.3</version>
 6 </dependency>
 7
 8 <dependency>
 9     <groupId>org.springframework.boot</groupId>
10     <artifactId>spring-boot-starter-web</artifactId>
11 </dependency>
完整pom如下:
 1 <?xml version="1.0" encoding="UTF-8"?>
 2 <project xmlns="http://maven.apache.org/POM/4.0.0"
 3          xmlns:xsi="http://www.w3.org/2001/XMLSchema-instance"
 4          xsi:schemaLocation="http://maven.apache.org/POM/4.0.0 http://maven.apache.org/xsd/maven-4.0.0.xsd">
 5     <modelVersion>4.0.0</modelVersion>
 6
 7     <groupId>org.example</groupId>
 8     <artifactId>test-springboot-admin-client</artifactId>
 9     <version>1.0-SNAPSHOT</version>
10     <parent>
11         <groupId>org.springframework.boot</groupId>
12         <artifactId>spring-boot-starter-parent</artifactId>
13         <version>2.2.5.RELEASE</version>
14     </parent>
15
16     <properties>
17
18         <project.build.sourceEncoding>UTF-8</project.build.sourceEncoding>
19         <project.reporting.outputEncoding>UTF-8</project.reporting.outputEncoding>
20         <java.version>1.8</java.version>
21     </properties>
22
23     <dependencies>
24
25         <!-- spring-boot-admin -->
26         <dependency>
27             <groupId>de.codecentric</groupId>
28             <artifactId>spring-boot-admin-starter-client</artifactId>
29             <version>2.2.3</version>
30         </dependency>
31
32         <dependency>
33             <groupId>org.springframework.boot</groupId>
34             <artifactId>spring-boot-starter-web</artifactId>
35         </dependency>
36
37         <dependency>
38             <groupId>org.springframework.boot</groupId>
39             <artifactId>spring-boot-starter-actuator</artifactId>
40         </dependency>
41
42         <dependency>
43             <groupId>org.springframework.boot</groupId>
44             <artifactId>spring-boot-starter-test</artifactId>
45             <scope>test</scope>
46         </dependency>
47
48     </dependencies>
49
50
51     <!-- SpringBoot打包插件,可以将代码打包成一个可执行的jar包 -->
52     <build>
53         <plugins>
54             <plugin>
55                 <groupId>org.springframework.boot</groupId>
56                 <artifactId>spring-boot-maven-plugin</artifactId>
57             </plugin>
58         </plugins>
59     </build>
60
61 </project>
2.3、编辑配置文件application.yml
 1 spring:
 2   application:
 3     name: admin-client
 4   boot:
 5     admin:
 6       client:
 7         url: http://localhost:9301 #配置admin-server地址
 8 server:
 9   port: 9305
10 management:
11   endpoints:
12     web:
13       exposure:
14         include: ‘*‘
15   endpoint:
16     health:
17       show-details: always
18 logging:
19   file: admin-client.log  #添加开启admin的日志监控
2.4、编辑启动类
1 @SpringBootApplication
2 public class Application {
3     public static void main(String[] args) {
4         SpringApplication.run(Application.class, args);
5     }
6 }
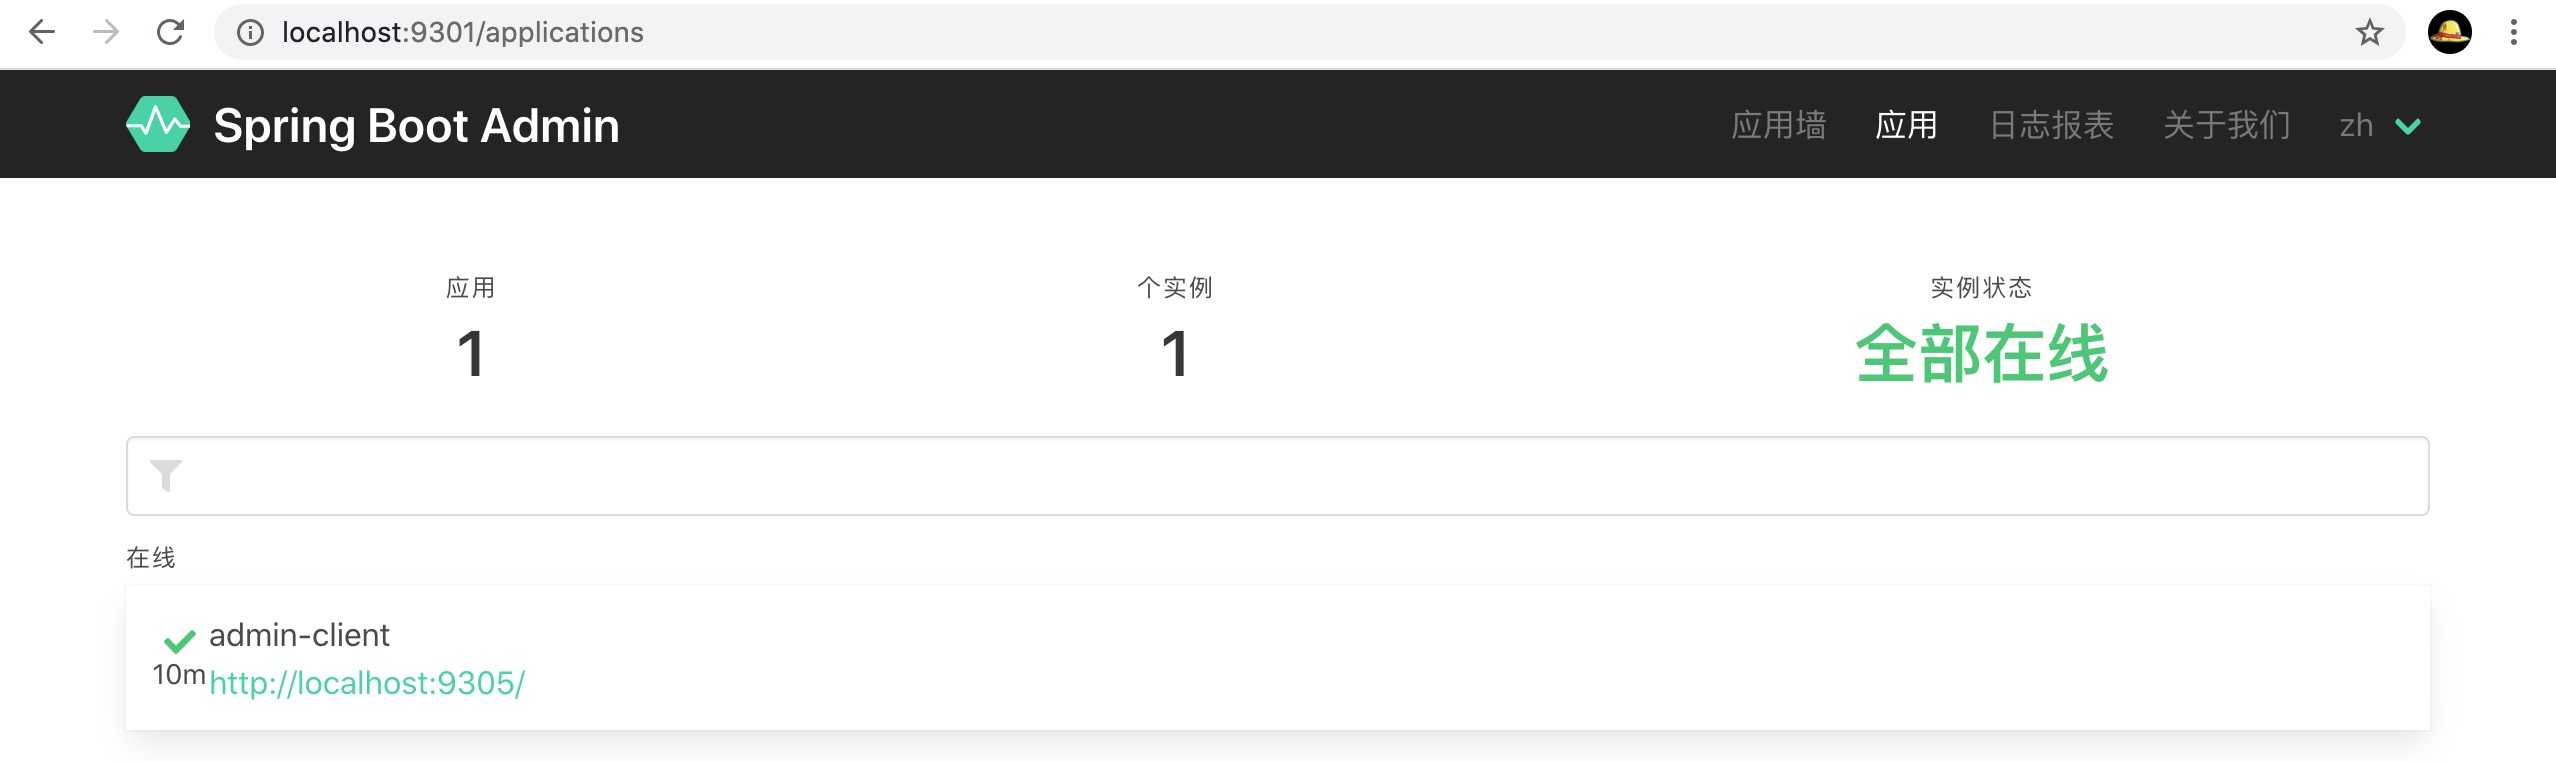
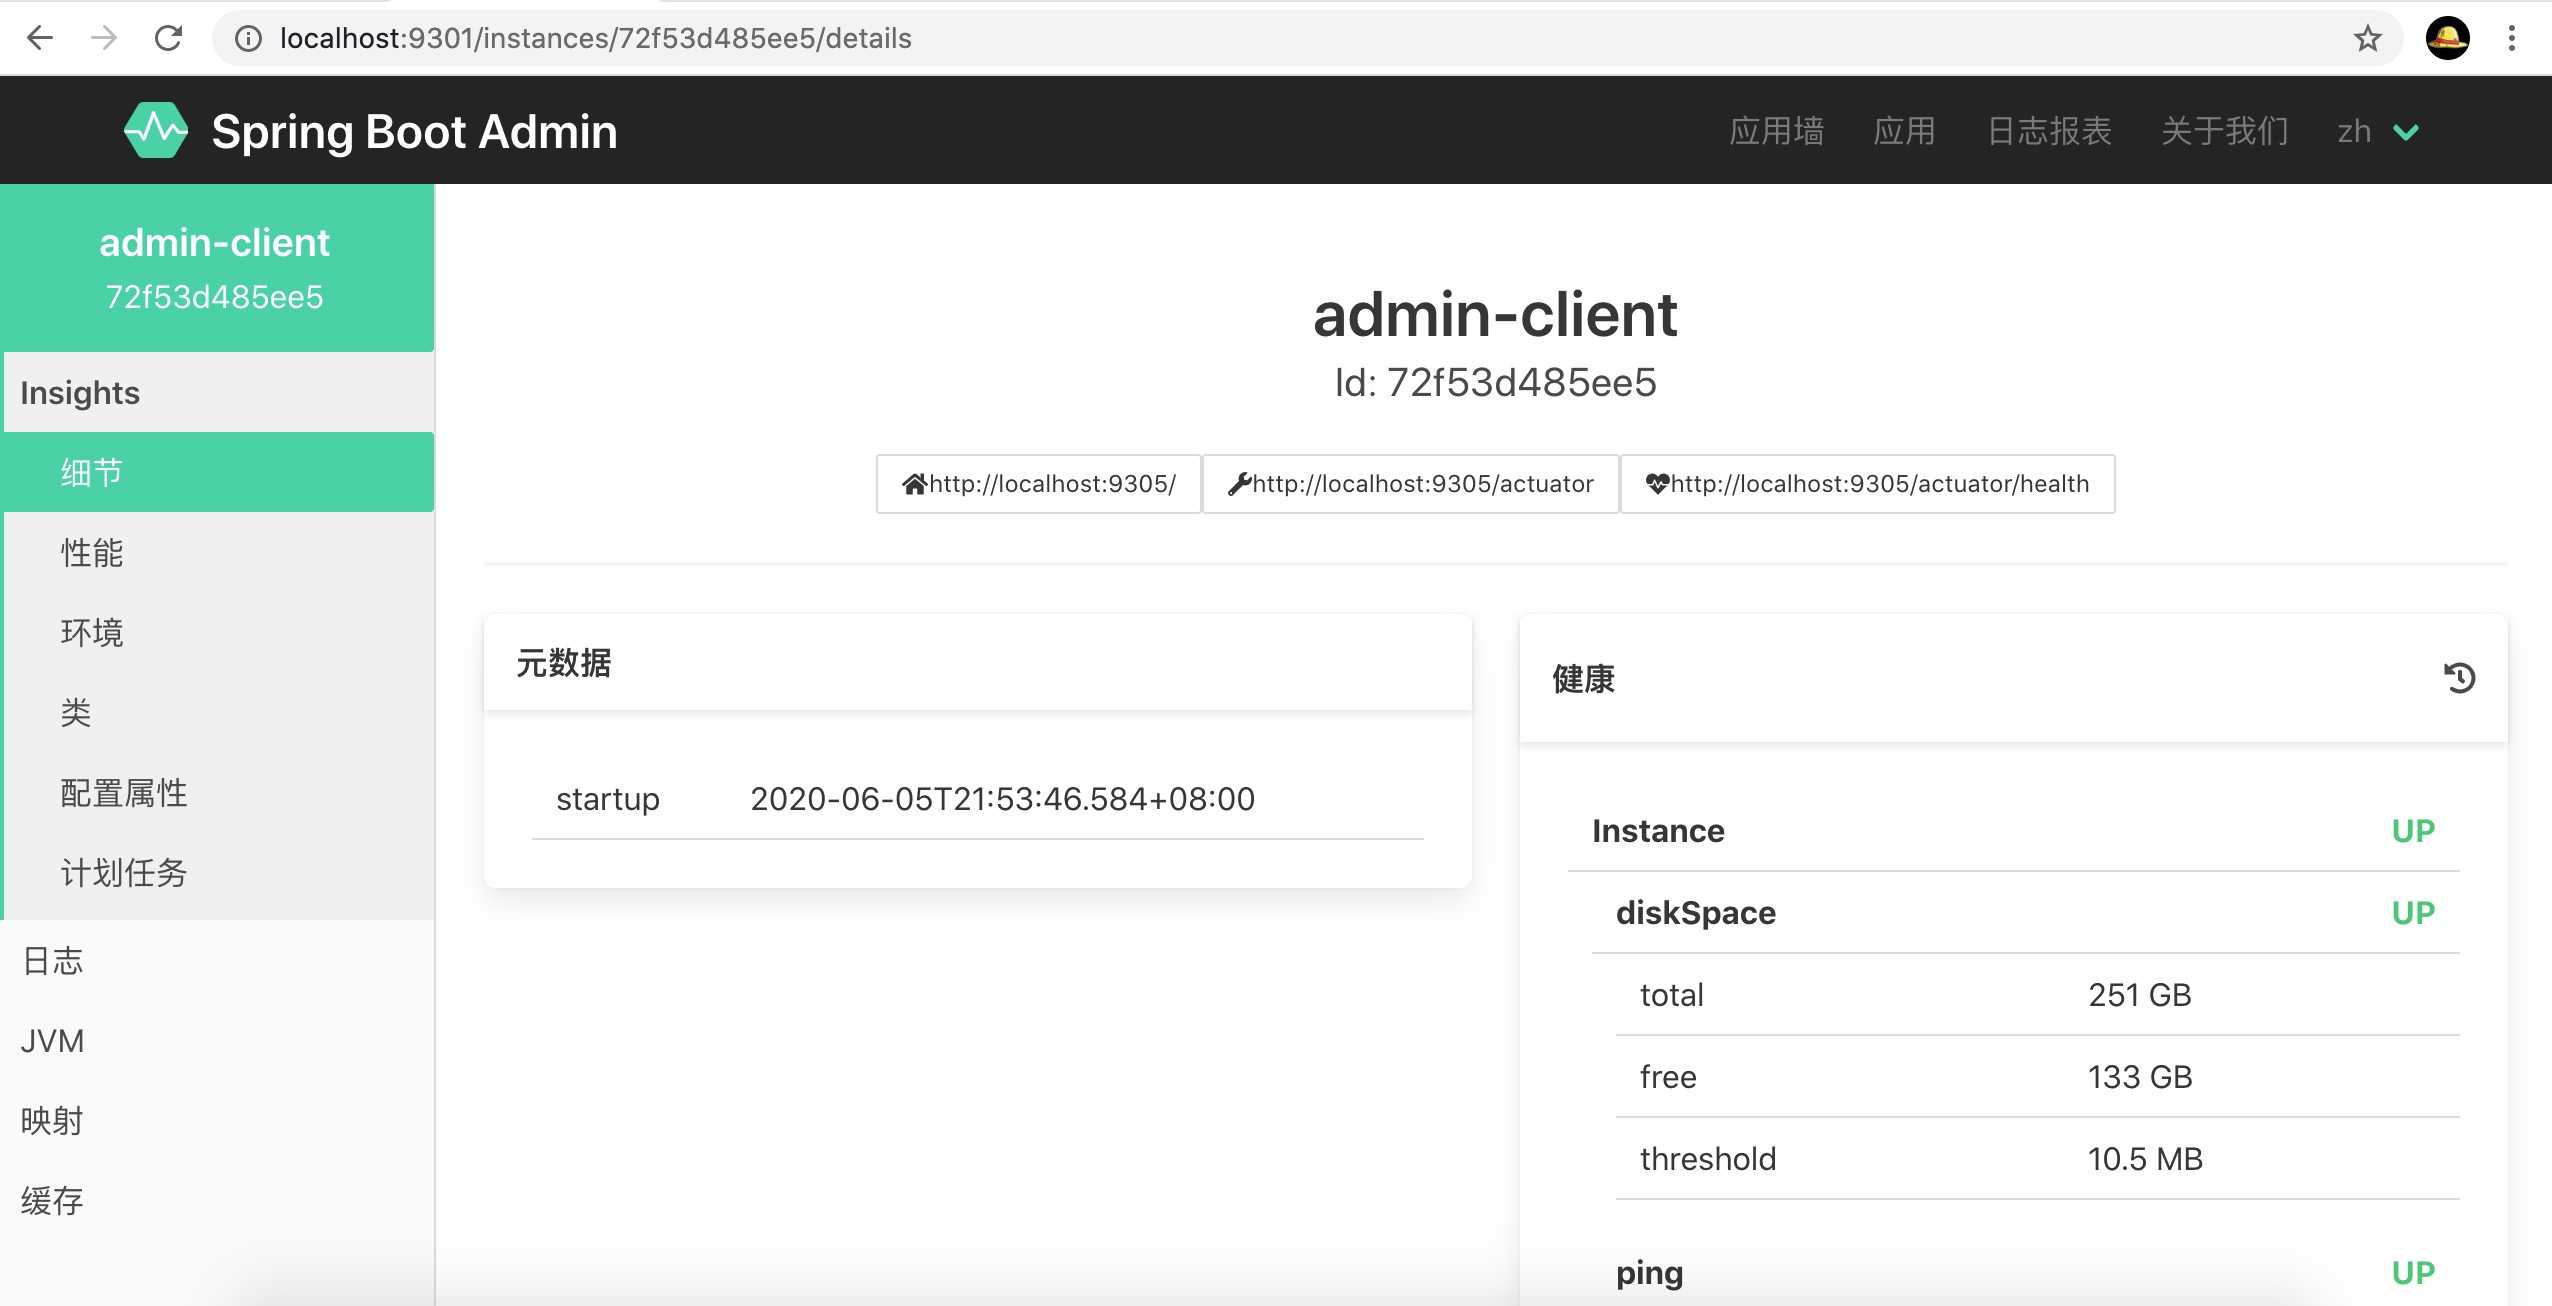
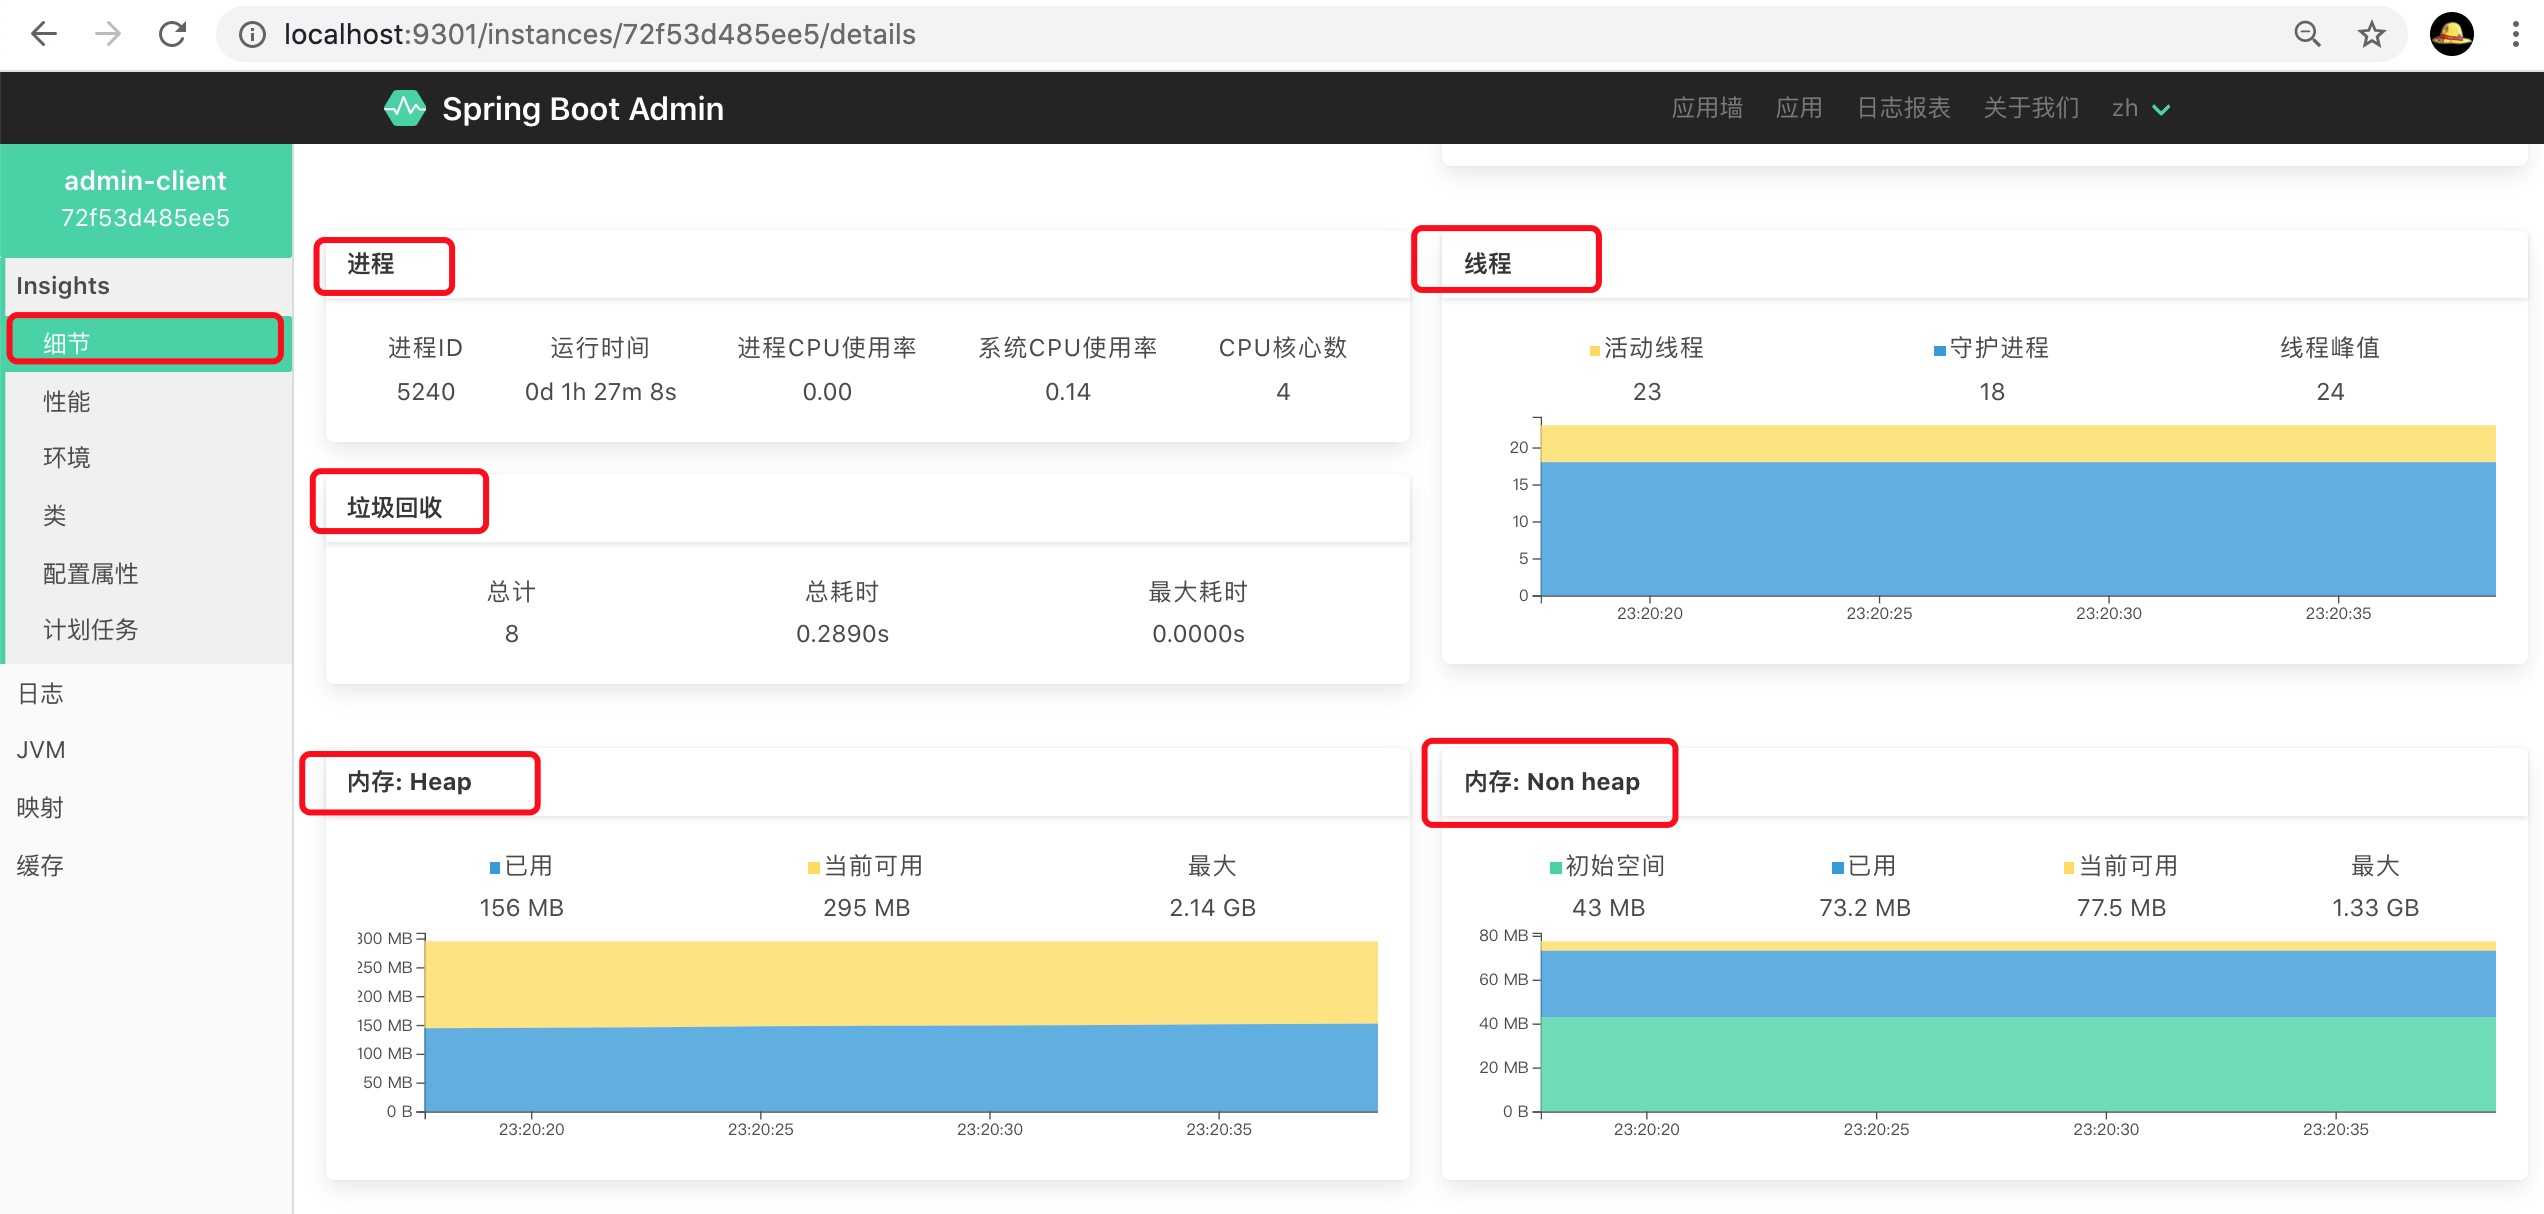
2.5、启动项目,继续访问admin-server的Web地址:http://localhost:9301/

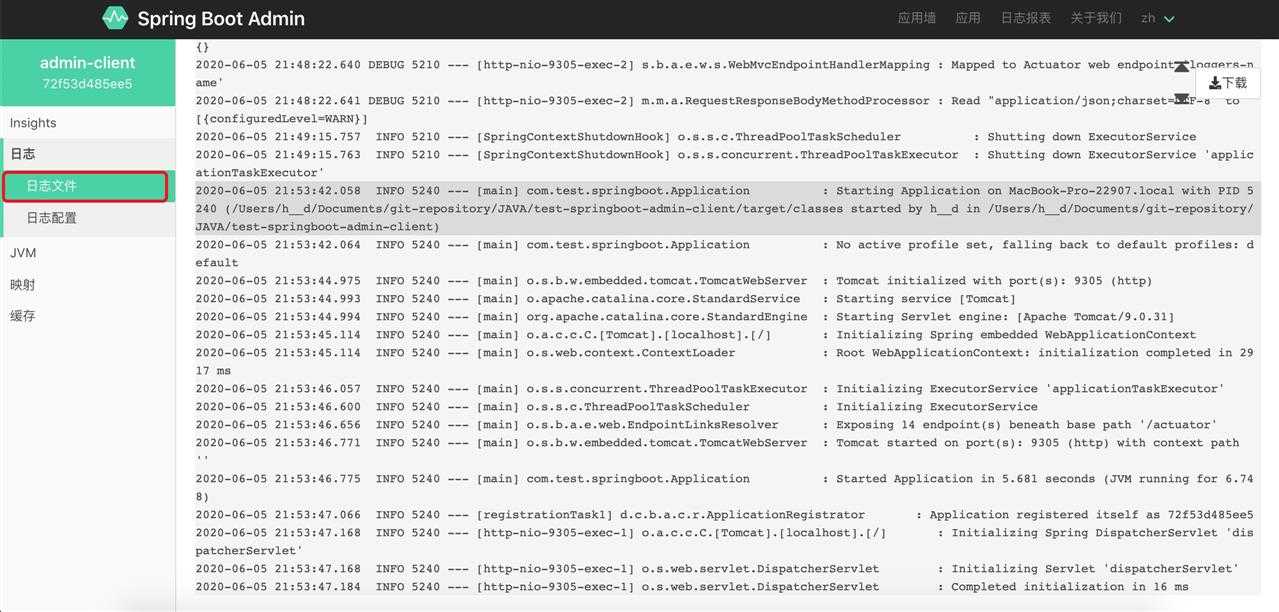
1 logging:
2   file: admin-client.log  #添加开启admin的日志监控
1、创建Eureka服务,参考:【SpringCloud】快速入门(一)
2、修改admin-server
在pom.xml中添加相关依赖:
1 <dependency>
2     <groupId>org.springframework.cloud</groupId>
3     <artifactId>spring-cloud-starter-netflix-eureka-client</artifactId>
4 </dependency>
在application-eureka.yml中进行配置,只需添加注册中心配置即可:
 1 spring:
 2   application:
 3     name: admin-server
 4 server:
 5   port: 9301
 6 eureka:
 7   client:
 8     register-with-eureka: true
 9     fetch-registry: true
10     service-url:
11       defaultZone: http://localhost:8761/eureka/
在启动类上添加@EnableDiscoveryClient来启用服务注册功能:
1 @EnableDiscoveryClient
2 @EnableAdminServer
3 @SpringBootApplication
4 public class Application {
5     public static void main(String[] args) {
6         SpringApplication.run(Application.class, args);
7     }
8 }
3、修改admin-client,
在pom.xml中添加相关依赖:同上
在application-eureka.yml中进行配置,只需添加注册中心配置即可,且去掉配置spring.boot.admin.client.url属性
 1 spring:
 2   application:
 3     name: admin-client
 4 #  boot:
 5 #    admin:
 6 #      client:
 7 #        url: http://localhost:9301 #配置admin-server地址
 8 server:
 9   port: 9305
10 management:
11   endpoints:
12     web:
13       exposure:
14         include: ‘*‘
15   endpoint:
16     health:
17       show-details: always
18
19 eureka:
20   client:
21     register-with-eureka: true
22     fetch-registry: true
23     service-url:
24       defaultZone: http://localhost:8761/eureka/
25
26 logging:
27   file: admin-client.log  #添加开启admin的日志监控
在启动类上添加@EnableDiscoveryClient来启用服务注册功能:
1 @EnableDiscoveryClient
2 @SpringBootApplication
3 public class Application {
4     public static void main(String[] args) {
5         SpringApplication.run(Application.class, args);
6     }
7 }
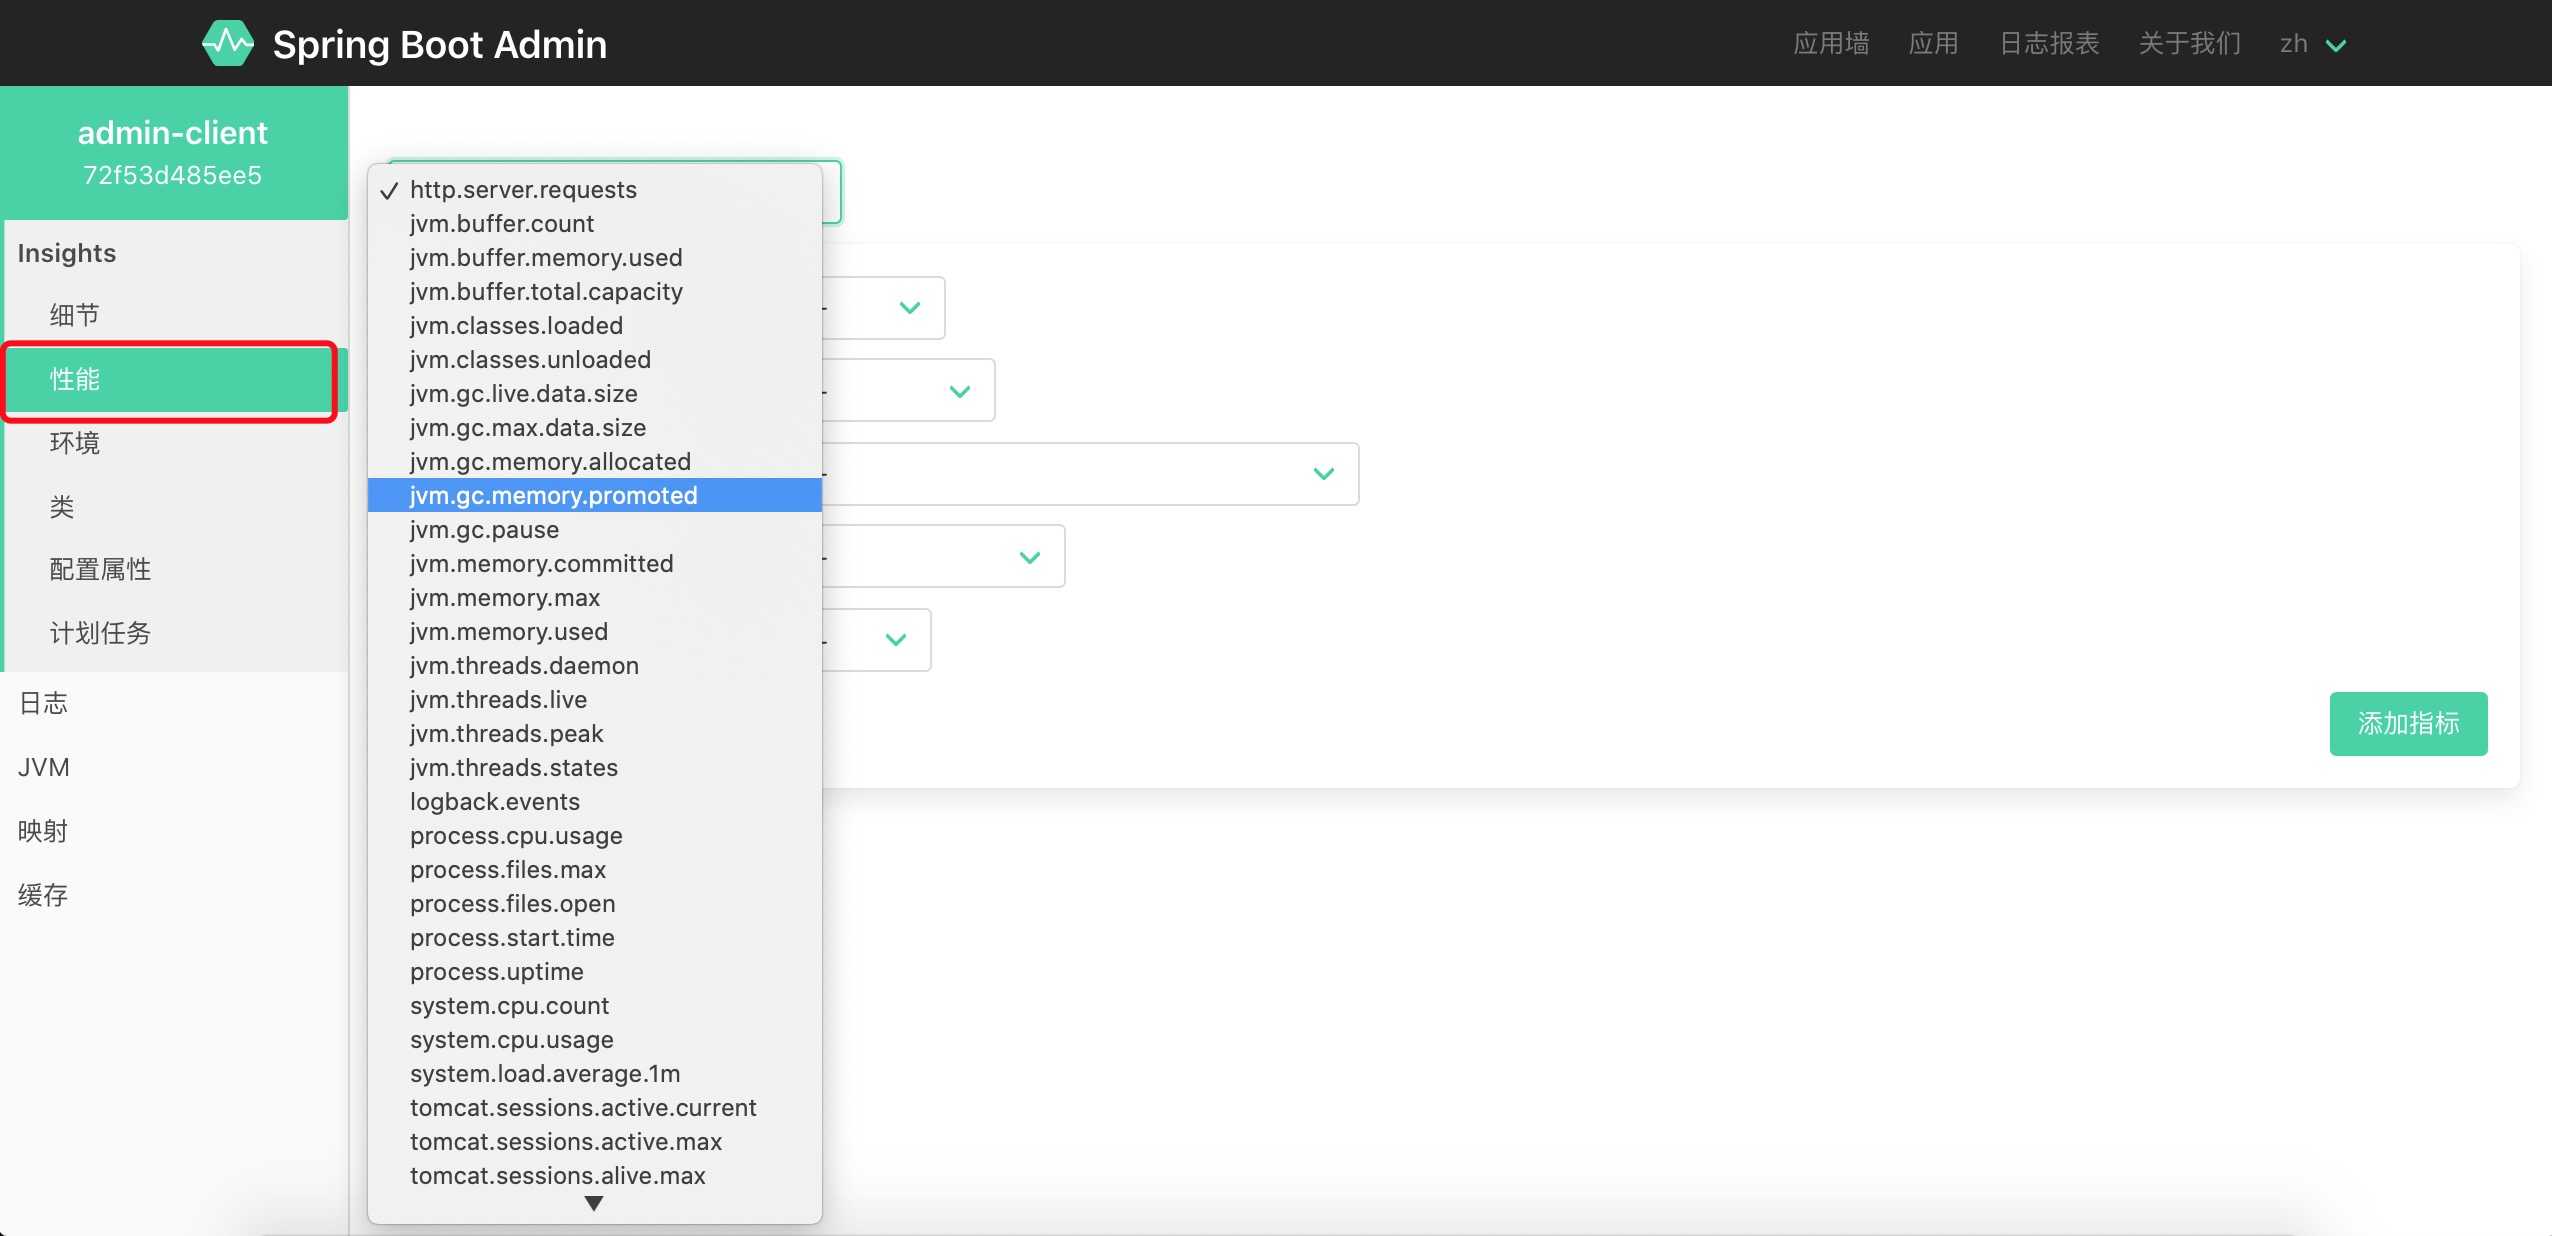
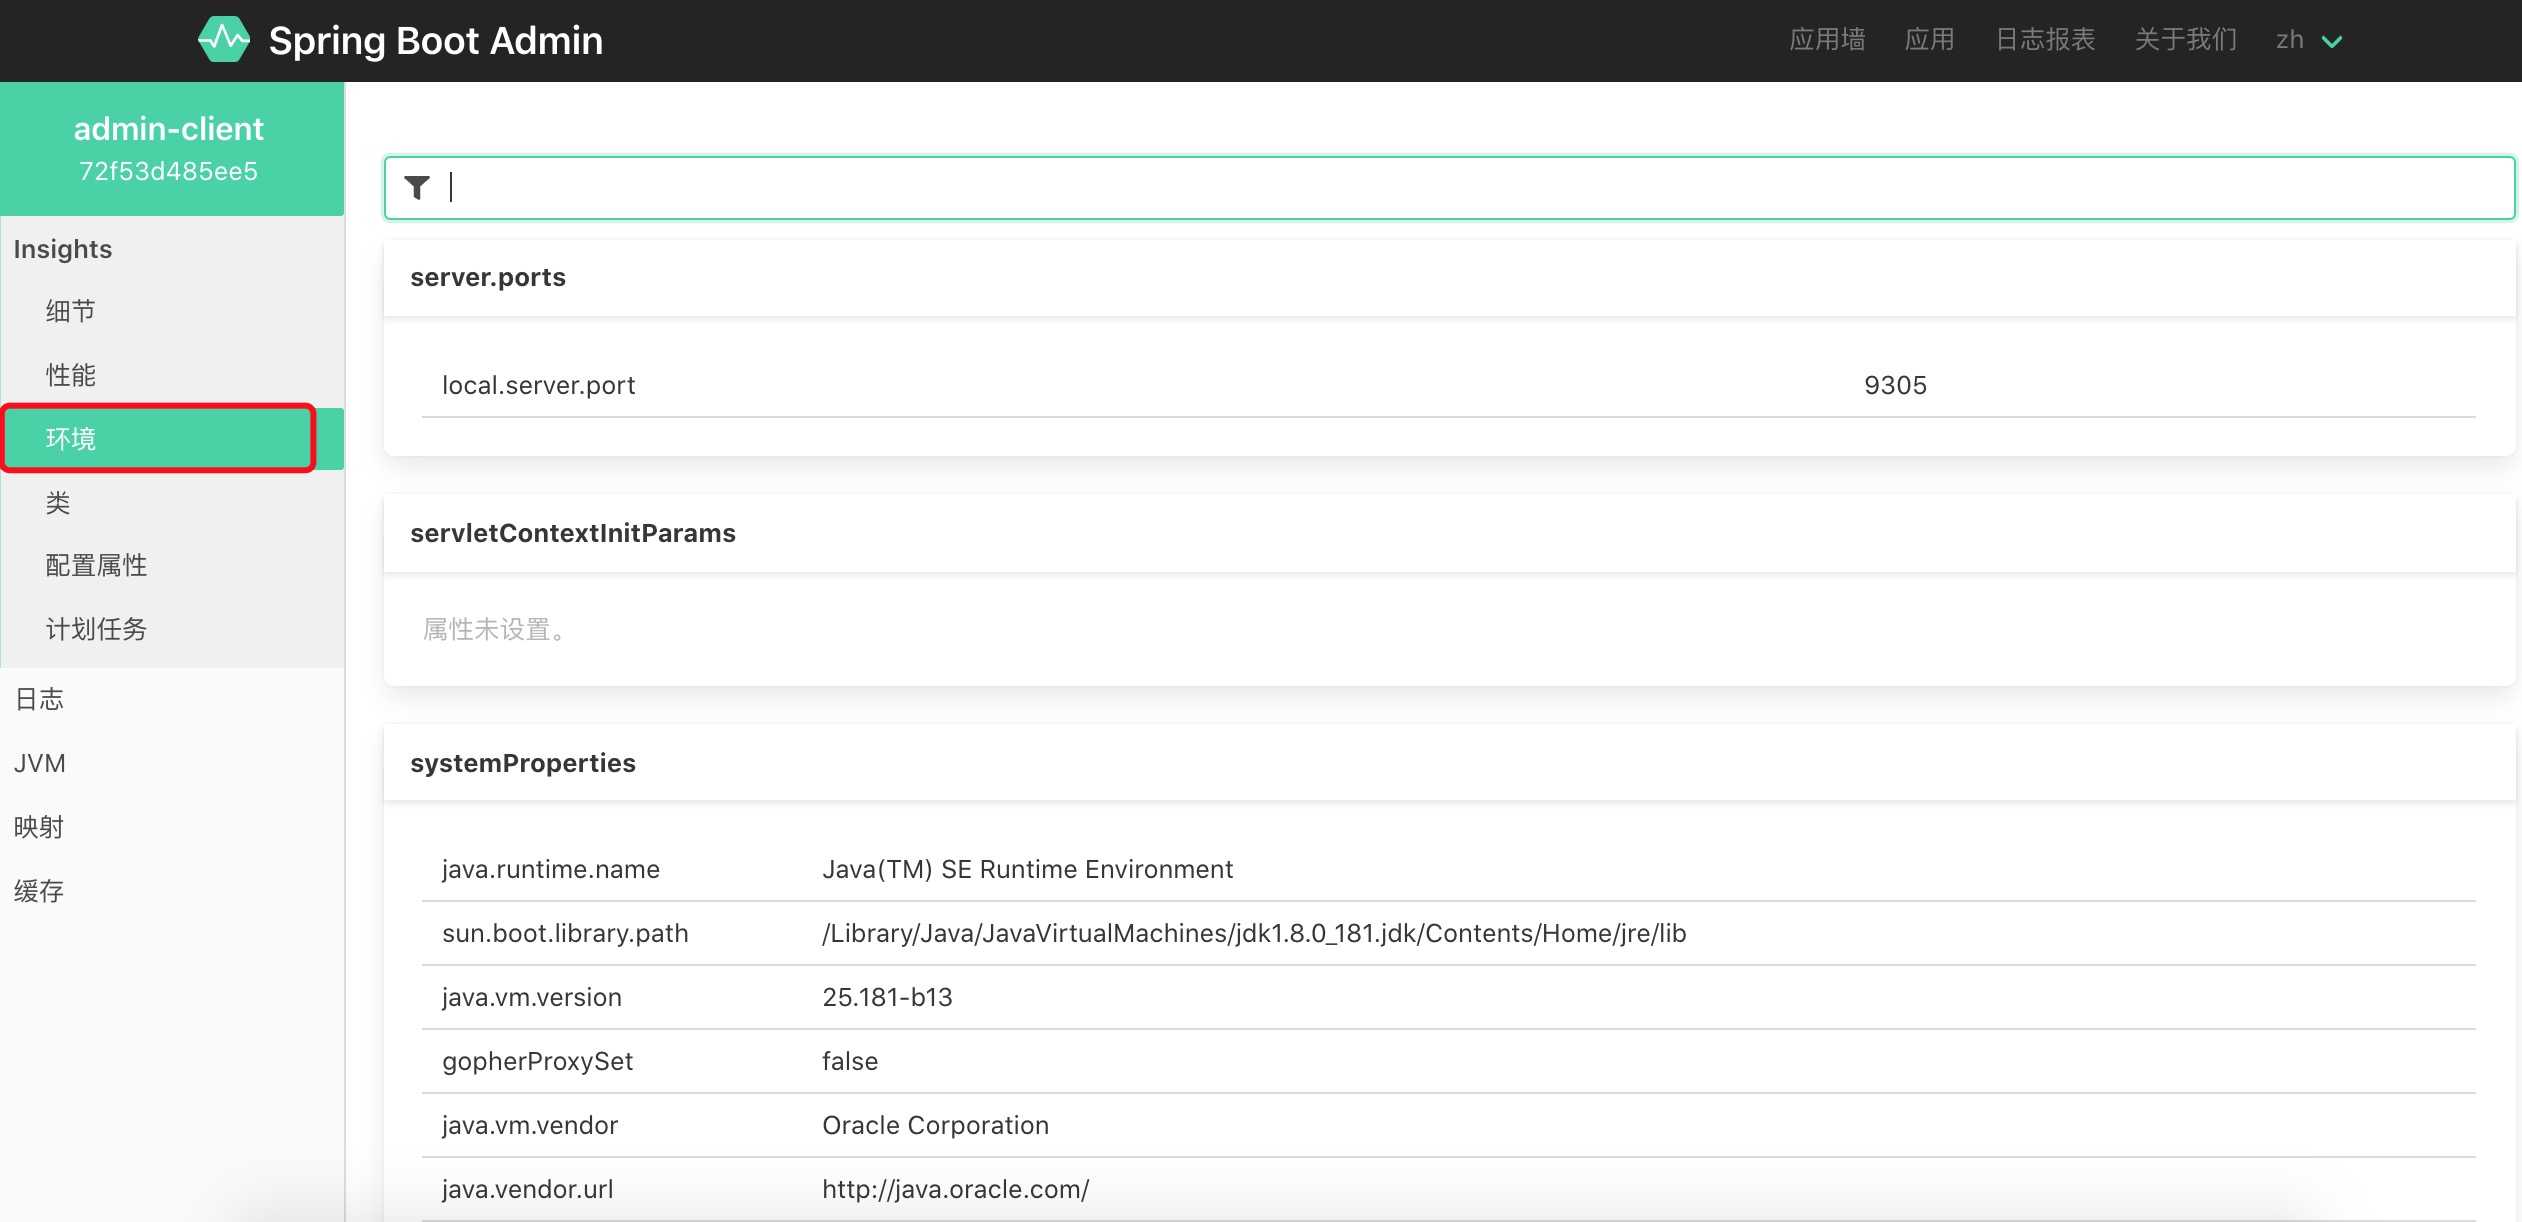
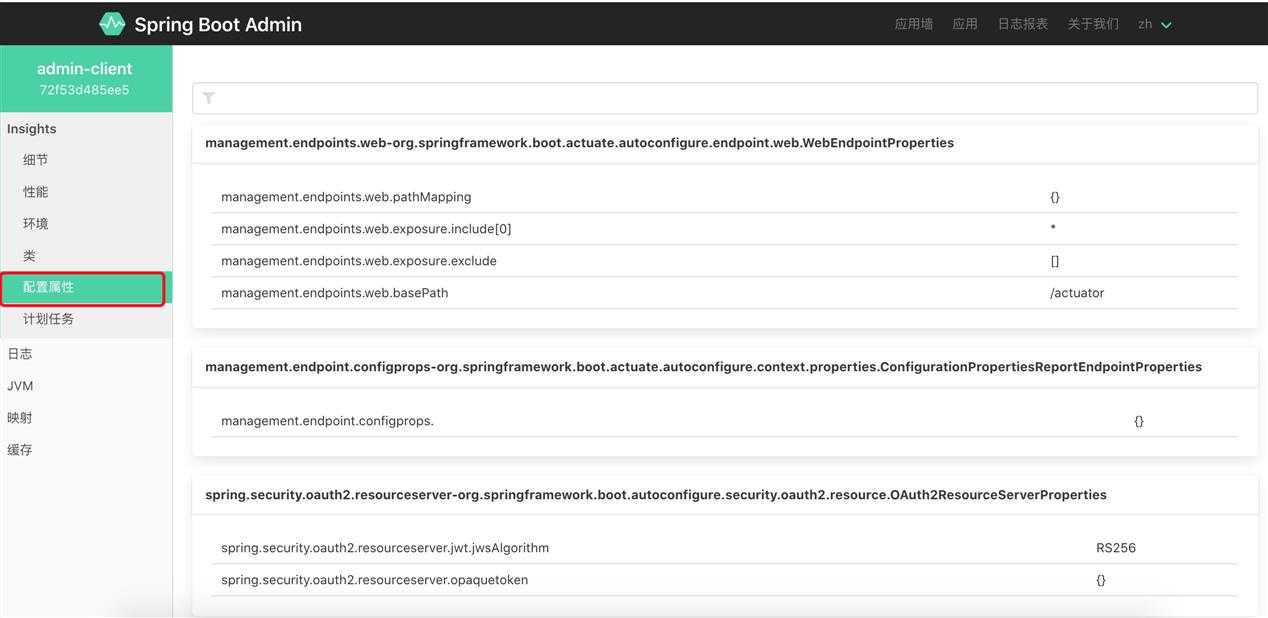
4、功能演示
启动Eureka注册中心,启动admin-server、admin-client
1)查看注册中心发现服务均已注册:http://localhost:8761

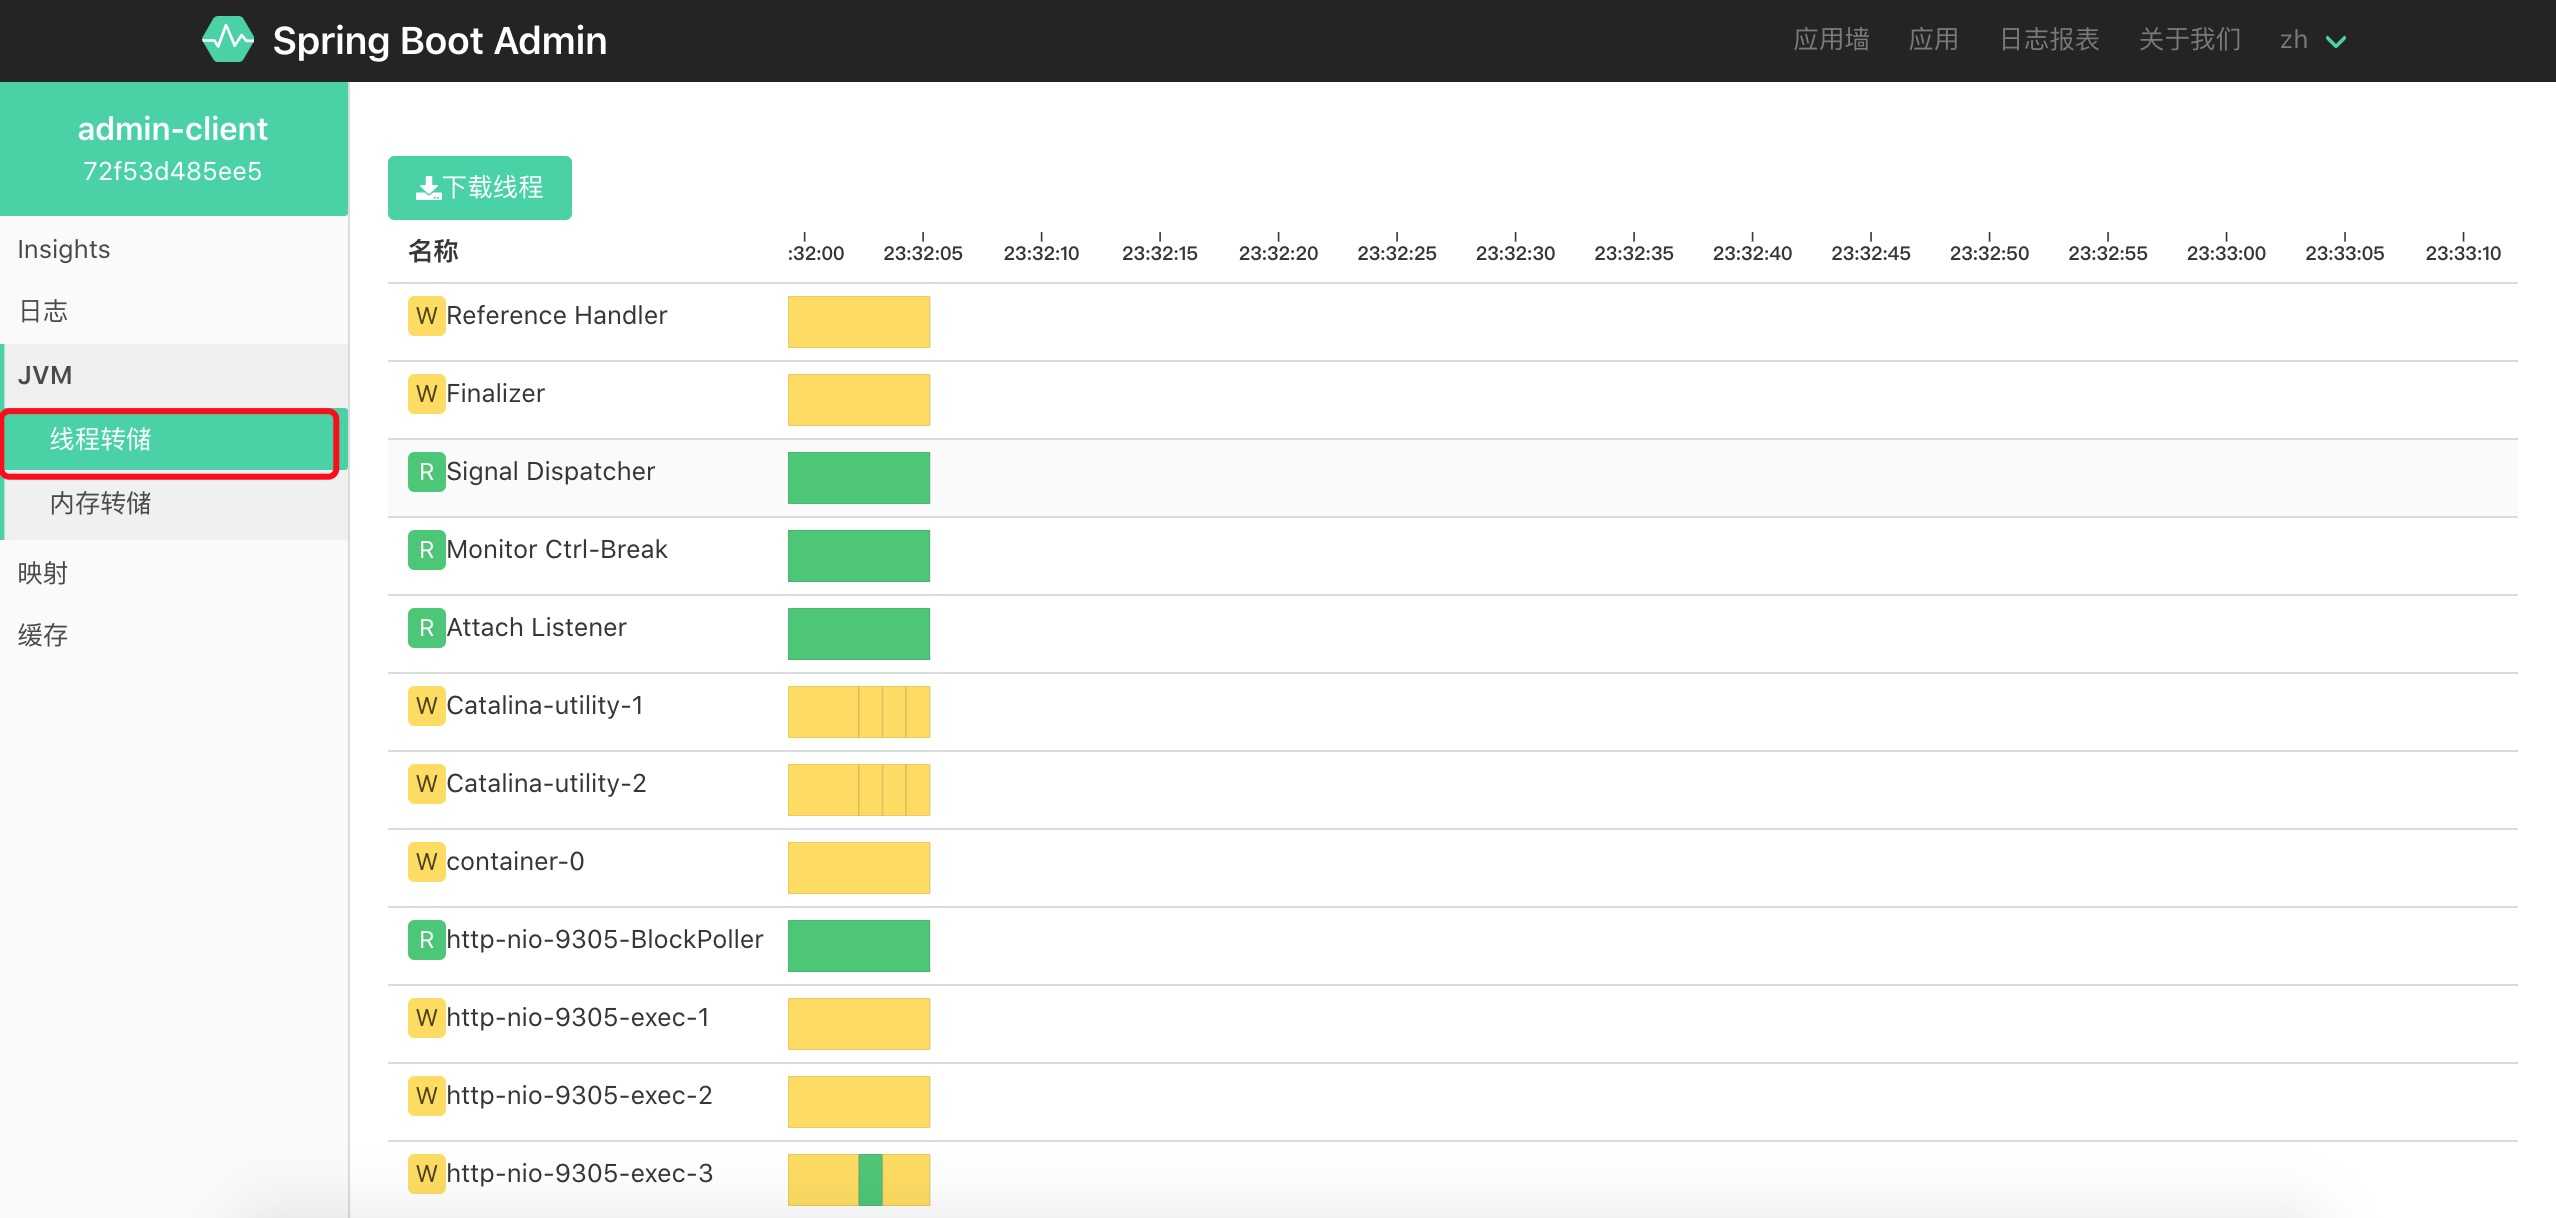
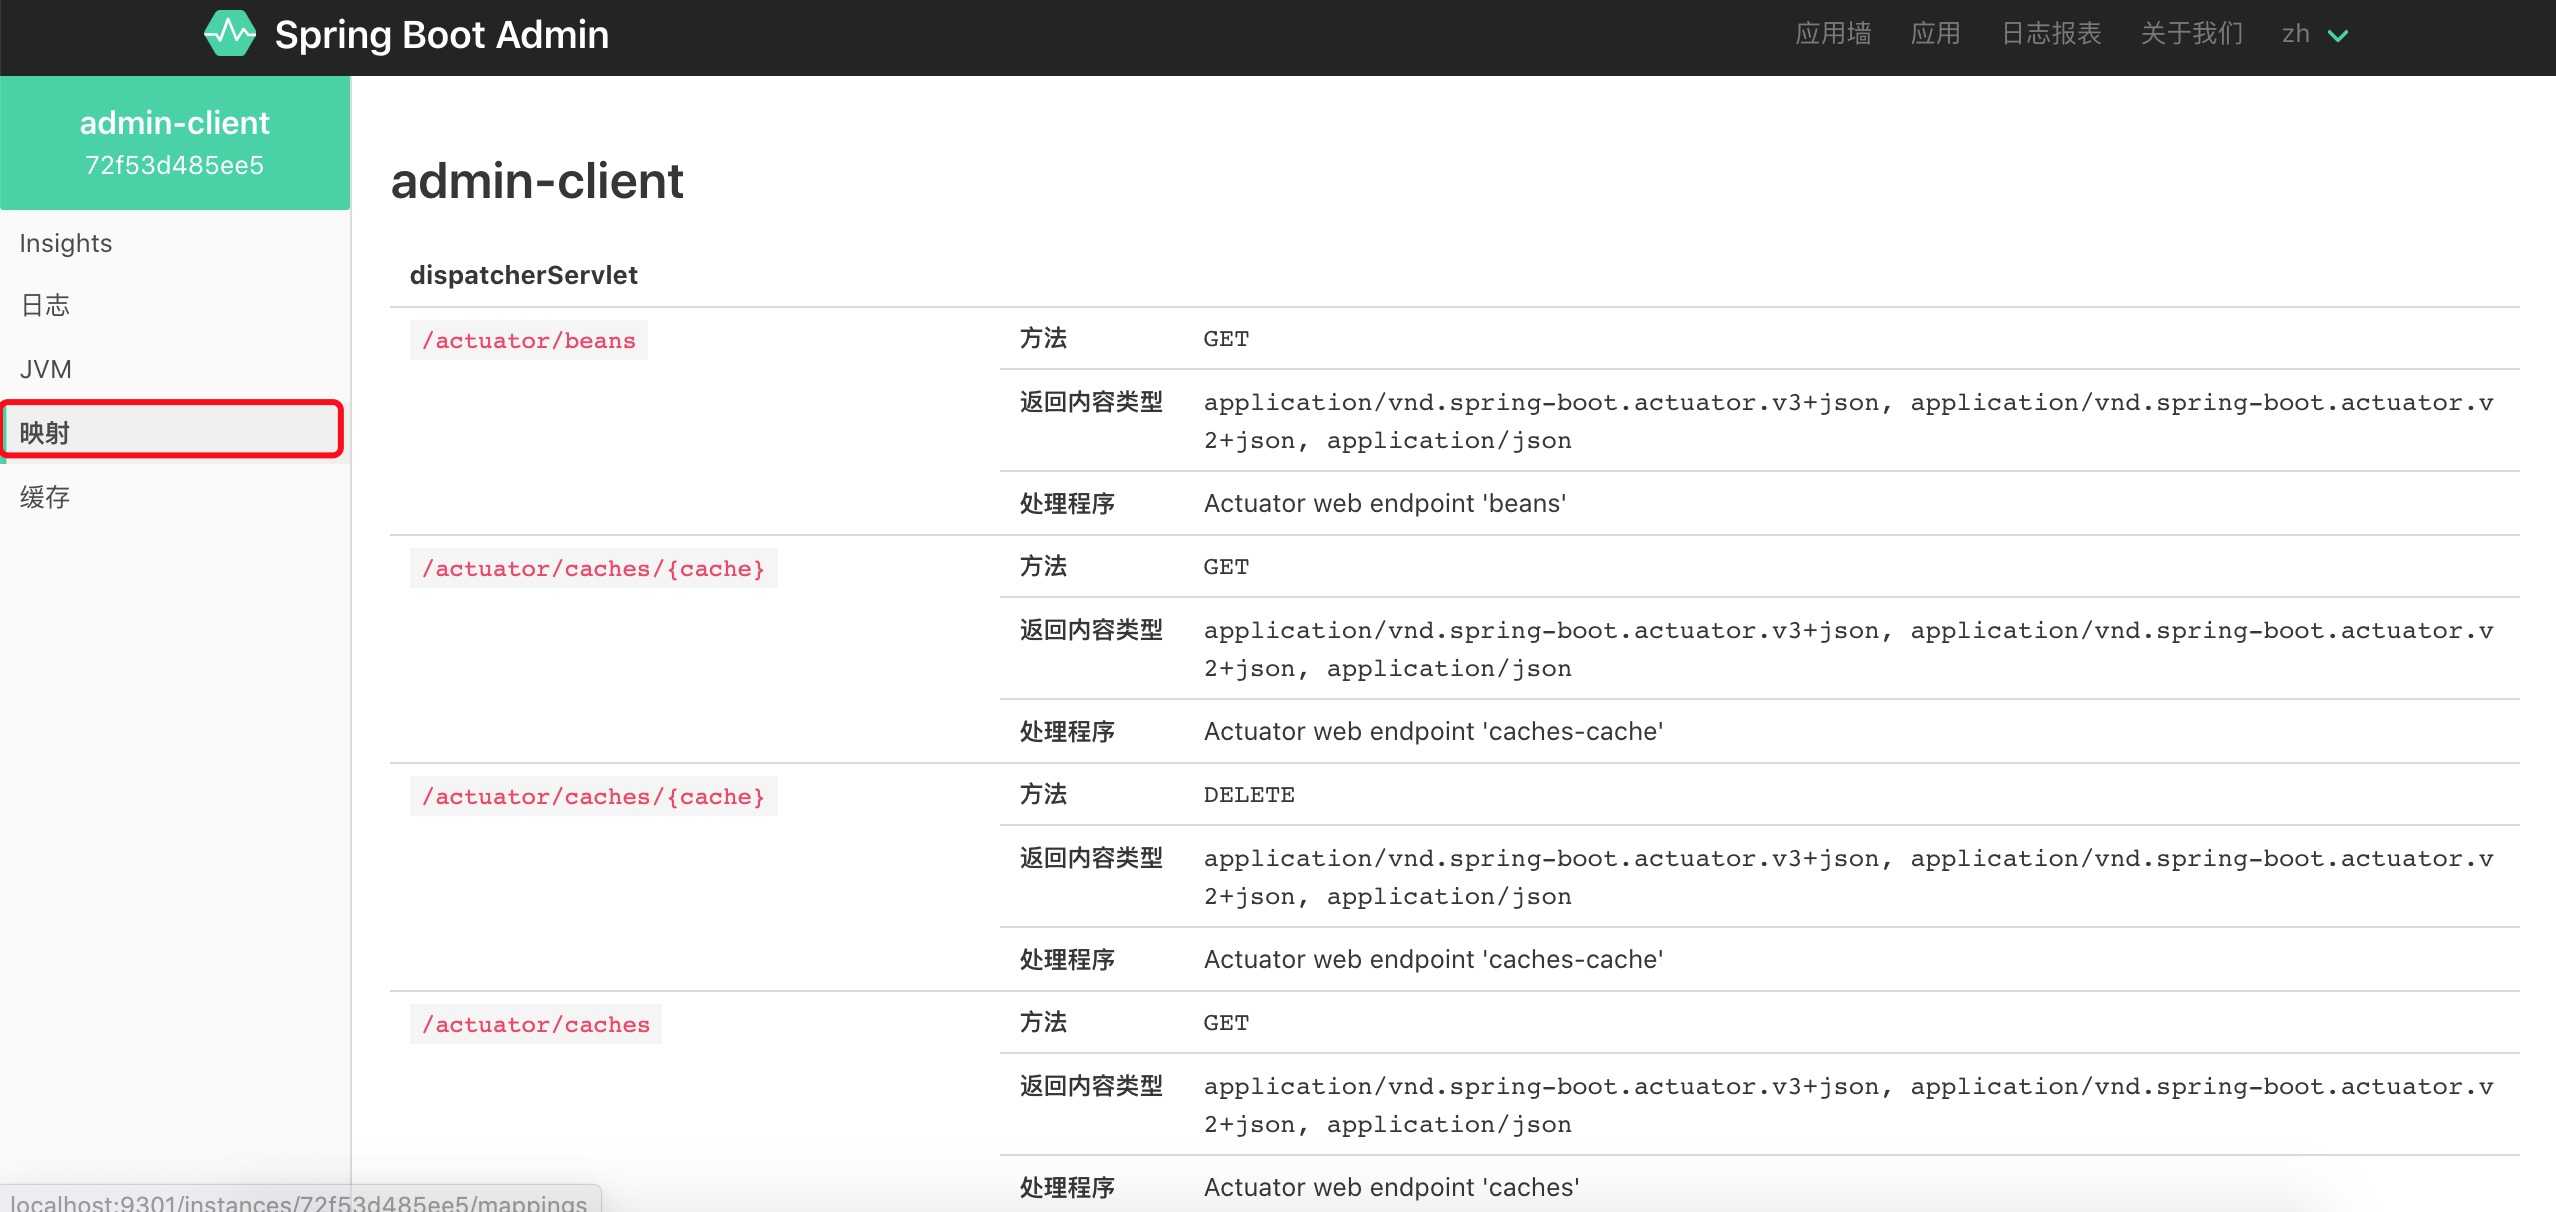
2)查看Spring Boot Admin 主页发现可以看到服务信息:http://localhost:9301

这里我们创建一个admin-server模块来与Spring Security集成
1、新建一个SpringBoot项目
2、pom引入Spring Security依赖
完整pom如下:
 1 <?xml version="1.0" encoding="UTF-8"?>
 2 <project xmlns="http://maven.apache.org/POM/4.0.0"
 3          xmlns:xsi="http://www.w3.org/2001/XMLSchema-instance"
 4          xsi:schemaLocation="http://maven.apache.org/POM/4.0.0 http://maven.apache.org/xsd/maven-4.0.0.xsd">
 5     <modelVersion>4.0.0</modelVersion>
 6
 7     <groupId>org.example</groupId>
 8     <artifactId>test-springboot-admin-sc-server</artifactId>
 9     <version>1.0-SNAPSHOT</version>
10
11     <parent>
12         <groupId>org.springframework.boot</groupId>
13         <artifactId>spring-boot-starter-parent</artifactId>
14         <version>2.2.5.RELEASE</version>
15     </parent>
16
17     <properties>
18         <project.build.sourceEncoding>UTF-8</project.build.sourceEncoding>
19         <project.reporting.outputEncoding>UTF-8</project.reporting.outputEncoding>
20         <java.version>1.8</java.version>
21     </properties>
22
23     <dependencies>
24
25         <dependency>
26             <groupId>org.springframework.boot</groupId>
27             <artifactId>spring-boot-starter-security</artifactId>
28         </dependency>
29
30         <dependency>
31             <groupId>org.springframework.cloud</groupId>
32             <artifactId>spring-cloud-starter-netflix-eureka-client</artifactId>
33             <version>2.2.2.RELEASE</version>
34         </dependency>
35
36         <!-- spring-boot-admin -->
37         <dependency>
38             <groupId>de.codecentric</groupId>
39             <artifactId>spring-boot-admin-starter-server</artifactId>
40             <version>2.2.3</version>
41         </dependency>
42
43         <dependency>
44             <groupId>org.springframework.boot</groupId>
45             <artifactId>spring-boot-starter-web</artifactId>
46         </dependency>
47
48         <dependency>
49             <groupId>org.springframework.boot</groupId>
50             <artifactId>spring-boot-starter-test</artifactId>
51             <scope>test</scope>
52         </dependency>
53
54     </dependencies>
55
56
57     <!-- SpringBoot打包插件,可以将代码打包成一个可执行的jar包 -->
58     <build>
59         <plugins>
60             <plugin>
61                 <groupId>org.springframework.boot</groupId>
62                 <artifactId>spring-boot-maven-plugin</artifactId>
63             </plugin>
64         </plugins>
65     </build>
66
67 </project>
3、编辑配置文件application.yml
 1 spring:
 2   application:
 3     name: admin-security-server
 4   security: # 配置登录用户名和密码
 5     user:
 6       name: admin
 7       password: 123456
 8   boot:  # 不显示admin-security-server的监控信息
 9     admin:
10       discovery:
11         ignored-services: ${spring.application.name}
12
13 server:
14   port: 9302
15
16 eureka:
17   client:
18     register-with-eureka: true
19     fetch-registry: true
20     service-url:
21       defaultZone: http://localhost:8761/eureka/
4、编辑主启动类
1 @EnableDiscoveryClient
2 @EnableAdminServer
3 @SpringBootApplication
4 public class Application {
5     public static void main(String[] args) {
6         SpringApplication.run(Application.class, args);
7     }
8 }
5、编辑配置类
 1 @Configuration
 2 public class SecuritySecureConfig extends WebSecurityConfigurerAdapter {
 3     private final String adminContextPath;
 4
 5     public SecuritySecureConfig(AdminServerProperties adminServerProperties) {
 6         this.adminContextPath = adminServerProperties.getContextPath();
 7     }
 8
 9     @Override
10     protected void configure(HttpSecurity http) throws Exception {
11         SavedRequestAwareAuthenticationSuccessHandler successHandler = new SavedRequestAwareAuthenticationSuccessHandler();
12         successHandler.setTargetUrlParameter("redirectTo");
13         successHandler.setDefaultTargetUrl(adminContextPath + "/");
14
15         http.authorizeRequests()
16                 //1.配置所有静态资源和登录页可以公开访问
17                 .antMatchers(adminContextPath + "/assets/**").permitAll()
18                 .antMatchers(adminContextPath + "/login").permitAll()
19                 .anyRequest().authenticated()
20                 .and()
21                 //2.配置登录和登出路径
22                 .formLogin().loginPage(adminContextPath + "/login").successHandler(successHandler).and()
23                 .logout().logoutUrl(adminContextPath + "/logout").and()
24                 //3.开启http basic支持,admin-client注册时需要使用
25                 .httpBasic().and()
26                 .csrf()
27                 //4.开启基于cookie的csrf保护
28                 .csrfTokenRepository(CookieCsrfTokenRepository.withHttpOnlyFalse())
29                 //5.忽略这些路径的csrf保护以便admin-client注册
30                 .ignoringAntMatchers(
31                         adminContextPath + "/instances",
32                         adminContextPath + "/actuator/**"
33                 );
34     }
35 }
6、测试
1)启动Eureka注册中心,启动admin-server、admin-client、admin-security-server
2)访问admin-security-server地址:http://localhost:9302/
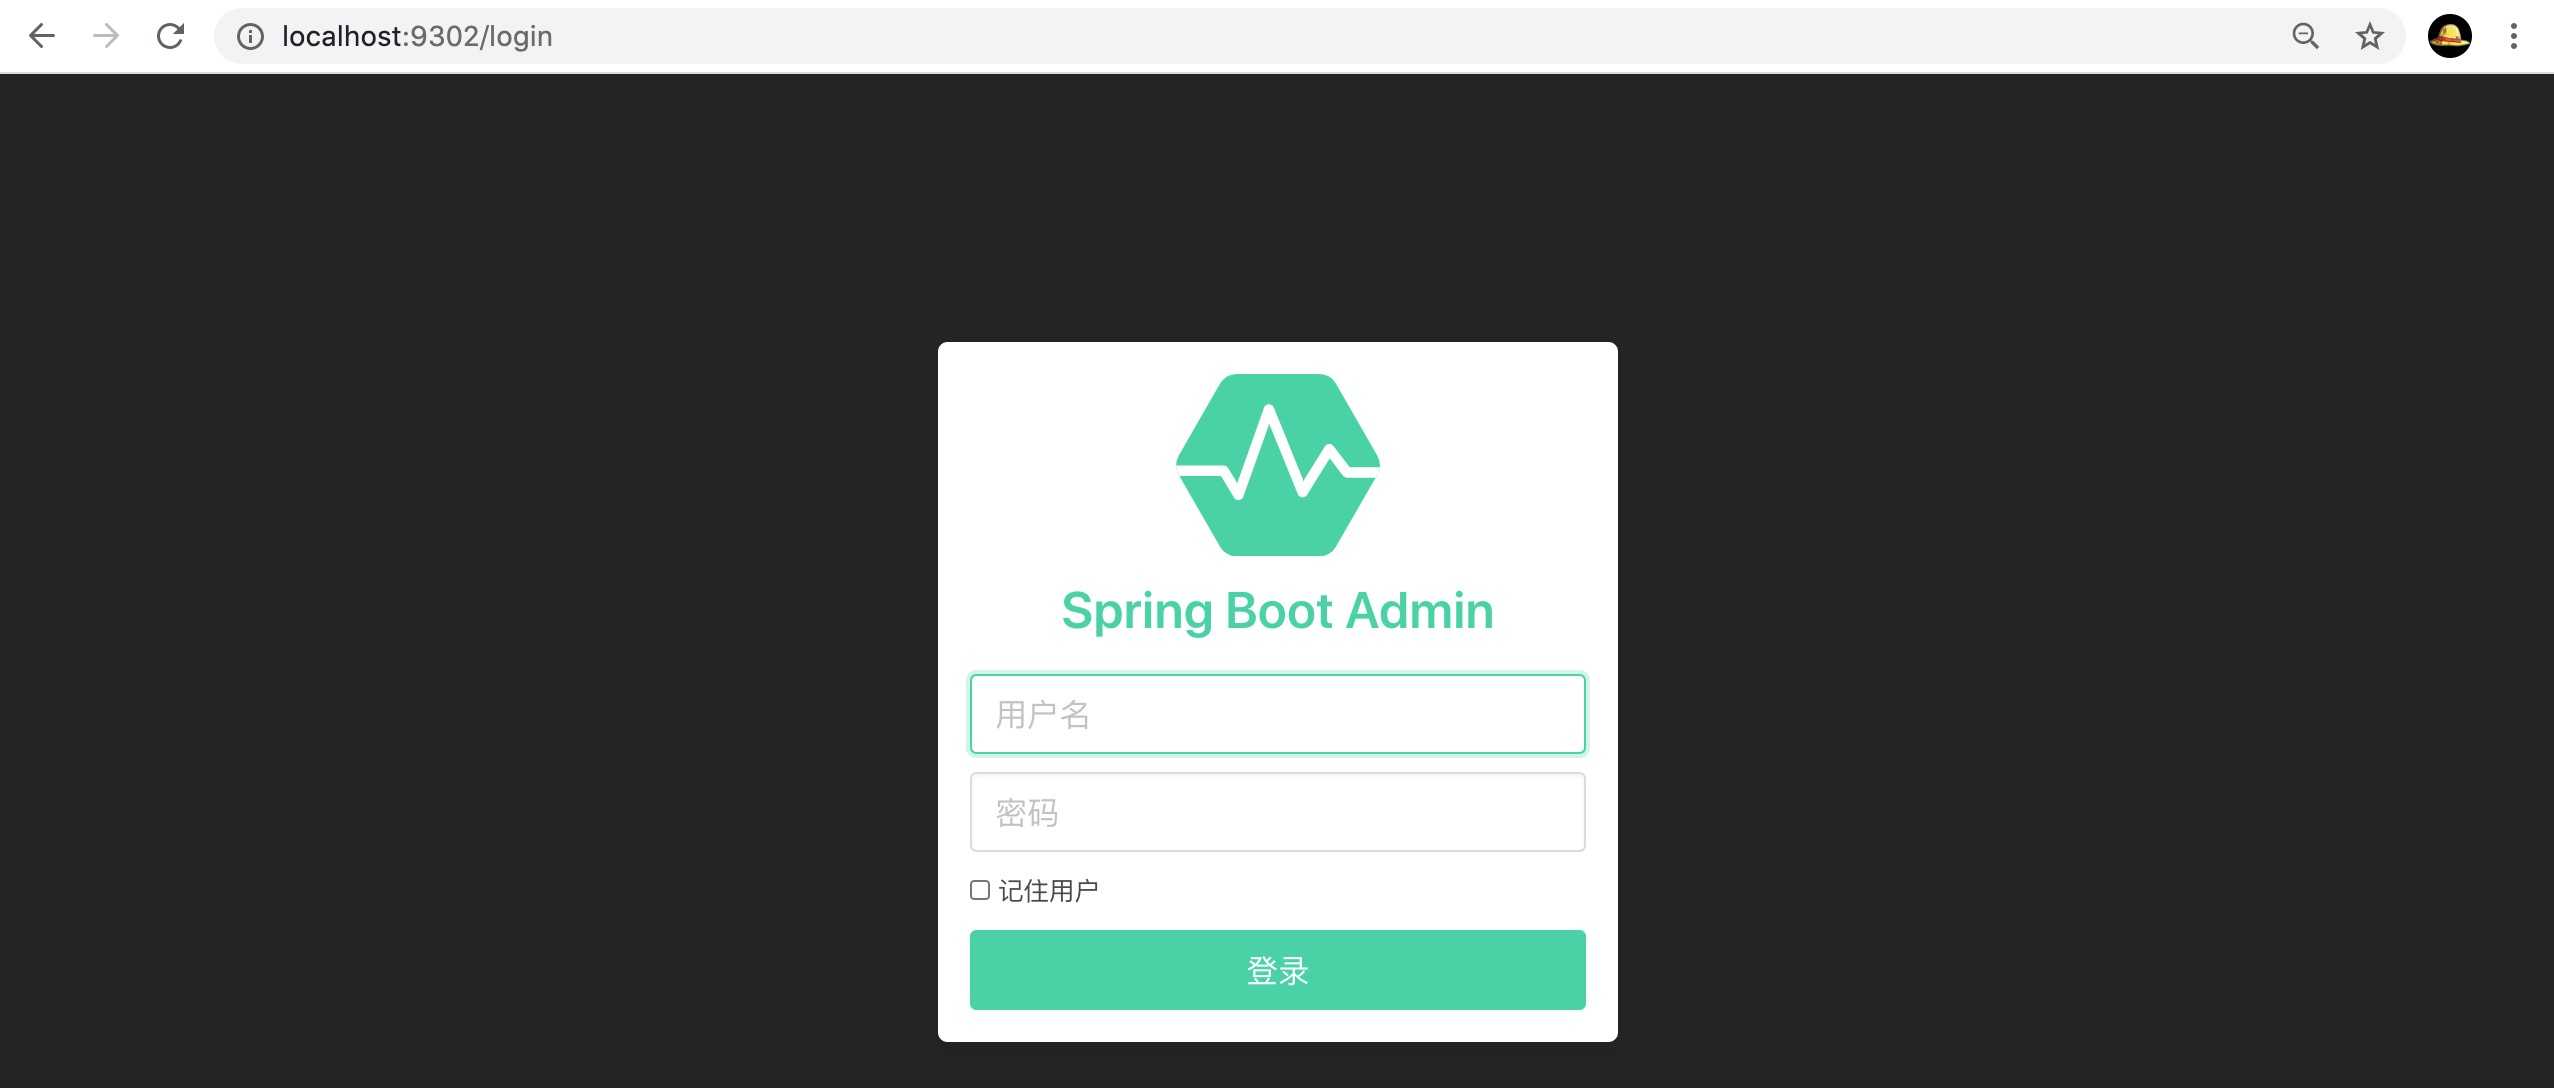
3)输入用户名/密码(admin/123456)访问,效果如下:

【SpringBoot】Spring Boot Admin 微服务应用监控
标签:密码 数据源 etc 注册 user target environ rom led
原文地址:https://www.cnblogs.com/h--d/p/13053087.html
