标签:already oca uuid 登录 user broadcast dsa cst rop
一、前提环境:重启网卡:
[root@localhost network-scripts]# systemctl restart network
[root@localhost network-scripts]# ifconfig
br0: flags=4163<UP,BROADCAST,RUNNING,MULTICAST> mtu 1500
inet 172.16.41.30 netmask 255.255.255.0 broadcast 172.16.41.255
inet6 fe80::20c:29ff:fee9:3fc2 prefixlen 64 scopeid 0x20<link>
ether 00:0c:29:e9:3f:c2 txqueuelen 0 (Ethernet)
RX packets 452 bytes 31566 (30.8 KiB)
RX errors 0 dropped 12 overruns 0 frame 0
TX packets 37 bytes 5704 (5.5 KiB)
TX errors 0 dropped 0 overruns 0 carrier 0 collisions 0
eno16777736: flags=4163<UP,BROADCAST,RUNNING,MULTICAST> mtu 1500
inet6 fe80::20c:29ff:fee9:3fc2 prefixlen 64 scopeid 0x20<link>
ether 00:0c:29:e9:3f:c2 txqueuelen 1000 (Ethernet)
RX packets 26188 bytes 1952055 (1.8 MiB)
RX errors 0 dropped 1426 overruns 0 frame 0
TX packets 600 bytes 125506 (122.5 KiB)
TX errors 0 dropped 0 overruns 0 carrier 0 collisions 0
lo: flags=73<UP,LOOPBACK,RUNNING> mtu 65536
inet 127.0.0.1 netmask 255.0.0.0
inet6 ::1 prefixlen 128 scopeid 0x10<host>
loop txqueuelen 0 (Local Loopback)
RX packets 2 bytes 170 (170.0 B)
RX errors 0 dropped 0 overruns 0 frame 0
TX packets 2 bytes 170 (170.0 B)
TX errors 0 dropped 0 overruns 0 carrier 0 collisions 0
virbr0: flags=4099<UP,BROADCAST,MULTICAST> mtu 1500
inet 192.168.122.1 netmask 255.255.255.0 broadcast 192.168.122.255
ether 52:54:00:e3:79:b8 txqueuelen 0 (Ethernet)
RX packets 0 bytes 0 (0.0 B)
RX errors 0 dropped 0 overruns 0 frame 0
TX packets 0 bytes 0 (0.0 B)
TX errors 0 dropped 0 overruns 0 carrier 0 collisions 0
三、新建50-libvirt-remote-access.pkla文件并配置SSH
在新KVM主机上新建50-libvirt-remote-access.pkla
[root@localhost ~]# vim /etc/polkit-1/localauthority/50-local.d/50-libvirt-remote-access.pkla
添加以下内容:
[Remote libvirt SSH access]
Identity=unix-user:root
Action=org.libvirt.unix.manage
ResultAny=yes
ResultInactive=yes
ResultActive=yes
修改50-libvirt-remote-access.pkla的归属者(如果时root登录创建的不用执行下面的命令)
[root@localhost ~]# chown -R root.root /etc/polkit-1/localauthority/50-local.d/50-libvirt-remote-access.pkla
[root@localhost ~]# ll /etc/polkit-1/localauthority/50-local.d/50-libvirt-remote-access.pkla
-rw-r--r--. 1 root root 133 6月 4 15:37 /etc/polkit-1/localauthority/50-local.d/50-libvirt-remote-access.pkla
回到webvirtmgr主机,进行设置:
将密钥上传到新KVM主机41.30
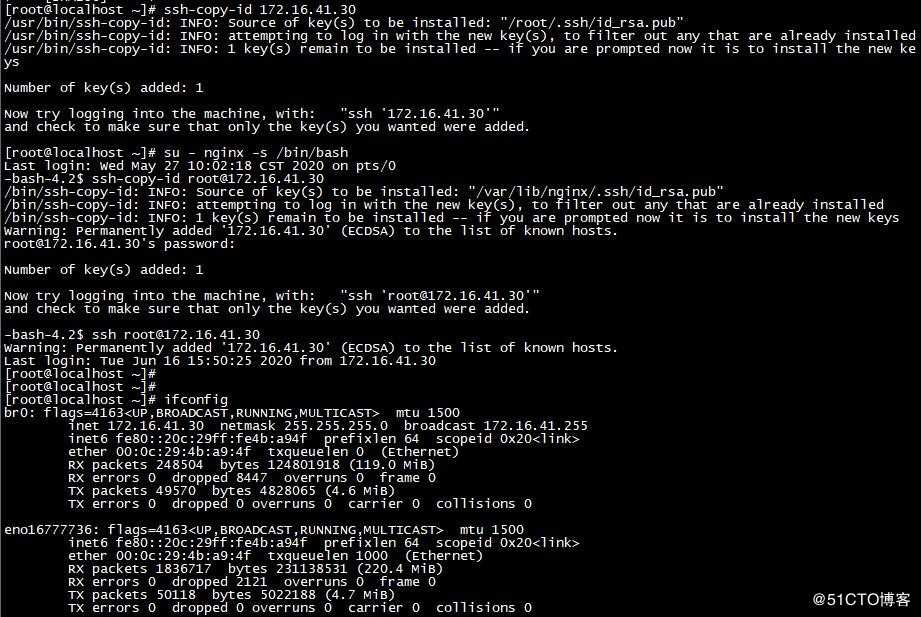
[root@localhost ~]# ssh-copy-id 172.16.41.30
/usr/bin/ssh-copy-id: INFO: Source of key(s) to be installed: "/root/.ssh/id_dsa.pub"
/usr/bin/ssh-copy-id: INFO: attempting to log in with the new key(s), to filter out any that are already installed
/usr/bin/ssh-copy-id: INFO: 1 key(s) remain to be installed -- if you are prompted now it is to install the new keys
root@172.16.41.30‘s password: #输入新KVM主机的密码
Number of key(s) added: 1
Now try logging into the machine, with: "ssh ‘172.16.41.30‘"
and check to make sure that only the key(s) you wanted were added.
无密码连接测试:
[root@localhost ~]# su - nginx -s /bin/bash
Last login: Wed May 27 10:02:18 CST 2020 on pts/0
-bash-4.2$ ssh-copy-id root@172.16.41.30 #
/bin/ssh-copy-id: INFO: Source of key(s) to be installed: "/var/lib/nginx/.ssh/id_rsa.pub"
/bin/ssh-copy-id: INFO: attempting to log in with the new key(s), to filter out any that are already installed
/bin/ssh-copy-id: INFO: 1 key(s) remain to be installed -- if you are prompted now it is to install the new keys
Warning: Permanently added ‘172.16.41.30‘ (ECDSA) to the list of known hosts.
root@172.16.41.30‘s password:
Number of key(s) added: 1
Now try logging into the machine, with: "ssh ‘root@172.16.41.30‘"
and check to make sure that only the key(s) you wanted were added.
-bash-4.2$ ssh root@172.16.41.30
Warning: Permanently added ‘172.16.41.30‘ (ECDSA) to the list of known hosts.
Last login: Tue Jun 16 15:50:25 2020 from 172.16.41.30
[root@localhost ~]#
[root@localhost ~]#
[root@localhost ~]# ifconfig
br0: flags=4163<UP,BROADCAST,RUNNING,MULTICAST> mtu 1500
inet 172.16.41.30 netmask 255.255.255.0 broadcast 172.16.41.255
inet6 fe80::20c:29ff:fe4b:a94f prefixlen 64 scopeid 0x20<link>
ether 00:0c:29:4b:a9:4f txqueuelen 0 (Ethernet)
RX packets 248504 bytes 124801918 (119.0 MiB)
RX errors 0 dropped 8447 overruns 0 frame 0
TX packets 49570 bytes 4828065 (4.6 MiB)
TX errors 0 dropped 0 overruns 0 carrier 0 collisions 0
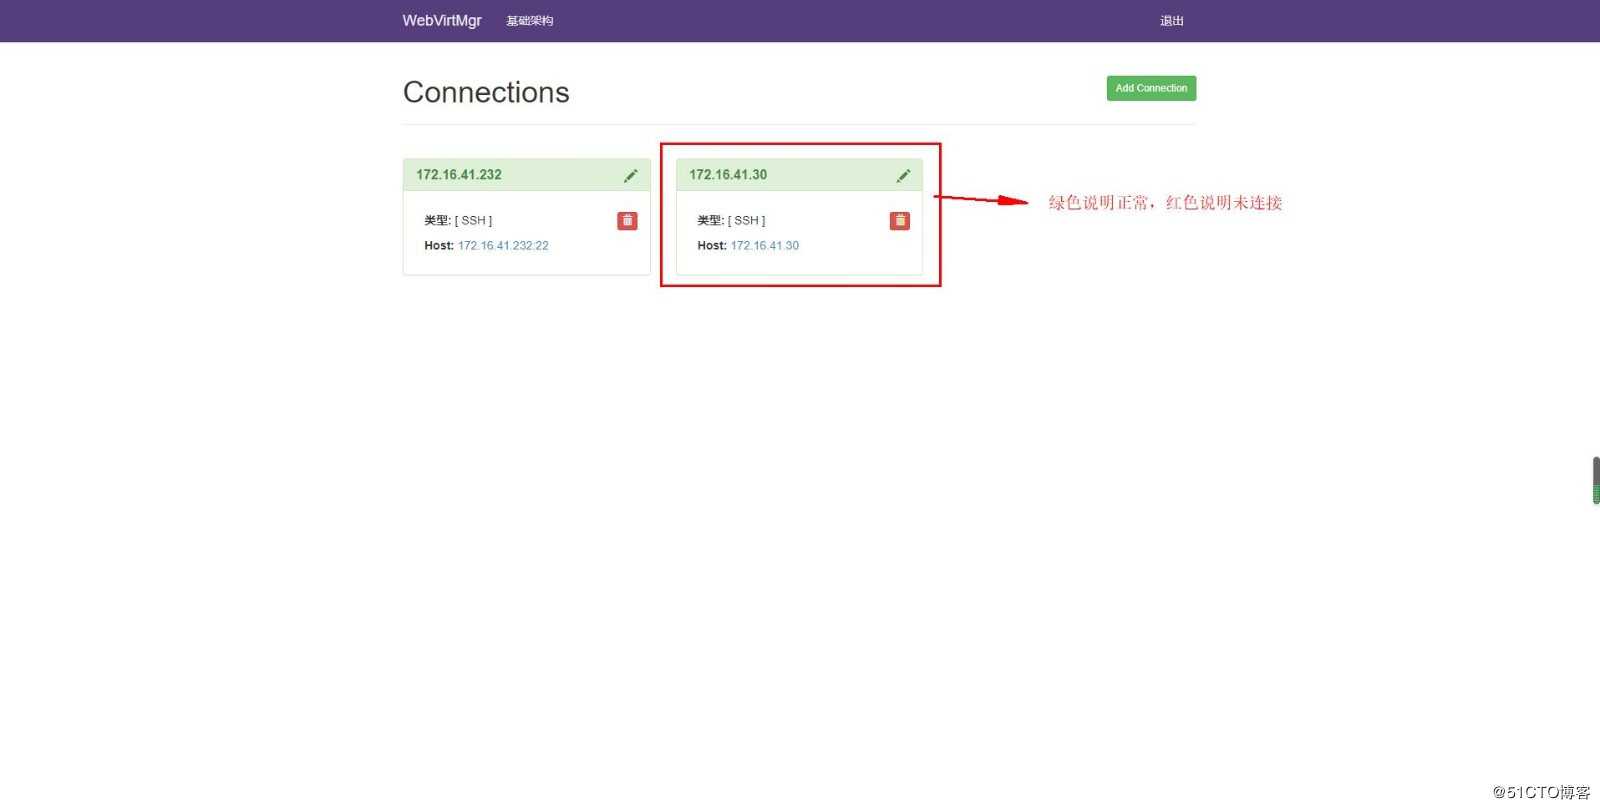
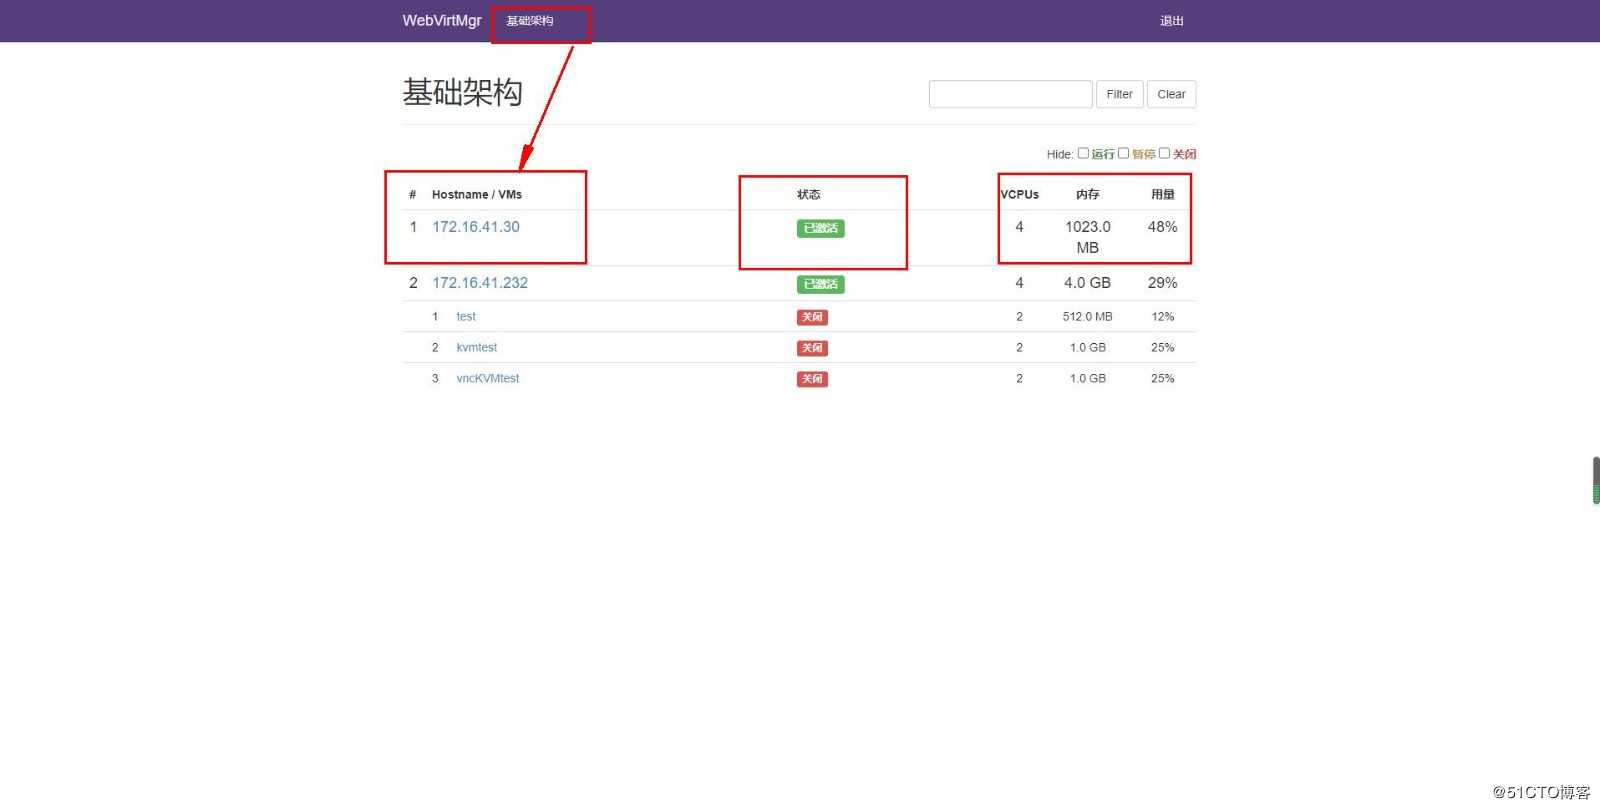
四、在WebVirtMgr添加新KVM主机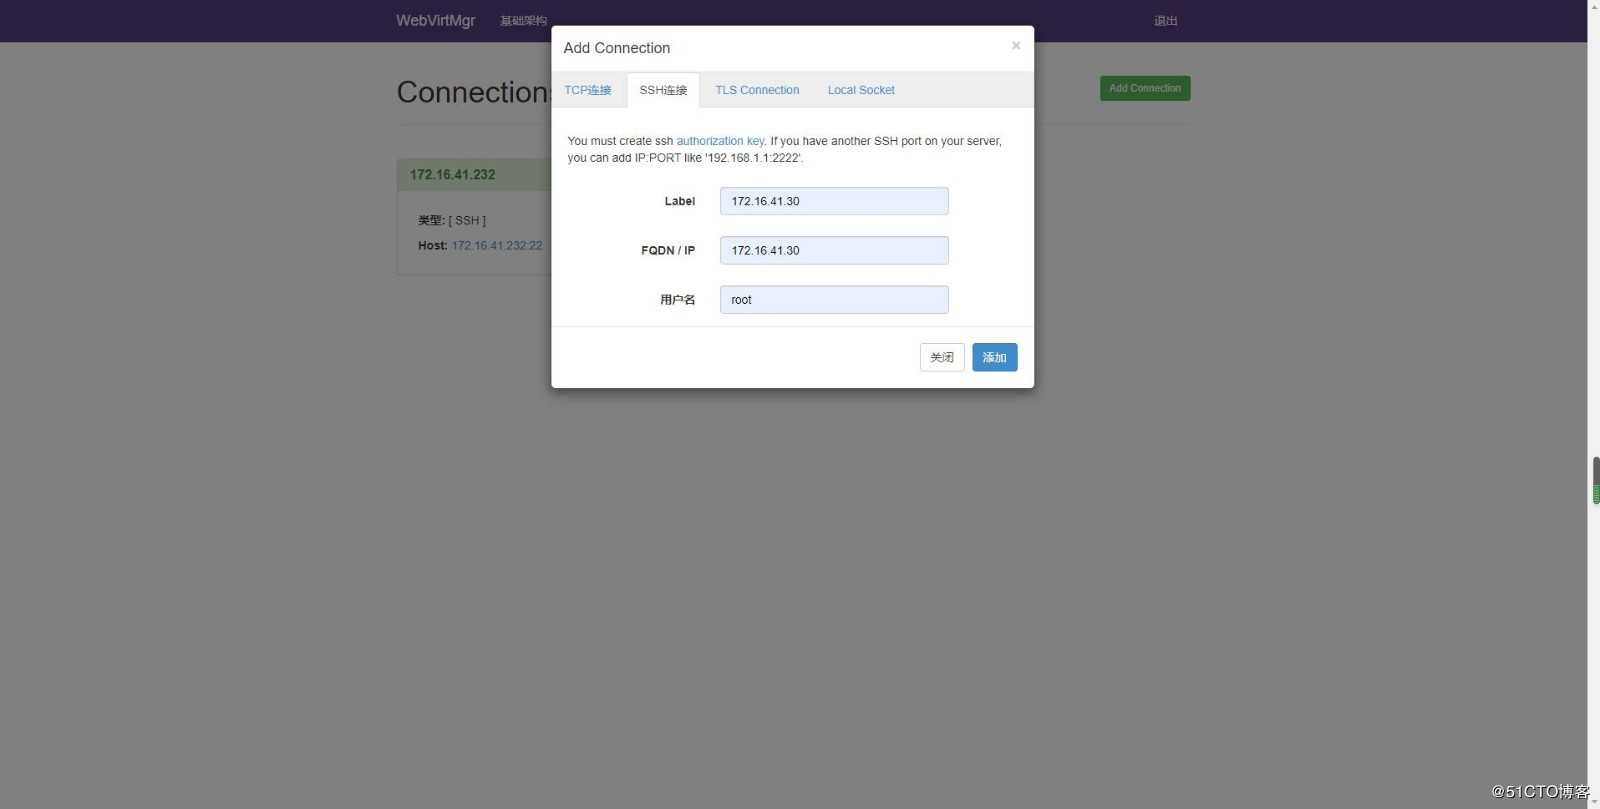
标签:already oca uuid 登录 user broadcast dsa cst rop
原文地址:https://blog.51cto.com/3001441/2505047