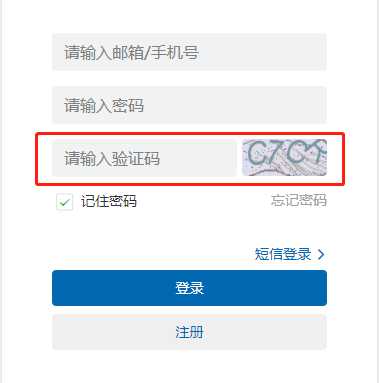
标签:注意 efault mamicode 需要 解决 src get 进制 验证码

须知:浏览器端网站请求接口验证图形验证码是否正确时,会自动携带token。
所以浏览器网站没有此问题,无需从获取图形验证码的接口获取token,因为浏览器自动传的,不需手动操作。
获取图形验证码时直接将接口请求地址赋值给src即可,如下:

现在的问题是:在uniapp中包含小程序及app端的情况,请求接口时是不会自动携带token的,需要手动添加。
所以我们就需要先从获取图形验证码的接口获取token,才能在验证图形验证码时额外手动添加token。
先在请求图形验证码的接口拿到图形验证码信息,包括token和乱码的图形验证码图片信息。如下(data里是图片信息,cookies里包含的就是token了)

以上方式肯定是拿不到图形验证码的图片的。我们需要经过以下处理
1、请求获取图形码接口时设置响应类型reponseType为arraybuffer
2、使用uni.arrayBufferToBase64(arrayBuffer)此api处理请求结果。此处注意base64转码后的字符串需要添加data:image/png;base64,前缀
3、请求验证接口时给Cookie里添加token
<script>
      export default{
            data(){
                  verifyCodeImg:‘‘,   //验证码图片
                  verifyCodeToken:‘‘,   //图形验证码的验证token
                  isVerifyCodeTure:false,  //验证码输入是否正确
            },
            onLoad(){
                  this.getVerifyCodeImg()
            },
            methods:{
                //获取图形验证码及其验证token
                getVerifyCodeImg(){
                      uni.request({
                            url: `${this.$baseUrl}/api-user/getVerification?t=${Math.random()}`,
                            method: ‘GET‘,
                            responseType: ‘arraybuffer‘,  //设置响应类型
                            success: res => {
                                  //将 ArrayBuffer 对象转成 Base64 字符串
                                  const arrayBuffer = new Uint8Array(res.data)
                                  const base64 = "data:image/png;base64,"+uni.arrayBufferToBase64(arrayBuffer)  //这里需要添加前缀
                                  this.verifyCodeImg=base64
                                  this.verifyCodeToken=res.cookies[0]
                            },
                            fail: () => {},
                      });
                },
                //检查图形验证码对错
                checkVerifyCode(){
                      if(this.verifyCode.length>=4){
                            let headers={
                                  Cookie: this.verifyCodeToken  //将token信息添加至请求头里
                            }
                            uni.request({
                                  url: `${this.$baseUrl}/api-user/checkVerification?code=${this.verifyCode}`,
                                  method: ‘GET‘,
                                  header: headers,
                                  success: res => {
                                        if(res.data.code==200){
                                              this.isVerifyCodeTure=true
                                        }else{
                                              this.isVerifyCodeTure=false
                                              this.verifyCode=‘‘
                                              this.getVerifyCodeImg()
                                              uni.showToast({title: ‘图形验证码输入错误‘,icon:‘none‘});
                                        }
                                  },
                                  fail: () => {},
                            });
                      }else{
                            this.isVerifyCodeTure=false
                      }
                },
          }
    }
</script>
uniapp解决图形验证码问题及arraybuffer二进制转base64格式图片
标签:注意 efault mamicode 需要 解决 src get 进制 验证码
原文地址:https://www.cnblogs.com/huihuihero/p/13183031.html