标签:pack cut 打包 getpath 公众号 加密 吐槽 文章 tags
前面《Springboot整合MongoDB的Docker开发,其它应用也类似》讲解了如何做Docker开发、如何把Springboot应用打包成一个镜像,但它是手动的,本文将讲解如何通过maven一键打包部署。
可以使用maven插件实现一键部署,这两个插件还是同一个公司的产品,就是著名的音乐流服务平台Spotify。

该插件可以实现镜像打包和push到仓库,无Dockerfile和有Dockerfile两种方式都可以,建议使用Dockerfile,更灵活。在maven的pom.xml文件加入以下插件配置:
<plugin>
  <groupId>com.spotify</groupId>
  <artifactId>docker-maven-plugin</artifactId>
  <version>1.2.2</version>
  <configuration>
    <imageName>pkslow/springboot-mongo</imageName>
    <imageTags>
      <imageTag>${imageVersion}</imageTag>
      <imageTag>latest</imageTag>
    </imageTags>
    <!-- optionally overwrite tags every time image is built with docker:build -->
    <forceTags>true</forceTags>
    <dockerDirectory>${project.basedir}</dockerDirectory>
    <resources>
      <resource>
        <targetPath>/</targetPath>
        <directory>${project.build.directory}</directory>
        <include>${project.build.finalName}.jar</include>
      </resource>
    </resources>
  </configuration>
</plugin>
imageName:这是镜像名称;
imageTags:标签,支持多标签,即同一个镜像文件多个标签;我指定了一个参数imageVersion,可以命令行传入,方便后续整合Jenkins。
forceTags:是否覆盖原有标签;
dockerDirectory:Dockerfile文件所在的位置;而且该目录下的所有文件都会被复制到${project.build.directory}/docker。因为我的Dockerfile放在项目根目录,所以整个项目的文件都复制过去了,包括源代码等。不得不吐槽一下这个设计,这是在强迫大家换个位置放Dockerfile吗?
resources:用来添加dockerDirectory外的其它资源文件。
添加后,通过以下命令执行:
$ mvn clean package docker:build -DimageVersion=0.0.4
通过命令docker images查看成功,运行也正常。
通过下面命令可以push到registry:
mvn clean package docker:build -DpushImage

mvn clean package docker:build -DpushImageTag
可以通过添加executions配置实现与maven生命周期的绑定。
<plugin>
  <groupId>com.spotify</groupId>
  <artifactId>docker-maven-plugin</artifactId>
  <version>VERSION GOES HERE</version>
  <executions>
    <execution>
      <id>build-image</id>
      <phase>package</phase>
      <goals>
        <goal>build</goal>
      </goals>
    </execution>
    <execution>
      <id>tag-image</id>
      <phase>package</phase>
      <goals>
        <goal>tag</goal>
      </goals>
      <configuration>
        <image>my-image:${project.version}</image>
        <newName>registry.example.com/my-image:${project.version}</newName>
      </configuration>
    </execution>
    <execution>
      <id>push-image</id>
      <phase>deploy</phase>
      <goals>
        <goal>push</goal>
      </goals>
      <configuration>
        <imageName>registry.example.com/my-image:${project.version}</imageName>
      </configuration>
    </execution>
  </executions>
</plugin>
有了这些绑定配置后,要打包镜像,直接mvn clean package即可。
首先,插件可以使用配置在本地 ~/.dockercfg 或 ~/.docker/config.json的验证信息,或者可以显式地配置在maven上。
如配置在settings.xml文件:
<servers>
  <server>
    <id>docker-hub</id>
    <username>foo</username>
    <password>secret-password</password>
    <configuration>
      <email>foo@foo.bar</email>
    </configuration>
  </server>
</servers>
密码是可以加密的,详情请查看: Maven‘s built in encryption function 。
在项目的pom.xml中使用:
<plugins>
  <plugin>
    <groupId>com.spotify</groupId>
    <artifactId>docker-maven-plugin</artifactId>
    <version>VERSION GOES HERE</version>
    <configuration>
      [...]
      <serverId>docker-hub</serverId>
      <registryUrl>https://index.docker.io/v1/</registryUrl>
    </configuration>
  </plugin>
</plugins>
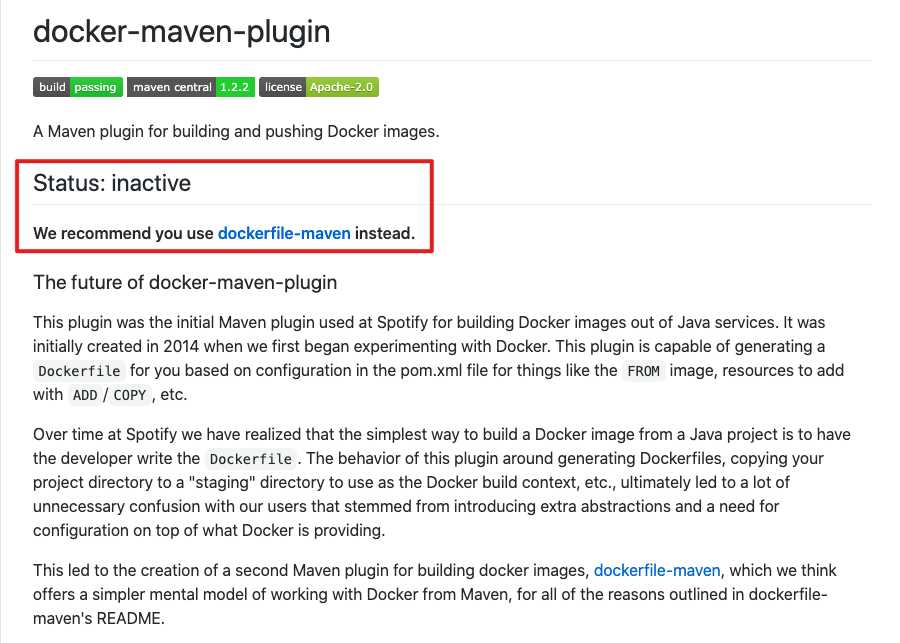
因为docker-maven-plugin有一些Bugs,所以Spotify开发了更方便简洁的插件dockerfile-maven。

dockerfile-maven-plugin的配置更简单:
<plugin>
  <groupId>com.spotify</groupId>
  <artifactId>dockerfile-maven-plugin</artifactId>
  <version>${dockerfile-maven-version}</version>
  <executions>
    <execution>
      <id>default</id>
      <goals>
        <goal>build</goal>
        <goal>push</goal>
      </goals>
    </execution>
  </executions>
  <configuration>
    <repository>spotify/foobar</repository>
    <tag>${project.version}</tag>
    <buildArgs>
      <JAR_FILE>${project.build.finalName}.jar</JAR_FILE>
    </buildArgs>
  </configuration>
</plugin>
配置好后,执行以下maven命令即可打包成镜像并推送到仓库:
mvn deploy
账号可以配置在pom.xml中,如下:
<plugin>
    <groupId>com.spotify</groupId>
    <artifactId>dockerfile-maven-plugin</artifactId>
    <version>${version}</version>
    <configuration>
        <username>repoUserName</username>
        <password>repoPassword</password>
        <repository>${docker.image.prefix}/${project.artifactId}</repository>
        <buildArgs>
            <JAR_FILE>target/${project.build.finalName}.jar</JAR_FILE>
        </buildArgs>
    </configuration>
</plugin>
当然,也可以配置在maven的配置文件settings.xml中,这样更安全,请参考:https://github.com/spotify/dockerfile-maven/blob/master/docs/authentication.md
通过maven插件,可以快速方便地一键打包、部署,非常方便,对后续的整个DevOps整合也是很有益的。
参考资料:
docker-maven-plugin:https://github.com/spotify/docker-maven-plugin
dockerfile-maven:https://github.com/spotify/dockerfile-maven
欢迎访问南瓜慢说 www.pkslow.com获取更多精彩文章!
欢迎关注微信公众号<南瓜慢说>,将持续为你更新...

多读书,多分享;多写作,多整理。
欢迎大家关注、分享。
Maven一键部署Springboot到Docker仓库,为自动化做准备
标签:pack cut 打包 getpath 公众号 加密 吐槽 文章 tags
原文地址:https://www.cnblogs.com/larrydpk/p/13258599.html