标签:修改 自己的 图表 展示 生产环境 curl ash imp dash
搭建了一次,Prometheus和Grafana结合监控Mysql和服务器的监控。分享下1.环境
搭建的服务器是CentOS Linux release 7.8.2003 (Core)
Mysql 是5.7.30
2. 安装Grafana
Grafana是一个可视化面板(Dashboard),有着非常漂亮的图表和布局展示,功能齐全的度量仪表盘和图形编辑器,支持Graphite、zabbix、InfluxDB、Prometheus等数据源。
2.1 下载并安装
下载地址:https://grafana.com/grafana/download
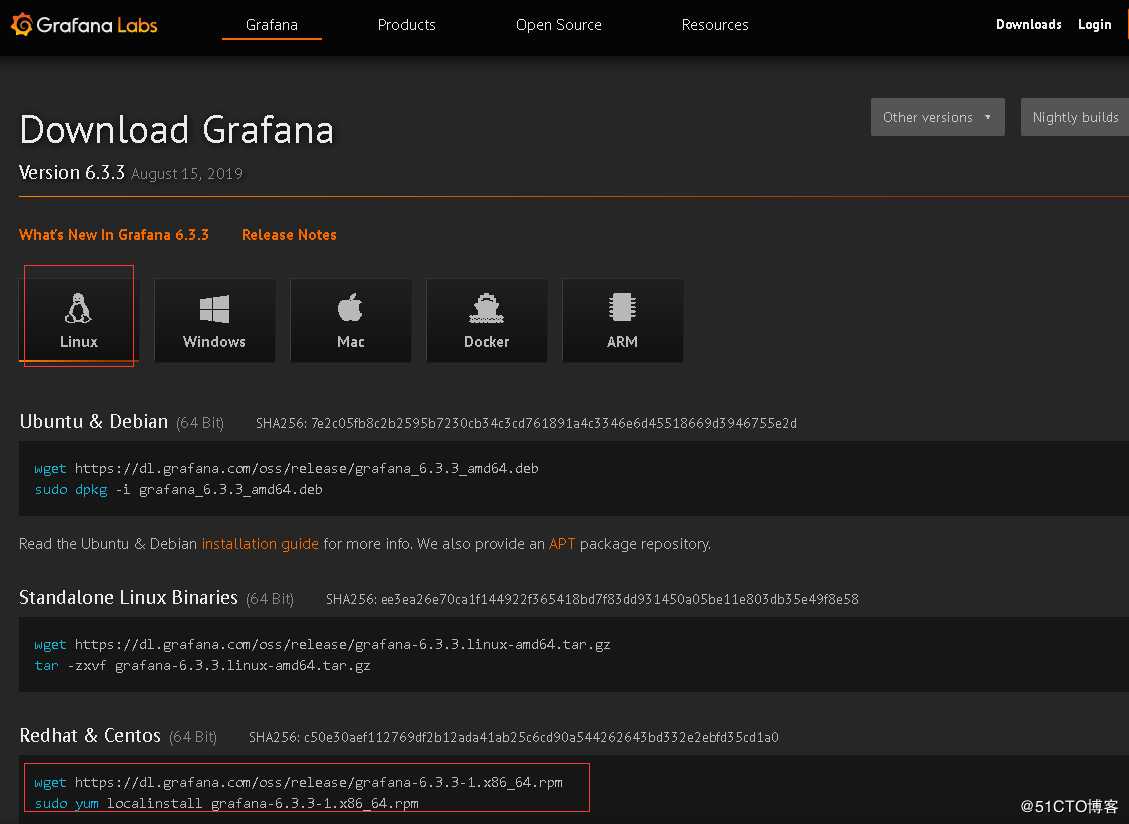
选择最新的版本进行安装,按照网站的提示运行脚本即可
wget https://dl.grafana.com/oss/release/grafana-6.3.3-1.x86_64.rpm
sudo yum localinstall grafana-6.3.3-1.x86_64.rpm
2.2 启动grafana
安装完成后,grafana服务默认已安装,配置文件为/etc/grafana/grafana.ini,如需修改路径及端口,可在该文件中修改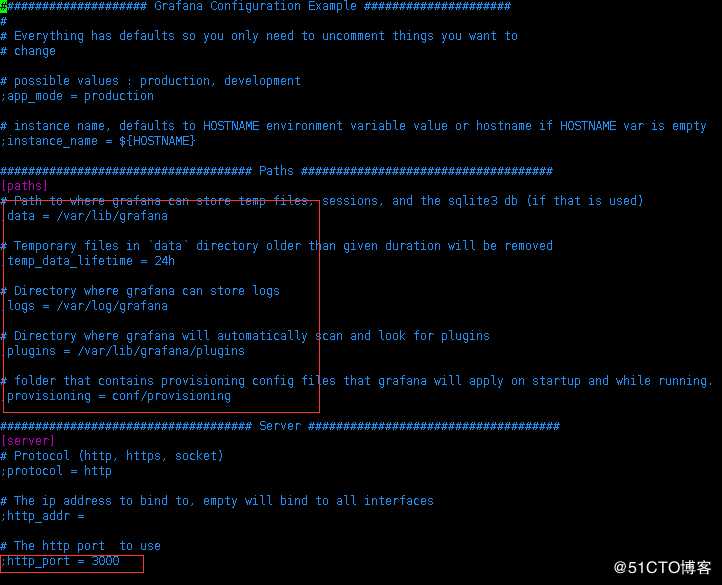
启动grafana
systemctl grafana-server start
2.3 登录grafana
访问页面http://服务器IP:3000 ,默认账号、密码admin/admin 首次登录将提示修改密码,建议修改
3. 安装Prometheus
3.1 Prometheus 主程序安装
Prometheus 主程序,主要是负责存储、抓取、聚合、查询方面
可登录官网进行下载,官网下载地址:https://prometheus.io/download/
根据操作系统类别选择文件进行下载,本次部署在linux上

/* 解压/
tar -zxvf prometheus-2.12.0.linux-amd64.tar.gz
3.2 启动prometheus主程序
生产环境可参考如下方式启动
/* 生产环境启动/
nohup ./prometheus --config.file=prometheus.yml --web.enable-lifecycle --storage.tsdb.retention.time=60d &
/**
--web.enable-lifecycle 加上此参数可以远程热加载配置文件,无需重启prometheus,调用指令是curl -X POST http://ip:9090/-/reload
-- storage.tsdb.retention.time 数据默认保存时间为15天,启动时加上此参数可以控制数据保存时间
*/
其他的参数及配置可以在prometheus.yml中调整及配置
4. 在需监控的机器上部署exporter
4.1 监控linux主机
下载监控linux主机的node_exporter,依旧从官网下载
/ 解压 */
tar -zxvf node_exporter-0.18.1.linux-amd64.tar.gz
可以按照默认方式启动
/* 启动 node_exporter/
cd node_exporter-0.18.1.linux-amd64
nohup ./node_exporter &
/
默认端口9100
*/
4.2 监控MySQL
4.2.1 下载
下载监控MySQL的mysqld_exporter,依旧从官网下载
/* 下载 /
wget https://github.com/prometheus/mysqld_exporter/releases/download/v0.12.1/mysqld_exporter-0.12.1.linux-amd64.tar.gz
/* 解压 /
tar -zxvf mysqld_exporter-0.12.1.linux-amd64.tar.gz
4.2.2 监控账号及修改文件配置
在MySQL里配置MySQL监控账号
/* 创建账号 /
mysql> CREATE USER ‘mysql_monitor‘@‘localhost‘ identified by ‘mysql_monitor‘;
/* 授权 /
mysql> GRANT REPLICATION CLIENT, PROCESS ON . TO ‘mysql_monitor‘@‘localhost‘;
mysql> GRANT SELECT ON performance_schema.* TO ‘mysql_monitor‘@‘localhost‘;
/*
注意,不用版本对权限要求不一致,启动时注意查看日志,如权限不足则继续授权或创建对应的账号
/
配置文件修改
cd mysqld_exporter-0.12.0.linux-amd64
vim .my.cnf
/**  添加如下配置 */
[client]
port=3306
user=mysql_monitor
password=mysql_monitor
4.2.3 启动监控脚本
nohup ./mysqld_exporter --config.my-cnf=.my.cnf &
5. 配置prometheus配置文件
5.1 添加各监控项
配置文件可以有多种配置方式,可以根据不同的分类和习惯配置。可参考如下方式配置
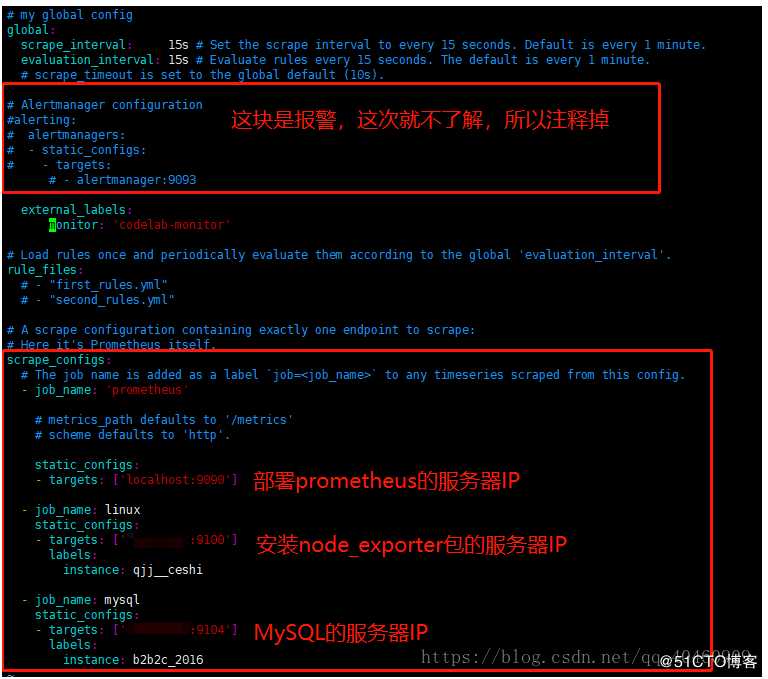
加载配置文件
cd /prometheus/
nohup ./prometheus --config.file=prometheus.yml &
浏览器访问: 部署prometheus服务器的 IP:9090 (即可访问)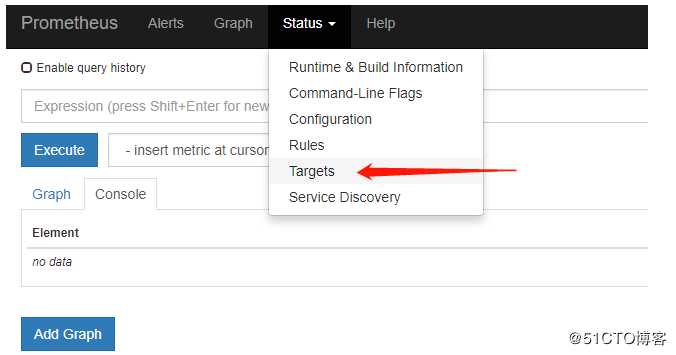
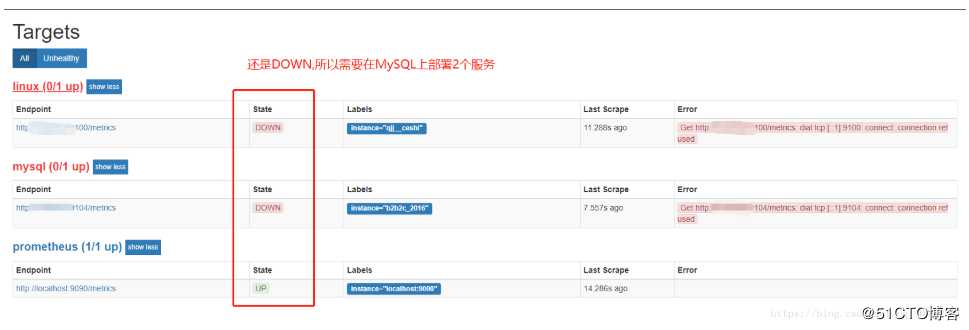
注意,因为Prometheus没有身份验证功能,任何人都能登上去,可以使用反向代理设置,或者使用些策略允许某个访问
5.2 启动或热加载prometheus
/* 启动 /
nohup ./prometheus --config.file=prometheus.yml --web.enable-lifecycle --storage.tsdb.retention.time=60d &
/*
-- storage.tsdb.retention.time 数据默认保存时间为15天,启动时加上此参数可以控制数据保存时间
/
/* 热加载 /
curl -X POST http://ip:9090/-/reload
/*
热加载的前提是启动时加了--web.enable-lifecycle
/
配置各监控仪表盘
6.1 下载各监控仪表盘
以上模板grafana官方网站均有,可以根据自己的需要下载对应的模板,对应地址为https://grafana.com/grafana/dashboards
找到对应的仪表盘模板后进入下载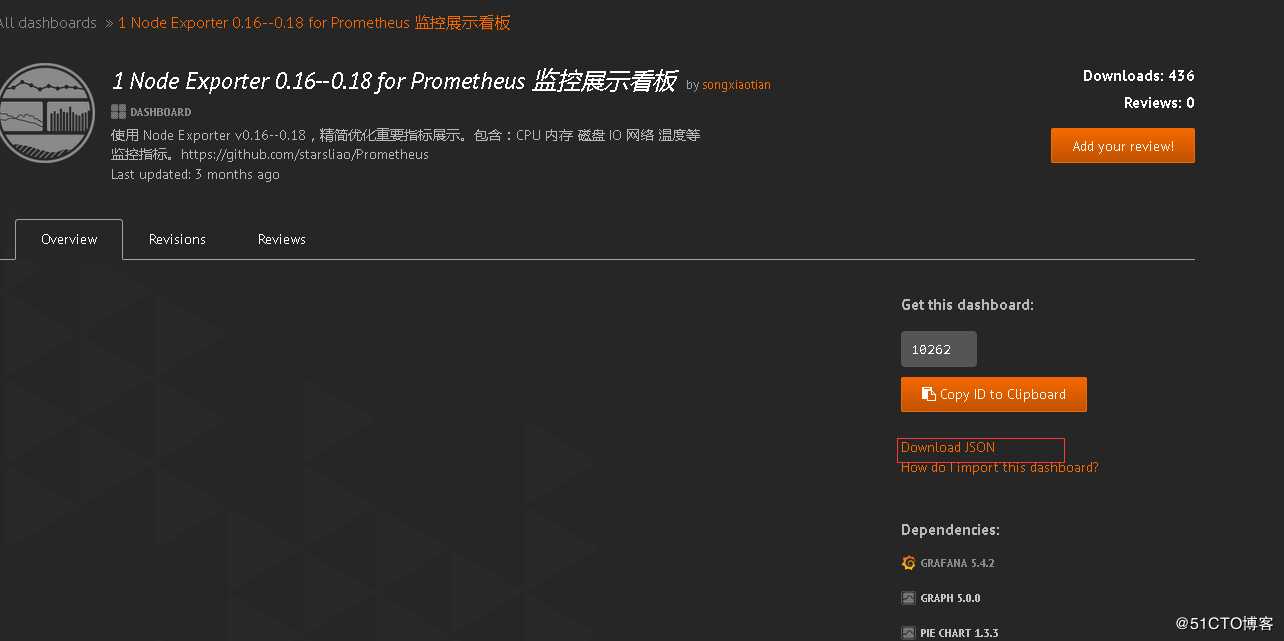
6.2 配置数据源
本次使用的均为prometheus数据源,因此配置一个prometheus的数据源
如果之前在grafana上没有配置过数据源 登录后会提示创建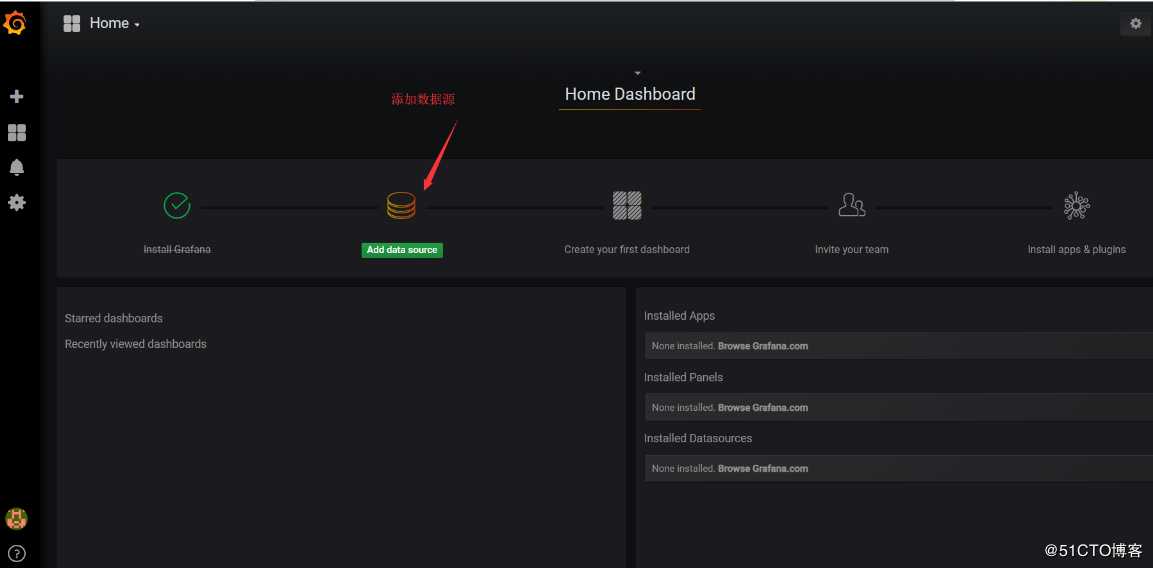
选择prometheus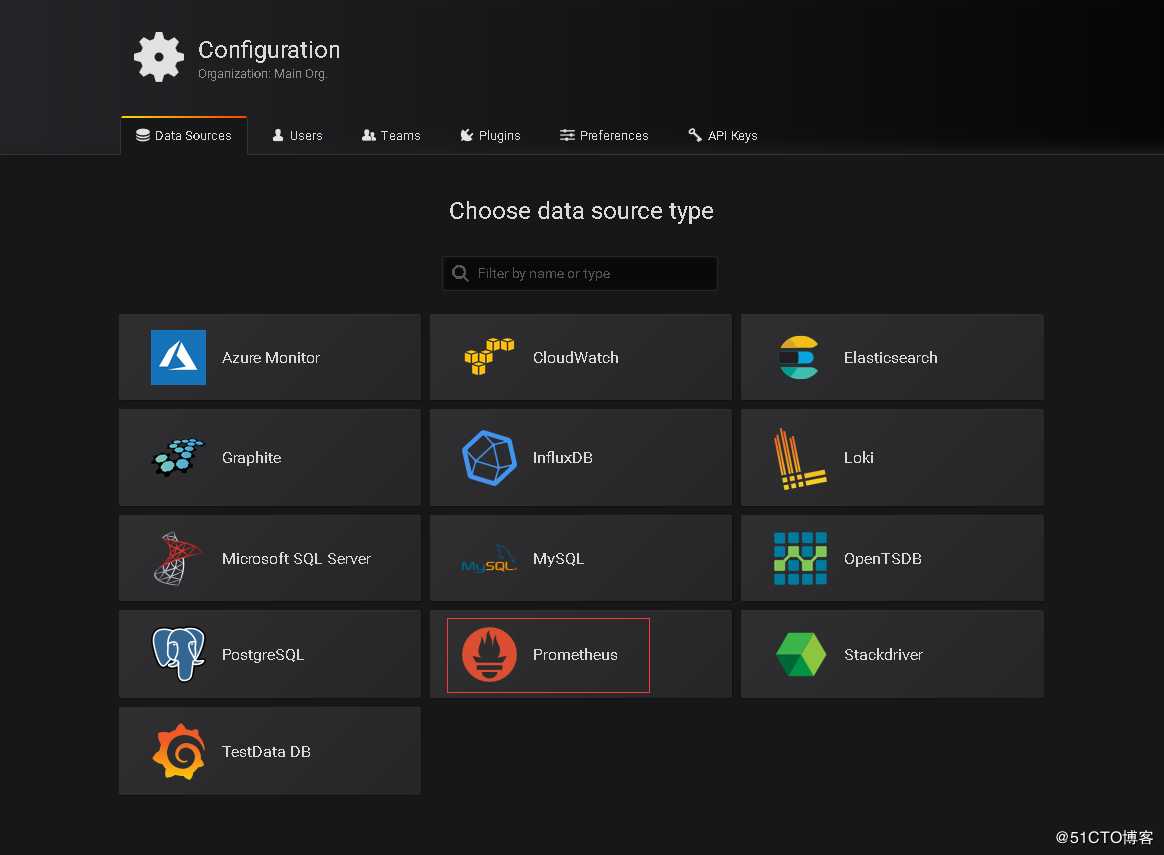
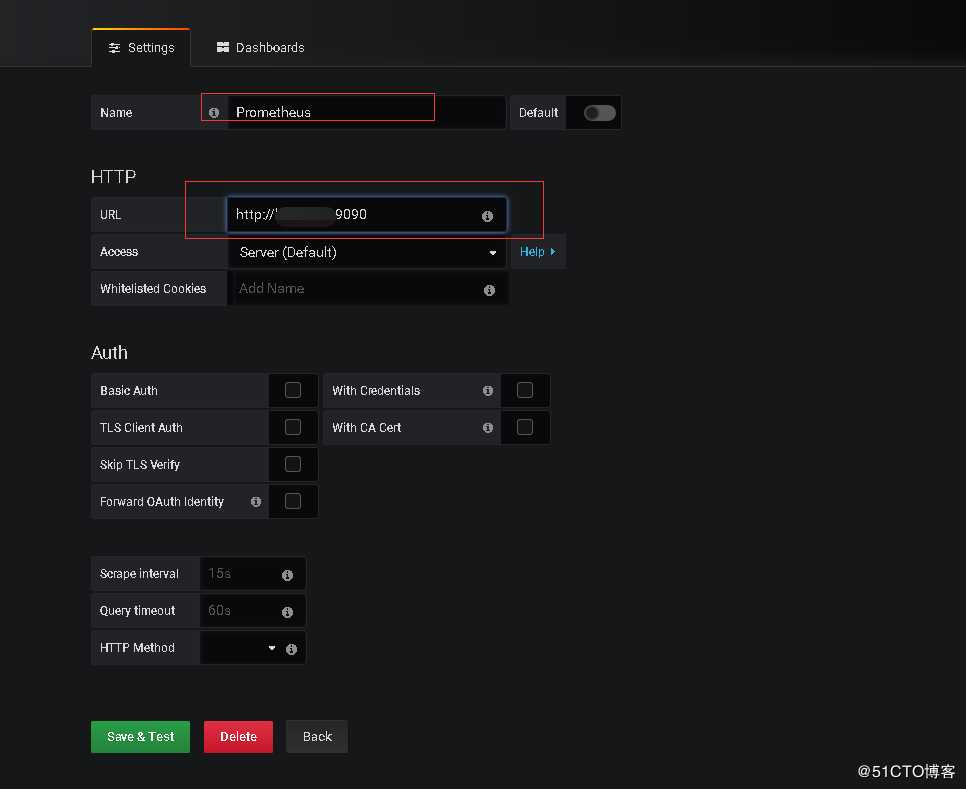
最终save & Test即可
6.3 导入仪表盘
将6.1中下载的模板导入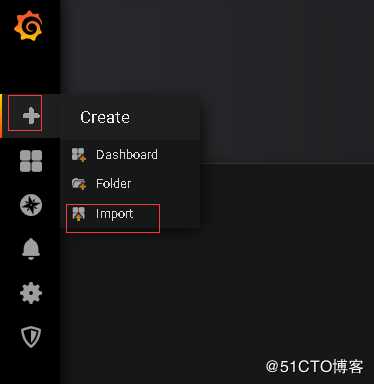
导入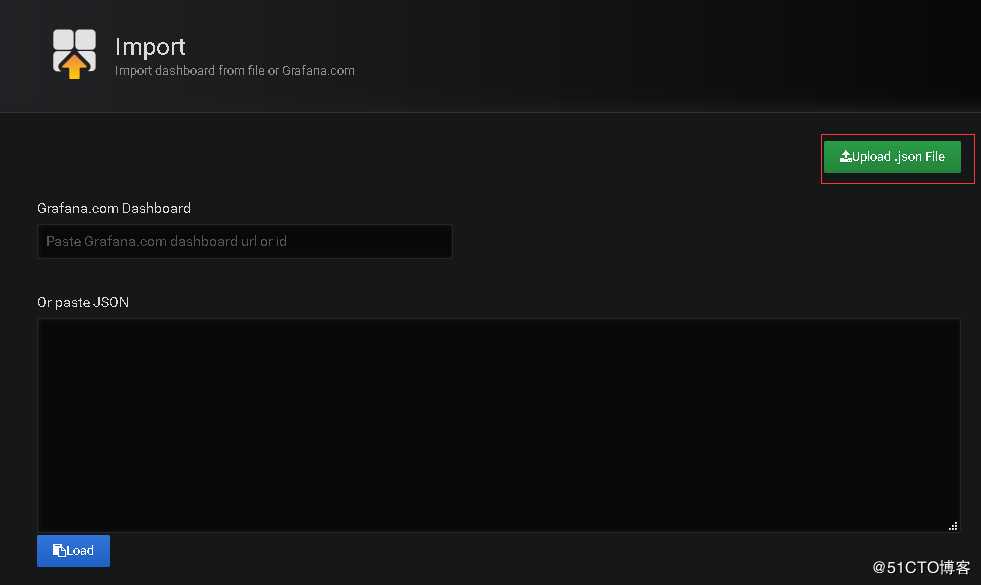
修改名称及数据源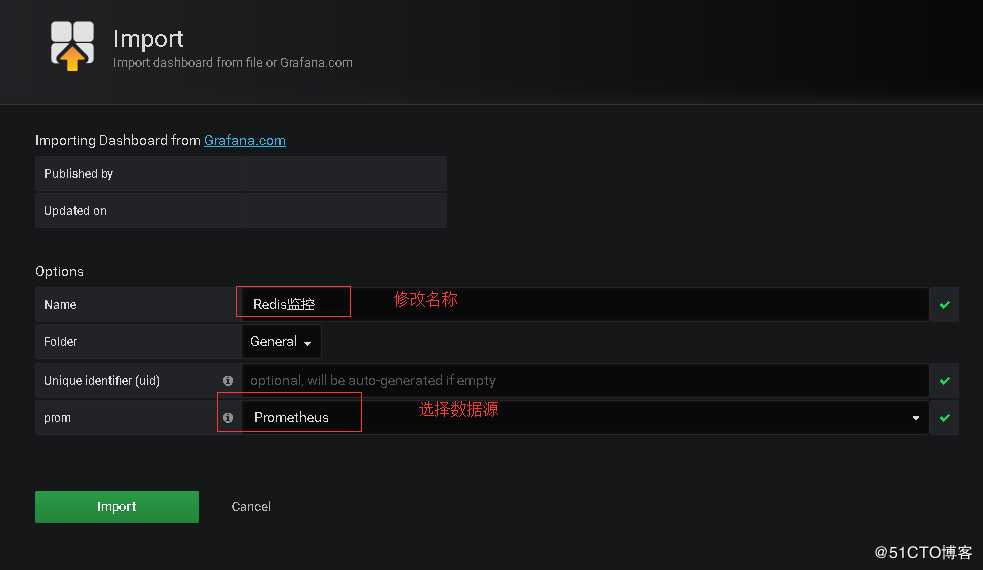
import即可
5.4 配置完成后即可查看各监控情况
主机监控如下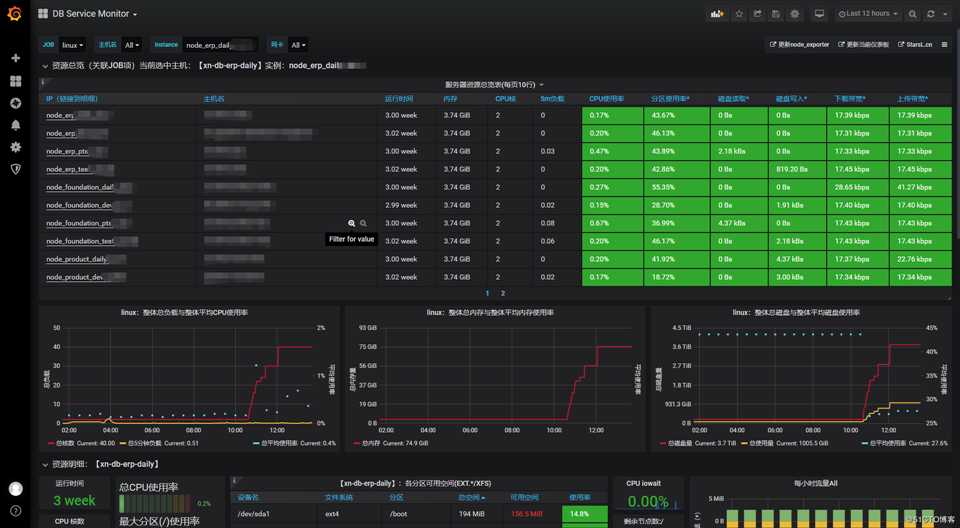
Mysql: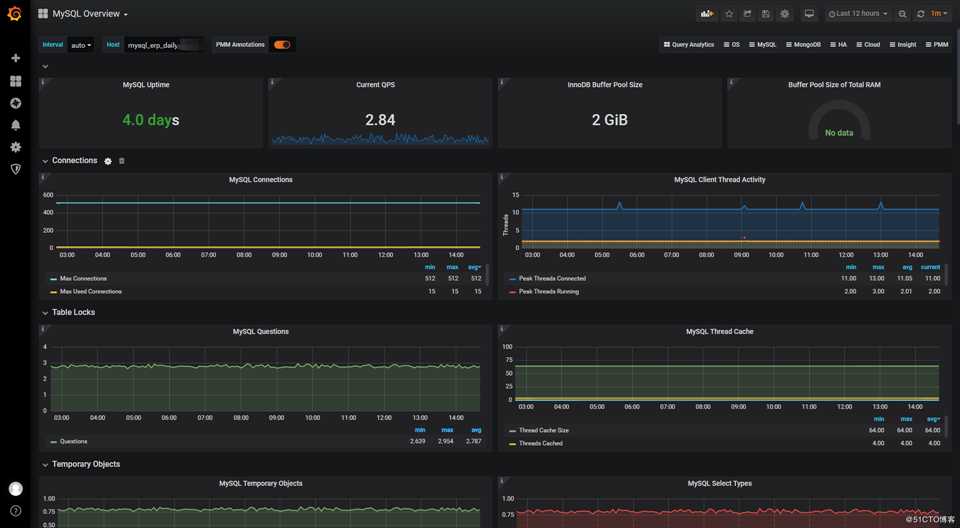
模板下载地址
百度云链接:https://pan.baidu.com/s/1iAB1K6og2GB8mGjoVW3XEw 密码:bqwc
服务器监控模板,导入时,搜索8919
Prometheus和Grafana结合监控MySQL服务性能
标签:修改 自己的 图表 展示 生产环境 curl ash imp dash
原文地址:https://blog.51cto.com/14202208/2510612