标签:消息 sha name 方式 http web服务器 字符串 loading 字符
具体的注册过程,根据官方文档一步一步来即可。这里需注意的是订阅号还是服务号;有些比较好的开发接口订阅号是没有的,但是注册服务号需要企业认证之类的,比较复杂。
在公众号后台打开启用即可。
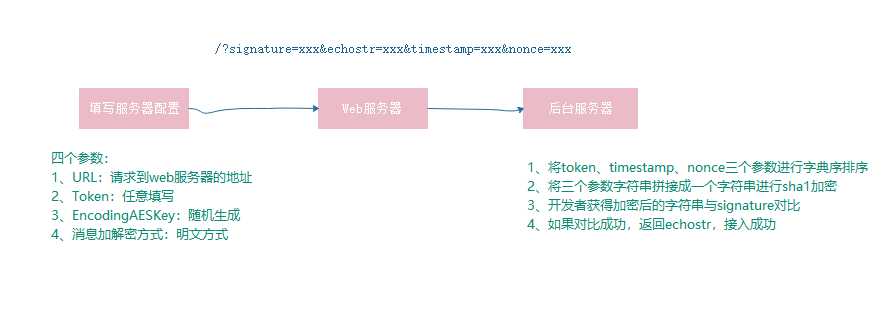
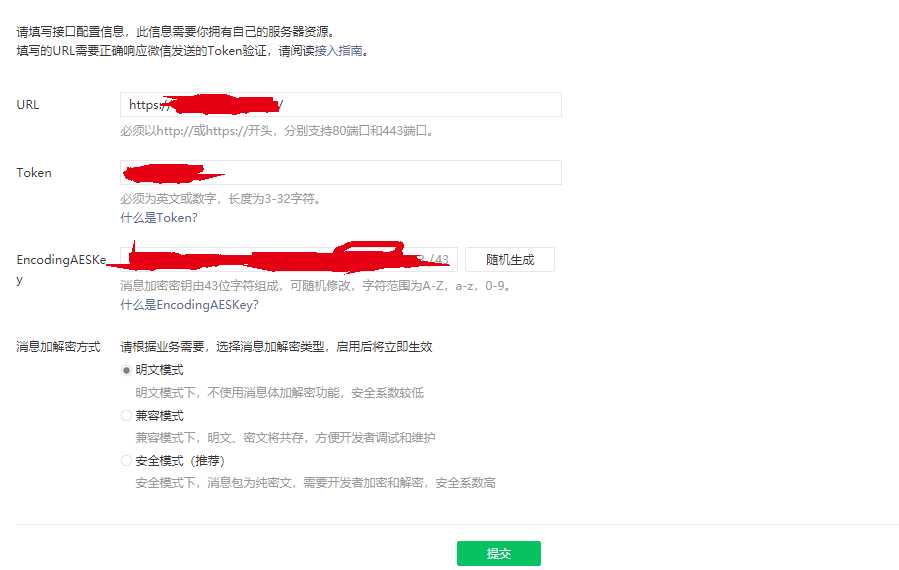
注:整个过程是动态的,是得先把后端的web和代码设置好,再来配置服务器配置,服务器配置的成功与否是会正儿八经的请求你填的这个URL去做校验的。刚开始的时候不太了解,以为只是填一下信息就行,一直token错误,最好的办法是边开发,边调试。


from flask import Flask
from flask import request
import hashlib

app = Flask(__name__)

@app.route(‘/wechat‘)
def wechat():

    # 1、 获取携带的 signature、timestamp、nonce、echostr
    signature = request.args.get("signature", "")
    timestamp = request.args.get("timestamp", "")
    nonce = request.args.get("nonce", "")
    echostr = request.args.get("echostr", "")
    print(signature, timestamp, nonce, echostr)

    token="xxxxxxxxx"

    # 2、 进行字典排序
    data = [token, timestamp, nonce]
    data.sort()

    # 3、三个参数拼接成一个字符串并进行sha1加密
    temp = ‘‘.join(data)
    sha1 = hashlib.sha1(temp.encode(‘utf-8‘))
    hashcode = sha1.hexdigest()
    print(hashcode)

    # 4、对比获取到的signature与根据上面token生成的hashcode,如果一致,则返回echostr,对接成功
    if hashcode == signature:
        return echostr
    else:
        return "error"


if __name__ == ‘__main__‘:
    app.run(host=‘0.0.0.0‘, port=5000, debug=True)
所有的文章,皆同步在公众号“运维汪”,可关注;也可加入“不扯淡,专注于技术”的QQ群:753512236

标签:消息 sha name 方式 http web服务器 字符串 loading 字符
原文地址:https://www.cnblogs.com/lemon-le/p/13401423.html