标签:广播 pass localhost inf com web res man pre
Spring cloud bus 通过轻量级的消息代理连接各个微服务,可以用来广播配置文件的修改,或者管理服务监控
Docker中RabbbitMQ安装命令:
docker run -d --hostname my-rabbit --name some-rabbit -p 15672:15672 5672:5672
rabbitmq:3-management
首先给config-server和config-client分别加上Spring Cloud Bus依赖
<dependency>
    <groupId>org.springframework.cloud</groupId>
    <artifactId>spring-cloud-starter-bus-amqp</artifactId>
</dependency>
然后,给两个分别配置,使之都连接到RabbitMQ上
spring.rabbitmq.host=127.0.0.1
spring.rabbitmq.port=5672
spring.rabbitmq.username=guest
spring.rabbitmq.password=guest
同时,由于configserver将提供刷新接口,所以给configserver加上actuator依赖
<dependency>
    <groupId>org.springframework.boot</groupId>
    <artifactId>spring-boot-starter-actuator</artifactId>
    <version>2.3.3.RELEASE</version>
</dependency>
然后记得在config-server中,添加开启bus-refresh端点:
management.endpoints.web.exposure.include=bus-refresh
由于给 config-server 中的所有接口都添加了保护,所以刷新接口将无法直接访问,此时,可以通过修
改 Security 配置,对端点的权限做出修改:
@Configuration
public class SecurityConfig extends WebSecurityConfigurerAdapter {
    @Override
    protected void configure(HttpSecurity http) throws Exception {
        http.authorizeRequests()
                .anyRequest().authenticated()
                .and()
                .httpBasic()
                .and()
                .csrf().disable();
    }
}
在这段配置中,开启了HttpBasic登录,这样,在发送刷新请求时,就可以直接通过HttpBasic配置认证信息了
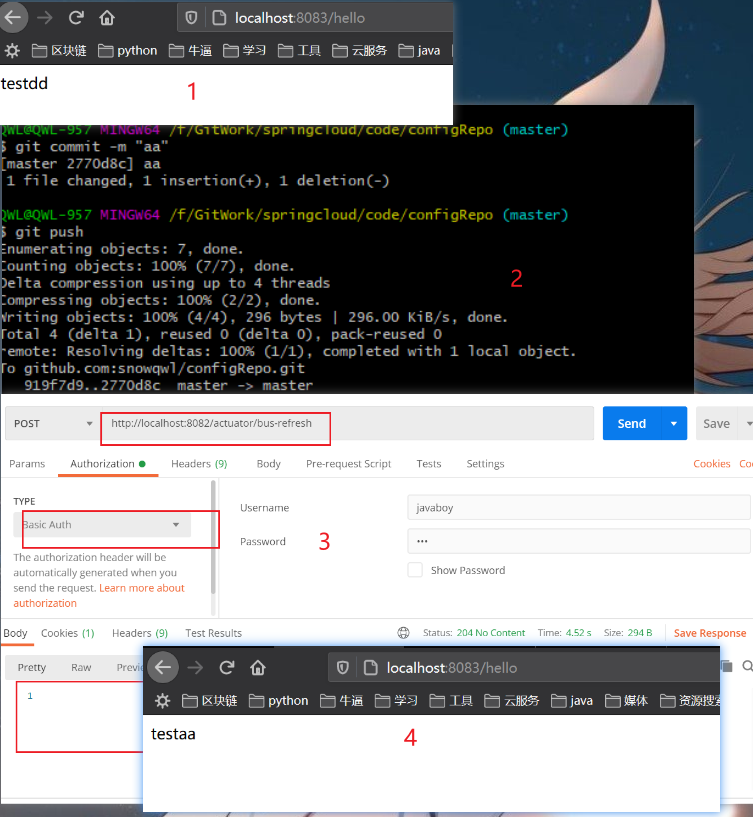
最后分别启动config-server和config-client,然后修改配置信息提交给GitHub,刷新config-client接口,查看是否有变化。然后发送如下post请求
http://localhost:8082/actuator/bus-refresh
这个 post 是针对 config-server 的,config-server 会把这个刷新的指令传到 rabbitmq ,然后
rabbitmq 再把指令传给 各个 client。

如果更新配置文件之后,不希望每个微服务都去刷新配置文件,那么可以通过如下配置解决问题
首先,给每一个config-client添加一个instance-id:
eureka.instance.instance-id=${spring.application.name}:${server.port}
然后,对config-client进行打包,打包完成后,通过如下命令启动两个config-client实例:
java -jar config-client-0.0.1-SNAPSHOT.jar --server.port=8082
java -jar config-client-0.0.1-SNAPSHOT.jar --server.port=8083
修改配置文件,并且提交到 GitHub 之后,可以通过如下方式只刷新某一个微服务,例如只刷新 8082
的服务。
http://localhost:8081/actuator/bus-refresh/client1:8082
client1:8082 表示服务的 instance-id。


标签:广播 pass localhost inf com web res man pre
原文地址:https://www.cnblogs.com/qiuwenli/p/13514671.html