标签:现在 简单的 自定义消息 uil aml static factory nal 版本
Spring Cloud Stream用来构建消息驱动的微服务
Spring Cloud Stream中,提供了一个微服务和消息中间件之间的一个粘合剂,这个粘合剂叫做Binder,Binder负责与消息中间件进行交互。而我们开发者则通过inputs或者outputs这样的消息通道与Binder进行交互
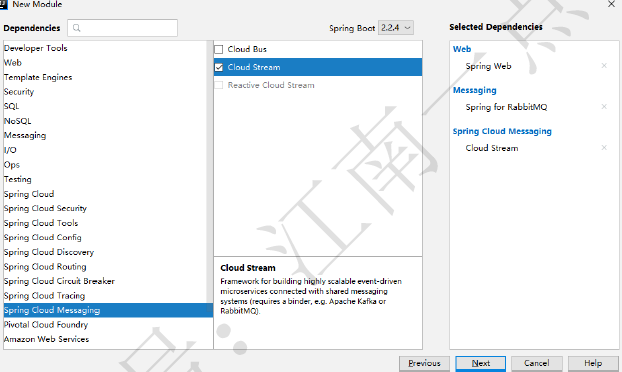
创建一个Spring Cloud Stream项目,添加三个依赖,web,rabbitmq,cloud stream:

项目创建成功后,添加 RabbitMQ 的基本配置信息:
spring.rabbitmq.host=127.0.0.1
spring.rabbitmq.port=5672
spring.rabbitmq.username=guest
spring.rabbitmq.password=guest
接下来,创建一个简单的消息接收器:
@EnableBinding(Sink.class)
public class MsgReceiver {
    public final static Logger logger = LoggerFactory.getLogger(MsgReceiver.class);

    @StreamListener(Sink.INPUT)
    public void receive(Object payload) {
        logger.info("Received:" + payload);
    }

}
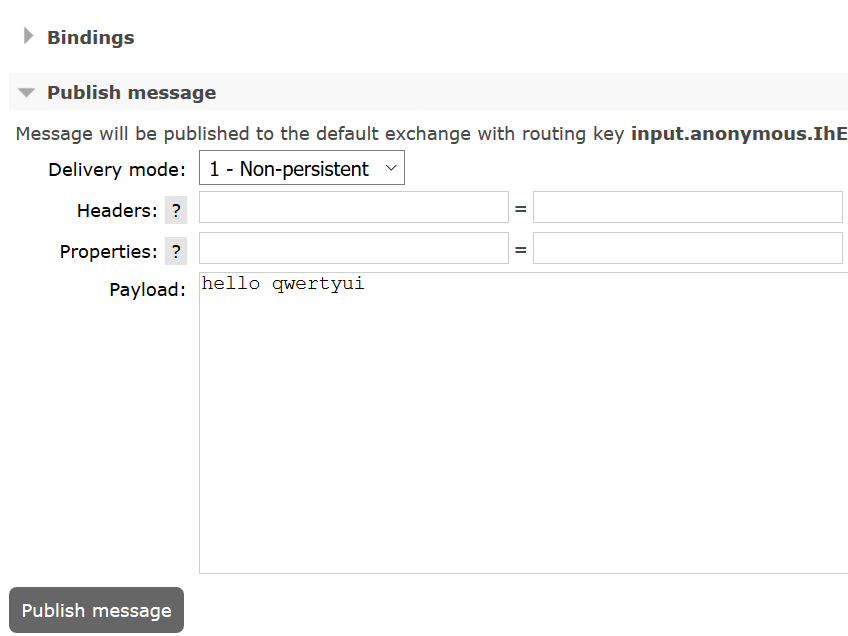
启动 stream 项目,然后,在 rabbitmq 后台管理页面去发送一条消息。


首先创建一个名为 MyChannel 的接口
public interface MyChannel {
    String INPUT = "javaboy-input";
    String OUTPUT = "javaboy-output";

    @Output(OUTPUT)
    MessageChannel output();

    @Input(INPUT)
    MessageChannel input();
}
@EnableBinding(MyChannel.class)
public class MsgReceiver2 {
    public final static Logger logger =
            LoggerFactory.getLogger(MsgReceiver2.class);

    @StreamListener(MyChannel.INPUT)
    public void receive(Object payload) {
        logger.info("received2:" + payload);
    }
}
再定义一个 HelloController 进行测试:
@RestController
public class HelloController {
    @Autowired
    MyChannel myChannel;

    @GetMapping("/hello")
    public void hello(){
        myChannel.output().send(MessageBuilder.withPayload("hello spring cloud stream!").build());
    }
}
同时,为了让消息输入输出通道对接上(因为现在这两个的通道名称不一样),再增加一点额外配置。
spring.cloud.stream.bindings.javaboy-input.destination=javaboy-topic
spring.cloud.stream.bindings.javaboy-output.destination=javaboy-topic

标签:现在 简单的 自定义消息 uil aml static factory nal 版本
原文地址:https://www.cnblogs.com/qiuwenli/p/13515034.html