标签:settings telnet 控制 txt 数据 ini als css set
内置支持 selecting and extracting 使用扩展的CSS选择器和XPath表达式从HTML/XML源中获取数据,并使用正则表达式提取助手方法。
interactive shell console (ipython-aware)用于尝试使用css和xpath表达式来获取数据,在编写或调试spider时非常有用。
内置支持 generating feed exports 以多种格式(json、csv、xml)存储在多个后端(ftp、s3、本地文件系统)
强大的编码支持和自动检测,用于处理外部、非标准和中断的编码声明。
Strong extensibility support ,允许您使用 signals 以及定义良好的API(中间件, extensions 和 pipelines )
广泛的内置扩展和用于处理的中间产品:
cookie和会话处理
HTTP功能,如压缩、身份验证、缓存
用户代理欺骗
robots.txt
爬行深度限制
更多
A Telnet console 用于挂接到运行在Scrapy进程中的Python控制台,以便内省和调试爬虫程序
还有其他的好东西,比如可重复使用的蜘蛛 Sitemaps 和XML/CSV源,这是 automatically downloading images (或任何其他媒体)与抓取的项目、缓存DNS解析程序等相关!
拿一个官方例子来看
import scrapy


class QuotesSpider(scrapy.Spider):
    name = ‘quotes‘
    start_urls = [
        ‘http://quotes.toscrape.com/tag/humor/‘,
    ]

    def parse(self, response):
        for quote in response.css(‘div.quote‘):
            yield {
                ‘text‘: quote.css(‘span.text::text‘).get(),
                ‘author‘: quote.xpath(‘span/small/text()‘).get(),
            }

        next_page = response.css(‘li.next a::attr("href")‘).get()
        if next_page is not None:
            yield response.follow(next_page, self.parse)
这里内置了scrapy.Spider,name就是每个的名字,这个start_urls是我们开启这个项目他就会第一个发起请求的列表,他就会自动交给parse函数处理,而且我们不能改parse这个名字,这里面的response就是返回的源代码
首先是我们创建一个项目
scrapy startproject tutorial
tutorial就是我们的项目名
F:\python post\code\ScrapyT>scrapy startproject tutorial
New Scrapy project ‘tutorial‘, using template directory ‘g:\python3.8\lib\site-packages\scrapy\templates\project‘, created in:
    F:\python post\code\ScrapyT\tutorial

You can start your first spider with:
    cd tutorial
    scrapy genspider example example.com

F:\python post\code\ScrapyT>
然后就是cd tutorial和scrapy genspider example example.com这里的example就是我们的要获取的网址,这里就默认
F:\python post\code\ScrapyT>cd tutorial

F:\python post\code\ScrapyT\tutorial>scrapy genspider example example.com
Created spider ‘example‘ using template ‘basic‘ in module:
  tutorial.spiders.example

F:\python post\code\ScrapyT\tutorial>
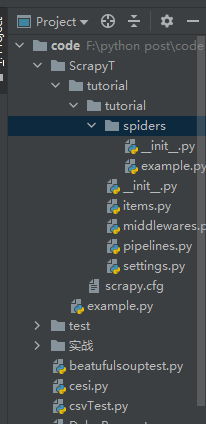
然后我们就可以看到目录下生成了这个py文件

import scrapy


class ExampleSpider(scrapy.Spider):
    name = ‘example‘
    allowed_domains = [‘example.com‘]
    start_urls = [‘http://example.com/‘]

    def parse(self, response):
        pass
我们使用时候在这里修改就行了
然后我们可以看到这里生成了很多文件,首先在使用了scrapy startproject tutorial后就生成了
tutorial/
    scrapy.cfg            # deploy configuration file

    tutorial/             # project‘s Python module, you‘ll import your code from here
        __init__.py

        items.py          # project items definition file

        middlewares.py    # project middlewares file

        pipelines.py      # project pipelines file

        settings.py       # project settings file

        spiders/          # a directory where you‘ll later put your spiders
            __init__.py
这些内容,这个spiders文件夹是存放我们的爬虫代码的,items是用来写爬虫代码的,middlewares是一些钩子,pipelines是中间件就下载一些东西要储存在这里改,settings是一些设置一些线程多开缓存啥啥的,scrapy.cfg是如果要部署在网页上需要设置的
这里第一只蜘蛛
import scrapy


class QuotesSpider(scrapy.Spider):
    name = "quotes"

    def start_requests(self):
        urls = [
            ‘http://quotes.toscrape.com/page/1/‘,
            ‘http://quotes.toscrape.com/page/2/‘,
        ]
        for url in urls:
            yield scrapy.Request(url=url, callback=self.parse)

    def parse(self, response):
        page = response.url.split("/")[-2]
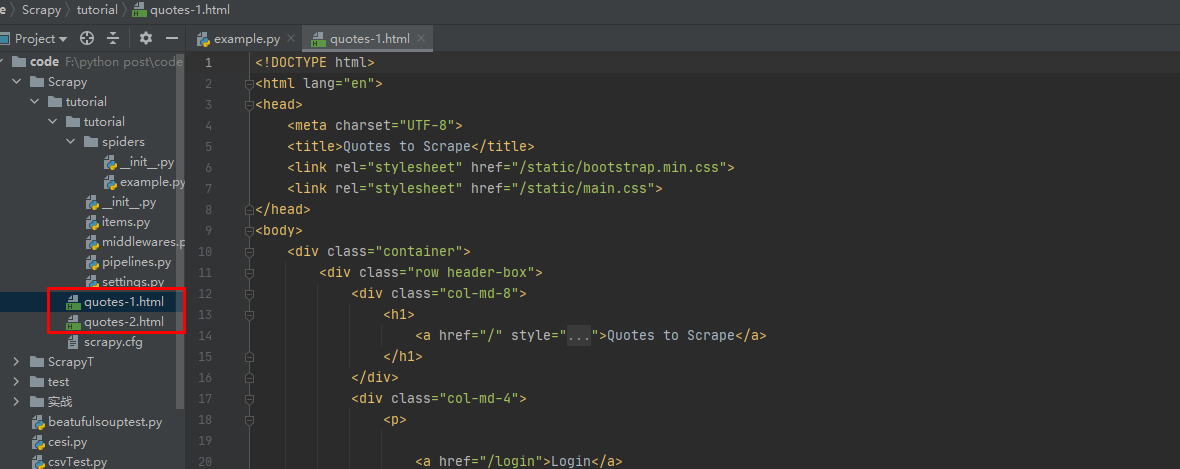
        filename = ‘quotes-%s.html‘ % page
        with open(filename, ‘wb‘) as f:
            f.write(response.body)
        self.log(‘Saved file %s‘ % filename)
运行scrapy crawl quotes

然后看下第二个
import scrapy


class QuotesSpider(scrapy.Spider):
    name = "quotes"
    start_urls = [
        ‘http://quotes.toscrape.com/page/1/‘,
        ‘http://quotes.toscrape.com/page/2/‘,
    ]

    def parse(self, response):
        for quote in response.css(‘div.quote‘):
            yield {
                ‘text‘: quote.css(‘span.text::text‘).get(),
                ‘author‘: quote.css(‘small.author::text‘).get(),
                ‘tags‘: quote.css(‘div.tags a.tag::text‘).getall(),
            }
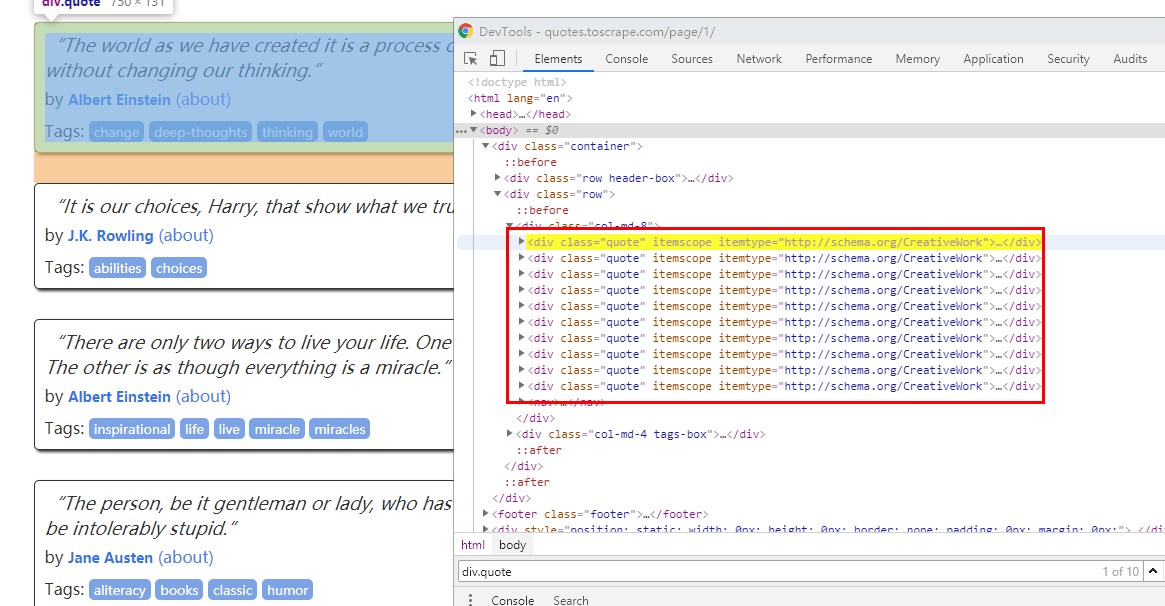
先看看div.quote其实就是每个div

这里text 和author用get tags用getall就是因为前两个只有一个 后者有多个,如果要存储就-o就行了
scrapy crawl quotes -o quotes.json

标签:settings telnet 控制 txt 数据 ini als css set
原文地址:https://www.cnblogs.com/yicunyiye/p/13669259.html