标签:映射 init 键值 project location tco bat control row
通过IDEA的Spring Initializr新建project或module,选择jdbc和mysql。
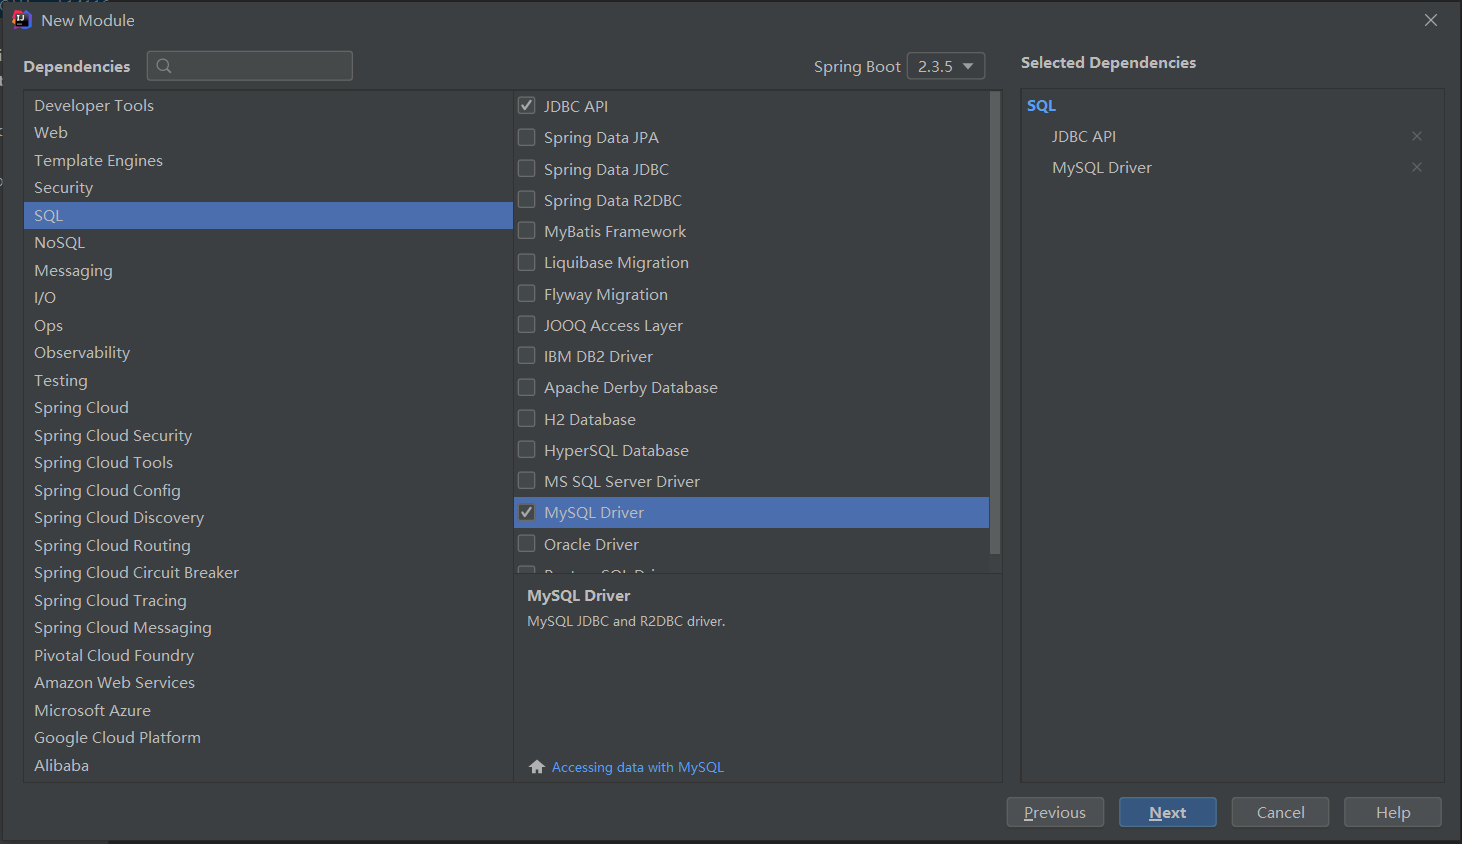
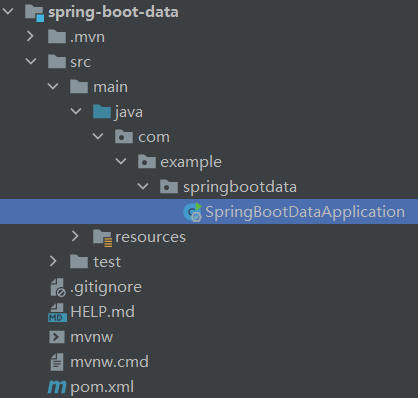
项目就初始化好了
配置pom.xml
<!--jdbc启动器-->
 	<dependency>
 		<groupId>org.springframework.boot</groupId>
 		<artifactId>spring-boot-starter-jdbc</artifactId>
 	</dependency>
 	<!--mysql驱动包-->
 	<dependency>
 		<groupId>mysql</groupId>
 		<artifactId>mysql-connector-java</artifactId>
 		<scope>runtime</scope>
 	</dependency>
配置application.yml
spring:
 datasource:
 	username: root
 	password: root
 	#mysql8版本以上的驱动包,需要指定以下时区
 	url: jdbc:mysql://127.0.0.1:3306/test?serverTimezone=GMT%2B8
 	#mysql8版本以上指定新的驱动类
 	driver-class-name: com.mysql.cj.jdbc.Driver
在测试类中测试,完美运行,整合成功!
import org.junit.jupiter.api.Test;
import org.junit.runner.RunWith;
import org.springframework.beans.factory.annotation.Autowired;
import org.springframework.boot.test.context.SpringBootTest;
import org.springframework.test.context.junit4.SpringRunner;

import javax.sql.DataSource;
import java.sql.Connection;
import java.sql.SQLException;

@RunWith(SpringRunner.class)
@SpringBootTest
class SpringBootDataApplicationTests {
 @Autowired
 DataSource dataSource;

 @Test
 public void contextLoads() throws SQLException{
 	//Springboot默认数据库连接池为com.zaxxer.hikari.HikariDataSource
 	System.out.println("datasource: " + dataSource.getClass());
 	Connection connection = dataSource.getConnection();
 	System.out.println(connection);
 	connection.close();
 }
}
如果不用默认的数据库连接池,而是使用第三方连接池如Druid就这样做!
pom引入Driud依赖
<dependency>
<groupId>com.alibaba</groupId>
<artifactId>druid</artifactId>
<version>1.1.12</version>
</dependency>
application.yml引入其他配置
spring:
  datasource:
    username: root
    password: root
    #mysql8版本以上的驱动包,需要指定以下时区
    url: jdbc:mysql://127.0.0.1:3306/test?serverTimezone=GMT%2B8
    #mysql8版本以上指定新的驱动类
    driver-class-name: com.mysql.cj.jdbc.Driver
    # 指定 Druid 数据源
    type: com.alibaba.druid.pool.DruidDataSource
    # 数据源其他配置, DataSourceProperties中没有相关属性,默认无法绑定
    initialSize: 8
    minIdle: 5
    maxActive: 20
    maxWait: 60000
    timeBetweenEvictionRunsMillis: 60000
    minEvictableIdleTimeMillis: 300000
    validationQuery: SELECT 1 FROM DUAL
    testWhileIdle: true
    testOnBorrow: false
    testOnReturn: false
    poolPreparedStatements: true
由于DataSourceProperties中没有相关属性,默认无法绑定,故自定义配置类,新建config文件夹,新建DruidConfig.java
/**
 * 绑定Druid相关信息
 *
 */
@Configuration
public class DruidConfig {


    @ConfigurationProperties(prefix = "spring.datasource")
    @Bean
    public DataSource druid() {

        return new DruidDataSource();
    }


}
搞定!
pom加入mybatis启动器
<!--mybatis启动器-->
		<dependency>
			<groupId>org.mybatis.spring.boot</groupId>
			<artifactId>mybatis-spring-boot-starter</artifactId>
			<version>1.3.2</version>
		</dependency>
config文件夹下新建MyBatisConfig.java配置类,配置驼峰转换,因为一般数据库字段不区分大小写,所以一般使用下划线分割,比如user_id,但是在Java类中我们规范使用驼峰命名为userId,在不使用xml中resultMap标签的配置情况下,mybatis提供mapUnderscoreToCamelCase属性设置自动转换驼峰命名。
import org.mybatis.spring.boot.autoconfigure.ConfigurationCustomizer;
import org.springframework.context.annotation.Bean;
import org.springframework.context.annotation.Configuration;

/**
 * MyBatis的注解 版本相关配置类
 */
@Configuration
public class MyBatisConfig {

    @Bean
    public ConfigurationCustomizer configurationCustomizer() {
        ConfigurationCustomizer configurationCustomizer = new ConfigurationCustomizer(){
            @Override
            public void customize(org.apache.ibatis.session.Configuration configuration) {
                //开启驼峰命名方式
                configuration.setMapUnderscoreToCamelCase(true);
            }
        };
        return configurationCustomizer;
    }

}
新建数据层文件ProviderMapper
import com.mengxuegu.springboot.entities.Provider;
import org.apache.ibatis.annotations.*;

/**
 * 使用Mybatis注解版本
 */
//@Mapper //指定这是操作数据的Mapper
public interface ProviderMapper {

    @Select("select * from provider where pid=#{pid}")
    Provider getProvierByPid(Integer pid);

    //useGeneratedKeys是否使用自增主键,keyProperty指定实体类中的哪一个属性封装主键值
    @Options(useGeneratedKeys = true, keyProperty = "pid")
    @Insert("insert into provider(providerName) values(#{providerName})")
    int addProvider(Provider provider);

    @Delete("delete from provider where pid=#{pid}")
    int deleteProviderByPid(Integer pid);

    @Update("update provider set providerName=#{providerName} where pid=#{pid}"  )
    int updateProvider(Provider provider);
}
新建Provider的POJO
public class Provider {
    private Integer pid;
    //供应商编码
    private String providerCode;
    //供应商名称
    private String providerName;
    //联系人
    private String people;
    //联系电话
    private String phone;
    //联系地址
    private String address;
    //传真
    private String fax;
    //描述
    private String describe;
    // 创建时间
    private Date createDate;
    ....
}
在启动类上启用@MapperScan(****)自动装配指定包下所有Mapper,省得在每个Mapper接口上写@Mapper
import org.mybatis.spring.annotation.MapperScan;
import org.springframework.boot.SpringApplication;
import org.springframework.boot.autoconfigure.SpringBootApplication;

//会自动 装配指定包下面所有Mapper,省得在每个Mapper上面写@Mapper
@MapperScan("com.mengxuegu.springboot.mapper")
@SpringBootApplication
public class SpringBootDataMybatisApplication {

    public static void main(String[] args) {
        SpringApplication.run(SpringBootDataMybatisApplication.class, args);
    }
}
service层和controll层自己写吧,搞定!
忘掉mapper接口文件的注解,使用配置文件开发!
创建全新的mapper层实例文件BillMapper.java
import com.mengxuegu.springboot.entities.Bill;
import org.apache.ibatis.annotations.Mapper;
import org.mybatis.spring.annotation.MapperScan;


//@Mapper 或 @MapperScan
public interface BillMapper {

    Bill getBillByBid(Integer bid);

    int addBill(Bill bill);

}
POJO为
public class Bill {

    private Integer bid;
    // 账单编码
    private String billCode;
    // 商品名称
    private String billName;
    // 商品单位
    private String billCom;
    // 商品数量
    private Integer billNum;
    // 总金额
    private Double money;
    // 供应商
    private Provider provider;
    // 是否付款 0 未付款, 1已付款
    private Integer pay;
    // 创建时间
    private Date createDate;
    ....
}
在resources创建新的目录结构如下:
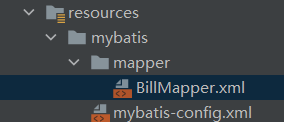
mybatis-config为核心配置文件,配置如下:
<?xml version="1.0" encoding="UTF-8" ?>
<!DOCTYPE configuration
        PUBLIC "-//mybatis.org//DTD Config 3.0//EN"
        "http://mybatis.org/dtd/mybatis-3-config.dtd">
<configuration>
    <!--核心配置文件,配置驼峰命名-->
    <settings>
        <setting name="mapUnderscoreToCamelCase" value="true"/>
    </settings>
</configuration>
BillMapper映射文件如下配置:
<?xml version="1.0" encoding="UTF-8" ?>
<!DOCTYPE mapper
        PUBLIC "-//mybatis.org//DTD Mapper 3.0//EN"
        "http://mybatis.org/dtd/mybatis-3-mapper.dtd">
<mapper namespace="com.mengxuegu.springboot.mapper.BillMapper">

    <select id="getBillByBid" resultType="com.mengxuegu.springboot.entities.Bill">
        select * from bill where bid=#{bid}
    </select>

    <insert id="addBill">
        insert into bill(bill_code, bill_name, bill_com, bill_num)
        values(#{billCode}, #{billName}, #{billCom}, #{billNum})
    </insert>

</mapper>
在application.yml中指定配置文件路径
#配置mybatis相关文件路径
mybatis:
  #映射配置文件路径
  mapper-locations: classpath:mybatis/mapper/*.xml
  #核心配置文件路径
  config-location: classpath:mybatis/mybatis-config.xml
搞定!
标签:映射 init 键值 project location tco bat control row
原文地址:https://www.cnblogs.com/wjshean/p/13945586.html