标签:apply map image 选择 other span xml文件 访问 ima
使用maven方式创建。
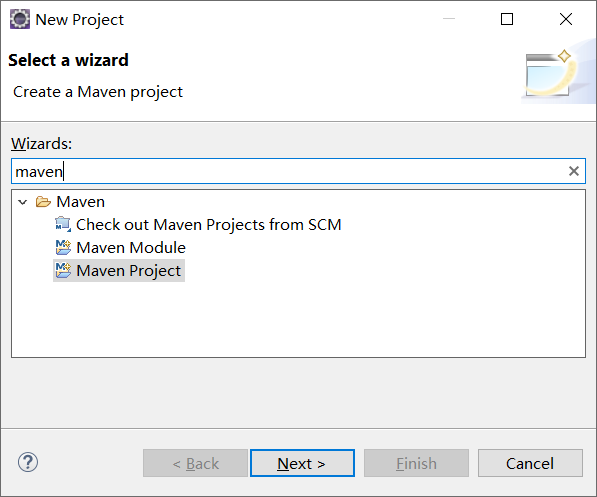
1.选择file->new->project,创建maven项目
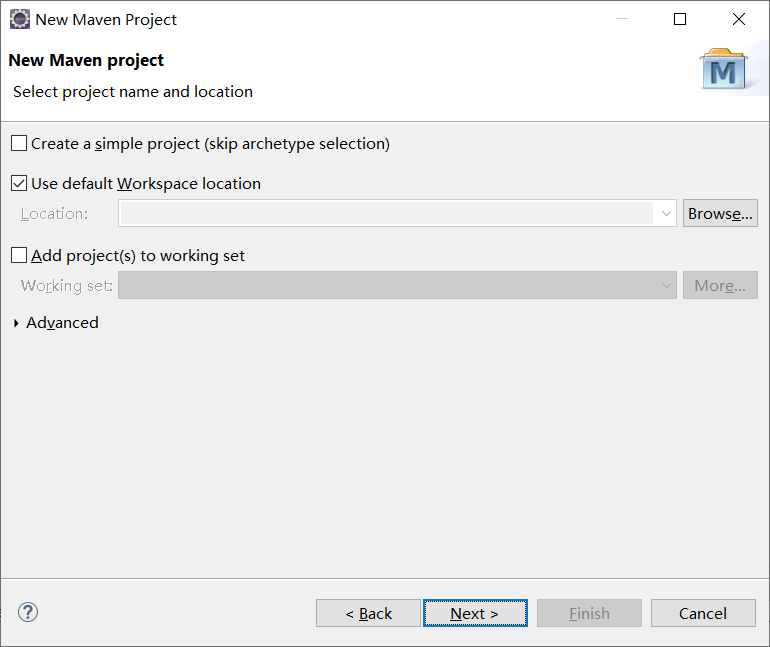
2. 选择默认的工作空间
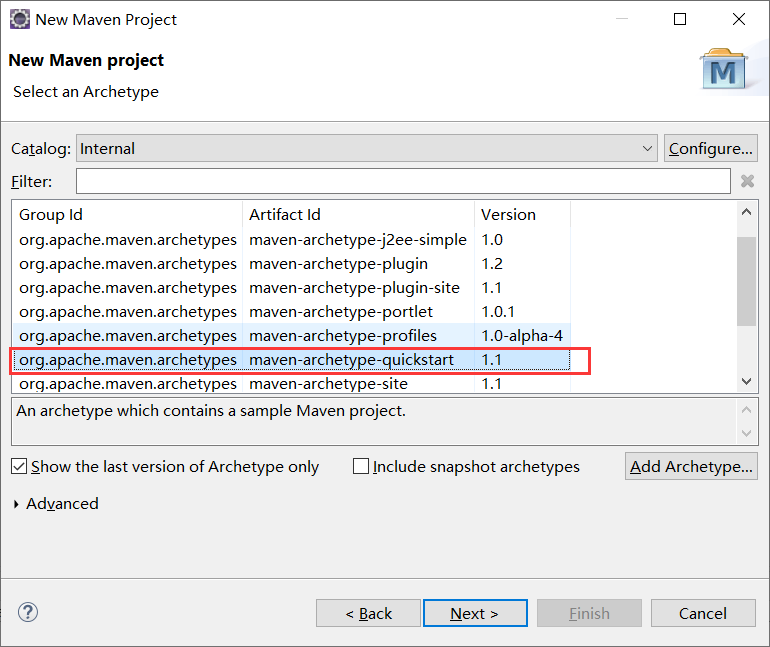
3.选择项目的类型,这里以web项目为主,选择quickstart类型的:
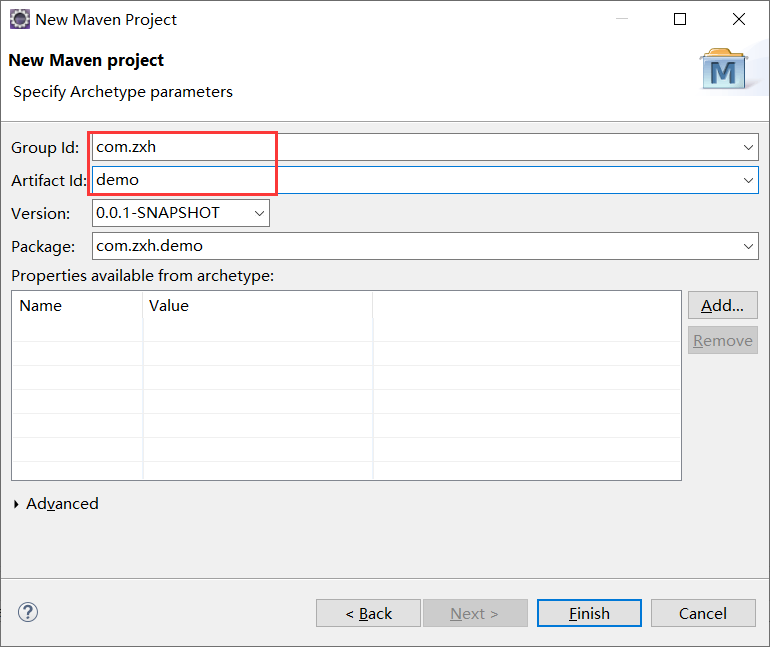
4.填写项目组和名称,点击finish
5.此时一个maven项目就创建成功了。
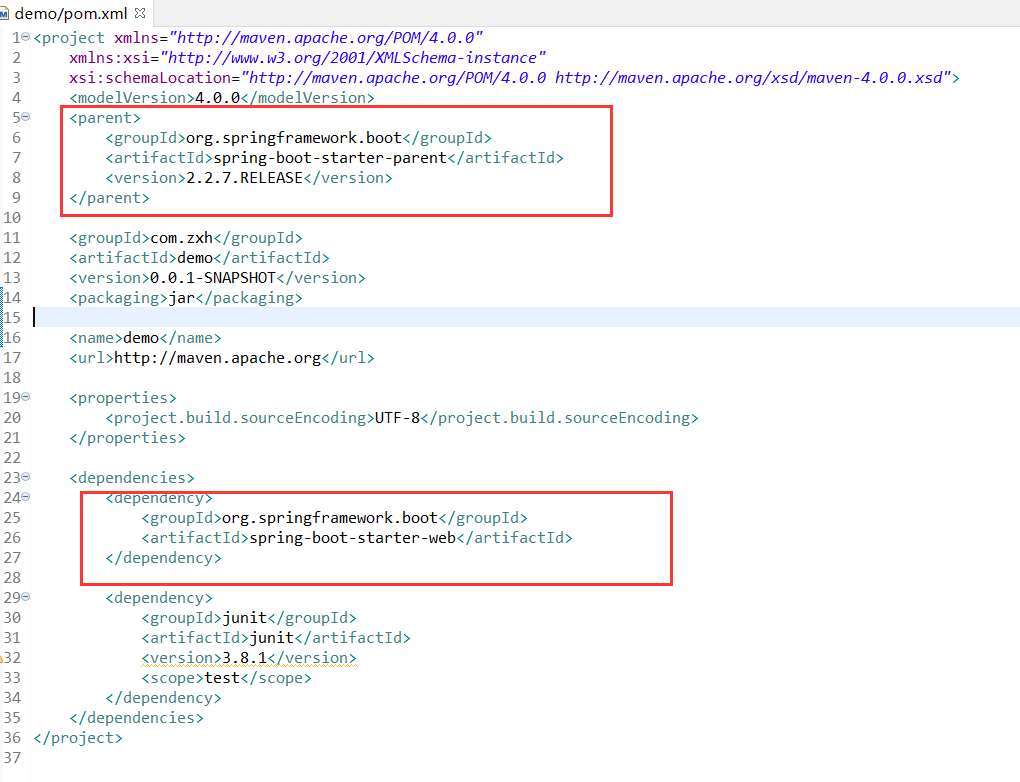
1.在上述的基础上,在pom.xml文件中添加父级依赖,版本根据需求修改
<parent>
    <groupId>org.springframework.boot</groupId>
    <artifactId>spring-boot-starter-parent</artifactId>
    <version>2.2.7.RELEASE</version>
</parent>
2.添加web的依赖
<dependency>
    <groupId>org.springframework.boot</groupId>
    <artifactId>spring-boot-starter-web</artifactId>
</dependency>
截图如下:图上其他的依赖根据需求添加
3.把App.java内容修改,设置为启动类
@SpringBootApplication
public class App{
    public static void main( String[] args ){
        // 启动springboot
        SpringApplication.run(App.class, args);
    }
}
参考图:

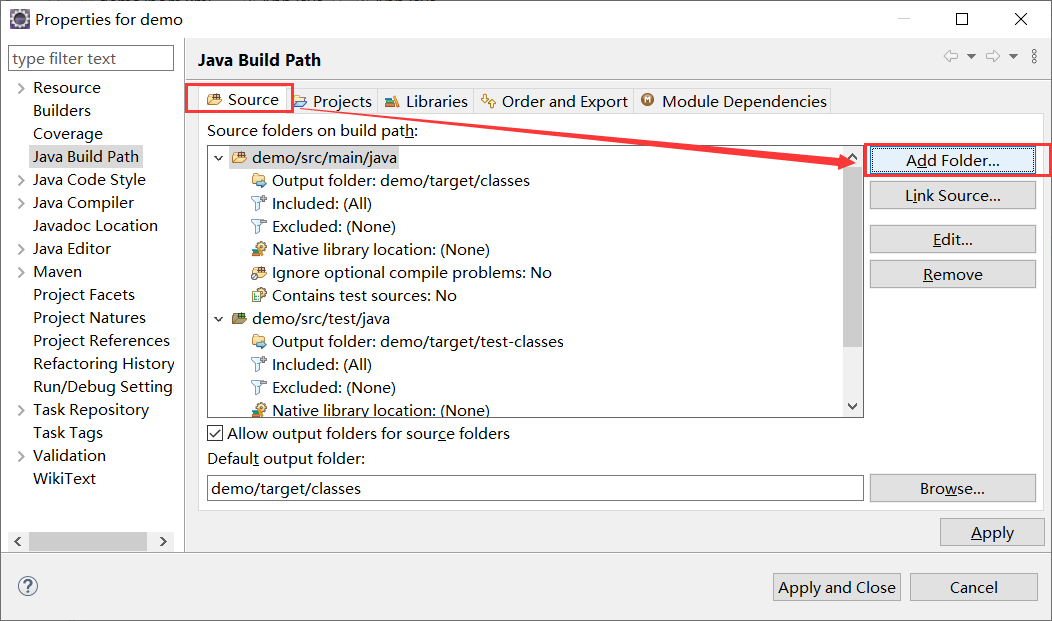
1.选中项目右键——>Build Path——>Configure Build Path,在窗口中选择Source——>Add Folder
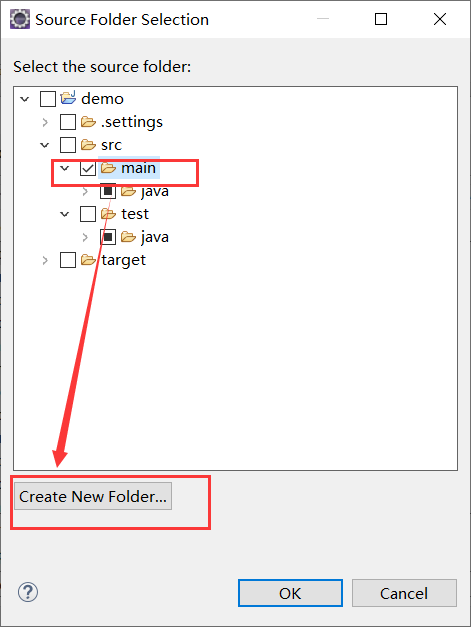
2.在弹出的窗口选择main,点击下面的Create New Folder
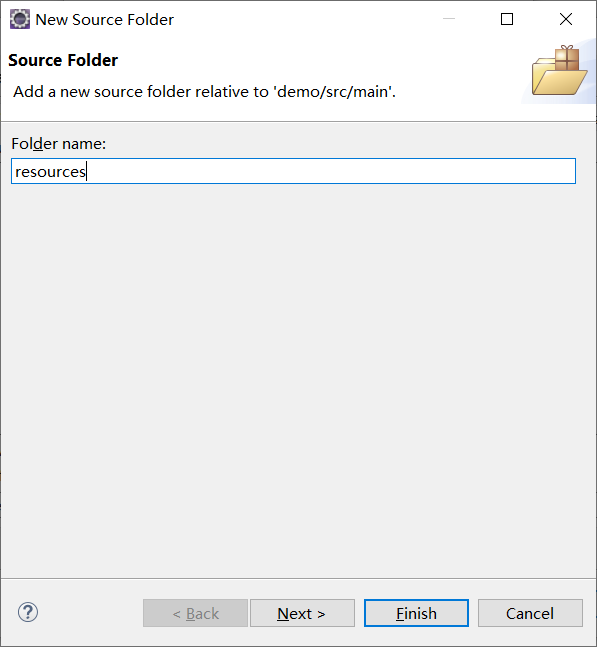
3.在弹出的窗口选输入resources,点击Finish,这个窗口关闭后再点击OK
4.创建成功后如下图, 是新建了一个同级的文件夹
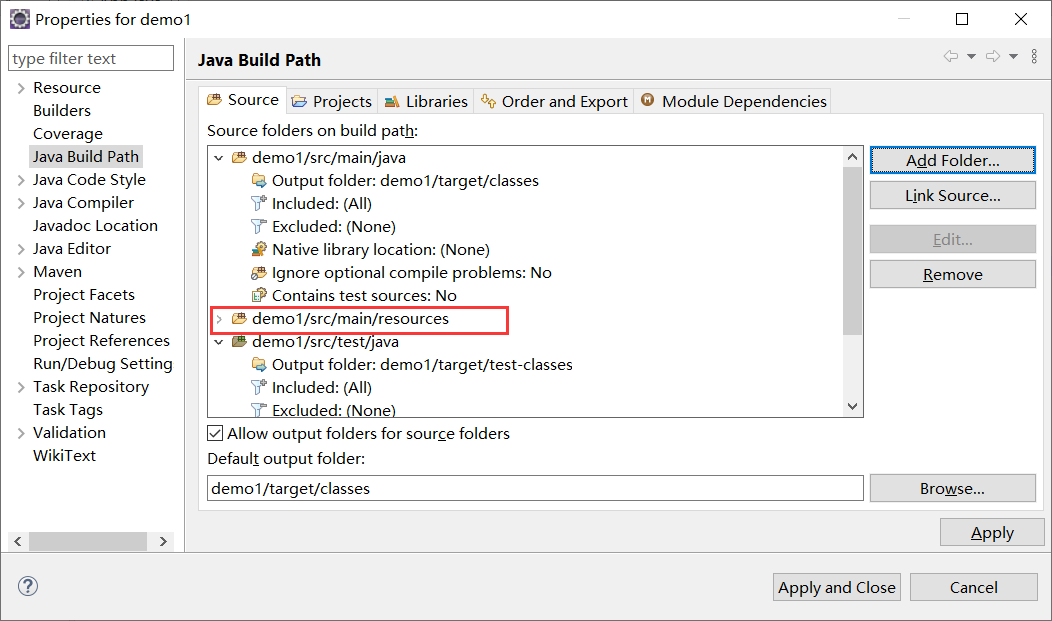
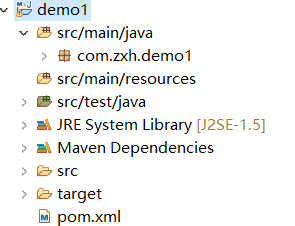
5.然后点击Apply,在左侧的目录中就生成了这个文件夹
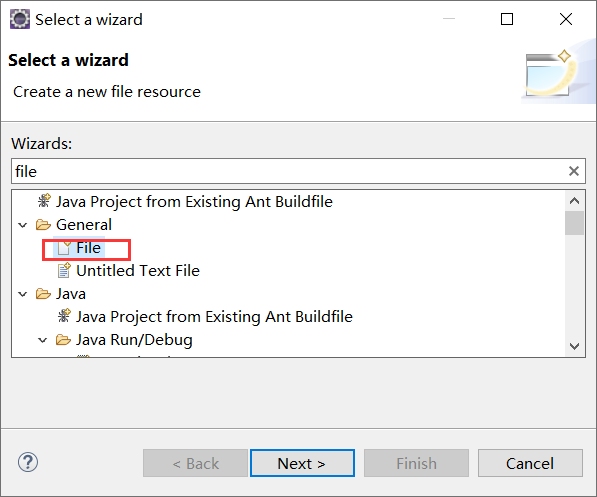
6.选中resources目录,右键,New->Other,输入file查询,在下一步中新建application.properties文件
7.编辑properties配置文件,把端口设置为9999

1.新建一个TestController类,内容如下:
package com.zxh.demo;

import org.springframework.web.bind.annotation.GetMapping;
import org.springframework.web.bind.annotation.RestController;

@RestController
public class TestController {


    @GetMapping("/test")
    public String test() {
        return "我是eclipse创建的springboot项目";
    }
}
2.进入App类中的main方法,右键Run As来启动项目,访问localhost:9999/test,即可看到返回的信息

标签:apply map image 选择 other span xml文件 访问 ima
原文地址:https://www.cnblogs.com/zys2019/p/14368328.html