标签:winform style blog http io ar color os 使用
昨天由于一些原因没有上课啦,虽然也看啦一些东西,但是感觉太少也就没有来啦,嘿嘿,今天认真地了解啦winform,学习了一些控件的使用,但是感觉好多属性知道怎么用的,却还是记得不太清楚,感觉看到啦知道,之后可能又会全然忘记啦,虽然这个winform已经不再用啦,但是还想是想好好学习下啦,只怕那天再次遇到啦还要自己在找资料啦,所以我还是详细的总结下啦
一.弹窗
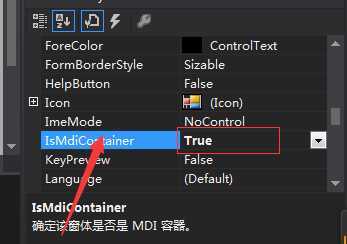
在Form中弹出另外一个窗体,首先建立一个Form窗体,把Form转变为容器,改变其属性如下:
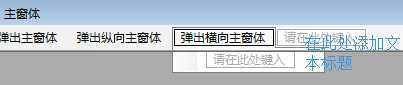
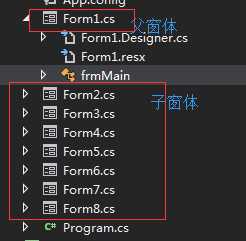
然后在工具中选取ToolStripMenuItem工具,添加其天梯,建立其他子窗体:
在父窗体中实现弹窗功能代码如下:
public partial class frmMain : Form
    {
        public frmMain()
        {
            InitializeComponent();
        }
        private void 弹出主窗体ToolStripMenuItem_Click(object sender, EventArgs e)
        {
            Form2 f2 = new Form2();
            f2.MdiParent = this;
            Form3 f3 = new Form3();
            f3.MdiParent = this;
            Form4 f4 = new Form4();
            f4.MdiParent = this;
            Form5 f5 = new Form5();
            f5.MdiParent = this;
            Form6 f6 = new Form6();
            f6.MdiParent = this;
            Form7 f7 = new Form7();
            f7.MdiParent = this;
            Form8 f8 = new Form8();
            f8.MdiParent = this;

            f2.Show(); f3.Show(); f4.Show();
            f5.Show(); f6.Show(); f7.Show();
            f8.Show();
        }

        private void 弹出纵向主窗体ToolStripMenuItem_Click(object sender, EventArgs e)
        {
            this.LayoutMdi(MdiLayout.TileVertical);
        }

        private void 弹出横向主窗体ToolStripMenuItem_Click(object sender, EventArgs e)
        {
            this.LayoutMdi(MdiLayout.TileHorizontal);
        }
    }
二.图片控件PictureBox的使用
设计Form窗体如下所示,添加一个PictureBox控件,然后选择添加两个按钮,最好下载一组图片以便于备用,然后实现其点击按钮上一张可以在PictureBox中显示上一张图片,点击按钮下一张,可以再PictureBox中显示下一张图片,代码如下:
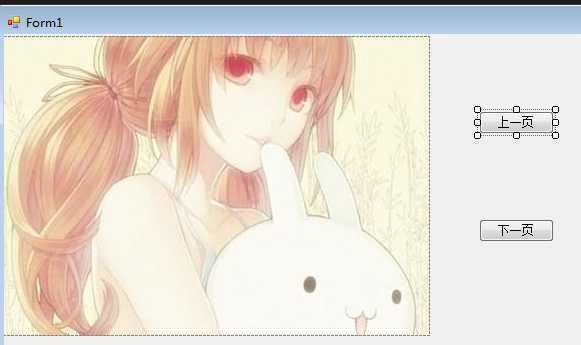
    public partial class Form1 : Form
    {
        public Form1()
        {
            InitializeComponent();
        }
        int i = 0;
        private void Form1_Load(object sender, EventArgs e)
        {
            string[] arraypath = Directory.GetFiles(@"G:\image");
            this.pictureBox1.Image = Image.FromFile(arraypath[0]);
        }
        private void btnpre_Click(object sender, EventArgs e)
        {
            string[] arraypath = Directory.GetFiles(@"G:\image");

            if (i == 0)
            {
                this.pictureBox1.Image = Image.FromFile(arraypath[arraypath.Length - 1]);
                i = arraypath.Length - 1;
            }
            else
            {
                i--;
                this.pictureBox1.Image = Image.FromFile(arraypath[i]);
            }
        }
        private void button2_Click(object sender, EventArgs e)
        {
            string[] arraypath = Directory.GetFiles(@"G:\image");

            if (i == arraypath.Length - 1)
            {
                this.pictureBox1.Image = Image.FromFile(arraypath[0]);
                i = 0;
            }
            else
            {
                i++;
                this.pictureBox1.Image = Image.FromFile(arraypath[i]);
            }
        }
    }
三.图片幻灯片形式播放
在Form窗体中选择添加控件PictureBox,然后添加一控件Timer即可,然后设置Timer的属性其属性,实现代码如下:
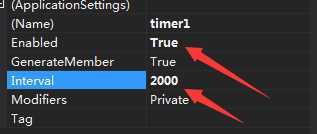
public partial class Form1 : Form
    {
        public Form1()
        {
            InitializeComponent();
        }
        private void Form1_Load(object sender, EventArgs e)
        {
            string[] arraypath = Directory.GetFiles(@"G:\image");
            this.pictureBox1.Image = Image.FromFile(arraypath[0]);
        }
        int i = 0;
        private void timer1_Tick(object sender, EventArgs e)
        {
            string[] arraypath = Directory.GetFiles(@"G:\image");
            i++;
            if (i == arraypath.Length)
            {
                i = 0;
                this.pictureBox1.Image = Image.FromFile(arraypath[i]);
            }
            else
            {
                this.pictureBox1.Image = Image.FromFile(arraypath[i]);
            }
        }
    }
四.richBox。
简单的说, 比普通textbox多的功能: 可以为每个字设定独立的字体,字号,颜色等..可以添加图片, 可以添加OLD对象.还比textbox多了很多种方法,比如直接打开文件,打印文件等。下面简单的实现下其功能:新建一个Form窗体,然后选择一个richBox控件,在文本框中选择写入一些文本,然后实现其事件,格式以及代码如下:

        private void richTextBox1_TextChanged(object sender, EventArgs e)
        {
            this.richTextBox1.AppendText("我被你写入了这个对话框里面");
        }
五.comboBox的使用
combobox在这里使用时间需要注意的是,仅仅能够选择单项。

    public partial class Form1 : Form
    {
        public Form1()
        {
            InitializeComponent();
        }
        private void Form1_Load(object sender, EventArgs e)
        {
            string[] strs = {"--请选择下拉项--", "C语言也能干大事","在校不迷茫","毕业即辉煌" };
            this.comboBox1.Items.AddRange(strs);
            this.comboBox1.SelectedItem = this.comboBox1.Items[0];
        }
}
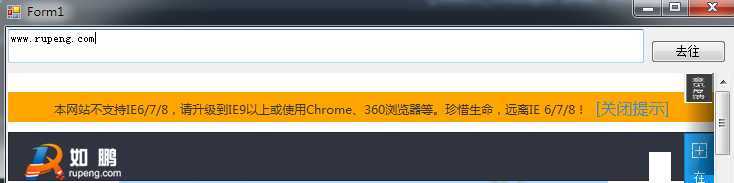
六.textbox的简单使用
        private void button1_Click(object sender, EventArgs e)
        {
            string urlpath = this.textBox1.Text;
            Uri uri = new Uri("http://"+ urlpath);
            this.webBrowser1.Url = uri;
        }
实现输入网址可以打开其网页的功能,例如:打开如鹏网。
七.实现区域的三级分类
在Form窗体上面选择三个textbox即可,然后实现其功能,代码入下:
 public partial class Form1 : Form
    {
        string[] Sheng = { "--请选择省份--", "河南省", "湖南省" };
        string[] Henancity = { "--请选择城市--", "郑州", "洛阳", "开封" };
        string[] HuNancity = { "--请选择城市--", "长沙", "湘潭", "株洲" };

        string[] zhengzhouArea = {"高新区","中原区","金水区","管城区","二七区","惠济区","郑东新区","航空港区","经开区" };
        string[] changshaArea = {"雨花区","芙蓉区","高桥区","岳麓区","韶山区" };
        public Form1()
        {
            InitializeComponent();
        }
        private void Form1_Load(object sender, EventArgs e)
        {
            this.cmbsheng.Items.AddRange(Sheng);
            this.cmbsheng.SelectedIndex = 0;
        }
        private void cmbsheng_SelectedIndexChanged(object sender, EventArgs e)
        {
            int index = this.cmbsheng.SelectedIndex;
            switch (index)
            {
                case 1:
                    this.cmbcity.Items.Clear();
                    this.cmbcity.Items.AddRange(Henancity);
                    this.cmbcity.SelectedIndex = 0;

                    break;
                case 2:
                    this.cmbcity.Items.Clear();
                    this.cmbcity.Items.AddRange(HuNancity);
                    this.cmbcity.SelectedIndex = 0;
                    break;
                default:
                    break;
            }
        }
        private void cmbcity_SelectedIndexChanged(object sender, EventArgs e)
        {
            int  index=this.cmbcity.SelectedIndex;
            object selecttext = this.cmbcity.SelectedItem;

            switch (index)
            {
                case 1:
                    if (selecttext.Equals("郑州"))
                    {
                        this.cmbarea.Items.Clear();
                        this.cmbarea.Items.AddRange(zhengzhouArea);
                        this.cmbarea.SelectedIndex = 0;
                    }
                    else if(selecttext.Equals("长沙"))
                    {
                        this.cmbarea.Items.Clear();
                        this.cmbarea.Items.AddRange(changshaArea);
                        this.cmbarea.SelectedIndex = 0;
                    }
                    break;
                case 2:
                    this.cmbarea.Items.Clear();
                    this.cmbarea.Items.AddRange(null);
                    this.cmbarea.SelectedIndex = 0;
                    break;
                case 3:
                    this.cmbarea.Items.Clear();
                    this.cmbarea.Items.AddRange(null);
                    this.cmbarea.SelectedIndex = 0;
                    break;
            }
        }
    }
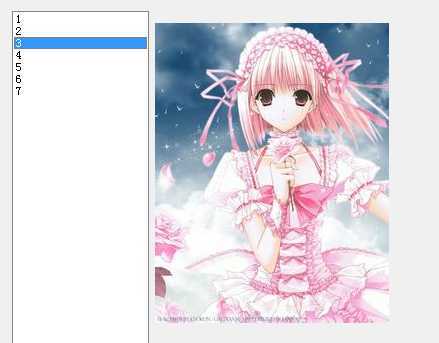
八.用ListBox和PictureBox实现其在ListBox中选择图片的序列,在picturebox中显示图片
 private void Form1_Load(object sender, EventArgs e)
        {
            string[] imagepath = Directory.GetFiles(@"G:\image");
            string[] filename=new string[imagepath.Length];
            for (int i = 0; i < imagepath.Length; i++)
            {
                string path = Path.GetFileNameWithoutExtension(imagepath[i]);
                filename[i] = path+"\r\n";
            }
               listBox1.Items.AddRange(filename);
        }
        private void listBox1_SelectedIndexChanged(object sender, EventArgs e)
        {
            int index = this.listBox1.SelectedIndex;
            this.pictureBox1.Image = Image.FromFile(@"G:\image\" + index + ".jpg");
        }
结果如下:
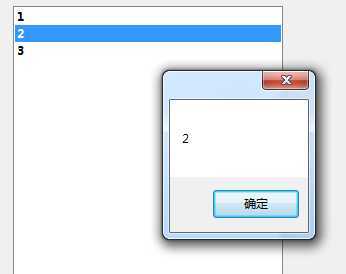
九.在messagebox消息框小时选择的listBox的内容
private void Form1_Load(object sender, EventArgs e)
        {
            string[] strs = {"1","2","3" };
            listBox1.Items.AddRange(strs);
        }
        private void listBox1_SelectedIndexChanged(object sender, EventArgs e)
        {
                 var  selected= this.listBox1.SelectedItems;
                 foreach (var item in selected)
                 {
                     MessageBox.Show(item.ToString());
                 }
        }
其运行结果如下:
好啦,今天在云和学院学习就这些啦,虽然有点多吧,但是在winform这方面也不需要过多的学习吧,所以就讲啦好多啦,只是让我们理解熟悉啦,嘿嘿,winform的学习感觉还好啦,只是在每个控件的属性上面该设置哪个属性估计记得是不太清楚,我想是不熟悉的原因吧。
标签:winform style blog http io ar color os 使用
原文地址:http://www.cnblogs.com/dyxd/p/4127326.html