标签:android style blog http ar io color os 使用
一 、Animations简介
Animations提供了一系列的动画效果,这些效果可以应用于绝大多数的控件;
二、Animations的分类
第一类:TweenedAnimations,该类Animations提供了旋转,移动,淡入淡出和缩放等效果;
第二类:Frame-by-Frame Animations,这类Animations可以创建一个Drawable序列,这些Drawable可以按照指定的时间间歇一个个的显示;
TweenedAnimations介绍
(1)TweenedAnimations可以分为下面几类:
1. Alpha:淡入淡出效果
2. Scale:缩放效果
3. Rotate:旋转效果
4. Translate:移动效果
(2)Animations的使用方法:
一种是在Java代码中使用,另一种是定义在XML文件中;
(3)在Java代码中使用步骤为:
a) 创建一个AnimationSet对象;
b)根据需要创建相应的Animation对象;
c)根据软件动画的需求,为Animation对象设置相应的数据;
d)将Animation对象添加到AnimationSet对象当中;
e)使用控件对象开始执行AnimationSet;
而Animation在代码中对应的四个子类分别为:
AlphaAnimation、TranslateAnimation、ScaleAnimation、RotateAnimation
例子:

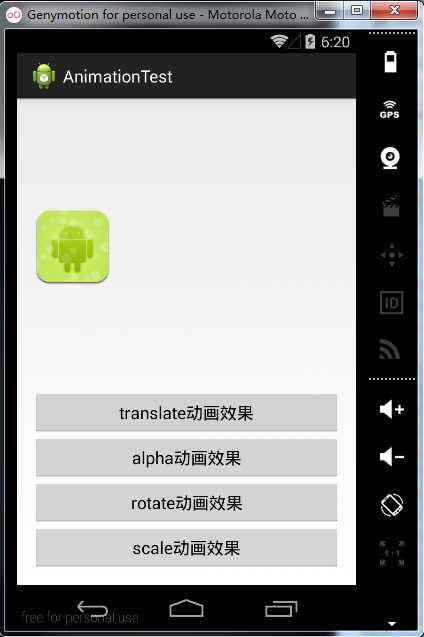
效果图不好传,就不传了;
代码如下:
activity_main.xml
<RelativeLayout xmlns:android="http://schemas.android.com/apk/res/android"
    xmlns:tools="http://schemas.android.com/tools"
    android:layout_width="match_parent"
    android:layout_height="match_parent"
    android:paddingBottom="@dimen/activity_vertical_margin"
    android:paddingLeft="@dimen/activity_horizontal_margin"
    android:paddingRight="@dimen/activity_horizontal_margin"
    android:paddingTop="@dimen/activity_vertical_margin"
    tools:context="com.xiaozhang.animationtest.MainActivity" >

    <Button
        android:id="@+id/scaleButtonId"
        android:layout_width="match_parent"
        android:layout_height="wrap_content"
        android:layout_alignParentBottom="true"
        android:text="scale动画效果" />

    <Button
        android:id="@+id/rotateButtonId"
        android:layout_width="match_parent"
        android:layout_height="wrap_content"
        android:layout_above="@id/scaleButtonId"
        android:text="rotate动画效果" />

    <Button
        android:id="@+id/alphaButtonId"
        android:layout_width="match_parent"
        android:layout_height="wrap_content"
        android:layout_above="@id/rotateButtonId"
        android:text="alpha动画效果" />

    <Button
        android:id="@+id/translateButtonId"
        android:layout_width="match_parent"
        android:layout_height="wrap_content"
        android:layout_above="@id/alphaButtonId"
        android:text="translate动画效果" />

    <LinearLayout
        android:layout_width="match_parent"
        android:layout_height="match_parent"
        android:orientation="vertical" >

        <ImageView
            android:id="@+id/imageViewId"
            android:layout_width="wrap_content"
            android:layout_height="wrap_content"
            android:layout_marginTop="100dp"
            android:src="@drawable/icon" />
    </LinearLayout>

</RelativeLayout>
MainActivity.java
package com.xiaozhang.animationtest;

import android.app.Activity;
import android.os.Bundle;
import android.view.View;
import android.view.View.OnClickListener;
import android.view.animation.AlphaAnimation;
import android.view.animation.Animation;
import android.view.animation.AnimationSet;
import android.view.animation.RotateAnimation;
import android.view.animation.ScaleAnimation;
import android.view.animation.TranslateAnimation;
import android.widget.ImageView;

public class MainActivity extends Activity {

    private ImageView imageView;

    @Override
    protected void onCreate(Bundle savedInstanceState) {
        super.onCreate(savedInstanceState);
        setContentView(R.layout.activity_main);
        findViewById(R.id.imageViewId);
        imageView = (ImageView) findViewById(R.id.imageViewId);
        findViewById(R.id.rotateButtonId).setOnClickListener(
                new OnClickListener() {

                    @Override
                    public void onClick(View v) {
                        AnimationSet animationSet = new AnimationSet(true);
                        RotateAnimation rotateAnimation = new RotateAnimation(
                                0, 360, Animation.RELATIVE_TO_PARENT, 0.3f,
                                Animation.RELATIVE_TO_PARENT, 0.3f);
                        rotateAnimation.setDuration(1000);
                        animationSet.addAnimation(rotateAnimation);
                        imageView.startAnimation(animationSet);

                    }
                });
        findViewById(R.id.scaleButtonId).setOnClickListener(
                new OnClickListener() {

                    @Override
                    public void onClick(View v) {
                        AnimationSet animationSet = new AnimationSet(true);
                        ScaleAnimation scaleAnimation = new ScaleAnimation(1,
                                0.0f, 1, 0.0f, Animation.RELATIVE_TO_PARENT,
                                0.1f, Animation.RELATIVE_TO_PARENT, 0.1f);
                        scaleAnimation.setDuration(1000);
                        animationSet.addAnimation(scaleAnimation);
                        imageView.startAnimation(animationSet);

                    }
                });
        findViewById(R.id.alphaButtonId).setOnClickListener(
                new OnClickListener() {
                    @Override
                    public void onClick(View v) {
                        // 创建一个AnimationSet对象
                        AnimationSet animationSet = new AnimationSet(true);
                        // 创建一个AlphaAnimation对象
                        AlphaAnimation alphaAnimation = new AlphaAnimation(0, 1);
                        // 设置整个动画执行所需要的时间
                        alphaAnimation.setDuration(2000);
                        // 将AlphaAnimation对象添加到AnimationSet当中
                        animationSet.addAnimation(alphaAnimation);
                        // 使用控件执行动画效果
                        imageView.startAnimation(alphaAnimation);

                    }
                });
        findViewById(R.id.translateButtonId).setOnClickListener(
                new OnClickListener() {
                    @Override
                    public void onClick(View v) {
                        AnimationSet animationSet = new AnimationSet(true);
                        TranslateAnimation translateAnimation = new TranslateAnimation(
                                Animation.RELATIVE_TO_SELF, 0f,
                                Animation.RELATIVE_TO_SELF, 0.5f,
                                Animation.RELATIVE_TO_SELF, 0f,
                                Animation.RELATIVE_TO_SELF, 1.0f);
                        translateAnimation.setDuration(1000);
                        animationSet.addAnimation(translateAnimation);
                        imageView.startAnimation(translateAnimation);

                    }
                });
    }
}
另外,Animation或AnimationSet有一系列的方法,如:
setDuration(long) :设置动画持续时间(单位:毫秒)
setFillAfter(boolean) :如果参数为true,则动画执行结束后,控件将停留在结束的状态
setFillBefore(boolean) :如果参数为true,则动画执行结束后,控件将回到执行前的状态
setStartOffset(long) :设置动画执行前的等待时间
setRepeatCount(int) :设置动画重复执行的次数
(4)使用XML文件来执行Animation;
a)在res文件夹下新建一个名为anim的文件夹;
b)为各个不同的效果分别创建xml文件,并首先加入set标签,标签代码如下:
<set xmlns:android="http://schemas.android.com/apk/res/android"
    android:interpolator="@android:anim/accelerate_interpolator" >

</set>
c)在该标签中分别加入rotate,alpha,scale或translate标签;
d)在代码当中使用AnimationUtils装载xml文件,并生成Animation对象;
例子如上,代码如下:
res/anim/alpha.xml
<?xml version="1.0" encoding="UTF-8"?>
<set xmlns:android="http://schemas.android.com/apk/res/android"
    android:interpolator="@android:anim/accelerate_interpolator" >

    <alpha
        android:duration="500"
        android:fromAlpha="1.0"
        android:startOffset="1000"
        android:toAlpha="0.0" />

</set>
res/anim/scale.xml
<?xml version="1.0" encoding="UTF-8"?>
<set xmlns:android="http://schemas.android.com/apk/res/android"
    android:interpolator="@android:anim/accelerate_interpolator" >

    <scale
        android:duration="2000"
        android:fromXScale="1.0"
        android:fromYScale="1.0"
        android:pivotX="50%"
        android:pivotY="50%"
        android:toXScale="0.0"
        android:toYScale="0.0" />

</set>
res/anim/rotate.xml
<?xml version="1.0" encoding="UTF-8"?>
<set xmlns:android="http://schemas.android.com/apk/res/android"
    android:interpolator="@android:anim/accelerate_interpolator" >

    <rotate
        android:duration="3000"
        android:fromDegrees="0"
        android:pivotX="50%"
        android:pivotY="50%"
        android:toDegrees="+350" />

</set>
res/anim/translate.xml
<?xml version="1.0" encoding="UTF-8"?>
<set xmlns:android="http://schemas.android.com/apk/res/android"
    android:interpolator="@android:anim/accelerate_interpolator" >

    <translate
        android:fromXDelta="50%"
        android:toXDelta="100%"
        android:fromYDelta="0%"
        android:toYDelta="100%"
        android:duration="2000"
        />

</set>
MainActivity.java
package com.xiaozhang.animationtest;

import android.app.Activity;
import android.os.Bundle;
import android.view.View;
import android.view.View.OnClickListener;
import android.view.animation.Animation;
import android.view.animation.AnimationUtils;
import android.widget.ImageView;

public class MainActivity extends Activity {

    private ImageView imageView;

    @Override
    protected void onCreate(Bundle savedInstanceState) {
        super.onCreate(savedInstanceState);
        setContentView(R.layout.activity_main);
        findViewById(R.id.imageViewId);
        imageView = (ImageView) findViewById(R.id.imageViewId);
        findViewById(R.id.rotateButtonId).setOnClickListener(
                new OnClickListener() {
                    @Override
                    public void onClick(View v) {

                        Animation animation = AnimationUtils.loadAnimation(
                                MainActivity.this, R.anim.rotate);
                        imageView.startAnimation(animation);
                    }
                });
        findViewById(R.id.scaleButtonId).setOnClickListener(
                new OnClickListener() {
                    @Override
                    public void onClick(View v) {

                        Animation animation = AnimationUtils.loadAnimation(
                                MainActivity.this, R.anim.alpha);
                        imageView.startAnimation(animation);

                    }
                });
        findViewById(R.id.alphaButtonId).setOnClickListener(
                new OnClickListener() {
                    @Override
                    public void onClick(View v) {
                        Animation animation = AnimationUtils.loadAnimation(
                                MainActivity.this, R.anim.scale);
                        imageView.startAnimation(animation);
                    }
                });
        findViewById(R.id.translateButtonId).setOnClickListener(
                new OnClickListener() {
                    @Override
                    public void onClick(View v) {
                        Animation animation = AnimationUtils.loadAnimation(
                                MainActivity.this, R.anim.translate);
                        imageView.startAnimation(animation);
                    }
                });
    }
}
不过需注意的是:
rotate.xml文件中android:pivotX的值共有三种设置方法:
1.android:pivotX="50" 这种方法使用绝对位置定位;
2.android:pivotX="50%" 这种方法相对于控件本身定位;
3.android:pivotx="50%p" 这种方法相对于控件的父控件定位;
标签:android style blog http ar io color os 使用
原文地址:http://www.cnblogs.com/xiaozhang2014/p/4167046.html