标签:
This will be my first blog in English.
Now , Let‘s begin.
Step 1:download the resources
download OpenCV-2.4.10-android-sdk.zip from http://opencv.org/downloads.html
Step 2:copy the OpenCV SDK into your project
decompress the package , then , cp OpenCV-->sdk-->java to Your_Project ---> libraries(created by ourselves)
rename the directory , mv java ---> opencv
Setp 3: create build.gradle file in opencv dirctory, then setup it
In this freshly mkdir folder add a typical build.gradle file; setup it like this:
apply plugin: ‘android-library‘

buildscript {
    repositories {
        jcenter()
    }
    dependencies {
        classpath ‘com.android.tools.build:gradle:1.0.0‘
    }
}

android {
    compileSdkVersion 21
    buildToolsVersion "21.1.2"

    defaultConfig {
        minSdkVersion 15
        targetSdkVersion 21
        versionCode 1
        versionName "1.0"
    }


    sourceSets {
        main {
            manifest.srcFile ‘AndroidManifest.xml‘
            java.srcDirs = [‘src‘]
            resources.srcDirs = [‘src‘]
            res.srcDirs = [‘res‘]
            aidl.srcDirs = [‘src‘]
        }
    }
}
when you create or setting up build.gradle , the android studio will promote to synchronous。
if not promoted to syn , then manually add "
include ‘:app‘, ‘:opencv‘ //:app is the original
project(‘:opencv‘).projectDir = new File(‘libraries/opencv‘)
"
then syn by manually.
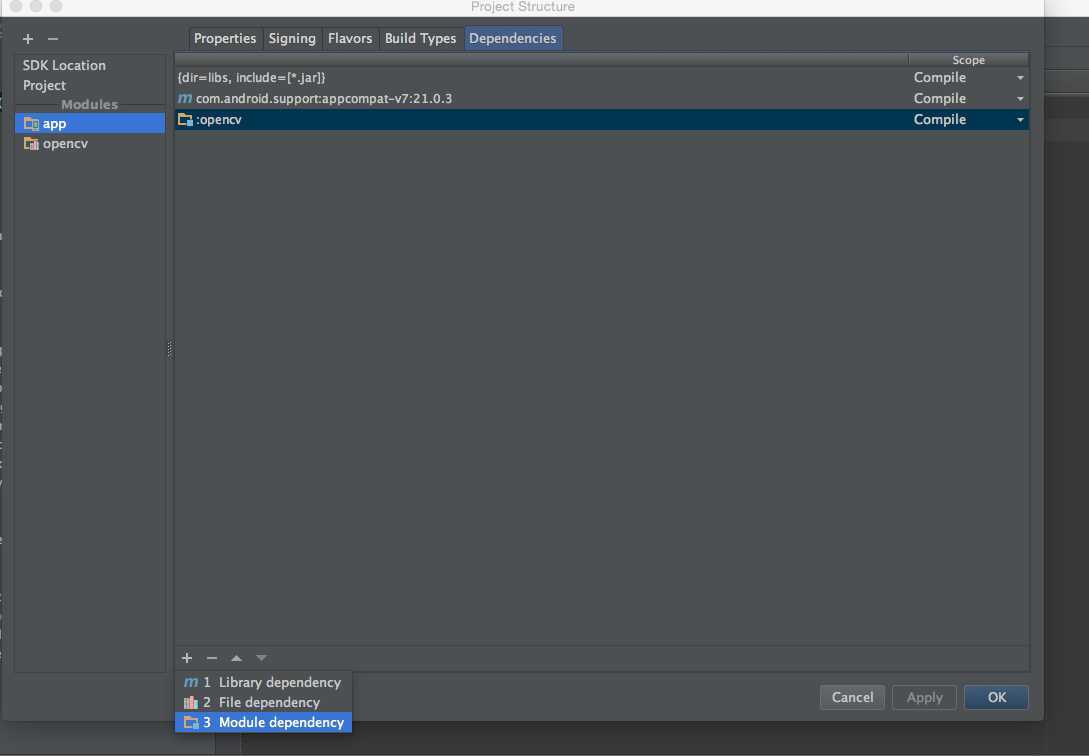
Step 4:Set up "Open Module settings"
click "+", add module dependency, selcet ":opencv" , click "apply" button
Step 5: copy OpenCV binaries into your project
OpenCV-2.?.?-android-sdk -> sdk -> native -> libs -> armeabi-v7a
to
out of OpenCV-2... -> lib --> armeabi-v7a //lib is a temporary folder. libraries is created before
decompress lib folder
zip -r libopencl-v7a.jar lib //压缩后名字改成 *.jar
then copy
mv libopencl-v7a.jar Project Root -> Your Project -> libraries (created before)
Step 6 : check it
add "if (!OpenCVLoader.initDebug()) {} ", and it will promote you to add "import org.opencv.android.OpenCVLoader;"
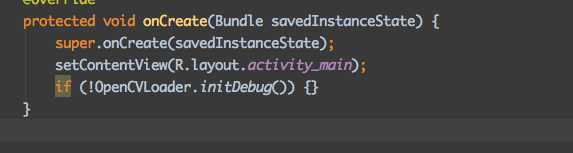
rebuild the project . if it is ok, everything is ok.
Related links:
http://stackoverflow.com/questions/17767557/how-to-use-opencv-in-android-studio-using-gradle-build-tool //It‘s best, two solution , each has advantages and disadvantages
http://hujiaweibujidao.github.io/blog/2014/10/22/android-ndk-and-opencv-development-with-android-studio/ //This is also good blog about how to install android NDK and OpenCV 。 The author of this blog is a student in Tsinghua University.
标签:
原文地址:http://www.cnblogs.com/zhongyuan/p/4196206.html