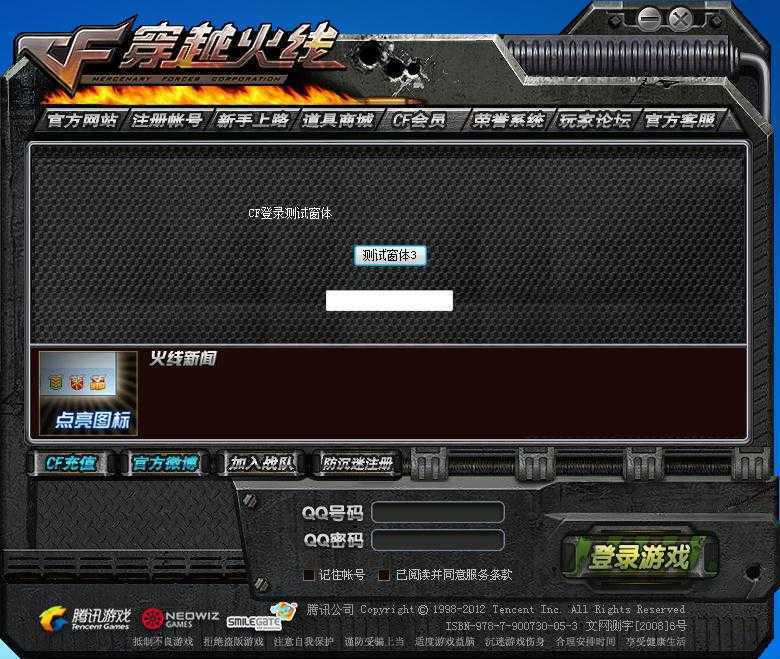
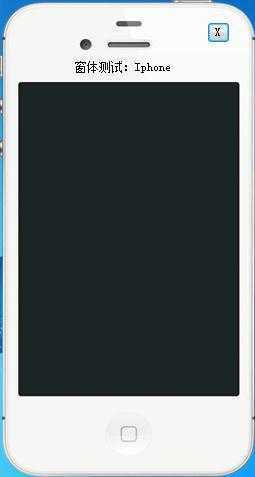
标签:
实现效果图1:
实现效果图2:
实现效果图3:
异形窗体的实现思路
(一)、采用UpdateLayeredWindow这个api函数基于Png图alpha通道绘制异形窗口
优点:真正意义上的异形窗口
缺点:用了WS_EX_LAYERED后当前窗体不处理paint事件,所以窗体上无法绘制控件,但这个控件确存在,而且可以响应事件
解决无法绘制控件方法:
1、思路:
采用双层窗口:底层背景窗口层与顶层控件层,用控件层Show()背景层,同时处理窗体的窗口移动事件,让另外一个窗体同步移动或者做其它事情。
2、实现:
底层背景层:采用UpdateLayeredWindow这个api函数基于带Alpha通道的Png图绘制
顶层控件层:
方法一:采用无边框窗口,把窗口背景颜色BackColor设置一个不常用颜色例如:ff00ff颜色,且把窗口TransparencyKey颜色属性设跟背景色BackColor一样(意义:去除带背景色的区域从而显示后面背景层)
方法二:采用无边框窗口,把窗口背景设为背景层对应位置的位图,给人一种透明的效果,但是编辑会有所限制。(SkinWhetherTank属性可以切换这两种透明模式)
优点:可以解决显示控件的问题,不影响控件的使用
缺点:方法一会让部分控件有毛边,方法二会让窗体编辑受限制。(缺点有待解决,望高手指点)
属性:
GradientTime:控件层渐变特效时长(越小越快)。
MainPosition:窗口在绘图层位置。
SkinBack:设置或获取绘图层窗口背景。
SkinMobile:窗体是否可以移动。
SkinOpacity:设置或获取绘图层窗口透明度(0-255)。
SkinShowInTaskbar:绘图层是否出现在Windows任务栏中。
SkinSize:设置或获取绘图层窗口大小。
SkinTrankColor:绘图层需要透明的颜色。
SkinWhetherTank:绘图层是否开启位图仿透明 注意(SkinOpacity < 255时,此属性为False可达到背景透明,控件不透明的效果。)。
 1 /// <summary>
 2 /// 创建支持位图区域的控件(目前有button和form)
 3 /// </summary>
 4 /// <param name="control">控件</param>
 5 /// <param name="bitmap">位图</param>
 6 public static void CreateControlRegion(Control control, Bitmap bitmap)
 7 {
 8     //判断是否存在控件和位图
 9     if (control == null || bitmap == null)
10         return;
11
12     control.Width = bitmap.Width;
13     control.Height = bitmap.Height;
14     //当控件是form时
15     if (control is System.Windows.Forms.Form)
16     {
17         //强制转换为FORM
18         Form form = (Form)control;
19         //当FORM的边界FormBorderStyle不为NONE时,应将FORM的大小设置成比位图大小稍大一点
20         form.Width = control.Width;
21         form.Height = control.Height;
22         //没有边界
23         form.FormBorderStyle = FormBorderStyle.None;
24         //将位图设置成窗体背景图片
25         form.BackgroundImage = bitmap;
26         //计算位图中不透明部分的边界
27         GraphicsPath graphicsPath = CalculateControlGraphicsPath(bitmap);
28         //应用新的区域
29         form.Region = new Region(graphicsPath);
30     }
31     //当控件是button时
32     else if (control is System.Windows.Forms.Button)
33     {
34         //强制转换为 button
35         Button button = (Button)control;
36         //不显示button text
37         button.Text = "";
38
39         //改变 cursor的style
40         button.Cursor = Cursors.Hand;
41         //设置button的背景图片
42         button.BackgroundImage = bitmap;
43
44         //计算位图中不透明部分的边界
45         GraphicsPath graphicsPath = CalculateControlGraphicsPath(bitmap);
46         //应用新的区域
47         button.Region = new Region(graphicsPath);
48     }
49 }
50
51 //计算位图中不透明部分的边界
52 private static GraphicsPath CalculateControlGraphicsPath(Bitmap bitmap)
53 {
54     //创建 GraphicsPath
55     GraphicsPath graphicsPath = new GraphicsPath();
56     //第一个找到点的X
57     int colOpaquePixel = 0;
58     // 偏历所有行(Y方向)
59     for (int row = 0; row < bitmap.Height; row++)
60     {
61         //重设
62         colOpaquePixel = 0;
63         //偏历所有列(X方向)
64         for (int col = 0; col < bitmap.Width; col++)
65         {
66             //如果是不需要透明处理的点则标记,然后继续偏历
67             if (bitmap.GetPixel(col, row).A == 255)
68             {
69                 //记录当前
70                 colOpaquePixel = col;
71                 //建立新变量来记录当前点
72                 int colNext = col;
73                 ///从找到的不透明点开始,继续寻找不透明点,一直到找到或则达到图片宽度
74                 for (colNext = colOpaquePixel; colNext < bitmap.Width; colNext++)
75                     if (bitmap.GetPixel(colNext, row).A < 255)
76                         break;
77                 //将不透明点加到graphics path
78                 graphicsPath.AddRectangle(new Rectangle(colOpaquePixel, row, colNext - colOpaquePixel, 1));
79                 col = colNext;
80             }
81         }
82     }
83     return graphicsPath;
84 }
转载之:CSkin论坛
案例源码下载:http://bbs.cskin.net/thread-54-1-1.html
标签:
原文地址:http://www.cnblogs.com/cskin/p/4234242.html