标签:
好久没写了,有些东西做过都快忘了,赶紧记一下。
现在来实现一个简单的相机程序。
原文地址http://www.cnblogs.com/rossoneri/p/4246134.html
当然需要的话可以直接调用系统的camera程序,但自己实现会使用更自由。
呐,既然要用实现相机,那就需要先了解一下调用camera的类android.hardware.camera

android.hardware.Camera

The Camera class is used to set image capture settings, start/stop preview, snap pictures, and retrieve frames for encoding for video. This class is a client for the Camera service, which manages the actual camera hardware.

To access the device camera, you must declare the android.Manifest.permission.CAMERA permission in your Android Manifest. Also be sure to include the <uses-feature> manifest element to declare camera features used by your application. For example, if you use the camera and auto-focus feature, your Manifest should include the following:

 <uses-permission android:name="android.permission.CAMERA" />
 <uses-feature android:name="android.hardware.camera" />
 <uses-feature android:name="android.hardware.camera.autofocus" />
To take pictures with this class, use the following steps:

Obtain an instance of Camera from open(int).
Get existing (default) settings with getParameters().
If necessary, modify the returned Camera.Parameters object and call setParameters(Camera.Parameters).
If desired, call setDisplayOrientation(int).
Important: Pass a fully initialized SurfaceHolder to setPreviewDisplay(SurfaceHolder). Without a surface, the camera will be unable to start the preview.
Important: Call startPreview() to start updating the preview surface. Preview must be started before you can take a picture.
When you want, call takePicture(Camera.ShutterCallback, Camera.PictureCallback, Camera.PictureCallback, Camera.PictureCallback) to capture a photo. Wait for the callbacks to provide the actual image data.
After taking a picture, preview display will have stopped. To take more photos, call startPreview() again first.
Call stopPreview() to stop updating the preview surface.
Important: Call release() to release the camera for use by other applications. Applications should release the camera immediately in android.app.Activity.onPause() (and re-open() it in android.app.Activity.onResume()).
To quickly switch to video recording mode, use these steps:

Obtain and initialize a Camera and start preview as described above.
Call unlock() to allow the media process to access the camera.
Pass the camera to android.media.MediaRecorder.setCamera(Camera). See android.media.MediaRecorder information about video recording.
When finished recording, call reconnect() to re-acquire and re-lock the camera.
If desired, restart preview and take more photos or videos.
Call stopPreview() and release() as described above.
This class is not thread-safe, and is meant for use from one event thread. Most long-running operations (preview, focus, photo capture, etc) happen asynchronously and invoke callbacks as necessary. Callbacks will be invoked on the event thread open(int) was called from. This class‘s methods must never be called from multiple threads at once.

Caution: Different Android-powered devices may have different hardware specifications, such as megapixel ratings and auto-focus capabilities. In order for your application to be compatible with more devices, you should not make assumptions about the device camera specifications.
另外补充一下,实现android的video也是使用的Camera API,用到相关的类为Camera,SurfaceView,MediaRecorder,Intent(MediaStore.ACTION_IMAGE_CAPTURE, MediaStore.ACTION_VEDIO_CAPTURE)
好,根据camera的说明,在开始编写程序之前需要确认manifest中添加关于使用摄像设备的适当的权限声明,如果使用camera API必须加上下段说明:
<uses-permission android:name="android.permission.CAMERA" />
当然,程序也需要声明使用camera的特性:
<uses-feature android:name="android.hardware.camera" />

我就不翻译了,应该不难懂
<uses-feature android:name="android.hardware.camera" />
The application uses the device‘s camera. If the device supports multiple cameras, the application uses the camera that facing away from the screen.

<uses-feature android:name="android.hardware.camera.autofocus" />
Subfeature. The application uses the device camera‘s autofocus capability.

<uses-feature android:name="android.hardware.camera.flash" />
Subfeature. The application uses the device camera‘s flash.

<uses-feature android:name="android.hardware.camera.front" />
Subfeature. The application uses a front-facing camera on the device.

<uses-feature android:name="android.hardware.camera.any" />
The application uses at least one camera facing in any direction, or an external camera device if one is connected. Use this in preference to android.hardware.camera if a back-facing camera is not required.
如果需要其他特性,在列表里选择性添加就好,比如一会儿我还需要自动对焦就要添加相关代码到manifest。添加特性代码就是为了防止你的程序被安装到没有摄像头或者不支持你要的功能的设备上去(prevent your application from being installed to devices that do not include a camera or do not support the camera features you specify. )
如果你的程序能通过适当的操作使用camera或一些特性,但并不特别需要它,可以增加required属性为false:
<uses-feature android:name="android.hardware.camera" android:required="false" />
Ok,前面说的有点多,下面说下使用camera的流程:
下面跟着流程,开始编码
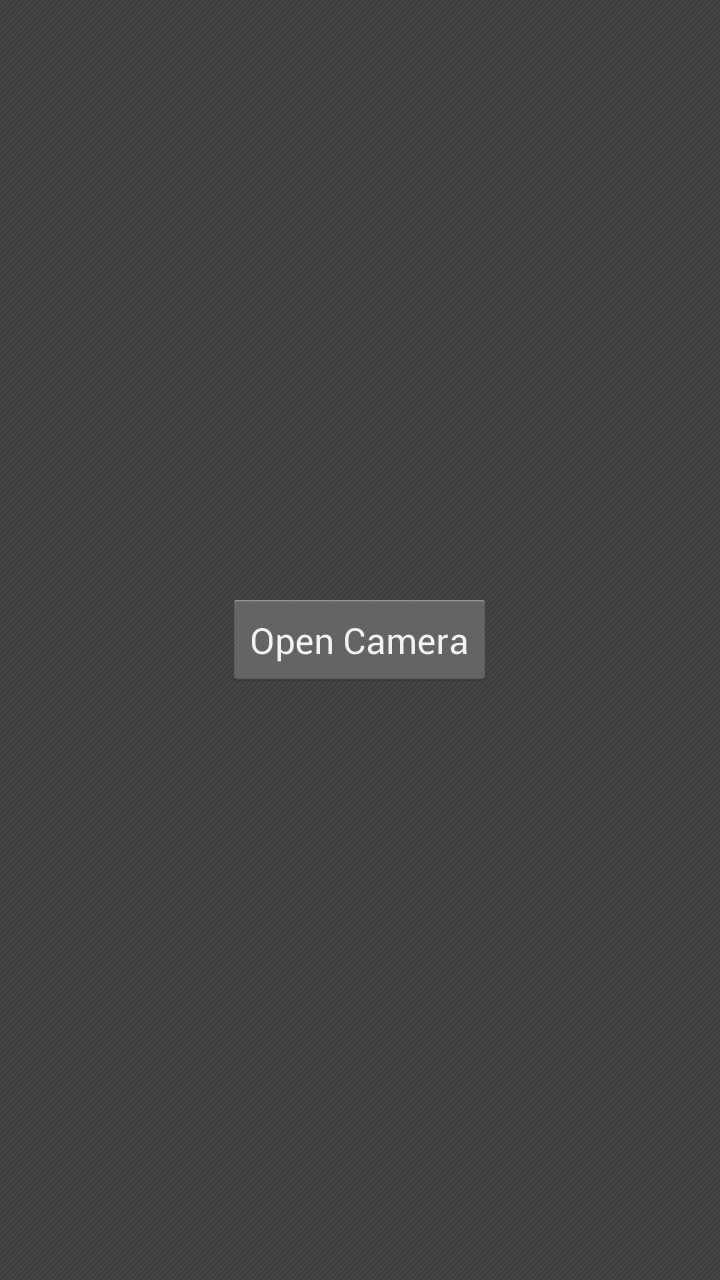
先在主界面添加一个按钮,用来打开相机,效果如下:


<RelativeLayout xmlns:android="http://schemas.android.com/apk/res/android"
    xmlns:tools="http://schemas.android.com/tools"
    android:layout_width="match_parent"
    android:layout_height="match_parent"
    tools:context="com.example.demo_camera.MainActivity" >

    <Button
        android:id="@+id/main_btn"
        android:layout_width="wrap_content"
        android:layout_height="wrap_content"
        android:layout_centerHorizontal="true"
        android:layout_centerVertical="true"
        android:text="@string/main_btn_open_camera" />

    <include
        android:id="@+id/camera_layout"
        android:layout_width="match_parent"
        android:layout_height="match_parent"
        layout="@layout/view_camera"
        android:visibility="gone" />

</RelativeLayout>
设计拍照界面,一个surfaceview用来显示预览画面,两个button进行拍照和返回

<?xml version="1.0" encoding="utf-8"?>
<FrameLayout xmlns:android="http://schemas.android.com/apk/res/android"
    android:id="@+id/camera_view"
    android:layout_width="match_parent"
    android:layout_height="match_parent" >

    <SurfaceView
        android:id="@+id/cameraSurfaceView"
        android:layout_width="match_parent"
        android:layout_height="match_parent"
        android:layout_gravity="center" />

    <RelativeLayout
        android:id="@+id/cameraButtonLayout"
        android:layout_width="match_parent"
        android:layout_height="match_parent"
        android:background="@android:color/transparent"
        android:orientation="horizontal" >

        <Button
            android:id="@+id/cameraTakePicCancle"
            android:layout_width="wrap_content"
            android:layout_height="wrap_content"
            android:layout_alignParentBottom="true"
            android:layout_alignParentEnd="true"
            android:layout_alignParentRight="true"
            android:background="@color/RoyalBlue"
            android:text="@string/camera_btn_back" />

        <Button
            android:id="@+id/cameraTakePic"
            android:layout_width="wrap_content"
            android:layout_height="wrap_content"
            android:layout_alignParentBottom="true"
            android:layout_marginEnd="10dp"
            android:layout_marginRight="10dp"
            android:layout_toLeftOf="@id/cameraTakePicCancle"
            android:layout_toStartOf="@id/cameraTakePicCancle"
            android:background="@color/RoyalBlue"
            android:text="@string/camera_btn_takephoto" />
    </RelativeLayout>

</FrameLayout>
编写camera操作的代码,增加了自动对焦,分辨前后摄像头等内容,为了代码看起来连贯,具体说明放在注释里

  1 package com.example.demo_camera;
  2
  3 import java.util.List;
  4
  5 import android.app.Activity;
  6 import android.graphics.PixelFormat;
  7 import android.hardware.Camera;
  8 import android.hardware.Camera.AutoFocusCallback;
  9 import android.hardware.Camera.CameraInfo;
 10 import android.hardware.Camera.Size;
 11 import android.view.SurfaceHolder;
 12 import android.view.SurfaceView;
 13 import android.view.View;
 14 import android.view.View.OnClickListener;
 15 import android.view.ViewGroup;
 16 import android.widget.Button;
 17
 18 public class CameraView {
 19     // Private Constants ///////////////////////////////////////////////////////
 20
 21     // Public Variables ////////////////////////////////////////////////////////
 22
 23     // Member Variables ////////////////////////////////////////////////////////
 24     private ViewGroup            mView;
 25     private Activity            mActivity;
 26
 27     private Button                mBtnTakePhoto;
 28     private Button                mBtnBack;
 29     private SurfaceView            mSurfaceView;
 30
 31     private Camera                mCamera;
 32     private Camera.Parameters    mParameters;
 33     private CameraInfo            mCameraInfo;
 34
 35     private int                    mDegree;
 36     private int                    mScreenWidth;
 37     private int                    mScreenHeight;
 38
 39     // Constructors ////////////////////////////////////////////////////////////
 40     public CameraView(Activity mActivity, ViewGroup mView) {
 41         this.mActivity = mActivity;
 42         this.mView = mView;
 43         initCameraView();
 44         initCameraEvent();
 45     }
 46
 47     // Class Methods ///////////////////////////////////////////////////////////
 48
 49     // Private Methods /////////////////////////////////////////////////////////
 50     private void initCameraView() {
 51         mBtnTakePhoto = (Button) mView.findViewById(R.id.cameraTakePic);
 52         mBtnBack = (Button) mView.findViewById(R.id.cameraTakePicCancle);
 53         mSurfaceView = (SurfaceView) mView.findViewById(R.id.cameraSurfaceView);
 54
 55     }
 56
 57     private void initCameraEvent() {
 58
 59         mSurfaceView.getHolder().setKeepScreenOn(true);// 屏幕常亮
 60         mSurfaceView.getHolder().addCallback(new SurfaceCallback());// 为surfaceHolder添加回调
 61         mSurfaceView.getHolder().setFormat(PixelFormat.TRANSPARENT);
 62
 63         mBtnTakePhoto.setOnClickListener(new OnClickListener() {
 64
 65             @Override
 66             public void onClick(View v) {
 67                 // TODO Auto-generated method stub
 68                 // if (mCamera != null) {
 69             }
 70         });
 71
 72         mBtnBack.setOnClickListener(new OnClickListener() {
 73
 74             @Override
 75             public void onClick(View v) {
 76                 // TODO Auto-generated method stub
 77
 78             }
 79         });
 80     }
 81
 82     private final class SurfaceCallback implements SurfaceHolder.Callback { // 回调中包含三个重写方法,看方法名即可知道是干什么的
 83
 84         @Override
 85         public void surfaceCreated(SurfaceHolder holder) { // 创建预览画面处理
 86             // TODO Auto-generated method stub
 87             int nNum = Camera.getNumberOfCameras(); // 根据摄像头的id找前后摄像头
 88             if (nNum == 0) {
 89                 // 没有摄像头
 90                 return;
 91             }
 92
 93             for (int i = 0; i < nNum; i++) {
 94                 CameraInfo info = new CameraInfo(); // camera information 对象
 95                 Camera.getCameraInfo(i, info);// 获取information
 96                 if (info.facing == CameraInfo.CAMERA_FACING_BACK) { // 后摄像头
 97                     startPreview(info, i, holder); // 设置preview的显示属性
 98                     return;
 99                 }
100             }
101
102         }
103
104         @Override
105         public void surfaceChanged(SurfaceHolder holder, int format, int width,
106                 int height) { // 预览画面有变化时进行如下处理
107             // TODO Auto-generated method stub
108             if (mCamera == null) {
109                 return;
110             }
111
112             mCamera.autoFocus(new AutoFocusCallback() { // 增加自动对焦
113                 @Override
114                 public void onAutoFocus(boolean success, Camera camera) {
115                     // TODO Auto-generated method stub
116                     if (success) { // 如果自动对焦成功
117                         mCamera.cancelAutoFocus(); // 关闭自动对焦,下次有变化时再重新打开自动对焦,这句不能少
118                     }
119                 }
120             });
121         }
122
123         @Override
124         public void surfaceDestroyed(SurfaceHolder holder) { // surfaceView关闭处理以下方法
125             // TODO Auto-generated method stub
126             if (mCamera != null) {
127                 mCamera.stopPreview();
128                 mCamera.release(); // 释放照相机 不能少
129                 mCamera = null;
130                 mCameraInfo = null;
131             }
132         }
133
134     }
135
136     private Size getOptimalSize(int nDisplayWidth, int nDisplayHeight,
137             List<Size> sizes, double targetRatio) { // 这里是我的一个计算显示尺寸的方法,可以自己去设计
138         final double ASPECT_TOLERANCE = 0.001;
139         if (sizes == null)
140             return null;
141
142         Size optimalSize = null;
143         double minDiff = Double.MAX_VALUE;
144
145         int targetHeight = Math.min(nDisplayWidth, nDisplayHeight);
146         for (Size size : sizes) {
147             double ratio = (double) size.width / size.height;
148             if (Math.abs(ratio - targetRatio) > ASPECT_TOLERANCE)
149                 continue;
150             if (Math.abs(size.height - targetHeight) < minDiff) {
151                 optimalSize = size;
152                 minDiff = Math.abs(size.height - targetHeight);
153             }
154         }
155         if (optimalSize == null) {
156             minDiff = Double.MAX_VALUE;
157             for (Size size : sizes) {
158                 if (Math.abs(size.height - targetHeight) < minDiff) {
159                     optimalSize = size;
160                     minDiff = Math.abs(size.height - targetHeight);
161                 }
162             }
163         }
164         return optimalSize;
165     }
166
167     // Public Methods //////////////////////////////////////////////////////////
168     public void show() {
169         mView.setVisibility(View.VISIBLE);
170         mSurfaceView.setVisibility(View.VISIBLE); //
171     }
172
173     public void hideCamera() {
174         mView.setVisibility(View.GONE);
175         mSurfaceView.setVisibility(View.GONE); //
176     }
177
178     public final ViewGroup getViewGroup() {
179         return mView;
180     }
181
182     public void initScreenSize(int nWidth, int nHeight) { // 设置屏幕的宽与高
183         ViewGroup.LayoutParams lp = mSurfaceView.getLayoutParams();
184         lp.width = nWidth;
185         lp.height = nHeight;
186         mSurfaceView.setLayoutParams(lp);
187
188         mScreenWidth = nWidth;
189         mScreenHeight = nHeight;
190     }
191
192     public void startPreview(CameraInfo info, int cameraId, SurfaceHolder holder) {// 在回调中调用设置预览的属性
193         try {
194
195             mCameraInfo = info;
196
197             mCamera = Camera.open(cameraId);
198
199             mCamera.setPreviewDisplay(holder); // 设置用于显示拍照影像的SurfaceHolder对象
200             mCamera.setDisplayOrientation(90); // 设置显示的方向,这里手机是竖直为正向90度,可以自己写个方法来根据屏幕旋转情况获取到相应的角度
201
202             {
203                 mParameters = mCamera.getParameters();
204
205                 // PictureSize 获取支持显示的尺寸 因为支持的显示尺寸是和设备有关,所以需要获取设备支持的尺寸列表
206                 // 另外因为是预览画面是全屏显示,所以显示效果也和屏幕的分辨率也有关系,为了最好的适应屏幕,建议选取
207                 // 与屏幕最接近的宽高比的尺寸
208                 List<Size> listPictureSizes = mParameters
209                         .getSupportedPictureSizes();
210
211                 Size sizeOptimalPicture = getOptimalSize(mScreenWidth,
212                         mScreenHeight, listPictureSizes, (double) mScreenWidth
213                                 / mScreenHeight);
214                 mParameters.setPictureSize(sizeOptimalPicture.width,
215                         sizeOptimalPicture.height);
216
217                 // PreviewSize
218                 List<Camera.Size> ListPreviewSizes = mParameters
219                         .getSupportedPreviewSizes();
220
221                 Size sizeOptimalPreview = getOptimalSize(
222                         sizeOptimalPicture.width, sizeOptimalPicture.height,
223                         ListPreviewSizes, (double) sizeOptimalPicture.width
224                                 / sizeOptimalPicture.height);
225                 mParameters.setPreviewSize(sizeOptimalPreview.width,
226                         sizeOptimalPreview.height);
227
228                 // 这里就是有的设备不支持Camera.Parameters.FOCUS_MODE_CONTINUOUS_PICTURE连续自动对焦这个字段,所以做个判断
229                 List<String> lstFocusModels = mParameters
230                         .getSupportedFocusModes();
231                 for (String str : lstFocusModels) {
232                     if (str.equals(Camera.Parameters.FOCUS_MODE_CONTINUOUS_PICTURE)) {
233                         mParameters
234                                 .setFocusMode(Camera.Parameters.FOCUS_MODE_CONTINUOUS_PICTURE);
235                         break;
236                     }
237                 }
238
239                 mCamera.setParameters(mParameters);
240             }
241
242             mCamera.startPreview(); // 开始预览
243
244         } catch (Exception e) {
245             e.printStackTrace();
246         }
247     }
248 }
在MainActivity中添加下面主要代码

 1 package com.example.demo_camera;
 2
 3 import android.app.Activity;
 4 import android.os.Bundle;
 5 import android.util.DisplayMetrics;
 6 import android.view.Menu;
 7 import android.view.MenuItem;
 8 import android.view.View;
 9 import android.view.Window;
10 import android.view.View.OnClickListener;
11 import android.view.ViewGroup;
12 import android.view.WindowManager;
13 import android.widget.Button;
14
15 public class MainActivity extends Activity {
16
17     Button        mBtnCamera;
18     ViewGroup    mVgCamera;
19     CameraView    mCameraView;
20
21     @Override
22     protected void onCreate(Bundle savedInstanceState) {
23         super.onCreate(savedInstanceState);
24
25         // 全屏显示要隐藏标题栏状态栏
26         // hide title bar
27         requestWindowFeature(Window.FEATURE_NO_TITLE);
28         // hide status bar
29         int flag = WindowManager.LayoutParams.FLAG_FULLSCREEN;
30         Window window = this.getWindow();
31         window.setFlags(flag, flag);
32
33         setContentView(R.layout.activity_main);
34
35         mBtnCamera = (Button) findViewById(R.id.main_btn);
36         mVgCamera = (ViewGroup) findViewById(R.id.camera_layout);
37         mCameraView = new CameraView(this, mVgCamera);
38
39         mBtnCamera.setOnClickListener(new OnClickListener() {
40
41             @Override
42             public void onClick(View v) {
43                 // TODO Auto-generated method stub
44                 mBtnCamera.setVisibility(View.GONE);
45                 mVgCamera.setVisibility(View.VISIBLE);
46
47                 setCameraSize();
48
49             }
50         });
51     }
52
53     private void setCameraSize() {
54
55         ViewGroup.LayoutParams params = mCameraView.getViewGroup()
56                 .getLayoutParams();
57         DisplayMetrics dm = new DisplayMetrics();
58         this.getWindowManager().getDefaultDisplay().getMetrics(dm);// 获得屏幕尺寸
59         params.width = dm.widthPixels;
60         params.height = dm.heightPixels;
61
62         mCameraView.getViewGroup().setLayoutParams(params);
63         mCameraView.initScreenSize(params.width, params.height);
64         mCameraView.show();
65     }
66
67     @Override
68     public boolean onCreateOptionsMenu(Menu menu) {
69         // Inflate the menu; this adds items to the action bar if it is present.
70         getMenuInflater().inflate(R.menu.main, menu);
71         return true;
72     }
73
74     @Override
75     public boolean onOptionsItemSelected(MenuItem item) {
76         // Handle action bar item clicks here. The action bar will
77         // automatically handle clicks on the Home/Up button, so long
78         // as you specify a parent activity in AndroidManifest.xml.
79         int id = item.getItemId();
80         if (id == R.id.action_settings) {
81             return true;
82         }
83         return super.onOptionsItemSelected(item);
84     }
85 }
在Manifest加入:
<uses-permission android:name="android.permission.CAMERA" />

<uses-feature android:name="android.hardware.camera" />
<uses-feature android:name="android.hardware.camera.autofocus" />
最后一些资源文件string和color

<?xml version="1.0" encoding="utf-8"?>
<resources>

    <string name="app_name">Demo_camera</string>
    <string name="hello_world">Hello world!</string>
    <string name="action_settings">Settings</string>
    <string name="camera_btn_back">Back</string>
    <string name="camera_btn_takephoto">TakePic</string>
    <string name="main_btn_open_camera">Open Camera</string>

    <color name="RoyalBlue">#4169E1</color>
</resources>
经过以上步骤,我们的设备就可以用摄像头进行预览了,预览时随意移动设备还可以自动对焦,效果如下图:

不过,这个是用DDMS截的图,如果是拍照,实际画面尺寸会与看到的稍有差别,原因在代码里也有写。
关于拍照takePicture(Camera.ShutterCallback, Camera.PictureCallback, Camera.PictureCallback, Camera.PictureCallback)的使用也很简单,在回调PictureCallback中重写public void onPictureTaken(byte[] data, Camera camera) {}方法,data就是图片数据,用bitmapfactory来decode一下,再处理一下显示的旋转方向与尺寸就ok了,这部分代码有空再补吧。
好了,又复习一遍这个过程发现还是蛮简单的。多看看官方的文档就好。ok,收工睡觉。
参考资料:
android sdk docs
标签:
原文地址:http://www.cnblogs.com/rossoneri/p/4246134.html