1 <?xml version="1.0" encoding="UTF-8"?>
2 <web-app xmlns:xsi="http://www.w3.org/2001/XMLSchema-instance"
3 xmlns="http://java.sun.com/xml/ns/javaee" xmlns:web="http://java.sun.com/xml/ns/javaee/web-app_2_5.xsd"
4 xsi:schemaLocation="http://java.sun.com/xml/ns/javaee http://java.sun.com/xml/ns/javaee/web-app_3_0.xsd"
5 id="WebApp_ID" version="3.0">
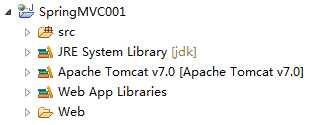
6 <display-name>SpringMVC001</display-name>
7 <servlet>
8 <servlet-name>springMvc</servlet-name>
9 <servlet-class>org.springframework.web.servlet.DispatcherServlet</servlet-class>
10 <load-on-startup>1</load-on-startup>
11 </servlet>
12
13 <servlet-mapping>
14 <servlet-name>springMvc</servlet-name>
15 <url-pattern>/</url-pattern>
16 </servlet-mapping>
17 </web-app>
1 <?xml version="1.0" encoding="UTF-8"?>
2 <beans xmlns="http://www.springframework.org/schema/beans"
3 xmlns:xsi="http://www.w3.org/2001/XMLSchema-instance"
4 xmlns:p="http://www.springframework.org/schema/p"
5 xmlns:context="http://www.springframework.org/schema/context"
6 xsi:schemaLocation="
7 http://www.springframework.org/schema/beans
8 http://www.springframework.org/schema/beans/spring-beans.xsd
9 http://www.springframework.org/schema/context
10 http://www.springframework.org/schema/context/spring-context.xsd">
11 <context:annotation-config />
12 <context:component-scan base-package="com.jiutian.learning.mvc.buniness.controller"/>
13 <bean id="viewResolver"
14 class="org.springframework.web.servlet.view.InternalResourceViewResolver"
15 p:prefix="/jsp/"
16 p:suffix=".jsp" />
17 </beans>
1 package com.jiutian.learning.mvc.buniness.controller;
2
3 import org.springframework.stereotype.Controller;
4 import org.springframework.web.bind.annotation.RequestMapping;
5 import org.springframework.web.bind.annotation.RequestMethod;
6
7 @Controller
8 @RequestMapping(value="/hello")
9 public class HelloController {
10
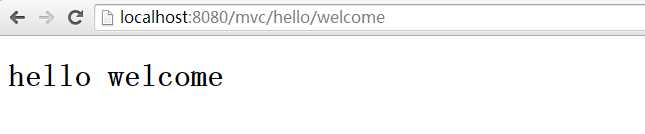
11 @RequestMapping(value="welcome",method = RequestMethod.GET)
12 public String hello(){
13 return "welcome";
14 }
15
16 }
1 <%@ page language="java" contentType="text/html; charset=utf-8" pageEncoding="utf-8"%>
2 <!DOCTYPE html PUBLIC "-//W3C//DTD HTML 4.01 Transitional//EN" "http://www.w3.org/TR/html4/loose.dtd">
3 <html>
4 <head>
5 <meta http-equiv="Content-Type" content="text/html; charset=utf-8">
6 <title>Insert title here</title>
7 </head>
8 <body>
9 <h1>hello welcome</h1>
10 </body>
11 </html>