标签:
本篇属于附加篇,在之前的总结中给大家提到过一个关于登录状态验证的效果,当时是通过Session对象完成的,今天我查了一下,JSP为我们封装了一个用于过滤用的过滤器类Filter,通过它我们就可以非常轻松的完成之前的那个功能了,而且可以在很多地方使用,非常实用。废话不多说,下面开始简单为大家介绍一下JSP提供的过滤器类。
1、过滤器简介:
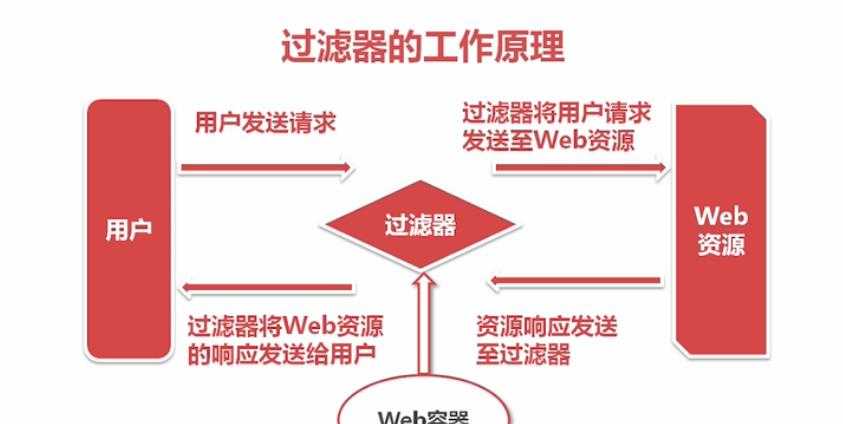
过滤器是什么?过滤器就是根据过滤规则对过滤源进行过滤,然后得到过滤结果。Web过滤器的是什么呢?首先Web过滤器的过滤源是用户的各种请求,过滤规则是开发人员实现制定好的,过滤结果是响应。如何理解呢?大家应该都有这样的经历,当我们想下载一个资源时,如果没有登录,这是系统就会弹出登录窗口强制我们登录;而当我们已经登录后,我们单击下载时,便不会出现强制我们登录的页面。这便是今天我们要一起学习的Web拦截器知识。
2、过滤器的工作原理:
3、过滤器的生命周期:
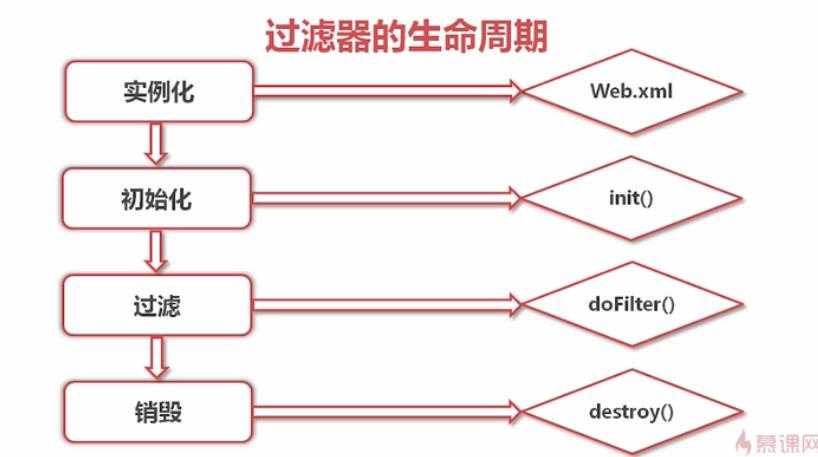
过滤器的初始化,我们将我们的工程添加到Tomcat后,当启动Tomcat后,系统便立即会调用过滤器的init()方法,也就是我们的工程一旦部署,我们在项目的添加的过滤器便立刻开始工作。当我们关闭Tomcat时,我们的过滤器会调用destroy()方法,结束我们的过滤监听。
4、探究过滤器的工作原理:
a、创建过滤器对象类:
public class firstFilter implements Filter {

    public void destroy() {
        System.out.println("Destory-----first");
    }

    public void doFilter(ServletRequest request, ServletResponse response,
            FilterChain arg) throws IOException, ServletException {
        System.out.println("start-----first");
        arg.doFilter(request, response);//没有该方法,页面将一直处于加载状态。
        System.out.println("end-----first");
    }

    public void init(FilterConfig arg0) throws ServletException {
        System.out.println("Init-----first");
    }

}
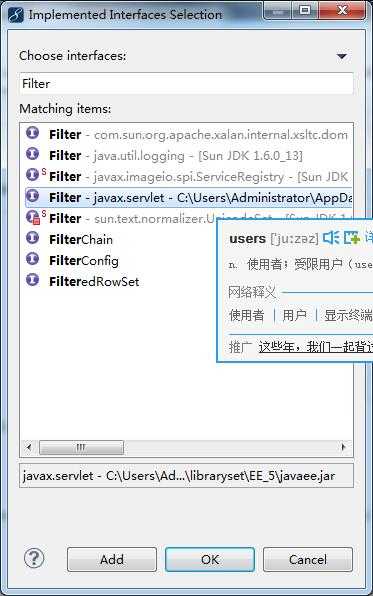
该类需要实现javax.servlet.Filter接口:
b、web.xml文件声明:
<?xml version="1.0" encoding="UTF-8"?>
<web-app version="2.5" xmlns="http://java.sun.com/xml/ns/javaee"
 xmlns:xsi="http://www.w3.org/2001/XMLSchema-instance" xsi:schemaLocation="http://java.sun.com/xml/ns/javaee   http://java.sun.com/xml/ns/javaee/web-app_2_5.xsd">

 <!-- 过滤器对象声明 -->
 <filter>
  <filter-name>firstFilter</filter-name><!-- 过滤器名 -->
  <filter-class>cn.imcook.filter.firstFilter</filter-class><!-- 指定我们新建的过滤器对象的地址 -->
 </filter>
 <!-- 过滤规则声明  -->
 <filter-mapping>
  <filter-name>firstFilter</filter-name><!-- 指定规则对于的过滤器对象 -->
  <url-pattern>/*</url-pattern><!-- *:代表所有的请求 -->
  <dispatcher>REQUEST</dispatcher><!-- 该处有四个值可选,默认是REQUEST -->
 </filter-mapping>

 <welcome-file-list>
  <welcome-file>index.jsp</welcome-file>
 </welcome-file-list>
 <login-config>
  <auth-method>BASIC</auth-method>
 </login-config>
</web-app>
这样一行行写代码,很不方便,myeclipse为我们提供了窗口化操作,请看下面的步骤:
打开我们的web.xml文件,点击Design,进入窗口操作界面:
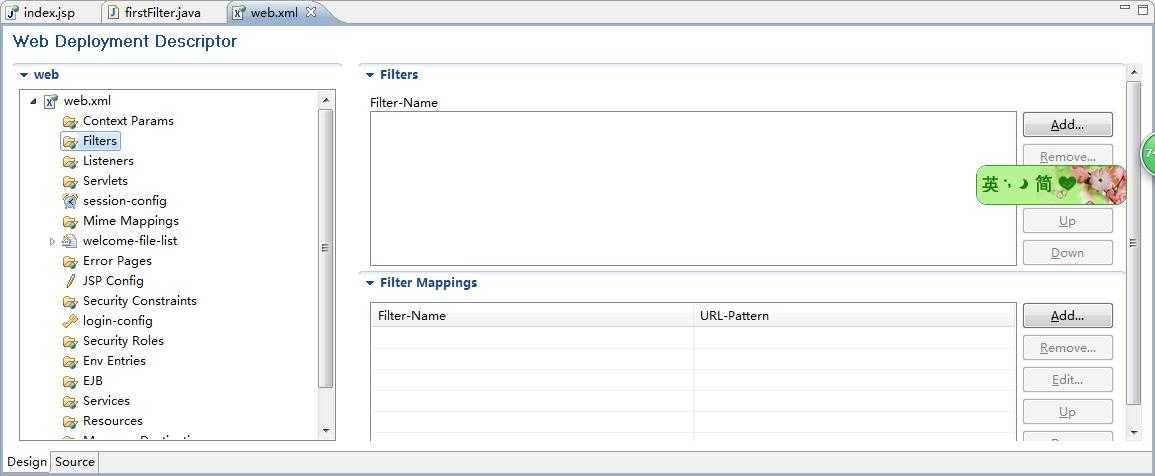
点击左侧的Filter,先添加一个过滤器对象:
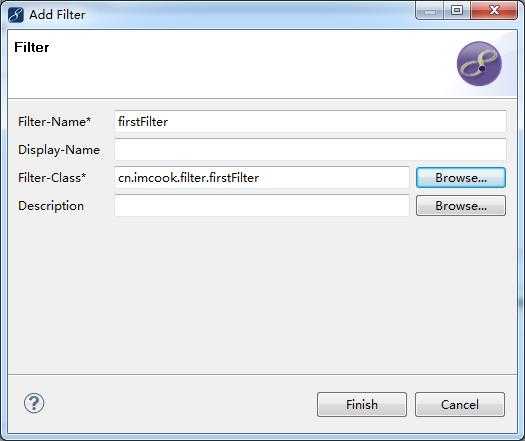
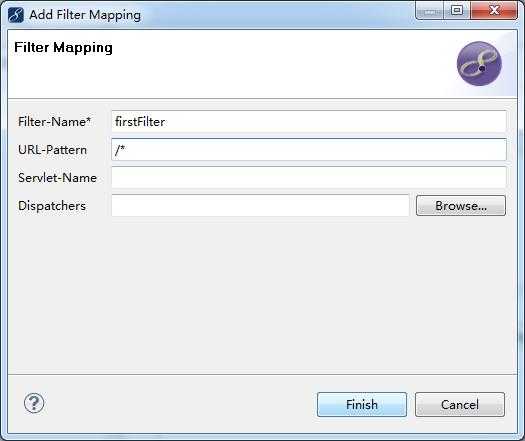
然后再点击Filter,添加该过滤器的规则声明(Filter Mapping):
5、启动Tomcat,在地址浏览器地址栏输入我们的工程名(例如:http://localhost:8080/HelloWord/index.jsp),观察myeclipse控制台的输出。
·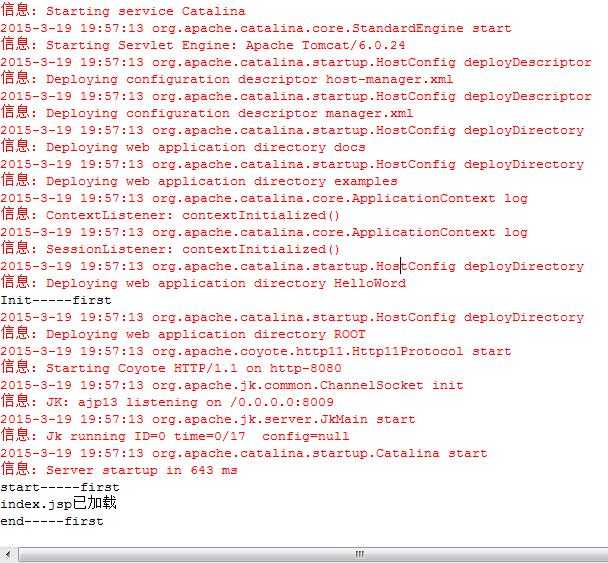
以上便是我们对Filter生命周期的探究。
6、过滤重定向:
在这里我们只需要在我们创建的Filter类中稍作修改就可以完成了,那如何修改呢?我只需要在我们的doFilter()方法中添加一个重定向就可以了。
public class loginFilter implements Filter {

    public void destroy() {
        System.out.println("Destroy");
    }

    public void doFilter(ServletRequest arg0, ServletResponse arg1,
            FilterChain arg2) throws IOException, ServletException {
        System.out.println("start-----doFilter");

        //arg2.doFilter(arg0, arg1);

        //重定向
        HttpServletRequest requst = (HttpServletRequest)arg0;
        HttpServletResponse response = (HttpServletResponse)arg1;
        response.sendRedirect(requst.getContextPath()+"/Login.jsp");

        System.out.println("end------doFilter");
    }

    public void init(FilterConfig arg0) throws ServletException {
        System.out.println("Init");
    }

}
对于JSP中关于过滤器的知识,就先为大家总结到这里,如果你对过滤器知识很感兴趣,请持续关注博客。下一篇:对个过滤器执行顺序
http://www.cnblogs.com/AndroidJotting/p/4351454.html
标签:
原文地址:http://www.cnblogs.com/softidea/p/4352746.html