标签:android
在前面的博客写到我针对一个项目完成了动态布局的效果,顿时感觉很爽,那么下面我针对我在前文中所讲的tabhost的实现做出一个新的方法,tabhost基本已经被启用,现在基本使用Fragment与viewpage进行实现相同的功能,在园子里有很多这样的博客,现在我在这里呢,继续是参考了一些博客进行了一些总结!
原因:在加载过程中,你会发现使用tabhost的内存资源比fragment大得多,因此我没有很多的安卓的截图的原因在于我一直使用真机做开发,这样虽然在博客园上很少能够图文并茂,但也使开发的安卓软件是真实可靠的,当然我没有任何对使用虚拟机开发的人有任何意见。
特别是现在我完全使用android studio进行开发,虽然这个IDE,我自己也不太熟悉,但是使用这个IDE还是相当之方便的!还能看内存的使用情况
好了,回归正途了,我们今天要讨论的是传说中Fragment,这玩意可以做好多事,就像我们的Activity一样,只要继承这个类就能激发其各种能力!说说Fragment的实质吧
Fragment自Android3.0引入的API,可以将其看作是Activity的子模块,其英文翻译是就是片段的意思!
在这里,我需要规定我使用的viewpage的局域与我使用的相当于tabhost的按键布局文件
   <LinearLayout xmlns:android="http://schemas.android.com/apk/res/android"
    xmlns:tools="http://schemas.android.com/tools"
    android:layout_width="match_parent"
    android:layout_height="match_parent"
    tools:context=".MainActivity"
    android:background="#f0f3f5"
    android:orientation="vertical"
    >

    <android.support.v4.view.ViewPager
        android:id="@+id/viewpager"
        android:layout_width="match_parent"
        android:layout_height="0dp"
        android:layout_weight="1"
        >
     </android.support.v4.view.ViewPager>
    <include layout="@layout/bottom"
    />
   </LinearLayout>
include layout=”@layout/bottom”表示我包含了一个叫bottom的layout文件
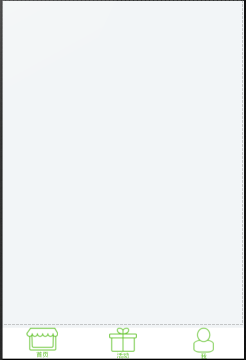
先看这个布局的效果图!

在这里,我们可以知道上面的
那么bottom这个文件咋么写呢?在这里我还更改了button的样式,让页面更加好看!
   <?xml version="1.0" encoding="utf-8"?>
<LinearLayout xmlns:android="http://schemas.android.com/apk/res/android"
    android:layout_width="match_parent"
    android:layout_height="98px"
    android:orientation="horizontal"
    android:layout_gravity="center"
    android:background="#ffffff"
    android:layout_alignParentBottom="true"
    android:id="@+id/tab"
    >
  <LinearLayout
    android:id="@+id/tab_home"
    android:layout_width="match_parent"
    android:layout_height="match_parent"
    android:orientation="vertical"
    android:layout_weight="1"
    android:clickable="true"

    >
    <RadioButton
        android:gravity="center"
        android:id="@+id/btnhometab"
        android:layout_width="match_parent"
        android:layout_height="match_parent"
        style="@style/Widget.AppCompat.ActionButton"
        android:checked="true"
        android:button="@null"
        android:text="首页"
        android:textSize="10sp"
        android:drawableTop="@drawable/tab_home"
        android:textColor="@drawable/tab_text_color"
        android:clickable="false"
        />
</LinearLayout>
    <LinearLayout
    android:id="@+id/tab_activity"
    android:layout_width="match_parent"
    android:layout_height="match_parent"
    android:orientation="vertical"
    android:layout_weight="1"
        android:clickable="true"
    >
        <RadioButton
            android:gravity="center"
            android:id="@+id/btnactivitytab"
            android:layout_width="match_parent"
            android:layout_height="match_parent"
            style="@style/Widget.AppCompat.ActionButton"
            android:checked="true"
            android:button="@null"
            android:text="活动"
            android:textSize="10sp"
            android:drawableTop="@drawable/tab_activity"
            android:textColor="@drawable/tab_text_color"
            android:clickable="false"
            />
</LinearLayout>
    <LinearLayout
        android:id="@+id/tab_me"
        android:layout_width="match_parent"
        android:layout_height="match_parent"
        android:orientation="vertical"
        android:layout_weight="1"
        android:clickable="true"
        >
        <RadioButton
            android:gravity="center"
            android:id="@+id/btnmetab"
            android:layout_width="match_parent"
            android:layout_height="match_parent"
            style="@style/Widget.AppCompat.ActionButton"
            android:checked="true"
            android:button="@null"
            android:text="我"
            android:textSize="10sp"
            android:drawableTop="@drawable/tab_me"
            android:textColor="@drawable/tab_text_color"
            android:clickable="false"
            />
    </LinearLayout>
</LinearLayout>
我们来看一下效果图:

在这里我们可以看到我将button的styke样式改成了actionButton样式,当然,还有一点要注意的是我将linearout做为了点击事件,而底下的radiobutton使之触发效果失效(android:clickable=”false”)这样可以使没点到图片只要在这个区域内便可以实现点击事件在textcolor这个属性我又设置了
我们先来看一下我所相匹配的mainactivity文件
import android.os.Bundle;
import android.support.v4.app.Fragment;
import android.support.v4.app.FragmentPagerAdapter;
import android.support.v4.view.ViewPager;
import android.view.View;
import android.view.Window;
import android.widget.LinearLayout;
import android.widget.RadioButton;

import java.util.ArrayList;
import java.util.List;


public class MainActivity extends android.support.v4.app.FragmentActivity {


    /******
     *各类声明
     */
    private ViewPager viewPager;

    private FragmentPagerAdapter pagerAdapter;
    private List<Fragment> fragments;

    private LinearLayout homeTab;
    private LinearLayout activityTab;
    private LinearLayout meTab;

    private RadioButton homeRbtn;
    private RadioButton activityRbtn;
    private RadioButton meRbtn;


    @Override
    protected void onCreate(Bundle savedInstanceState) {
        super.onCreate(savedInstanceState);
        requestWindowFeature(Window.FEATURE_NO_TITLE);
        setContentView(R.layout.activity_main);
        GetView();//你可以先将其注释掉
        initView();
        initEvent();
        setSelect(0);
    }
    /*****
     * 动态布局实现 请参考我写的动态布局
     */
    private void GetView(){
        Autosize autosize = new Autosize();
        // 获取实际的屏幕宽度
        autosize.setScreensize(autosize.Metricwidth(this));
        LinearLayout bottom = (LinearLayout) findViewById(R.id.tab);
        autosize.llinearlayoutheight(98,bottom);
    }
    /******
     * famage 处理
     *
     */
    private void initView() {

        viewPager = (ViewPager) findViewById(R.id.viewpager);

        //bottom的tab linearlayout id
        homeTab = (LinearLayout) findViewById(R.id.tab_home);
        activityTab = (LinearLayout) findViewById(R.id.tab_activity);
        meTab = (LinearLayout) findViewById(R.id.tab_me);

        homeRbtn = (RadioButton) findViewById(R.id.btnhometab);
        activityRbtn = (RadioButton) findViewById(R.id.btnactivitytab);
        meRbtn = (RadioButton) findViewById(R.id.btnmetab);

        fragments = new ArrayList<Fragment>();
        //添加tab
        fragments.add(new FragmentHome());
        fragments.add(new FragmentActivity());
        fragments.add(new FragmentMe());
        //相应的适配器
        pagerAdapter = new FragmentPagerAdapter(getSupportFragmentManager()) {

            @Override
            public android.support.v4.app.Fragment getItem(int position) {
                return fragments.get(position);
            }

            @Override
            public int getCount() {
                return fragments.size();
            }
        };
        // 绑定适配器
        viewPager.setAdapter(pagerAdapter);
        viewPager.setOnPageChangeListener(new ViewPager.OnPageChangeListener() {
            @Override
            public void onPageScrolled(int position, float positionOffset, int positionOffsetPixels) {

            }

            @Override
            public void onPageSelected(int position) {
                int currentItem = viewPager.getCurrentItem();
                setTab(currentItem);
            }

            @Override
            public void onPageScrollStateChanged(int state) {
            }
        });
    }
    //设置事件
    private  void initEvent(){
        View.OnClickListener listener = new View.OnClickListener() {
            @Override
            public void onClick(View v) {
                switch (v.getId()) {
                    case R.id.tab_home:
                        setSelect(0);
                        break;
                    case R.id.tab_activity:
                        setSelect(1);
                        break;
                    case R.id.tab_me:
                        setSelect(2);
                        break;
                    default:
                        break;

                }
            }
        };
        homeTab.setOnClickListener(listener);
        activityTab.setOnClickListener(listener);
        meTab.setOnClickListener(listener);

    }


    private void setTab(int i){
        resetbtn();
// 切换内容区域
        switch (i)
        {
            case 0:
                homeRbtn.setChecked(true);
                break;
            case 1:
                activityRbtn.setChecked(true);
                break;
            case 2:
                meRbtn.setChecked(true);
                break;
        }

    }
    private void setSelect(int i){
        viewPager.setCurrentItem(i);
        setTab(i);
    }

    private void resetbtn(){
        homeRbtn.setChecked(false);
        activityRbtn.setChecked(false);
        meRbtn.setChecked(false);
    }

}
相信大家对此有了一定的了解,我是通过radiobutton的不同状态来确定更改的颜色的!
tab_text_color.xml
<?xml version="1.0" encoding="utf-8"?>
<selector xmlns:android="http://schemas.android.com/apk/res/android">
    <item android:state_checked="true" android:color="#64c32f"/>
    <!-- not selected -->
    <item android:state_checked="false" android:color="#000000"/>
</selector>
tab_me.xml
<?xml version="1.0" encoding="utf-8"?>
<selector xmlns:android="http://schemas.android.com/apk/res/android" >
    <item
        android:state_checked="false"
        android:drawable="@drawable/firsttab2"/>
    <item
        android:state_checked="true"
        android:drawable="@drawable/firsttab" />
</selector>
通过这两个xml文件,我做了相应的效果!
后面我将写一篇有关百度定位最新版本的使用博客,如果你喜欢我写的博客呢!求关注!
android开发学习笔记系列(5)--fragment与viewpage
标签:android
原文地址:http://blog.csdn.net/u013983194/article/details/44981145