标签:
闲来无事写个教程给大家。
实现功能:融云会话聊天及UI,发送表情消息
使用模块:rongCloud chatBox
融云的各种申请我就不说了。
教程开始:因为融云为第三方模块,每次调试都得需要云编译,建议大家先把UI和基本代码做好。
JS插件使用:zepto.min.js
一、UI的制作
效果图: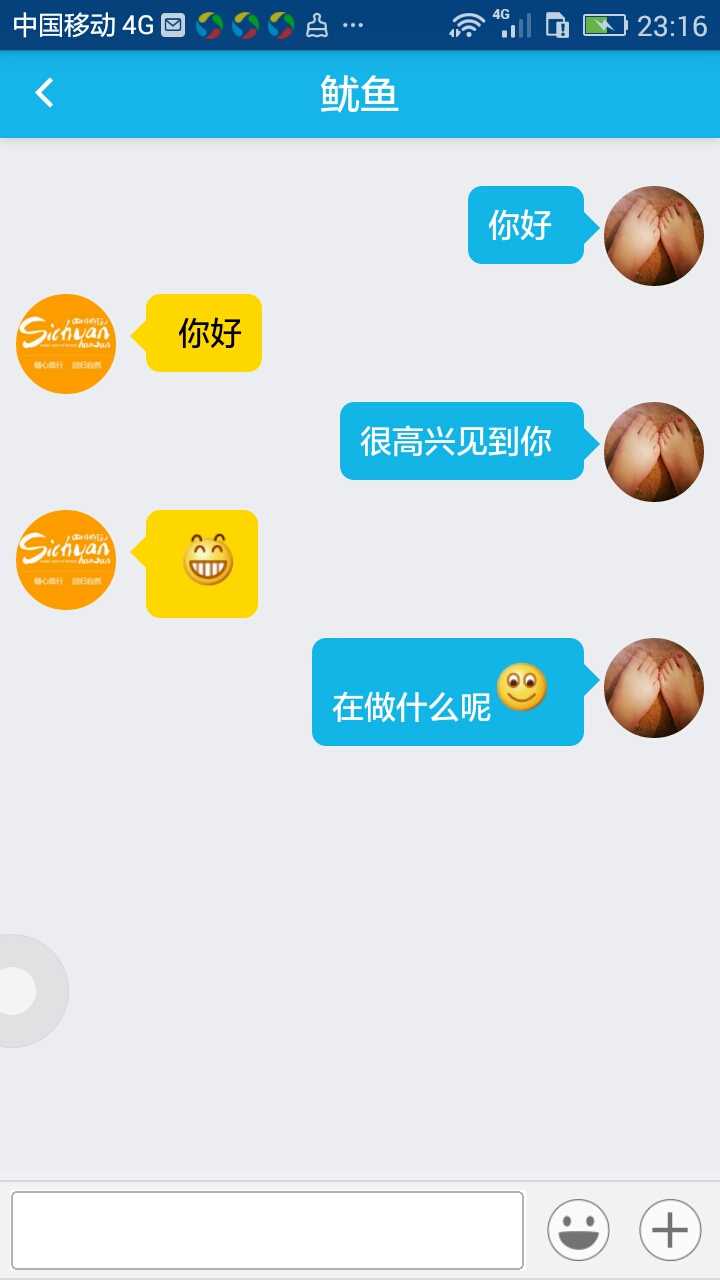
CSS代码:
/*会话消息容器*/
#messageList { padding: 15px 0; overflow: hidden;}
/*接收消息类,左侧*/
.receiver{ clear:both;}
.receiver .receiver-avatar{float: left;}
.receiver .receiver-avatar img { width: 50px; height: 50px;}
.receiver .receiver-cont{ float: left;margin: 0 20px 10px 15px; padding: 10px; border-radius:7px; max-width: 60%; position: relative;}
.receiver .status { width: 30px; height: 30px; position: absolute; right: -35px; top: 3px;}
/*发送消息类,右侧*/
.sender{clear:both;}
.sender .status { width: 30px; height: 30px; position: absolute; left: -35px; top: 3px; font-size: 18px; font-weight: 700; color: #990000;}
.sender .status img { width: 30px; height: 30px;}
.sender .sender-avatar{float: right;}
.sender .sender-avatar img { width: 50px; height: 50px;}
.sender .sender-cont{float:right; margin: 0 10px 10px 20px; padding: 10px; border-radius:7px; color: #ffffff; max-width: 60%; position: relative;}
.left_triangle{ height:0px; width:0px; border-width:8px; border-style:solid; border-color:transparent #faff72 transparent transparent; position: absolute; left:-16px; top:6px; }
.right_triangle{ height:0px; width:0px; border-width:8px; border-style:solid; border-color:transparent transparent transparent #15b5e9; position: absolute; right:-16px; top:6px;}
<div id="messageList">
<div class="sender">
<div class="sender-avatar">
<img src="chatTemplateExample2_files/cat.jpg">
</div>
<div class="sender-cont">
<div class="right_triangle"></div>
<span><img src="发送用户头像" width="30" height="30">发送内容</span>
<div class="status"><!--发送状态--></div>
</div>
</div>
<div class="receiver">
<div class="receiver-avatar">
<img src="对方用户头像">
</div>
<div class="receiver-cont">
<div class="left_triangle"></div>
<span>发送内容</span>
</div>
</div>
</div>
上面的就直接拿去复制使用了
----------------------------------------------------------
二、融云的链接
融云的链接需要用到token了,我们可以在自己的服务器搭建一个生成获取token的方法。这个方法在融云的文档里面有介绍,以php为例
生成用户的token要使用到用户ID,用户昵称,用户头像。
网站上的每个用户都需要对应一个token,可以将这个token写入到自己的用户表中,以便调取使用。
在APP上使用融云聊天时token时只需要获取自己的token就可以。
APP我使用的方法是用户登录后get获取token然后写入到本地数据库中,然后从本地调用(这样有点安全性问题)
class类
class ServerAPI{
private $appKey; //appKey
private $appSecret; //secret
const SERVERAPIURL = ‘https://api.cn.rong.io‘; //请求服务地址
private $format; //数据格式 json/xml
/**
* 参数初始化
* @param $appKey
* @param $appSecret
* @param string $format
*/
public function __construct($appKey,$appSecret,$format = ‘json‘){
$this->appKey = $appKey;
$this->appSecret = $appSecret;
$this->format = $format;
}
/**
* 获取 Token 方法
* @param $userId 用户 Id,最大长度 32 字节。是用户在 App 中的唯一标识码,必须保证在同一个 App 内不重复,重复的用户 Id 将被当作是同一用户。
* @param $name 用户名称,最大长度 128 字节。用来在 Push 推送时,或者客户端没有提供用户信息时,显示用户的名称。
* @param $portraitUri 用户头像 URI,最大长度 1024 字节。
* @return json|xml
*/
public function getToken($userId,$name,$portraitUri) {
try{
if(empty($userId))
throw new Exception(‘用户 Id 不能为空‘);
if(empty($name))
throw new Exception(‘用户名称 不能为空‘);
if(empty($portraitUri))
throw new Exception(‘用户头像 URI 不能为空‘);
$ret = $this->curl(‘/user/getToken‘,array(‘userId‘=>$userId,‘name‘=>$name,‘portraitUri‘=>$portraitUri));
if(empty($ret))
throw new Exception(‘请求失败‘);
return $ret;
}catch (Exception $e) {
print_r($e->getMessage());
}
}
}
下面开始聊天的程序,大体思路为:
打开好友对话窗口-----加载融云模块----初始化融云-----连接融云(我的token)----发送消息(对方用户ID)
|----------加载----初始化-----链接-----监听消息
首先我们来先实现给指定用户发送消息(结合chatBox)
JS
1.获取指定用户ID,一般情况下是从其他页面传递过来的(比如好友列表),加载chatBox模块
下面代码里面有三个自定义函数,
getMessage(mytoken);---------监听获取最新消息
sendMessage(mytoken,sendMsg);-------发送消息
getImgsPaths(sourcePathOfChatBox, callback);-------表情图片类的处理
这三个后面会有单独说明
var touserid = null;好友ID全局
apiready = function(){
touserid = api.pageParam.touserid;//好友用户ID
var mytoken = $api.getStorage(‘token‘);//我的token
getMessage(mytoken);//获取最新消息,后面会有专门介绍
//引入chatbox
var chatBox = api.require(‘chatBox‘);
var sourcePath = "widget://image/emotion";//表情存放目录
var emotionData;//存储表情
getImgsPaths(sourcePath, function (emotion) {
emotionData = emotion;
})
chatBox.open({
//按钮类,图片URL就根据实际情况来
switchButton:{
faceNormal:"widget://image/chatBox_face1.png",
faceHighlight:"widget://image/chatBox_face1.png",
addNormal: "widget://image/chatBox_add1.png",
addHighlight: "widget://image/chatBox_add1.png",
keyboardNormal: "widget://image/chatBox_key1.png",
keyboardHighlight: "widget://image/chatBox_key1.png"
},
sourcePath: sourcePath
},function(ret,err){
/*
*1.用户输入文字或表情
*/
/*用户输入表情或文字*/
/*使用读文件方法,读json*/
var sendMsg = transText(ret.msg);
//发送消息
sendMessage(mytoken,sendMsg);//发送消息的函数,后面会有介绍
/*将文字中的表情符号翻译成图片,并可自定义图片尺寸*/
function transText(text, imgWidth, imgHeight){
var imgWidth = imgWidth || 30;
var imgHeight = imgHeight || 30;
var regx = /\[(.*?)\]/gm;
var textTransed = text.replace(regx,function(match){
var imgSrc = emotionData[match];
if(!imgSrc){
//说明不对应任何表情,直接返回
return match;
}
var img = "<img src="+imgSrc+" width="+imgWidth+" height="+imgHeight+">";
return img;
});
return textTransed;
}
});
}
这样页面就成功加载了chatBox模块,下面先介绍一下表情图片类的处理函数,看不明白的就直接拿去使用了
/*一个工具方法:可以获取所有表情图片的名称和真实URL地址,以JSON对象形式返回。其中以表情文本为 属性名,以图片真实路径为属性值*/
function getImgsPaths(sourcePathOfChatBox, callback){
var jsonPath = sourcePathOfChatBox + "/emotion.json";//表情的JSON数组
api.readFile({
path: jsonPath
},function(ret,err){
if(ret.status){
var emotionArray = JSON.parse(ret.data);
var emotion = {};
for(var idx in emotionArray){
var emotionItem = emotionArray[idx];
var emotionText = emotionItem["text"];
var emotionUrl = "../image/emotion/"+emotionItem["name"]+".png";
emotion[emotionText] = emotionUrl;
}
/*把emotion对象 回调出去*/
if("function" === typeof(callback)){
callback(emotion);
}
}
});
}
2.使用融云发送消息
先加载融云模块,在初始化,初始化后链接,发送消息
sendMessage(mytoken,content);---我的token,消息内容
//发送消息
function sendMessage(mytoken,content){
var rong = api.require(‘rongCloud‘);
rong.init();//初始化
rong.connect({
token: mytoken//我的token
},
function(ret, err){
if(ret.status=="success"){
rong.sendTextMessage({
conversationType: ‘PRIVATE‘,//类型
targetId: touserid,//好友ID,因为是设置了全局,所以直接拿来使用了
text: content,//消息内容
extra: ‘‘
}, function (ret, err) {
if (ret.status == ‘prepare‘){
//准备发送
$("#messageList").append(‘<div class="sender"><div class="sender-avatar"><img src="http://www.qinghuwai.com/uploadfile/member/1/avatar/1.jpg"></div><div class="sender-cont"><div class="right_triangle"></div><span>‘+ret.result.message.content.text+‘</span><div id="status_‘+ret.result.message.messageId+‘" class="status">准备发送时的状态,可以加载一张loading图片</div></div></div>‘);
}else if (ret.status == ‘success‘){
//发送成功后移除loading
$("#status_"+ret.result.message.messageId).remove();
}else if (ret.status == ‘error‘){
//发送失败后的护理,一般讲loading图片变为 “!”;
$("#status_"+ret.result.message.messageId).html("!");
}
}
);
};
}
);
}
3.监听最新消息
//接受消息
function getMessage(mytoken){
var rong = api.require(‘rongCloud‘);
rong.init();
rong.setOnReceiveMessageListener(function (ret, err) { if(ret.result.message.targetId==touserid){
$("#messageList").append(‘<div class="receiver"><div class="receiver-avatar"><img src="http://www.qinghuwai.com/uploadfile/member/6/avatar/6.jpg"></div><div class="receiver-cont"><div class="left_triangle"></div><span>‘+ret.result.message.content.text+‘</span></div></div>‘);
}
})
rong.connect({
token: mytoken
},
function(ret, err){}
);
}
到此就差不多完成了,云编译一下看小效果,不明白的欢迎楼下提问
【APICloud平台融云模块教程第一弹】聊天会话的实现及UI
标签:
原文地址:http://www.cnblogs.com/apicloud/p/4455960.html