标签:
安装Node后,打开node所在的文件夹,有一个node_modules文件夹,打开node_modules文件夹,可看到有一个npm文件夹和formidable这个文件夹。如果没有,说明没安装 node-formidable模块。(node-formidable模块是外部模块是Felix Geisendörfer开发的)
安装node-formidable模块:
cmd输入->> npm install formidable
安装成功:
               npm info build Success: formidable@1.0.9
               npm ok


1.Server.js

// 最终服务端————简单的服务器

var http = require("http"); //在node中,可以使用require()函数来加载模块.
var url = require("url");//加载url模块
function start(route, handler) {
    function OnRequest(request, response) {
        var pathname = url.parse(request.url).pathname; //获得url地址
            //handler,执行的方法
            route(pathname, handler, response,request); //这里把request也传入route...
    }
    http.createServer(OnRequest).listen(8888);
    console.log("Server has Started...");
}
exports.start = start; //start是一个方法,调用
2.route.js

function route(pathname, handler, response,request) {
    //匹配用户的输入的url,是不是一个方法 function,是方法就把方法返回,不是就报错 Not Found 404
    if (typeof handler[pathname] == "function") {
        return handler[pathname](response, request);
    } else {
        response.writeHead(200, { "Content-Type": "text/plain" });
        response.write("Not Found 404...");
        response.end();
    }
}
exports.route = route;
3.index.js

var server = require("./server"); //    ./server  获得node.exe 同级别目录下的server.js文件
var router = require("./route"); //获得 route.js文件
var requestHandlers = require("./handler"); //获得 handler.js文件
var handle = {};

//制定路由规则,在url中输入  /start 则返回  handler.js  中的 start 方法!!!
handle["/start"] = requestHandlers.start;
handle["/upload"] = requestHandlers.upload;
handle["/show"] = requestHandlers.show;  //添加要显示的show方法

server.start(router.route,handle);  //主入口......
4.handler.js

/*
在 route中被调用的方法  ( Node.js不会对数据做缓存 )
*/

/*
查询数据库,又或者是进行大量的计算会包含阻塞操作。形象的说就是“它阻塞了所有其他的处理工作”。
引入了一个新的Node.js模块,child_process。之所以用它,是为了实现一个既简单又实用的非阻塞操作:exec()。
*/
var exec = require("child_process").exec;
var querystrnig = require("querystring");//querystring模块,处理POST数据
var fs = require("fs");//fs模块中,nodejs提供了异步和同步两种读写方式
var formidable = require("formidable");// node - formidable模块。
function start(response) {

    console.log("Request handler ‘start‘ was called.");
    var body = ‘<html>‘ +
     ‘<head>‘ +
     ‘<meta http-equiv="Content-Type" content="text/html; ‘ +
     ‘charset=UTF-8" />‘ +
     ‘</head>‘ +
     ‘<body>‘ +
     ‘<form action="/upload" enctype="multipart/form-data" method="post">‘ +
     ‘<input type="file" name="upload" multiple="multiple">‘ +
     ‘<input type="submit" value="Upload File" />‘ +
     ‘</form>‘ +
     ‘</body>‘ +
     ‘</html>‘;       //这里是一个HTML 页面的Form表单

    exec("ls -lah", function (error, stdout, stderr) {
        response.writeHead(200, { "Content-Type": "text/html" });
        //body = stdout;
        response.write(body);
        response.end();
    });
}

function upload(response, request) {
    console.log("Request handler ‘upload‘ was called.");
    var form = new formidable.IncomingForm();// 使用 node - formidable模块中的方法
    form.uploadDir = "temp"; //指明路径

    form.parse(request, function (error, fields, files) {
        console.log("path:" + files.upload.path);
        try
        {
            //files.upload.path 文件
            //"temp/test.png" 把用户发送过来的图片保存到temp目录下。test.png是图片的文件名
            fs.renameSync(files.upload.path, "temp/test.png");
        }catch(e){
            console.log(e);
        }
           response.writeHead(500, { "Content-Type": "text/html" });
           response.write("Received Image:<br/>");
           response.write("<img src=‘/show‘ />");//src指向的url地址为:show
           response.end();
    })
}

//执行用户上传的图片文件。把图片展示出来
function show(response) {
    console.log("Show was called....");
    fs.readFile("temp/test.png", "binary", function (error, file) {
        if (error) {
            response.writeHead(500, { "Content-Type": "text/plain" });
            response.write(error + "\n");
            response.end();
        } else {
            response.writeHead(200, { "Content-Type": "image/png" });
            response.write(file, "binary");//binary 二进制
            response.end();
        }
    });
}

exports.start = start;
exports.upload = upload;
exports.show = show;
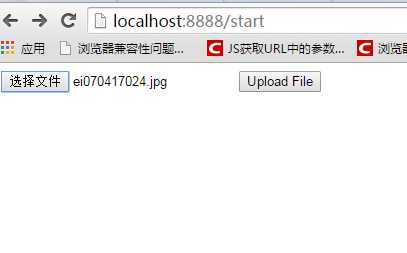
cmd->node index.js
//url 输入:http://localhost:8888/start

-->Upload File 提交 (能看到图片啦....)

标签:
原文地址:http://www.cnblogs.com/jiangshuilang/p/4460968.html