标签:
import UIKit

let ID = "Cell" //cell的ID,建议像这样写一个常量,不要直接使用"Cell"

class ViewController: UIViewController, UITableViewDataSource, UITableViewDelegate { //0.遵守协议

    override func viewDidLoad() {
        super.viewDidLoad()

        //1.创建UITableView(跟OC几乎一样)
        var tableView = UITableView(frame: view.bounds, style: UITableViewStyle.Plain)

        //2.注册Cell
        tableView.registerClass(UITableViewCell.self, forCellReuseIdentifier: ID)
        //下面这种写法也是可以的
        //tableView.registerClass(UITableViewCell.classForCoder(), forCellReuseIdentifier: ID)

        //3.设置数据源和代理
        tableView.dataSource = self
        tableView.delegate = self;

        //4.添加到view中
        self.view.addSubview(tableView)
    }
}
注意:1.协议的写法,不需要写<>。2.上面的代码中第0步和第3步会报错,不要惊慌,暂时无视,并不是代码有问题,是因为我们没有实现相应的协议方法。
二、准备假数据
    // 懒加载
    lazy var datas: [Int] = {
        // 创建一个存放int的数组
        var nums = [Int]()
        // 添加数据
        for i in 0...50 {
            nums.append(i)
        }
        // 返回
        return nums
    }()
这里采用懒加载,Swift的懒加载和OC差别还是比较大的,需要注意一下。
三、实现协议方法
  // MARK: - UITableViewDataSource & UITableViewDelegate

    func tableView(tableView: UITableView, numberOfRowsInSection section: Int) -> Int {
        //返回有多少行Cell, 这里返回数组的count
        return datas.count
    }

    func tableView(tableView: UITableView, cellForRowAtIndexPath indexPath: NSIndexPath) -> UITableViewCell {
        // 获得cell
        let cell = tableView.dequeueReusableCellWithIdentifier(ID, forIndexPath: indexPath) as! UITableViewCell

        // 配置cell
        cell.textLabel!.text = "假数据 - \(datas[indexPath.row])"

        // 返回cell
        return cell
    }
解释几个可能有点迷糊的地方:
1.as:这个东西比较符合人类思维,给苹果点个赞。意思就是把什么当作什么,在上面的代码中,由于方法dequeueReusableCellWithIdentifier的返回值是
AnyObject(也就是OC中的id类型),所以需要通过as告诉编译器这实际上是一个UITableViewCell。
2.!(感叹号):这玩意就是告诉编译器我确定这里的的cell.textLabel一定是非nil的, 可以放心的执行后面的。as后面的!也是一样的道理。
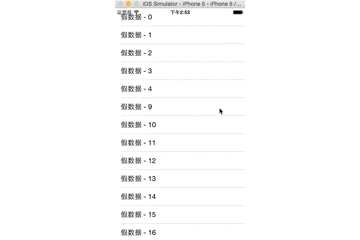
至此,可以编译运行看看效果了.

四、增加左滑删除功能
实现一个方法即可
 // 提交编辑操作
 func tableView(tableView: UITableView, commitEditingStyle editingStyle: UITableViewCellEditingStyle,
  forRowAtIndexPath indexPath: NSIndexPath) {
     // 如果是删除操作
     if editingStyle == .Delete {
         // 从数组中移除对应位置的数据
         datas.removeAtIndex(indexPath.row)
         // 删除表格中对应行的数据
         tableView.deleteRowsAtIndexPaths([indexPath], withRowAnimation: UITableViewRowAnimation.Fade)
     }
 }
大功告成,运行看看效果吧。祝大家生活愉快!

标签:
原文地址:http://www.cnblogs.com/wugaojun/p/4470568.html