标签:
1、创建工程项目
2、工程界面(教程3)
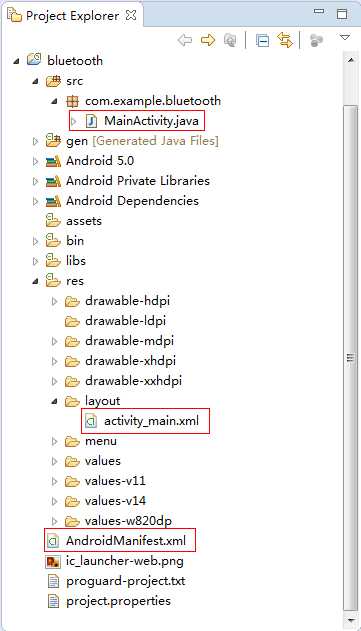
如下目录所示:src目录下MainActivity.java是程序;res下面都是图标等资源文件,layout下的activity_main.xml是按钮等界面控制的布局和属性;AndroidManifest.xml是activity等注册的文件。
gen目录是系统生成的含有自动生成的资源ID号等;android5.0那几个是库和包等文件;assets是加进去的资源文件,区别于res的是这些的文件不会自动生成ID;values存放的是变量值定义
3、创建activity方法(教程4~5)
按钮响应:
创建两个activity,这里创建的一个为activity01,另外一个为otheractivity。
通过intent响应按钮触发动作。
通过intent在两个activity间传递数据。
package main.activity01;

import android.app.Activity;
import android.content.DialogInterface;
import android.content.DialogInterface.OnClickListener;
import android.content.Intent;
import android.os.Bundle;
import android.text.method.KeyListener;
import android.view.Menu;
import android.view.MenuItem;
import android.view.View;
import android.widget.Button;
import android.widget.TextView;

/***************************************************
 * 创建activity要点
 * 1.一个activity就是一个类,并且这个activity要继承Activity
 * 2.需要重写onCreate方法
 * 3。每一个activity都需要在AndroidManifest里面注册
 * 4.为activity添加必要的控件
 * */
public class Activity01 extends Activity {
    private Button mybutton=null;
    @Override
    protected void onCreate(Bundle savedInstanceState) {
        super.onCreate(savedInstanceState);
        setContentView(R.layout.activity01);
        mybutton    =    (Button)findViewById(R.id.button1);
        mybutton.setOnClickListener(new Button.OnClickListener() {
               public void onClick(View v)
               {
                   //创建一个intent对象
                    Intent intent    = new Intent();
                    intent.setClass(Activity01.this, otheractivity.class);
                    Activity01.this.startActivity(intent);
               }
          });
    }
}
package main.activity01;

import android.app.Activity;
import android.os.Bundle;

public class otheractivity extends Activity {

    @Override
    protected void onCreate(Bundle savedInstanceState) {
        // TODO Auto-generated method stub
        super.onCreate(savedInstanceState);
        setContentView(R.layout.other);
    }
}
<RelativeLayout xmlns:android="http://schemas.android.com/apk/res/android"
    xmlns:tools="http://schemas.android.com/tools"
    android:layout_width="wrap_content"
    android:layout_height="wrap_content"
    tools:context="${relativePackage}.${activityClass}" >

    <Button
        android:id="@+id/button1"
        android:layout_width="wrap_content"
        android:layout_height="wrap_content"
        android:layout_alignParentBottom="true"
        android:layout_alignParentRight="true"
        android:layout_alignParentEnd="true"
        android:text="copener" />

</RelativeLayout>
<RelativeLayout xmlns:android="http://schemas.android.com/apk/res/android"
    xmlns:tools="http://schemas.android.com/tools"
    android:layout_width="wrap_content"
    android:layout_height="wrap_content"
    tools:context="${relativePackage}.${activityClass}" >

    <TimePicker
        android:id="@+id/timePicker1"
        android:layout_width="wrap_content"
        android:layout_height="wrap_content"
        android:layout_alignParentLeft="true"
        android:layout_alignParentTop="true" />

</RelativeLayout>
<?xml version="1.0" encoding="utf-8"?>
<manifest xmlns:android="http://schemas.android.com/apk/res/android"
    package="main.activity01"
    android:versionCode="1"
    android:versionName="1.0" >

    <uses-sdk
        android:minSdkVersion="8"
        android:targetSdkVersion="21" />

    <application
        android:allowBackup="true"
        android:icon="@drawable/ic_launcher"
        android:label="@string/app_name"
        android:theme="@style/AppTheme" >
        <activity
            android:name=".Activity01"
            android:label="@string/app_name" >
            <intent-filter>
                <action android:name="android.intent.action.MAIN" />

                <category android:name="android.intent.category.LAUNCHER" />
            </intent-filter>
        </activity>

        <activity
               android:name=".otheractivity"
               android:label="@string/otheractivity_name" >
        </activity>
    </application>

</manifest>
<?xml version="1.0" encoding="utf-8"?>
<resources>

    <string name="app_name">activity01</string>
    <string name="hello_world">copener first Android APP</string>
     <string name="otheractivity_name">otheractivity</string>

</resources>
############################################################################
蓝牙知识:
主模块:主动搜索从模块,建立连接
从模块:不能主动建立连接,只能等别人连接自己
主从一体:能够在主机和从机模式间切换,即可做主机也可作从机
配对码是从机产生,主机端要输入同样配对码才能进行通信。有部分模块是不需要配对码的。
相关资料帖子:
http://blog.csdn.net/kangear/article/details/37612919
http://blog.csdn.net/a1031359915/article/details/21465195
http://jingyan.baidu.com/article/2f9b480d56d9c741ca6cc251.html
http://www.bubuko.com/infodetail-653603.html
自动配对
http://immortal.haotui.com/thread-566-1-1.html
############################################################################
五、从机AT指令集
注意:从机的AT指令不带回车符
1、测试通讯
发送:AT(返回OK,一秒左右发一次)
返回:OK
2、改蓝牙串口通讯波特率
发送:AT+BAUD1
返回:OK1200
发送:AT+BAUD2
返回:OK2400
……
1---------1200
2---------2400
3---------4800
4---------9600
5---------19200
6---------38400
7---------57600
8---------115200
9---------230400
A---------460800
B---------921600
C---------1382400
不建议用在超过115200 的波特率,信号的干扰会使系统不稳定。
设置超过115200 后用电脑无法使用,要用单片机编程于高于115200 才能使用此波特率和 重新发AT 命令设低波
特率 用AT命令设好波特率后,下次上电使用不需再设,可以掉电保存波特率。
3、改蓝牙名称
发送:AT+NAMEname
返回:OKsetname
参数name:所要设置的当前名称,即蓝牙被搜索到的名称。20 个字符以内。
例:
发送AT+NAMEbill_gates
返回OKsetname
这时蓝牙名称改为bill_gates
参数可以掉电保存,只需修改一次。PDA 端刷新服务可以看到更改后的蓝牙名称。
4、改蓝牙配对密码
发送:AT+PINxxxx
返回:OKsetpin
参数xxxx:所要设置的配对密码,4 个字节,此命令可用于从机或主机。
从机是适配器或手
机弹出要求输入配对密码窗口时,手工输入此参数就可以连接从机。主蓝牙模块搜索从机后,
如果密码正确,则会自动配对,主模块除了可以连接配对从模块
外,其他产品包含从模块的
时候也可以连接配对,比如含蓝牙的数码相机,蓝牙GPS,蓝牙串口打印机,等等,特别地,
蓝牙GPS为典型例子
例:
发送AT+PIN8888
返回OKsetpin
这时蓝牙配对密码改为8888,模块在出厂时的默认配对密码是1234。
参数可以掉电保存,只需修改一次。
标签:
原文地址:http://www.cnblogs.com/COpener/p/4230865.html