标签:
一、简单介绍
CAPropertyAnimation的子类
属性解析:
fromValue:keyPath相应属性的初始值
toValue:keyPath相应属性的结束值
随着动画的进行,在长度为duration的持续时间内,keyPath相应属性的值从fromValue渐渐地变为toValue
如果fillMode=kCAFillModeForwards和removedOnComletion=NO,那么在动画执行完毕后,图层会保持显示动画执行后的状态。但在实质上,图层的属性值还是动画执行前的初始值,并没有真正被改变。
比如,CALayer的position初始值为(0,0),CABasicAnimation的fromValue为(10,10),toValue为(100,100),虽然动画执行完毕后图层保持在(100,100)这个位置,实质上图层的position还是为(0,0)
二、平移动画
代码示例:
 1 //
 2 //  YYViewController.m
 3 //  07-核心动画(基础动画)
 4 //
 5 //  Created by apple on 14-6-21.
 6 //  Copyright (c) 2014年 itcase. All rights reserved.
 7 //
 8
 9 #import "YYViewController.h"
10
11 @interface YYViewController ()
12 @property(nonatomic,strong)CALayer *myLayer;
13 @end
14
15 @implementation YYViewController
16
17 - (void)viewDidLoad
18 {
19     [super viewDidLoad];
20
21     //创建layer
22     CALayer *myLayer=[CALayer layer];
23     //设置layer的属性
24     myLayer.bounds=CGRectMake(0, 0, 50, 80);
25     myLayer.backgroundColor=[UIColor yellowColor].CGColor;
26     myLayer.position=CGPointMake(50, 50);
27     myLayer.anchorPoint=CGPointMake(0, 0);
28     myLayer.cornerRadius=20;
29     //添加layer
30     [self.view.layer addSublayer:myLayer];
31     self.myLayer=myLayer;
32 }
33
34 //设置动画(基础动画)
35 -(void)touchesBegan:(NSSet *)touches withEvent:(UIEvent *)event
36 {
37     //1.创建核心动画
38     //    CABasicAnimation *anima=[CABasicAnimation animationWithKeyPath:<#(NSString *)#>]
39     CABasicAnimation *anima=[CABasicAnimation animation];
40
41     //1.1告诉系统要执行什么样的动画
42     anima.keyPath=@"position";
43     //设置通过动画,将layer从哪儿移动到哪儿
44     anima.fromValue=[NSValue valueWithCGPoint:CGPointMake(0, 0)];
45     anima.toValue=[NSValue valueWithCGPoint:CGPointMake(200, 300)];
46
47     //1.2设置动画执行完毕之后不删除动画
48     anima.removedOnCompletion=NO;
49     //1.3设置保存动画的最新状态
50     anima.fillMode=kCAFillModeForwards;
51
52     //2.添加核心动画到layer
53     [self.myLayer addAnimation:anima forKey:nil];
54
55 }
  @end
代码说明:
第42行设置的keyPath是@"position",说明要修改的是CALayer的position属性,也就是会执行平移动画
第44,45行,这里的属性接收的时id类型的参数,因此并不能直接使用CGPoint这种结构体类型,而是要先包装成NSValue对象后再使用。
默认情况下,动画执行完毕后,动画会自动从CALayer上移除,CALayer又会回到原来的状态。为了保持动画执行后的状态,可以加入第48,50行代码
执行效果:
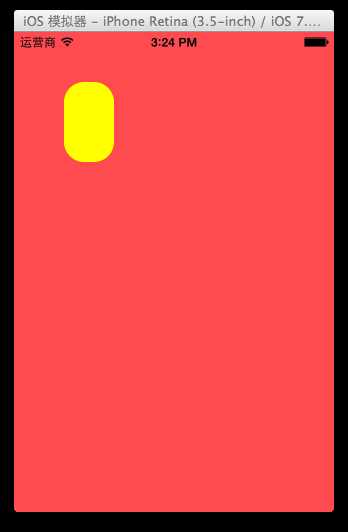
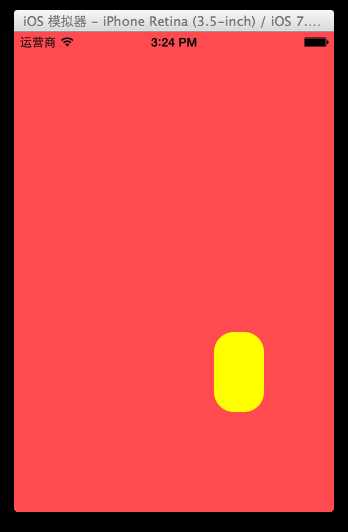
设置代理:设置动画的代理,可以监听动画的执行过程,这里设置控制器为代理。
代码示例:
 1 #import "YYViewController.h"
 2
 3 @interface YYViewController ()
 4 @property(nonatomic,strong)CALayer *myLayer;
 5 @end
 6
 7 @implementation YYViewController
 8
 9 - (void)viewDidLoad
10 {
11     [super viewDidLoad];
12
13     //创建layer
14     CALayer *myLayer=[CALayer layer];
15     //设置layer的属性
16     myLayer.bounds=CGRectMake(0, 0, 50, 80);
17     myLayer.backgroundColor=[UIColor yellowColor].CGColor;
18     myLayer.position=CGPointMake(50, 50);
19     myLayer.anchorPoint=CGPointMake(0, 0);
20     myLayer.cornerRadius=20;
21     //添加layer
22     [self.view.layer addSublayer:myLayer];
23     self.myLayer=myLayer;
24 }
25
26 //设置动画(基础动画)
27 -(void)touchesBegan:(NSSet *)touches withEvent:(UIEvent *)event
28 {
29     //1.创建核心动画
30     //    CABasicAnimation *anima=[CABasicAnimation animationWithKeyPath:<#(NSString *)#>]
31     CABasicAnimation *anima=[CABasicAnimation animation];
32
33     //1.1告诉系统要执行什么样的动画
34     anima.keyPath=@"position";
35     //设置通过动画,将layer从哪儿移动到哪儿
36     anima.fromValue=[NSValue valueWithCGPoint:CGPointMake(0, 0)];
37     anima.toValue=[NSValue valueWithCGPoint:CGPointMake(200, 300)];
38
39     //1.2设置动画执行完毕之后不删除动画
40     anima.removedOnCompletion=NO;
41     //1.3设置保存动画的最新状态
42     anima.fillMode=kCAFillModeForwards;
43     anima.delegate=self;
44     //打印
45     NSString *str=NSStringFromCGPoint(self.myLayer.position);
46     NSLog(@"执行前:%@",str);
47
48     //2.添加核心动画到layer
49     [self.myLayer addAnimation:anima forKey:nil];
50
51 }
52
53 -(void)animationDidStart:(CAAnimation *)anim
54 {
55     NSLog(@"开始执行动画");
56 }
57
58 -(void)animationDidStop:(CAAnimation *)anim finished:(BOOL)flag
59 {
60     //动画执行完毕,打印执行完毕后的position值
61     NSString *str=NSStringFromCGPoint(self.myLayer.position);
62     NSLog(@"执行后:%@",str);
63 }
64
65 @end
打印position的属性值,验证图层的属性值还是动画执行前的初始值{50,50},并没有真正被改变为{200,300}。

三、缩放动画
实现缩放动画的代码示例:
 1 //
 2 //  YYViewController.m
 3 //  08-核心动画平移
 4 //
 5 //  Created by apple on 14-6-21.
 6 //  Copyright (c) 2014年 itcase. All rights reserved.
 7 //
 8
 9 #import "YYViewController.h"
10
11 @interface YYViewController ()
12 @property(nonatomic,strong)CALayer *myLayer;
13 @end
14
15 @implementation YYViewController
16
17 - (void)viewDidLoad
18 {
19     [super viewDidLoad];
20
21     //创建layer
22     CALayer *myLayer=[CALayer layer];
23     //设置layer的属性
24     myLayer.bounds=CGRectMake(0, 0, 150, 60);
25     myLayer.backgroundColor=[UIColor yellowColor].CGColor;
26     myLayer.position=CGPointMake(50, 50);
27     myLayer.anchorPoint=CGPointMake(0, 0);
28     myLayer.cornerRadius=40;
29     //添加layer
30     [self.view.layer addSublayer:myLayer];
31     self.myLayer=myLayer;
32 }
33
34 -(void)touchesBegan:(NSSet *)touches withEvent:(UIEvent *)event
35 {
36     //1.创建动画
37     CABasicAnimation *anima=[CABasicAnimation animationWithKeyPath:@"bounds"];
38     //1.1设置动画执行时间
39     anima.duration=2.0;
40     //1.2设置动画执行完毕后不删除动画
41     anima.removedOnCompletion=NO;
42     //1.3设置保存动画的最新状态
43     anima.fillMode=kCAFillModeForwards;
44     //1.4修改属性,执行动画
45     anima.toValue=[NSValue valueWithCGRect:CGRectMake(0, 0, 200, 200)];
46     //2.添加动画到layer
47     [self.myLayer addAnimation:anima forKey:nil];
48 }
49
50 @end
实现效果:
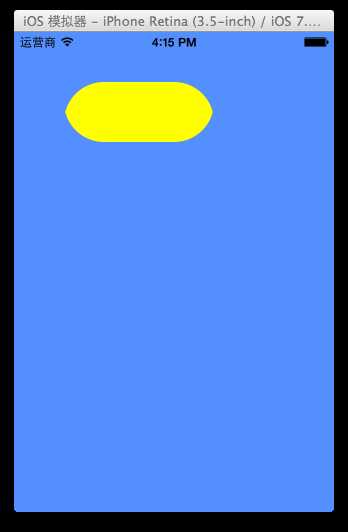
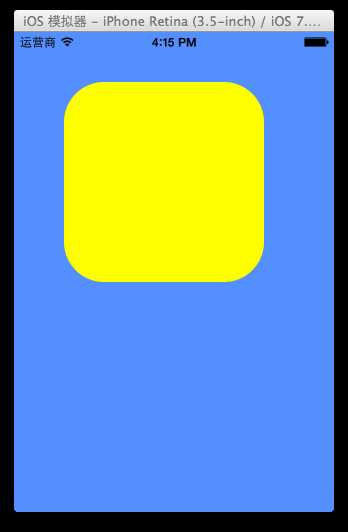
四、旋转动画
代码示例:
 1 //
 2 //  YYViewController.m
 3 //  09-核心动画旋转
 4 //
 5 //  Created by apple on 14-6-21.
 6 //  Copyright (c) 2014年 itcase. All rights reserved.
 7 //
 8
 9 #import "YYViewController.h"
10
11 @interface YYViewController ()
12 @property(nonatomic,strong)CALayer *myLayer;
13 @end
14
15 @implementation YYViewController
16 - (void)viewDidLoad
17 {
18     [super viewDidLoad];
19
20     //创建layer
21     CALayer *myLayer=[CALayer layer];
22     //设置layer的属性
23     myLayer.bounds=CGRectMake(0, 0, 150, 60);
24     myLayer.backgroundColor=[UIColor yellowColor].CGColor;
25     myLayer.position=CGPointMake(50, 50);
26     myLayer.anchorPoint=CGPointMake(0, 0);
27     myLayer.cornerRadius=40;
28     //添加layer
29     [self.view.layer addSublayer:myLayer];
30     self.myLayer=myLayer;
31 }
32
33 -(void)touchesBegan:(NSSet *)touches withEvent:(UIEvent *)event
34 {
35     //1.创建动画
36     CABasicAnimation *anima=[CABasicAnimation animationWithKeyPath:@"transform"];
37     //1.1设置动画执行时间
38     anima.duration=2.0;
39     //1.2修改属性,执行动画
40     anima.toValue=[NSValue valueWithCATransform3D:CATransform3DMakeRotation(M_PI_2+M_PI_4, 1, 1, 0)];
41     //1.3设置动画执行完毕后不删除动画
42     anima.removedOnCompletion=NO;
43     //1.4设置保存动画的最新状态
44     anima.fillMode=kCAFillModeForwards;
45
46     //2.添加动画到layer
47     [self.myLayer addAnimation:anima forKey:nil];
48 }
49 @end
实现效果:
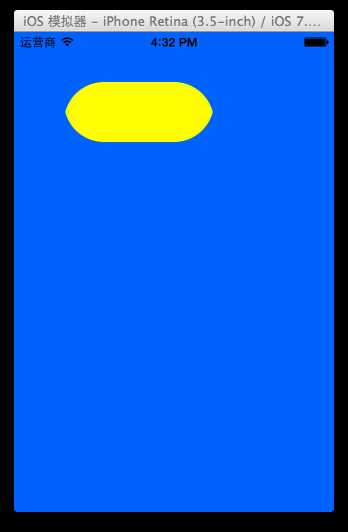
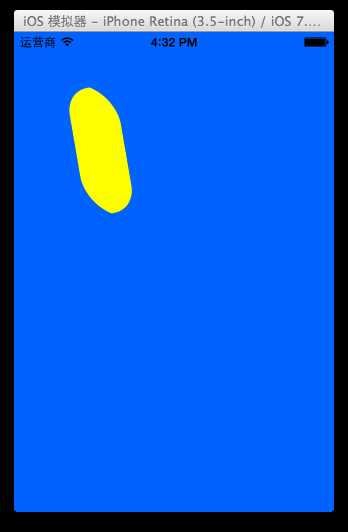
提示:如果要让图形以2D的方式旋转,只需要把CATransform3DMakeRotation在z方向上的值改为1即可。
anima.toValue=[NSValue valueWithCATransform3D:CATransform3DMakeRotation(M_PI_2+M_PI_4, 1, 1, 0)];
四、补充
可以通过transform(KVC)的方式来进行设置。
代码示例(平移):
 1 #import "YYViewController.h"
 2
 3 @interface YYViewController ()
 4 @property(nonatomic,strong)CALayer *myLayer;
 5 @end
 6
 7 @implementation YYViewController
 8 - (void)viewDidLoad
 9 {
10     [super viewDidLoad];
11
12     //创建layer
13     CALayer *myLayer=[CALayer layer];
14     //设置layer的属性
15     myLayer.bounds=CGRectMake(0, 0, 150, 60);
16     myLayer.backgroundColor=[UIColor yellowColor].CGColor;
17     myLayer.position=CGPointMake(50, 50);
18     myLayer.anchorPoint=CGPointMake(0, 0);
19     myLayer.cornerRadius=40;
20     //添加layer
21     [self.view.layer addSublayer:myLayer];
22     self.myLayer=myLayer;
23 }
24
25 -(void)touchesBegan:(NSSet *)touches withEvent:(UIEvent *)event
26 {
27     //1.创建动画
28     CABasicAnimation *anima=[CABasicAnimation animation];
29     anima.keyPath=@"transform";
30     //1.1设置动画执行时间
31     anima.duration=2.0;
32     //1.2修改属性,执行动画
33
34     anima.toValue=[NSValue valueWithCATransform3D:CATransform3DMakeTranslation(0, 100, 1)];
35     //1.3设置动画执行完毕后不删除动画
36     anima.removedOnCompletion=NO;
37     //1.4设置保存动画的最新状态
38     anima.fillMode=kCAFillModeForwards;
39
40     //2.添加动画到layer
41     [self.myLayer addAnimation:anima forKey:nil];
42 }
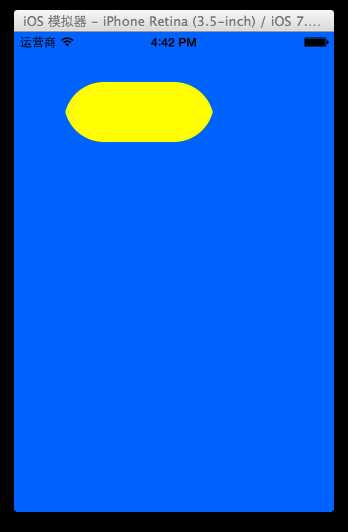
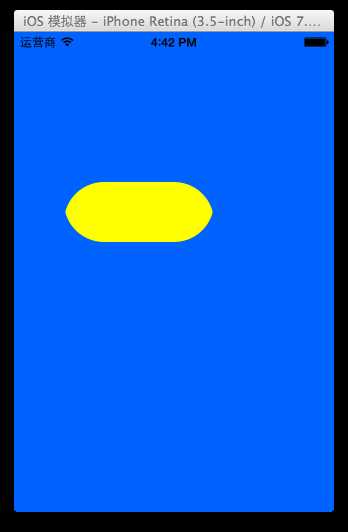
实现效果:
绘制的图形在y的方向上移动100个单位。
标签:
原文地址:http://www.cnblogs.com/kaisa0502/p/4502716.html